
Dining and Lounge Seating Under One Pergola: A Two-Zone Plan
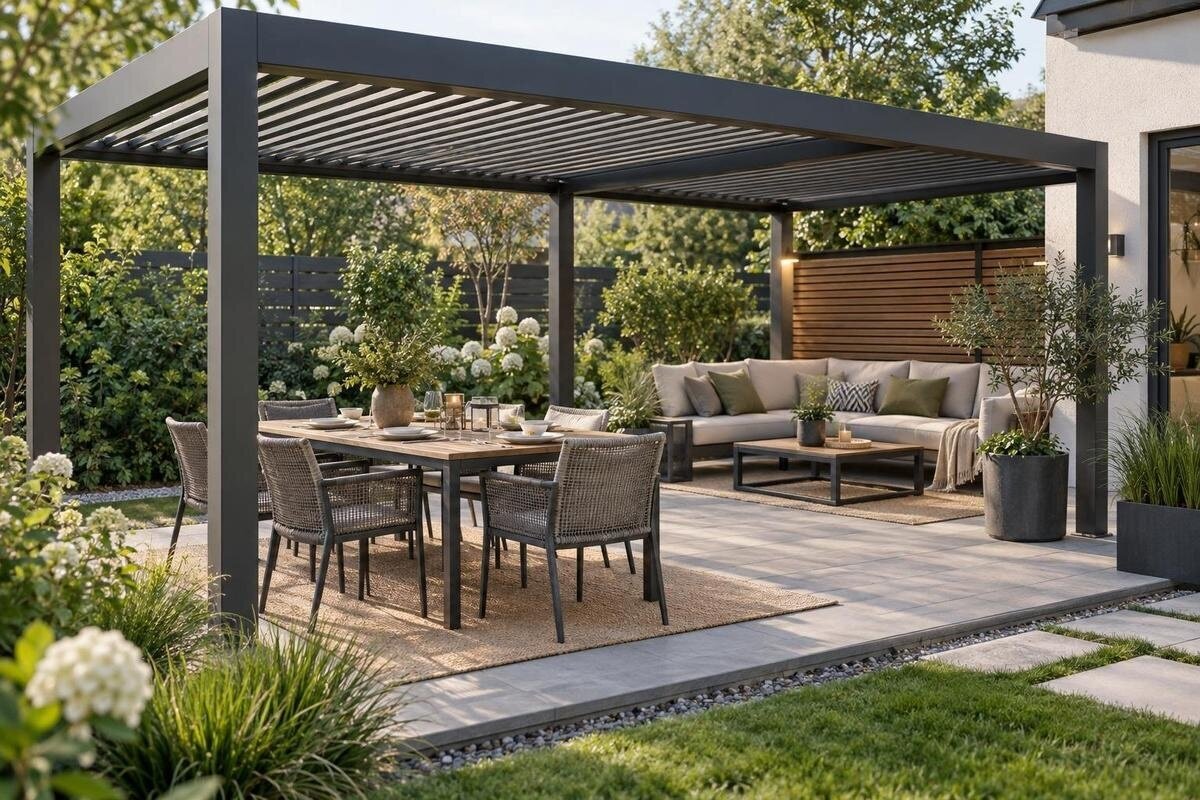
Pergola layout guide
Fitting a dining table and a lounge set beneath one pergola is only the first test. Both areas should remain usable while people are eating, getting up, serving food or relaxing; a clear route to the house and garden must survive those activities too. Planning from the pergola’s outline alone can hide pinch points around chair backs, coffee tables and supports. This guide focuses on how the two zones work together: measuring their real footprints, positioning them around the routes you use and testing a shared layout before choosing a configuration.

Plan for two activities happening at once
Begin by writing down what simultaneous use means in your household. A weekday meal for two, a larger gathering, reading in the lounge and chatting with guests place different demands on seats, surfaces and access. Record the usual number of diners and lounge users, which dining chairs need to be occupied at once, whether you use armchairs or a footstool, and where drinks or serving dishes go. Do not plan around an occasional maximum if it makes everyday use cramped, but include any regular extra chair that would otherwise end up in the route. Note which items stay outside and which are brought out only for guests, so the plan does not reserve space for storage that is usually elsewhere.
Then test the two activities as if they happen together. One person should be able to leave the dining table for the kitchen while another remains seated in the lounge; someone entering from the garden should not have to ask seated people to move. Mark likely paths on a sketch before arranging cushions or choosing a focal point. If a route only works when the table is empty or every chair is tucked in, it is not a reliable everyday layout. Repeat the test with the number of people you normally expect, not just one person walking round an empty patio. This separates a shared outdoor room from two sets that merely fit beneath the same outline.
Place the zones around the house and garden routes
Choose positions according to the routes people already use. If food and crockery travel out from the kitchen, putting the dining area near the relevant door can shorten repeated trips; if a garden view, evening light or a quieter corner matters more, the lounge may deserve that position instead. Neither arrangement is automatically right. Note which doors are used, where people enter from the garden and whether windows, gates or access paths need to stay clear. A balanced drawing can still be awkward if reaching either zone means cutting across the other activity, so trace the journeys people will make, including trips to the garden, rather than looking only at furniture outlines.
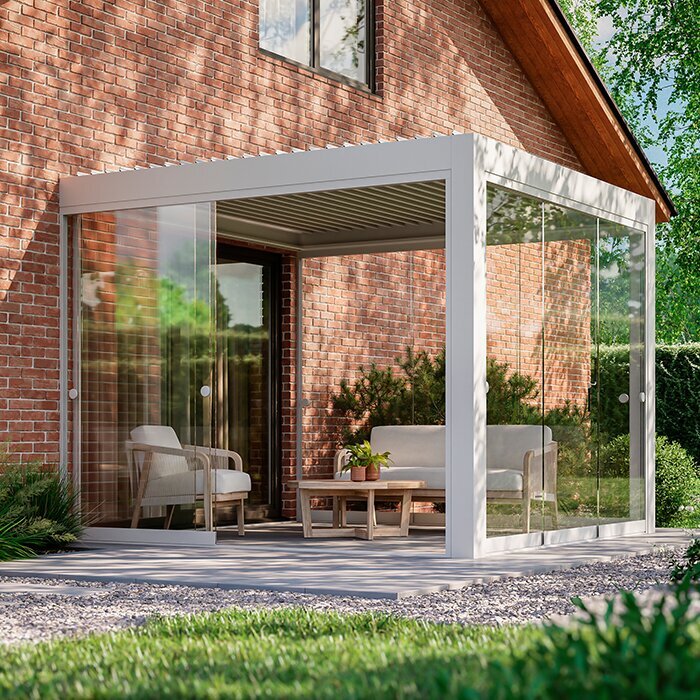
Concept only: place the dining table near the house, lounge seating towards the garden, and a continuous route along one side. Reverse the zones if access, views or changing sun favour another arrangement; this is a starting sketch, not a prescribed plan. On a wall-side layout, include the wall, door opening and any projections instead of treating that edge as free space. If a wall-mounted form is on your shortlist, compare the site with the Bloomcabin Lean-To Pergola as a named configuration, then confirm the exact dimensions and positions before deciding whether it works. The route still needs to fit the people and furniture you have measured.
Measure both furniture footprints
Measure each item in the arrangement you intend to use, not just its catalogue width. Record the tabletop with any leaf open, chair width and depth, arms on lounge seating, the coffee table, stools, side tables and any planter that will stay in place. Include a chair's position when someone is seated and the space needed to pull it out; measure a recliner or footstool in the position it occupies during use. Furniture is not a single fixed rectangle. Its moving parts often decide whether the dining and lounge zones can sit side by side. Use the same unit throughout and label movable items separately from fixed features.
Draw the measured pieces to scale on graph paper or a simple digital plan, showing both areas at once. Add chairs in their pulled-out positions, then mark the space people need to turn, serve food, carry cups and pass behind seated guests. A gap on an empty plan is not spare space if it is needed for one of these tasks. Once the drawing is measured, compare it with the Bloomcabin Pergola product page; verify the exact dimensions and support positions for the version under consideration rather than relying on the model name. A scaled plan is more useful for that comparison than a photograph of furniture beneath a roof.
Allow for chair movement and serving
A dining zone needs more than a rectangle for the tabletop. Draw the usual chair positions, space to pull each chair back and the route used by whoever sets down or clears plates. Check whether a chair at the end of the table can move without meeting a lounge seat, post or wall, and whether someone can pass while diners are seated. If access is only needed on certain sides, show that as an intentional arrangement rather than assuming every place can be reached equally. Do not count a tucked-in chair as the full working footprint: people push chairs back, turn to stand and may need room to carry a plate. The key test is whether diners can sit and get up without displacing lounge users.
Serving changes the pattern too. A person carrying a dish or tray needs a direct route from the house to the table, without threading between a coffee table and someone's feet. If crockery or drinks will be set down on a sideboard, include its footprint and room to use it. With an extendable table, map both closed and open positions and keep the lounge accessible in each. When comparing the Bioclimatic Aluminum Pergola listing, include the serving route in your layout enquiry rather than supplying table dimensions alone. Identify where dishes arrive and where they are put down: these movements can reveal why an apparently spacious arrangement is awkward during a meal.
Keep a clear route through the pergola
Draw one primary route from each house access point towards the garden, and keep it readable across the whole pergola area. It should not end at a chair back, pass between occupied seats or depend on moving a side table. If there are two doors or a gate on different sides, map both routes, not only the one used most. Mark where each path enters and exits, and note whether it has to pass the dining zone, the lounge or neither. A clear path lets people reach either area without interrupting conversation and makes carrying food, blankets or garden items less awkward. It also reveals plans that separate the zones but leave no sensible way to pass through the middle.
Plan for pinch points at the times they occur. An open door, a pulled-out dining chair, a seated person's legs and a lounge footstool may all occupy space at once. Mark those positions rather than relying on measurements taken with everything tucked in. Decide the route width from who uses the patio and what they carry; someone who needs to move mobility equipment or walk alongside a child has different requirements from a person carrying one cup. If the path cannot stay clear while both areas are occupied, rotate or separate the zones, or change the furniture combination, instead of accepting repeated obstruction. A route that looks generous when the pergola is empty may be the first thing lost when guests arrive.
Separate the zones without creating a bottleneck
A subtle division can make the two areas legible without adding a barrier. Turning the dining table across the lounge seating, aligning a rug beneath one group or leaving a visible strip of floor between footprints can mark the change of use. Choose a cue that does not occupy the main route: planters, screens and low tables each take up space and can create a bottleneck. A rug or movable accessory can make the layout easier to adjust when extra guests arrive, but its usual position must still leave a clear path. Keep the boundary simple enough to recognise from the house and garden, while allowing people to move between zones without stepping around an obstacle.
Allow for changes at the edges too. A pulled-back chair should not enter the lounge's main passage, and a sofa arm should not become the corner people brush against while carrying plates. Include existing downpipes, wall projections and stored accessories on the site plan. For a house-side arrangement, use the wall-mounted pergola listing when discussing how the proposed structure would meet that space. Keep site features and proposed components distinct on the drawing, so an existing obstruction is not overlooked or confused with a new support. Check the boundary from both directions: an easy approach from the house may still involve an awkward turn from the garden.
Arrange both areas for conversation
Decide whether the two groups should share a conversation or feel more separate. In the lounge, arrange seats so people can see one another without continually twisting in their chairs; at the table, consider which diners will face the lounge and which will have their backs to it. Think through the view from each occupied seat. A tall chair back, planter or screen may interrupt contact between groups, while facing every seat inwards may waste a valued garden view. A temporary chair arrangement helps you judge these trade-offs from seated eye level. It is particularly useful when a lounge seat would otherwise face only the side of the dining table.
Furniture choice affects that relationship. Deep sofas and wide arms can extend the lounge footprint further into shared space than a compact pair of chairs, while a large coffee table can make the centre difficult to cross. For conversation between diners and lounge guests, leave an opening between the groups rather than filling it with occasional furniture. For separate conversations, angle the seats away slightly without blocking access. If you are considering the regular pergola option, show this furniture orientation on your enquiry drawing as well as the measurements. It explains which open edges and views matter to your arrangement, rather than presenting two anonymous furniture rectangles.
Check sun and exposure in both seating zones
Check conditions at the times each area will actually be used. Observe where sun falls during meals and when people tend to relax; shade across the table at lunch may not help lounge users later in the day. Note glare from windows, the garden or a pale surface if it affects seated views. Do not assume the pergola outline shades every chair equally or that the sides shelter the perimeter: low sun and wind-driven rain can reach seats near an open edge. Mark which places would be exposed and decide whether they are occasional spare seats or ones that need to work regularly. Repeat the check at more than one time if the patio's use changes over the day.
Consider whether occupants can change positions without losing the route. A chair moved to avoid sun or wind should not block dining chair movement or force people through the lounge. Mark an alternative position for the most exposed seat and test whether its occupant can still reach a side table. When reviewing the Bloomcabin Bioclimatic Aluminum Pergola, use documented information for the exact configuration to assess any proposed shade or shelter provision; the model name alone does not establish it. Keep your observations of the site alongside that information. They show when and where protection matters, rather than assuming both seating zones have identical needs.

Try the layout at full size
Before choosing a structure, mark the full layout on the patio. Use masking tape, chalk or cardboard outlines for the table, pulled-out chairs, sofa, coffee table and any boundary objects; then walk the route with a tray or the bulky item you regularly carry. Sit in each intended seat and check whether another person can pass. A paper drawing may miss an awkward turn by a post or the sense of crowding beside a door, so a temporary floor plan on the ground can expose conflicts while the furniture is still easy to move. Make a note of each point where you instinctively shift an object or turn sideways.
Run the rehearsal with both areas occupied, not only as an empty patio. Ask one person to sit at the table while another uses the lounge, then swap places and walk to the garden. Pull chairs out, open doors and repeat the serving journey. Change one thing at a time so you can identify what resolves each conflict. Photograph the successful arrangement and record its measurements for comparison with the regular pergola listing. Keep a record of any compromise too, such as losing an occasional chair: it is easy to forget this when looking at a tidier product image. Retest if you later choose larger furniture.
Check the exact pergola configuration against the plan
Once the furniture arrangement and routes work, compare them with a drawing of the proposed structure. Locate posts, any wall connection, roof edges, drainage elements and other components shown for that configuration. Distinguish overall roof dimensions from the space available between supports: a chair may sit beneath the roof outline yet conflict with a post when pulled back. The supplied product listings give an area range of 97–258 ft², but area alone cannot establish the shape or usable width of either zone. Overlay the structure and furniture drawings at the same scale, keeping the occupied chair positions visible.
Compare the regular, bioclimatic aluminium and lean-to options using dimensions and configuration details confirmed for the version under consideration. The aluminium pergola product page provides a reference for that model enquiry. If a drawing leaves a support position or usable edge unclear, ask the retailer or installer to clarify that specific point. For a proposed wall connection, have a qualified installer assess the site rather than treating a successful furniture plan as proof that installation is suitable. Keep the agreed drawing with your furniture measurements: together they record the arrangement you evaluated and make later changes easier to assess.
Frequently asked questions
Can a dining table and lounge set fit under one pergola?
They can if the complete furniture footprints fit at the same time, including pulled-out chairs, seated people, serving space and the route between the house, both zones and the garden. A pergola’s overall area does not prove that this arrangement works: shape, support locations and door access matter too. Test the furniture you actually use rather than relying on a photograph or nominal area.
Which zone should go nearest the house?
Put the area you reach from the house most often where that route is shortest if it makes daily use easier; for many households that is the dining table because food and dishes travel back and forth. It is not a rule. A garden view, door position, afternoon sun or route to the garden may favour the lounge instead, provided the other area remains accessible without crossing occupied seats.
How much space should I leave between the two areas?
There is no single gap that suits every furniture set. Base it on the movements that need to happen there: pulling out chairs, passing while someone is seated, carrying a tray and moving mobility equipment or a child. Mark those movements on the plan and preserve a clear route when both zones are occupied; a gap that works on an empty sketch may vanish during a meal.
Will compact furniture solve a tight layout?
Compact furniture may reduce the footprint, but it does not remove the need for seat access, chair movement or a serving path. A narrow lounge chair can still obstruct the only route if it is badly placed, and a small table may leave no room for diners to move back. Compare the actual pieces in use; consider fewer seats or another arrangement if the two complete zones cannot work together.
What should I measure before comparing pergolas?
Measure the table in each regular position, chairs pulled out, lounge seats, coffee and side tables, door openings and the route to the garden. Record posts, walls, projections and fixed items, plus anything that cannot be moved. Then compare the drawing with the exact dimensions and support positions for the configuration under consideration; the area range alone cannot confirm a fit.
A good two-zone plan does not need an elaborate divider; it needs two recognisable areas that remain comfortable when used together. Measure furniture in working positions, reserve the route people actually take and test the arrangement with doors, chairs and users in place. Then compare that complete plan with the exact pergola configuration, including any supports and edges. If a route only works when furniture is pushed in or the lounge is empty, revise the layout before selecting the structure.
