
Draughts Around Windows: Adjustment, Failed Seals or an Installation Problem?

Window troubleshooting guide
A draught investigation often begins during a retrofit: rooms are being redecorated, external access is already arranged, or one troublesome window is being compared with others before a larger replacement order. That is a useful moment to slow down. Air felt near a window can come through the closing sash, around a degraded weather seal, at the frame-to-wall junction, or from another route that happens to emerge beside the reveal. Cold glass can also create a convincing draught-like sensation without a gap at all. The practical aim is not to diagnose every detail from indoors, but to narrow the evidence before choosing adjustment, seal work, an installation inspection or replacement. Start with a clean, fully closed and locked window, then note exactly where the sensation occurs, whether wind changes it and whether operating the sash changes it.
Begin with the room, not the assumed fault
Treat the first inspection as a comparison exercise. Identify whether the sensation is strongest at the glass centre, one sash corner, the meeting point of two sashes, beneath the cill or beside the reveal. Mark a repeatable point with low-tack tape and note the wind, room and operation of extractor fans. This creates a useful record without assuming the cause.
A window should be tested in its normal secured position. Remove temporary obstructions at the sill, loose blind cords, accumulated debris and anything caught near the closing line. Close and lock it gently. Watch whether one edge meets first, whether the handle needs exceptional force or whether the sash seems to sit unevenly in the frame. Do not use force to make a lock overcome resistance: that can obscure the cause or damage hardware. Compare the same area after opening and closing the sash once or twice. A symptom that moves, weakens or disappears with operation points the enquiry towards the moving parts; one that remains at the wall finish requires a different line of investigation.
Separate a cold surface from moving outside air
The human body is very sensitive to a cool radiant surface. On a chilly day, glazing can make the nearby area feel uncomfortable even if the window closes correctly. Air cooled by the inside face of the glazing can descend, particularly at a larger opening or behind a closed curtain, and be interpreted as a draught at floor level. Compare the centre of the pane with its edges and the perimeter of the frame. A sharply localised sensation at a repeatable point is more useful evidence than a general feeling that the entire window area is cold. Also consider room airflow: a radiator, supply grille, stairwell, kitchen extractor or fireplace can alter the sensation near the window.
Use simple checks as indicators rather than measurements. A narrow strip of lightweight tissue held near a suspected joint may move, but indoor pressure and mechanical extraction can affect the result. If practical, repeat the observation with intermittent extractors off, then with them on, and never use a flame. Look for dust tracing one short line, a rattle in gusts, daylight visible at a closed sash or a change when the window is locked. Moisture on room-side glass does not identify a leak. When examining a top-hung outward-opening window, distinguish air at its closing perimeter from broadly descending cool air beneath the glazing.
Assess the whole opening
Check how the opening sash reaches its seal
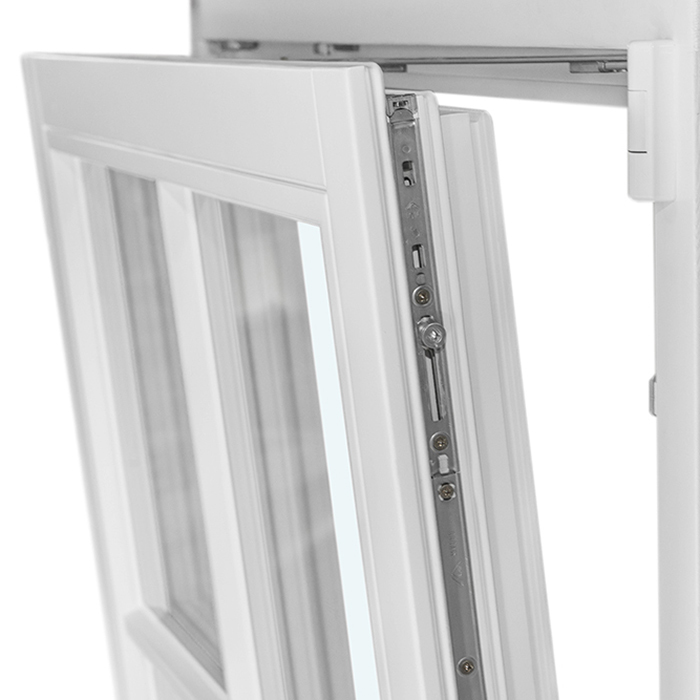
Opening windows rely on an even relationship between sash, frame, hinges or stays, locking points and compression seals. If the sash has dropped slightly, is twisted, or does not travel fully into its closed position, one corner may not compress the seal as intended. The useful question is not simply whether the window locks, but whether it locks evenly. Inspect the visible closing gap from indoors and outdoors where access is safe. Uneven spacing, rubbing marks, a sash that catches, or a handle that becomes difficult only near the final turn are observations worth reporting. They are not, by themselves, instructions to alter hardware settings, which vary by system and should be adjusted by someone familiar with that window.
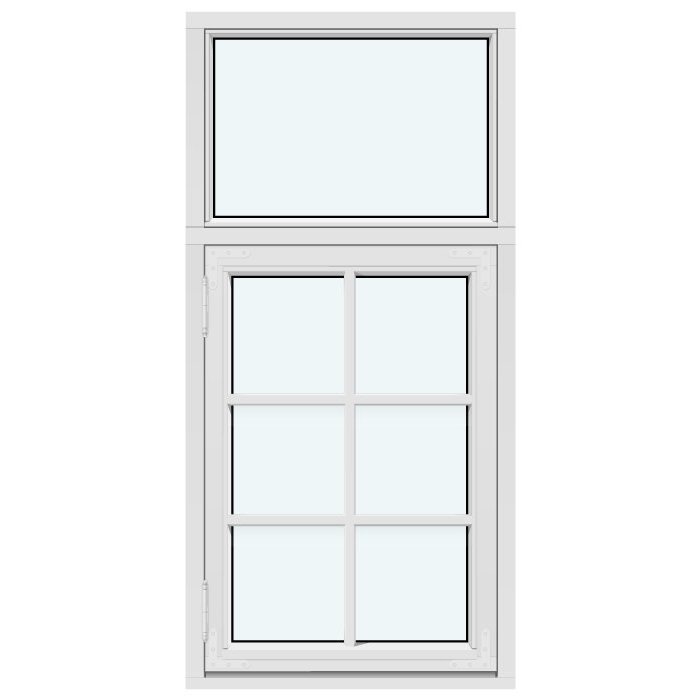
Opening style changes the inspection points. An outward-opening side-hung Kombi window follows a different closing path from a single-sash inward-opening window, pivot or top-hung design. Note the type before arranging service, along with whether the problem occurs at the hinge side, handle side, head or cill. Check that debris, paint, a swollen surface, a misplaced restrictor or a damaged component is not holding the sash away from the frame. Photograph the closed window straight-on and take a close image of the affected corner. Clear evidence helps an installer decide whether a careful adjustment visit is sensible before more extensive remedial work is discussed.
Inspect weather seals as continuous contact lines
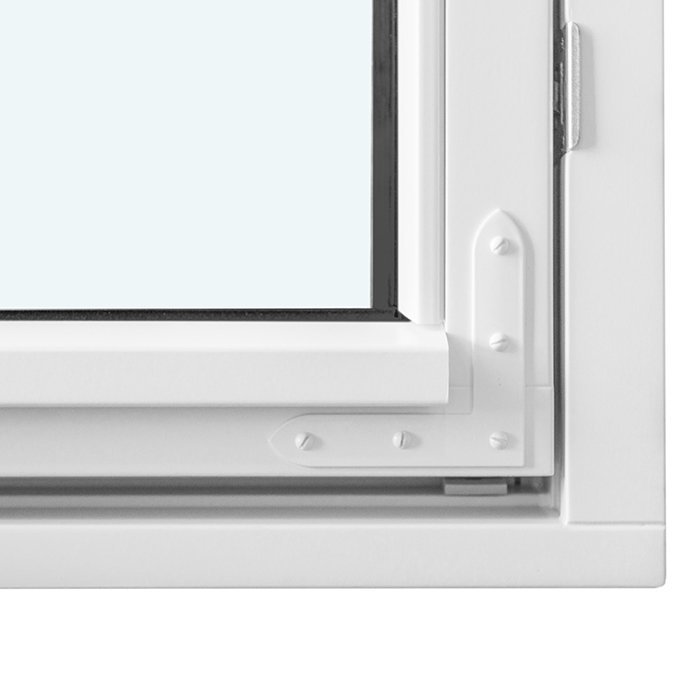
Weather seals are intended to form a continuous contact line when the sash is closed. With the window open, look for sections that are flattened, torn, loose from their channel, contaminated, painted over or visibly displaced at corners. A seal can look broadly intact yet fail where it has shrunk back from a join or where the sash does not meet it evenly. Clean only in a manner suitable for the particular window and avoid stretching, gluing or substituting unknown seal profiles as a quick fix. An ill-matched replacement can prevent closure or create a different weak point. If a seal is visibly damaged, photograph its profile and location before it is removed or altered.
A small paper strip can provide a cautious comparison between neighbouring sections of the same window. Close and lock the sash over the strip, then note any pronounced difference in resistance. This is not a pass-or-fail test because seal designs vary. If weak resistance, visible displacement and the draught coincide, seal contact becomes more plausible; air at plasterwork points elsewhere.
Do not confuse a glazing fault with a perimeter draught
Cloudiness, droplets or a permanent haze between panes can indicate that the sealed glazing unit has lost its integrity. This affects the unit between the panes; it does not automatically establish that outdoor air is entering the room at the sash edge or frame junction. First make sure the moisture is genuinely between panes rather than on a surface that can be wiped. Record when it is visible, whether it clears and whether it occurs across one pane or several. A glazing assessment may be appropriate, but it should be described separately from the observed draught so that the scope is not built on an unsupported assumption.
Glazing bars can complicate the visual reading of an opening. Decorative bars contribute to the glazing’s appearance, while glass-dividing bars divide the glazed area; neither should be assumed to be the leak route without evidence. For a divided design such as a historic-style Kombi outward-opening side-hung window, record whether air is felt at the operating sash perimeter, at the meeting of sash and frame, or simply near the centre of a glazed panel. This matters if replacement is considered: preserve the desired appearance and opening pattern, but specify remedial work around the identified fault rather than treating every visible division as a structural problem.
Trace the frame-to-wall junction carefully
Air emerging at the internal reveal, trim joint, plaster crack or skirting beside the cill is not well explained by sash adjustment alone. The route may lie at the frame interface or within the adjacent construction before emerging indoors. Note whether it follows one side or concentrates at a corner, and record cracks, staining or loose trim. Do not remove finishes without an agreed investigation and making-good plan.
External observation can be useful only where access is safe and proportionate. Look for obvious failed perimeter sealant, damaged render, open cladding joints or gaps between an external finish and the frame. These signs need interpretation in the context of the whole wall, drainage arrangement and existing installation, not a bead of sealant applied blindly from one side. Ask a suitably qualified installer or building professional to identify the likely air path and the proposed sequence of opening-up, repair and making-good. The important specification question is: what will be inspected beyond the visible line, how will the frame perimeter be detailed, and how will the result be checked before finishes are reinstated?
Assess the whole opening
Use wind direction and pressure as diagnostic clues
A defect that is noticeable only during wind from one elevation can still be real, but its pattern helps locate it. Record which façade is affected and whether the draught increases during gusts, steady rain, cold weather or use of an extractor fan. A sash-edge issue might intensify when wind presses against that side of the building; a wall-path symptom may appear at a reveal or cill irrespective of the exact sash position. Indoor pressure matters too. Kitchen and bathroom extraction, a cooker hood, an open flue and even opening another external door can change air movement through small gaps. Repeat observations under comparable conditions rather than drawing a conclusion from one unusually stormy evening.
This record is particularly valuable for larger glazed openings. Sliding panels, multiple closing lines and wide rooms can create sensations that seem to originate from one location but are influenced by the whole opening and indoor airflow. If the concern is beside a side-sliding patio door, identify whether it is at the moving panel’s closing edge, the track area, the fixed panel, the jamb or the wall finish. State whether the panel is fully shut and locked during each test. A contractor can then bring the right approach to adjustment and sealing rather than treating a broad patio-door complaint as though it were identical to a small casement-window draught.
Plan a repair visit with useful evidence
A productive service request says what happens, where it happens and what has already been observed, without insisting on a diagnosis. Include the approximate age of the installation if known, opening type, room, elevation, exact location, photographs of the closed sash and seal, and a short log of weather conditions. Mention operational symptoms such as rubbing, resistance at the handle, loose trim or visible seal displacement. Ask whether the appointment is intended to assess sash adjustment, weather seals, glazing, perimeter installation or a combination. If access equipment, internal furniture protection or exterior access is likely to affect the visit, raise this at the outset; retrofit coordination is often as important as identifying the fault.
Agree the assessment scope and ask what an inconclusive result would mean. The visit may identify an adjustment, a compatible replacement seal, a glazing problem or the need to inspect around the frame. Request a written account of the observed cause, proposed work, exclusions and making-good responsibilities. If replacement is agreed, Bloomcabin states a five-year warranty for windows and doors and delivery of four to six weeks, subject to order confirmation.
Decide when replacement is the sensible route
Replacement becomes a clearer option when assessment finds multiple linked problems, such as difficult operation, compromised closing contact, damaged components and an installation that cannot reasonably be remedied within the project’s aims. It may also be chosen when a planned refurbishment makes access, internal finishing and external detailing more efficient as one coordinated job. Yet replacement does not remove the need for diagnosis. The survey must establish accurate opening dimensions, sill and reveal conditions, drainage approach, desired opening direction, glazing layout and how the new frame will connect with the existing wall. A new window can only perform as well as the selected configuration and the completed installation allow.
For an opening that does not need to provide ventilation or another operational function, a fixed non-opening window is an alternative with no opening sash perimeter. That does not make it universally preferable: it changes how the room is ventilated, cleaned and used. Where an opening sash is required, discuss handle reach, external clearance, furniture and cleaning access. Do not select a product merely because its title suggests a particular outcome; request the project-specific information needed for the proposed construction and compare it with the wider refurbishment plan. The draught evidence should shape the brief, not become a shortcut around careful specification.
Write a replacement brief that avoids recurring uncertainty
A good enquiry separates non-negotiables from preferences. List which windows open and why, which are fixed, the required sightlines, colour, decorative bars or glass-dividing bars, privacy needs, glazing preferences and access constraints. Add the existing problem in neutral terms: for example, “air movement felt at the lower handle-side sash edge in gusty conditions” or “cool sensation and air movement at internal trim beside the cill”. For a room where inward operation works best, a two-sash inward-opening window provides a clear starting configuration to discuss, but the order should still confirm dimensions, handing, glazing and all relevant details rather than relying on the product name alone.
Ask the surveyor or supplier to distinguish product supply from installation work, and frame-level work from repairs to the surrounding wall and finishes. Confirm who measures, who identifies the suitable fixing and sealing strategy, who checks the aperture condition, and who makes good internally and externally. If a period appearance is important, say so early rather than assuming it follows from a general window category; a historic-style two-sash outward-opening side-hung window is a different visual and operational proposition from a plain single sash. Finally, obtain the order confirmation before arranging dependent trades. That sequence gives joinery, plastering, decoration and external access a realistic basis for coordination.
Common questions
Can I adjust a draughty window myself?
Avoid changing hardware settings unless you have the correct instructions for that specific window and understand the effect of each adjustment. First document uneven closure, rubbing and the precise leak location. A competent installer can assess alignment, locking engagement and seal contact without turning a simple diagnosis into damaged hardware or a worse closing problem.
Does condensation mean my window seals have failed?
Not necessarily. Condensation on the room-facing glass surface can result from indoor humidity meeting a cool surface. Persistent haze or droplets between panes may indicate a sealed glazing-unit issue, but that is distinct from proving a draught around the sash or frame. Describe both observations separately when requesting an assessment.
Why is the draught strongest at the bottom corner?
A lower corner can be affected by uneven sash contact, a displaced seal, local hardware alignment, the cill junction or airflow travelling behind internal finishes. Its position alone does not identify the cause. Check whether the sensation changes after locking the sash and whether it is at the moving sash edge or the surrounding reveal.
Should I add sealant around the inside of the frame?
Do not use internal sealant as a default response to a suspected draught. It may hide the route, complicate later inspection or be unsuitable for the relevant joint. Identify whether the air is coming through the sash, a perimeter interface or adjacent fabric first. A professional should specify any repair as part of the whole junction.
What should I send an installer before a visit?
Send photographs of the closed window and suspected area, the opening type, room and elevation, notes on wind and extractor-fan conditions, and any visible seal or finish damage. Explain whether operation is difficult and whether the symptom changes when locked. This helps the installer prepare for adjustment, seal inspection or broader frame-perimeter investigation.
Next step
A draught around a window is a location problem before it is a product problem. Establish whether the sensation is cold glass, moving air at the sash, a discontinuity in the weather seal, or a path around the frame and adjacent finishes. Test the window only when fully closed and locked, compare several points and keep a short evidence record. Then commission the narrowest credible next step: adjustment and seal assessment for a sash-edge issue, glazing assessment for between-pane haze, or a wider installation inspection where air emerges at trim or plaster. If replacement follows, use the investigation to create a precise brief for the opening, wall junction and retrofit sequence.
