
Electric Infrared Heaters Under a Pergola: What to Check
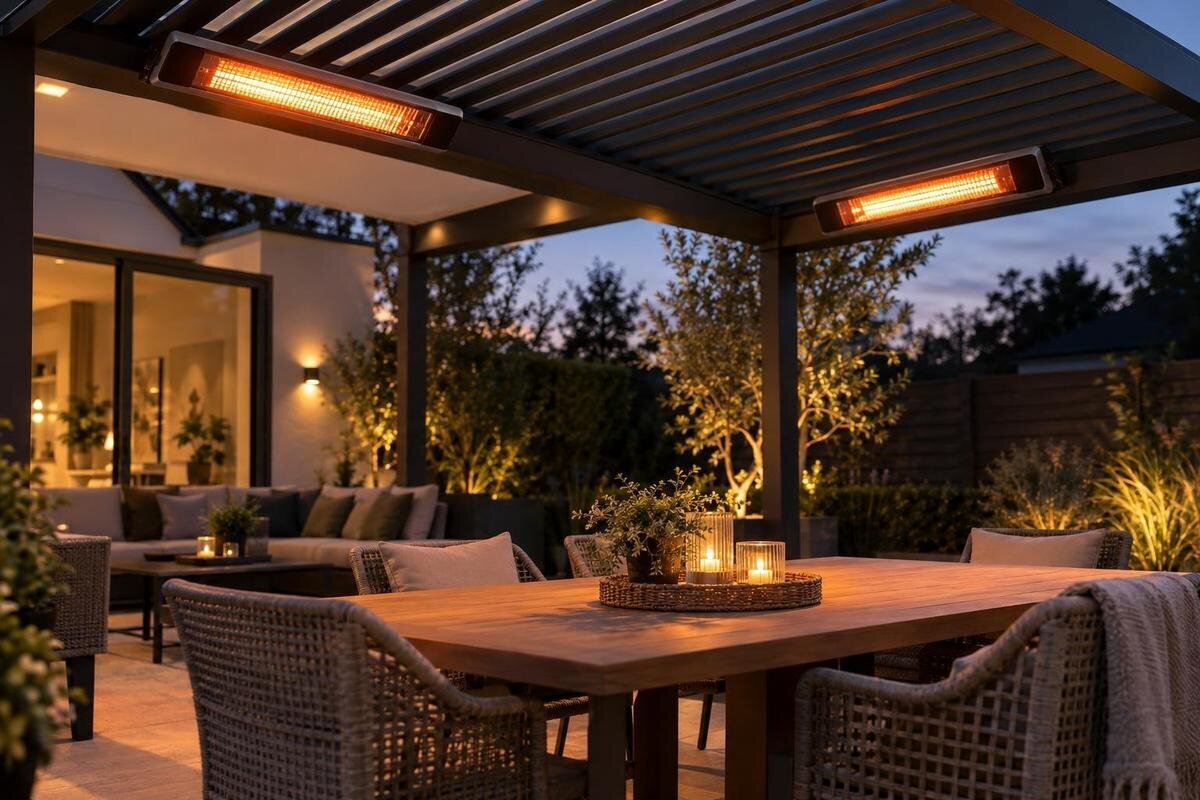
Pergola heating
An electric infrared heater may be sold for outdoor use, but that does not establish that it can be fixed beneath any pergola. The heater maker’s instructions must allow the proposed mounting position and exposure; the pergola maker must approve the attachment; and a qualified electrician must assess the supply. Check those points together before choosing equipment or arranging work. The real question is whether this heater, frame, roof arrangement and electrical provision form an acceptable installation as one complete plan.

Confirm approval from both manufacturers
Treat approval as two separate questions. The heater manufacturer sets the permitted fixing method, orientation, installation clearances, surrounding materials and operating conditions for that exact model. The pergola manufacturer can confirm whether the frame and proposed point may accept the equipment. Neither response replaces the other: a bracket may be approved for a ceiling generally but not for the member you have, while a beam that looks substantial may not be an approved fixing. Ask for an answer tied to the model numbers, proposed position and mounting method, rather than a broad assurance about outdoor use. If a manufacturer refers you to an installer, ask what information that installer needs.
Give both parties the same brief: the exact pergola and heater models, proposed bracket and fixing point, roof type, intended operating position, and photographs or a marked-up sketch. Include nearby walls, screens and other materials so the answer relates to the actual setting. If you are considering the Bloomcabin Lean-To Pergola, use that exact product name in your enquiry and request the documentation for the configuration you intend to order. Ask whether the reply covers your proposed location and any roof movement, rather than only a general category of equipment. Keep any conditions attached to the answer: approval for one bracket or position should not be read as permission for every alternative.
Take clearances from the exact heater manual
Find the current instructions for the exact heater model and note any model or manual revision. Read the mounting diagrams as well as the written warnings: conditions may differ for ceiling, wall or other orientations, and the required clearances can vary accordingly. Check which distances apply above, below, behind and to each side, along with any stated mounting height, angle or restricted direction. Follow the reference points shown in the diagram rather than guessing where a distance starts. Do not borrow a convenient figure from another brand, a retailer photograph or a generic patio-heater guide; similar-looking units may have different requirements.
Have the installer compare each required distance with the proposed position, using the manual’s stated measurement points. Include the roof, beams, posts, walls, glazing, furniture and any materials that could enter the restricted space. The bracket and protruding parts of the heater also need to be shown clearly in the proposal. Record uncertain measurements rather than estimating around an obstruction. When comparing the Bloomcabin Pergola with your available space, request the relevant dimensional drawings so the installer can assess the actual configuration. Overall pergola dimensions alone cannot show whether a heater fits within a particular bay. If the heater manual does not cover the arrangement, seek clarification before installation.
Verify that the pergola can accept the fixing
Clearance from nearby surfaces is only part of the mounting check. The frame needs a point and fixing method accepted for the heater attachment, including any bracket or fixings specified by the heater manufacturer. Confirm which member, if any, may be used and whether the proposed method is approved. Do not assume that a beam, decorative trim, gutter, louvre or convenient edge is a suitable anchor. Nor should you drill, clamp or improvise a bracket where the method is not documented. A change to the frame may affect other components, so include the proposed attachment in the enquiry rather than leaving it to be decided on the day.
A product photograph cannot show what lies behind a cover or how a frame member is intended to be used. Share a marked-up image of the precise point and ask whether the heater, its mounting hardware and that location are acceptable together. If the answer specifies a different fixing, request its documented details before work starts. For the Lean-To Pergola model, distinguish clearly between a proposed attachment to the pergola and one to the building: they are separate mounting proposals requiring assessment of the relevant support. Record who is responsible for confirming each attachment. If additional structural assessment is requested, have it completed by an appropriately qualified professional rather than relying on the apparent strength of a visible member.
Check every position of a moving roof
If a pergola roof opens, tilts, retracts or otherwise changes position, check the heater against every permitted roof position, not only the one shown in a photograph. Consider clearances, contact with moving parts, access for movement and whether a change in roof position affects the heater’s exposure to rain or wind. Controls can also be affected if a moving component comes close to the fitting. Rely only on movement limits or combinations stated by the pergola manufacturer; do not assume that leaving the roof partly open resolves a conflict. If the roof does not move, this check is less relevant, but its fixed position still belongs in the clearance assessment.
Ask for a written answer that names the roof positions in which the proposed heater may be installed and operated, or confirms that the mounting is not supported. When enquiring about the Bloomcabin bioclimatic pergola, request the roof drawings and operating instructions for the exact configuration being offered; the model name alone does not establish its movement or heater compatibility. The review should distinguish the space occupied by moving parts from their position when stationary. It should also address what happens during ordinary operation, rather than depending on everyone remembering an informal restriction. Any required operating restriction needs to be explicit in the agreed proposal and available to the installer and future users.

Match the heater to the actual weather exposure
Assess exposure at the proposed mounting point rather than assuming the whole structure is sheltered. Rain can reach an open-sided area from the edge, while wind, moisture or condensation may affect the heater, controls, connectors and cable route. A roof may reduce some exposure without excluding all of it. Compare the exact unit’s stated outdoor rating and permitted conditions with the location where it will operate. A description such as suitable for patios or outdoor spaces is not a substitute for the manufacturer’s instructions about the type and degree of exposure the heater can tolerate.
Check whether any published rating applies to the complete heater or only to a particular part, and whether the instructions require protection from direct rain, spray or damp conditions. Look for separate guidance on controls and connections instead of assuming they have the same rating as the heater. Do not add an unofficial cover or enclosure to resolve a mismatch: it could affect ventilation, clearances or access, and needs its own approval. If the Bloomcabin Pergola model is on your shortlist, describe the intended site and configuration in your enquiry, including exposed sides and nearby roof edges. This gives the adviser a more useful basis for assessing exposure than a photograph of the product in another setting.
Have the electrical supply assessed
Electrical suitability is separate from whether the heater physically fits. Give a qualified electrician the heater’s exact model, rated input and connection instructions, along with the intended position and details of other electrical equipment planned for the pergola. Ask them to assess the supply, circuit capacity, protective arrangements and connection method for the completed installation. Do not infer that a nearby outdoor socket, an existing lighting feed or a spare-looking cable can serve the heater. A professional needs to review the actual supply and proposed equipment before confirming what is suitable.
Include the cable route, access to switches or controls, and the exposure of each connection point in the discussion. The proposed route must also fit the heater manufacturer’s requirements and avoid a snag or contact point around doors, moving roof parts and normal circulation. Agree the timing of electrical work with the electrician, particularly if the design could make access difficult later. Do not plan around an unverified extension lead or an assumed low-demand setting; ask about the exact heater configuration and intended use. This is a question for an assessment of the complete installation, not a wiring task to work out from a product photograph.
Decide whether radiant heat suits the seating area
Infrared warmth is directional: it is intended to warm people or surfaces reached by its radiant output, rather than to guarantee an even rise in the temperature of all outdoor air. That distinction matters beneath an open-sided pergola, where air can move freely. Note where people usually sit, whether they remain in one place and whether the heater’s permitted orientation can serve that area while still meeting its clearances. This helps you judge whether a proposed arrangement has a plausible use, without assuming it will deliver a particular comfort level in every condition.
Obstructions and changing use also matter. A beam, screen or tall object may interrupt the path from a heater, while a dining arrangement can put people in different places over an evening. Compare manufacturer coverage information, if provided, with the way you expect to use the space. Do not move the unit closer or alter its angle to compensate unless the instructions allow that mounting. If you are considering the Bloomcabin lean-to model, show the usual seating arrangement alongside the proposed heater location in your enquiry. Distinguish the seats you want to serve from walkways or occasional seating; this helps the adviser assess the intended use without treating the entire pergola floor area as a heating target.
Include furnishings and screens in the clearance check
Assess the space as it will actually be furnished, not as an empty frame. Note cushions, removable covers, hanging decorations, blinds, screens, plants and movable furniture that could be close to the heater or enter its clearance area. People may pull out a chair, stand to serve food or store items overhead, so consider foreseeable movement as well as a fixed layout. The heater manual may identify materials or uses that must be kept away. Follow its wording rather than judging safety by whether a fabric feels thick or a surface seems far enough away.
If side screens, curtains or blinds are added later, repeat the check before using the heater. Closing a side may change airflow and exposure, as well as the distance between the heater and nearby materials. Consider whether an item could swing, flap, sag or be repositioned into a restricted area, and whether normal access brings people close to the fitting. When enquiring through the Bloomcabin Pergola product page, identify any side accessories you intend to include and ask for their relevant drawings or instructions. Show both their stored and deployed positions in the proposal. Keep removable furnishings in the assessment too: an accessory drawing will not account for your own cushions, covers or decorations.

Give every adviser the same installation details
Keep one shared information pack so each adviser works from the same proposal. Label photographs with the proposed fixing point and include a sketch showing the dimensions that have actually been measured. Distinguish confirmed measurements from estimates, and identify areas that could not be inspected, such as a concealed cable route or covered frame detail. Add the exact heater and pergola identifiers, document revisions and intended accessories. Date the pack and update it when the proposal changes. This avoids an electrician reviewing one heater while the pergola supplier answers a question about another, or an installer relying on a photograph taken before a screen was added.
If advice differs, identify the precise point of disagreement: attachment, clearance, exposure, roof operation or electrical provision. Do not combine the most convenient parts of separate answers into an arrangement that nobody has approved. For an enquiry about the Bloomcabin Bioclimatic Aluminum Pergola, retain the exact catalogue name in the records so replies can be matched to the intended model. Ask each adviser to state the scope of their answer and any outstanding dependency on another assessment. Keep written replies, the manual revision and installer notes together, including any later clarification that replaces an earlier answer. The person carrying out the work should receive the current version, not a mixture of old and new proposals.
Keep approval tied to the final equipment
Before ordering, record the accepted combination: exact heater model, mounting orientation and location, approved fixing method, applicable clearances, any roof-position restrictions, exposure limits and agreed electrical provision. Match each item to a manual or written confirmation, and mark open questions rather than treating them as implied approval. Check that the product description, manual and quotation refer to the same model; similar names do not guarantee identical mounting instructions. If a key detail is missing, defer the decision instead of relying on a verbal assurance about a comparable installation.
Recheck the arrangement if the heater, bracket, pergola part or location changes, even if a replacement looks equivalent. A new screen, roof accessory or different furniture layout can also alter the practical clearance picture. During installation, ask the installer to pause if the frame, service route or actual spacing differs from the agreed plan, and obtain a fresh decision from the relevant professional. Once fitted, use and maintain the heater only as its own instructions state. This final comparison keeps the equipment, attachment and installation advice connected to the same plan.
Frequently asked questions
Does an outdoor rating mean a heater is suitable beneath any pergola?
No. An outdoor rating relates to the product’s stated exposure limits; it does not confirm that a particular pergola member is an approved fixing or that the required clearances fit. Check the exact heater manual against the intended position, then obtain the pergola manufacturer’s approval for the attachment.
Can I fit a heater to a pergola beam myself?
Do not decide from the beam’s appearance. Use only a fixing point and method accepted by the pergola manufacturer and permitted by the heater instructions. If the attachment is not documented or would alter the frame, ask the manufacturers and a qualified installer before work begins.
Can a heater go beneath an adjustable or louvred roof?
Only if the relevant instructions permit that combination. Check the heater against every roof position and confirm that movement cannot create a clearance or contact issue. A roof that happens to be open when the heater is fitted is not, by itself, evidence that the arrangement is suitable.
Will an infrared heater warm the whole pergola?
Not necessarily. Infrared heat is directed towards people and surfaces it reaches, while an open-sided area loses warmth to moving air. Compare any manufacturer coverage information with how you plan to use the space; do not treat a heater’s rating as a guaranteed temperature for the whole area.
What should I send an electrician before they assess the installation?
Provide the exact heater model and manual, its electrical details, the pergola model, the proposed fixing point, photographs or a sketch, roof positions and the location’s exposure. Include other planned electrical equipment and the proposed cable route so the electrician can assess the complete arrangement.
An infrared heater beneath a pergola is a sound choice only when the heater instructions, the pergola manufacturer’s mounting approval and the electrical assessment all relate to the same installation. Treat any gap between them as an open question, not an invitation to estimate. Once the fixing, clearances, exposure and supply have been confirmed together, you can judge whether the heater’s documented use fits the way you plan to use the space.
