
Glazing Bars for Windows and Doors: Types, Patterns and Buying Considerations
UK window and door planning
Glazing bars should be considered before replacement windows or patio doors are measured, not added after the main frames have been selected. They alter the apparent size of every pane, the uninterrupted view and the relationship between new units and retained openings. On a retrofit, the pattern may also need to coordinate with brick openings, rendered reveals, neighbouring doors and windows that will not yet be replaced. A grid that looks balanced across the garden elevation can feel intrusive from a kitchen sink or sofa, so assess it from both sides. Begin by deciding whether you want decorative bars or bars that divide the glazing into separate sections. Then develop an elevation-wide rule, test it against each opening and record the final arrangement clearly enough for the order drawing to be checked.
Specification check 1
Start with the complete elevation
Photograph the façade square-on and mark every window and door, including units that will be retained. Note which openings are seen together from the pavement, drive or garden. The objective need not be perfect symmetry: a stair window or broad patio opening may justify a different arrangement. Look instead for a shared rule, such as aligned horizontal divisions, related pane proportions or one bar colour. This approach is especially helpful where a rear extension meets an older elevation. A pattern that suits a small casement can become crowded when copied repeatedly across a wide opening, so sketch the visible glass areas rather than judging outer frame dimensions alone.
Repeat the exercise indoors from the places where rooms are actually used. Check seated views, kitchen worktops, desks, landings and the route towards each door. A central cross may look composed outside yet interrupt the most valued part of a garden view. A fixed non-opening window can provide a calm area of uninterrupted glazing beside patterned opening lights, while bars may help a large fixed pane relate to smaller neighbouring units. Write down the intended effect in plain language: a framed outlook, a more regular façade rhythm or fewer apparent expanses of glass. That statement gives the supplier a design aim to test rather than an unexplained collection of grid lines.
Identify how the bars are constructed
A decorative bar is primarily a visual feature. It creates the appearance of smaller panes while the glazing behind the pattern may remain uninterrupted, depending on the system offered. Decorative elements may be positioned differently by different suppliers, and their depth, shadow and appearance from each side can vary. Ask for a section detail or physical sample and establish whether bars appear internally, externally or on both relevant faces. Avoid assuming that a broad description such as Georgian or heritage confirms the construction. Such terms may describe an aesthetic direction, but they do not tell you how the glazing or decorative elements are assembled.
Glass-dividing bars create separate glazed sections, making the pane arrangement part of the construction rather than only an applied visual pattern. Their joints and shadow lines may appear more pronounced when viewed obliquely or in strong side light. That dimensional effect can be desirable, but it is not automatically the best answer for every opening. Additional divisions also introduce more edges, corners and visual interruption. Use the terms decorative bar and glass-dividing bar in your enquiry, then require the proposed method to be labelled on the drawing. A visualisation can help with overall direction, but the approval drawing should identify the frame, sash, glazed sections and every intended division.
Specification check 2
Build the pattern from glass proportions
Divide the visible glass area rather than the rough opening or a standard grid copied from another project. A narrow upright window may favour vertically proportioned apparent panes, whereas a landscape window may carry one shallow horizontal division more naturally. Equal squares are not a universal solution: they can make a tall opening look squat or turn a broad opening into numerous small fields. Compare a no-bar version with two restrained patterns at the same scale. Include the surrounding frame, because its width affects the apparent proportions. Also check whether proposed verticals relate sensibly to nearby mullions, brick joints, cladding lines or door frames.
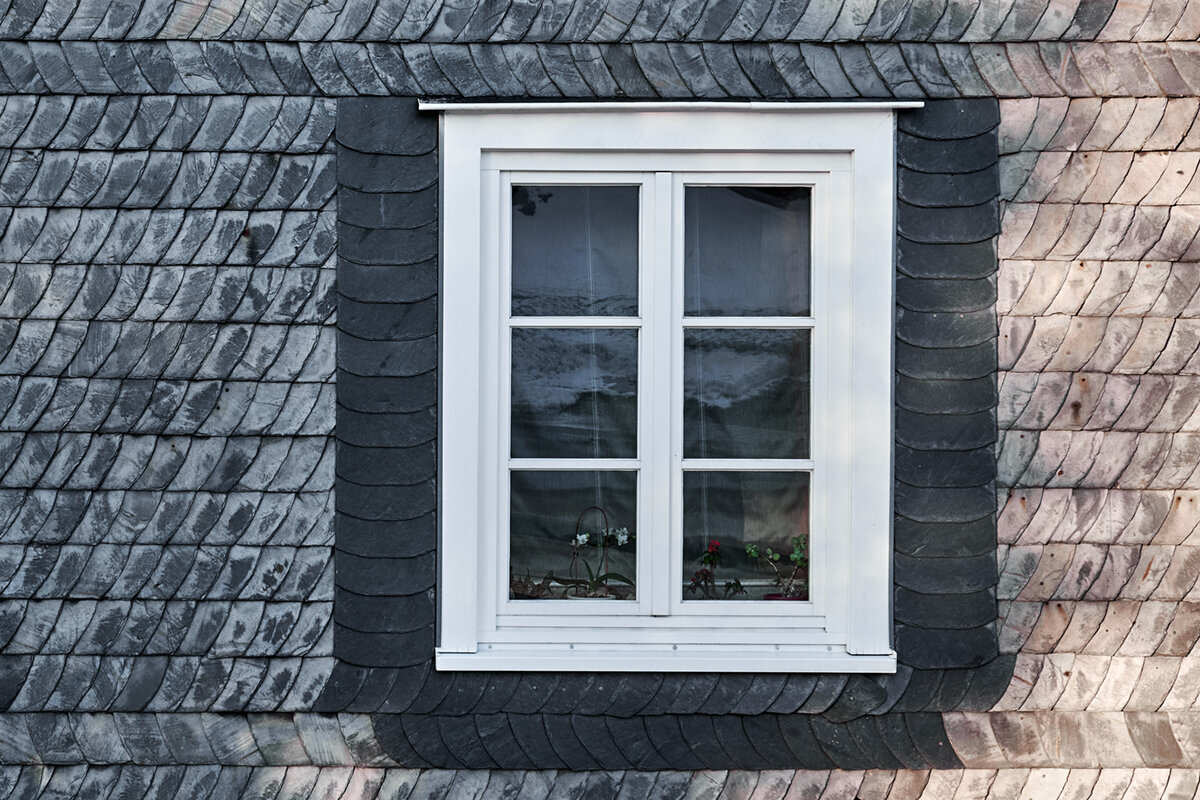
Treat a multi-sash window as one composition before decorating each sash separately. On a two-sash outward-opening side-hung window, bars can acknowledge the central meeting line or compete with it. A horizontal that almost aligns across both sashes but misses slightly may look accidental, while unnecessary verticals beside the meeting line can make the centre disproportionately heavy. Decide whether the two sides should mirror one another and whether key horizontals should continue at a common level. Across windows of different sizes, preserve a recognisable relationship rather than forcing identical pane dimensions. Ask for dimensions to visible bar centre lines so the layout can be assessed against the actual ordered size.
Protect important views
Every pattern exchanges some open-glass view for visual structure. Stand at the dining table, sofa, desk, landing and kitchen sink rather than inspecting only from the doorway. Consider whether a bar crosses the horizon, a mature tree, a useful view of the garden or the area where children play. A grid can frame these scenes attractively, but it can also make a compact room feel busier. Tape lines on an existing pane or use a correctly scaled overlay to compare options. This simple test is more informative than viewing an isolated sample because it shows the pattern at the height and distance from which it will normally be experienced.
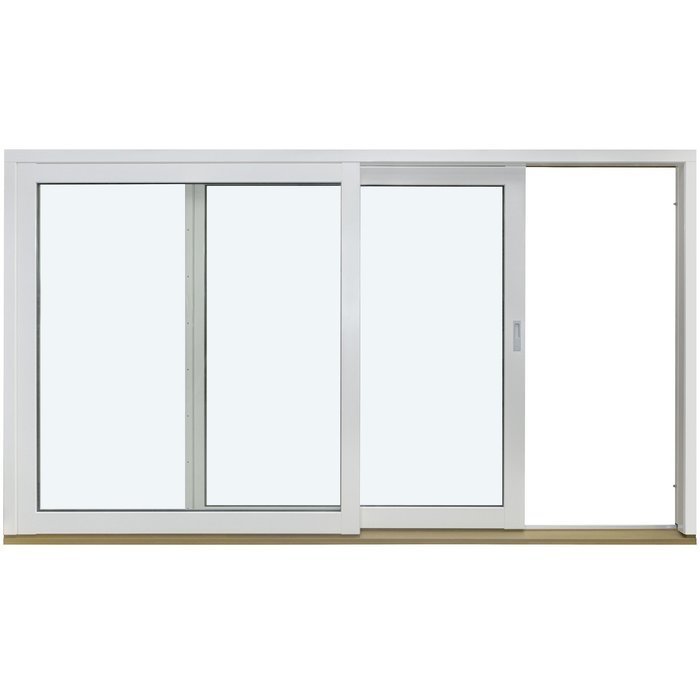
Glazed doors combine a view with moving panels, so their pattern needs a separate check. On a Patio Life side-sliding patio door, assess bars across the complete opening and note where panels meet or overlap. A layout that appears balanced when closed may become fragmented when one panel moves. Decide whether the priority is a clear central outlook, a regular exterior composition or a measured compromise between the two. Request an elevation showing the door closed and identify every moving leaf. If possible, mark the principal indoor viewing position on the plan as well. This prevents a generic grid name from taking precedence over how the opening will actually be seen and used.
Specification check 3
Design around opening operation
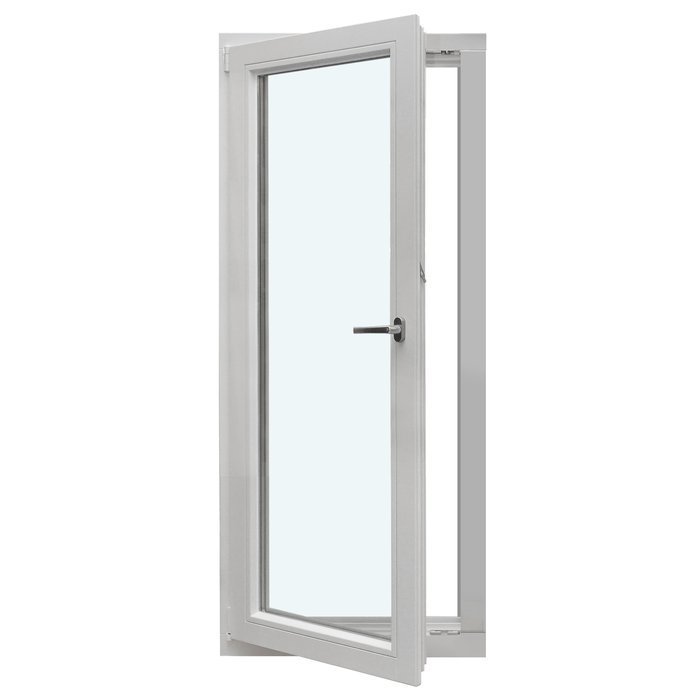
The same grid reads differently on a fixed light, side-hung casement, pivot window or sliding door. Handles, hinges, meeting stiles and opening lines already add visual information, so the bars should work with them. Review outward-opening windows from outdoors when closed and from indoors where the handle and opening edge are used. A dense pattern may disguise the shape of the opening sash, while a restrained division can reinforce it. Pivoting designs have their own strong organising axes. Ask for operational lines and bars to appear on the same drawing; approving the decorative pattern in isolation can conceal awkward alignments or narrow strips of glazing beside a frame.
Opening direction also affects the room around a glazed door. A single-leaf inward-opening patio door enters the interior when opened, so curtains, blinds and nearby furniture need to be considered alongside the bars. Decide whether the grid should align with neighbouring window bars, the door’s frame rails or a separate architectural line. Avoid placing a decorative vertical so close to an edge that it creates an unintended sliver of apparent glass. A horizontal around the handle area may feel visually crowded once the hardware is shown. Add the handle, lock area, threshold and intended window dressing to the review drawing before approving what otherwise looks like a simple pattern.
Compose doors and sidelights together
Wide glazed doors are usually read as one architectural opening, even when several leaves are involved. Establish the principal verticals at the outer frame, leaf junctions and any sidelights before adding decorative divisions. With double doors, extra bars near the meeting stile can make the centre too emphatic. A regular multi-pane treatment may suit a compact, traditionally composed garden entrance, whereas fewer fields can preserve openness in a broad opening. Use a heritage-style double-leaf outward-opening patio door as a configuration comparison only when that opening type suits the project; the heritage label alone should not dictate the grid. Judge the drawing from several metres away as well as close up.
Door glazing and sidelights should belong to the same scheme without necessarily carrying identical patterns. A single-panel door sidelight has a much narrower proportion than the door leaf, so copying the door grid exactly may create compressed or incomplete-looking panes. One shared horizontal division may be enough, or the sidelight may remain without decorative bars while nearby glazing carries the pattern. Consider how the arrangement appears from the hall, the approach path and the normal standing position at the door. Record whether the door and sidelight are intended to match exactly, share only selected alignment lines or deliberately contrast. That wording is clearer than asking for them merely to look coordinated.
Specification check 4
Be selective on large or unusual glazing
A large glazed field does not automatically need numerous bars. Frame width, reveal depth, sash arrangement and the view beyond already give it scale. In a contemporary extension, a few divisions may echo roof beams, posts or cladding joints without turning the opening into a patchwork. A more regular arrangement may help new glazing relate to smaller existing windows elsewhere. Always compare the proposed pattern with a no-bar version. That baseline reveals whether the bars solve a genuine compositional problem or have been added because an empty pane looked unfamiliar on a drawing. It also helps identify where a single strategic line would work better than a complete grid.
Unusual shapes need patterns designed around their geometry. A fixed triangular or angled non-opening window may derive much of its character from the outline itself; imposing a rectangular grid can weaken that shape or leave tiny residual areas at corners. If divisions are wanted, relate them to the strongest diagonal, roof or frame lines. Curved openings similarly need a pattern drawn for the curve rather than a square grid cropped to fit. Review the entire assembly at a realistic scale, including any rectangular units beside it. If the arrangement cannot be explained through the form of the opening or the organising lines of the elevation, leaving the glass clear may provide a more coherent result.
Compare visual weight, finish and light
A grid is more than lines on an elevation. Its visual weight depends on bar width, depth, colour, projection and contrast with the glass and frame. Dark bars against a pale outdoor view may appear more assertive indoors than they do on a white drawing. Elements proud of the glass can create stronger shadows than a flatter treatment. Matching the frame colour generally creates a unified composition, while a contrast makes the pattern a more deliberate graphic feature. Neither is inherently preferable. Ask to see representative finish samples in the likely room light and outside in daylight, rather than choosing colour solely from a backlit screen or a small printed swatch.
Think about the character and distribution of light as well as the apparent brightness. Fewer broad fields retain a more open outlook, whereas numerous smaller apparent panes create a stronger rhythm and more intersections with reflections. In a shaded room, avoid increasing pattern density simply because a detailed grid looked attractive in a bright showroom image. Interior fittings also matter. Shelving, pendant lights, cabinet lines and curtain tracks may compete with the glazing pattern. A simple interior elevation can reveal whether bars support the room’s main lines or introduce another unrelated layer. This is particularly useful where the glazed opening occupies most of one wall and will dominate the room.
Specification check 5
Plan for cleaning and everyday use
Ask where each decorative element sits and how the offered system is cleaned from the inside and outside. More detailed arrangements create additional visual edges and corners, although the exact routine depends on the construction. Consider upper-storey access, planting beside ground-floor windows, conservatory roofs and furniture that restricts approach from indoors. Do not assume that every decorative-bar system has the same maintenance implications. Ask the supplier to demonstrate or describe access for the specified arrangement. If easy cleaning is a priority, compare the preferred pattern with a simpler alternative rather than abandoning the design immediately. The practical question is whether its day-to-day demands suit the location and household.
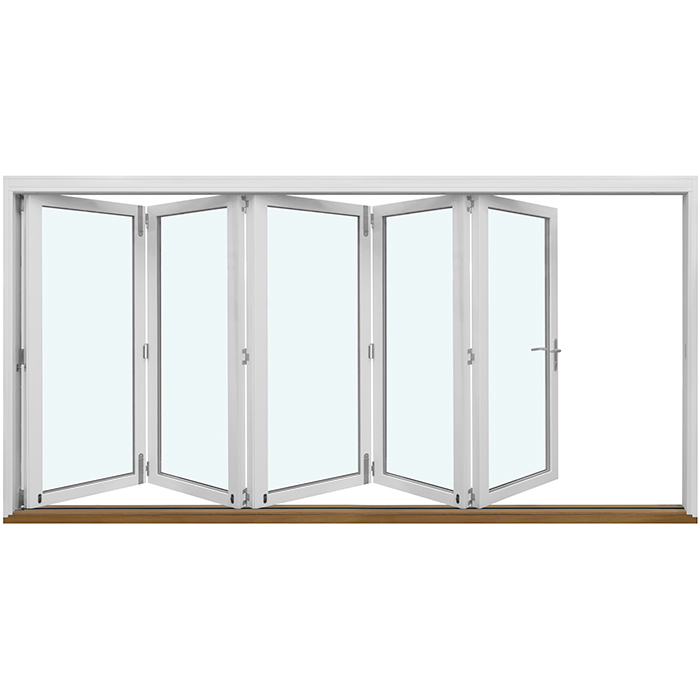
Coordinate blinds, curtains and screens early. A blind close to the glazing can make a strong grid look busier, while a curtain stack may hide the outer part of a carefully centred arrangement. On an outward-opening bifold door, the leaves alter the composition as they fold, so inspect how the grid reads when the opening is closed, partly open and fully folded back. Include furniture, dining tables and outdoor seating when checking important sightlines. Bars are not unsuitable for an active door set, but their layout should work in the configurations used most often. A closed-door marketing image cannot show whether the pattern remains coherent during everyday movement through the opening.
Prepare an order-ready schedule
Give every opening a reference such as W01 or D03 and record its room, overall size, operation, opening direction and required bar treatment. Add an elevation sketch showing horizontal and vertical divisions, intended alignment with adjacent units and whether the proposal uses decorative or glass-dividing bars. State explicitly where glazing is to remain without decorative bars. This avoids an assumption that one treatment applies throughout. For work completed in phases, identify retained units that the new pattern should relate to and future openings that may eventually change the balance. A shared schedule gives the homeowner, supplier and installer one document against which quotations, revisions and final drawings can be compared.
Approve order-specific drawings rather than relying on a phrase such as four panes or traditional style. Check every glazed section, bar location, sash line, door-leaf junction, handle area and paired opening. Confirm which elements are decorative and which divide the glazing, where the decorative treatment appears and which finish has been selected. Resolve discrepancies before order confirmation and retain the approved version. Bloomcabin windows and doors carry a 5-year warranty, and delivery is stated as 4–6 weeks subject to order confirmation. Those commercial details do not replace drawing approval: the drawing and schedule are the practical records of the selected pattern, opening configuration and no-bar exceptions.
Glazing-bar questions
Are decorative bars the same as glass-dividing bars?
No. Decorative bars create the appearance of smaller panes, while glass-dividing bars separate the opening into individual glazed sections. Exact construction varies by system, so require the proposed method to be named on the drawing. Labels such as Georgian, heritage or traditional do not by themselves establish how the glazing is assembled.
Should every window have the same glazing-bar pattern?
Not necessarily. Openings with different sizes, shapes and functions may need different layouts. Aim for a shared design rule, such as aligned horizontal divisions, related pane proportions or a consistent colour, rather than copying one grid everywhere. Review the full elevation, including retained windows and doors, before deciding.
Do glazing bars work on large patio doors?
They can, provided the pattern is designed across the complete door set rather than added independently to each leaf. Review the appearance with panels closed and moving. A restrained arrangement preserves more view, while a stronger grid gives the opening more visual structure. The drawing should identify all moving panels.
What should I check before approving an order?
Request an order-specific elevation identifying the frame, sashes, door leaves and every bar. Confirm whether bars are decorative or glass-dividing, their location, finish and alignment with neighbouring units. Check handles, meeting stiles, unusual corner areas and all openings intended to have no bars, not merely the number of apparent panes.
Can glazing bars be chosen after the window design is finalised?
It is better to choose them during specification because spacing depends on actual glass areas, sash divisions and door operation. A late change may require revised drawings or alter the composition. If uncertain, compare a no-bar elevation with two restrained patterns before order confirmation instead of relying on a generic style image.
What to do next
Glazing bars have a disproportionate influence on the character of a window or door. Start with the whole elevation and the indoor viewpoints that matter, then distinguish decorative bars from genuine glass-dividing construction. Develop proportions from the real glazed areas and test the pattern against sashes, handles, moving door leaves, blinds and cleaning access. Large or unusually shaped openings deserve individual treatment rather than a standard grid. Finally, record every bar and every deliberate no-bar opening in a schedule, then approve order-specific drawings. This process makes the chosen pattern purposeful, whether the result is a carefully articulated façade or glazing intentionally left clear.
