
How Long Does an Aluminium Greenhouse Last?
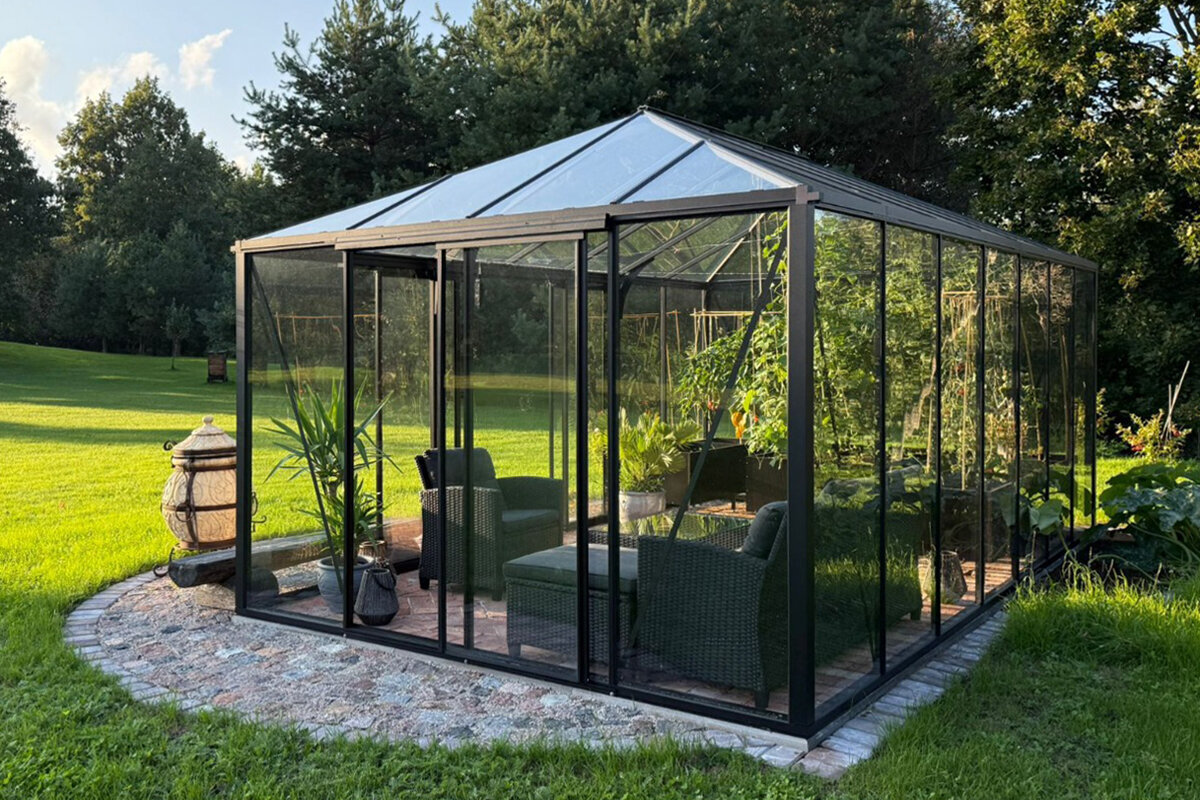
Greenhouse ownership report
How long does an aluminium greenhouse last?
An aluminium greenhouse can remain a valuable part of a garden for many years, but its service life is shaped by more than the frame alone. Site preparation, glazing care, ventilation habits and the availability of replaceable components all influence how confidently it can be maintained over time.
The short answer
An aluminium greenhouse can serve a garden for a long period when its frame, glazing, foundations and moving components are routinely inspected and cared for. Aluminium is valued for being practical outdoors, but lifespan still depends on installation quality, local exposure and prompt attention to wear, damage and drainage.
Think in terms of condition rather than a fixed expiry date. A clean, stable greenhouse with sound seals, secure glazing and freely operating doors and vents is easier to keep in use. A model supported by clearly identifiable replacement parts also gives an owner more practical repair options.
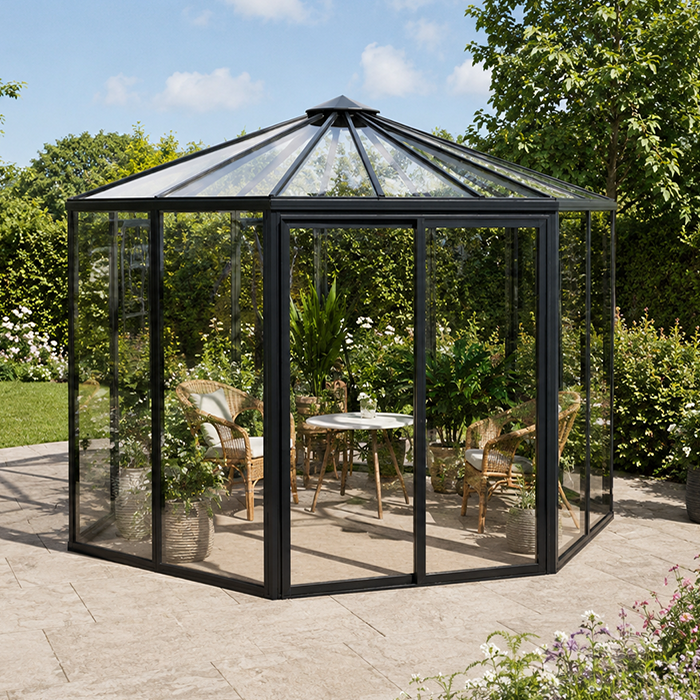
01
Frame and base
A level, well-prepared base and correctly secured frame reduce avoidable strain, helping doors, glazing and fasteners remain properly aligned.
02
Routine attention
Seasonal cleaning, drainage checks and gentle adjustment of moving components can prevent minor build-up or looseness becoming a larger maintenance task.
03
Repair planning
Keep product details, photographs and notes about components so that any future enquiry about compatible spare parts is clearer and more efficient.
A practical inspection guide to lifespan, care and repair-ready ownership.
The useful question is not simply how long does an aluminium greenhouse last, but how well can it be looked after through changing seasons. A durable structure starts with a suitable model and careful installation, then benefits from routine checks that catch small concerns before they become disruptive repairs. Long-term ownership is therefore a combination of materials, maintenance and sensible planning.
British gardens place a greenhouse through wet winters, gusty weather, pollen, leaf fall and rapid swings between cool mornings and warm afternoons. None of these automatically shortens its life, yet each can expose neglected drainage, loose fittings or tired moving parts. Treating the greenhouse as a maintained garden building, rather than a fit-and-forget purchase, makes its condition easier to manage.
It also helps to choose with future maintenance in mind. Consider access around the structure, the practicality of cleaning the glazing, how doors and vents will be reached, and whether individual parts can be identified if they need attention. This guide focuses on those ownership decisions, rather than making a warranty or lifetime-cost promise.
Inspection 01 · Inspection sheet one
What determines greenhouse lifespan?
The frame is only one part of the ownership picture. Aluminium is well suited to a garden structure because it does not require the recurring paint regime associated with some other materials, yet the whole assembly must work together. Foundation accuracy, fastening points, glazing retention, doors, vents and rainwater management each affect whether the greenhouse continues to feel stable and straightforward to use.
Its setting matters just as much. A sheltered garden may present different challenges from an open plot, where debris, driving rain and wind-blown soil can gather in tracks and gutters. Leave enough working space around the greenhouse to inspect it, clean the panels and clear debris. Accessible maintenance is more likely to be carried out regularly, which is a meaningful advantage over the years.
- Inspect the base perimeter after seasonal ground movement, looking for gaps, standing water or any sign that alignment has changed.
- Keep shrubs, climbers and stored materials away from the frame so moisture and debris do not remain trapped against it.
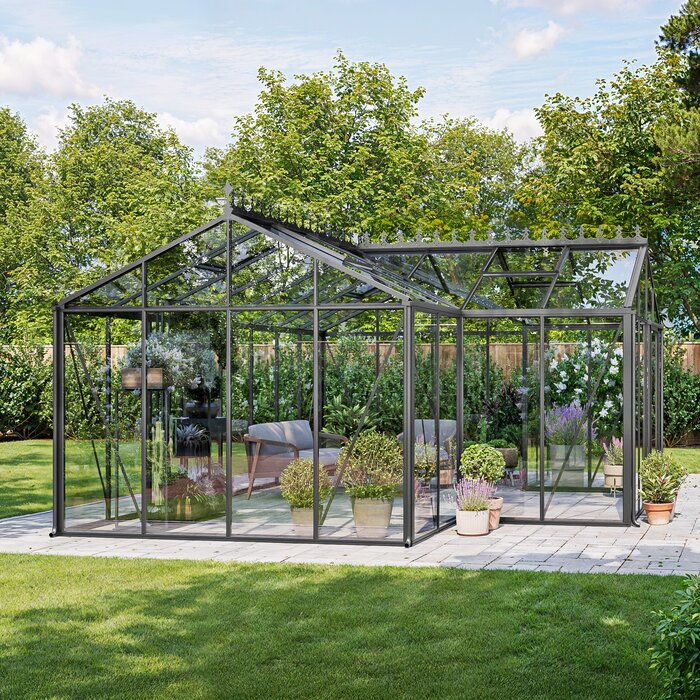
For a freestanding garden layout with clear access on all sides, explore a standard Classic greenhouse for open gardens and assess how its proportions suit your available maintenance space.
Inspection 02 · Inspection sheet two
Start with a sound installation
A greenhouse’s future maintenance burden is often set on installation day. The supporting surface should be suitable for the chosen structure, level and prepared according to the relevant instructions. If the frame begins out of square or the base is uneven, doors may not move cleanly and glazing can sit under unnecessary pressure. Taking time to check alignment during assembly is a practical investment in easier ownership.
Water should also have somewhere sensible to go. Observe the proposed site after rain before committing to it, and avoid treating the greenhouse as an isolated object in the garden. Nearby slopes, paving falls and downpipes can direct water towards the base. Good access for installation is useful later too, because it makes it less difficult to inspect exterior panels, gutters and fixings without squeezing through planting.
- Read the current product instructions before preparing the site, particularly the requirements for the base, anchoring and assembly sequence.
- Check door and vent movement once assembly is complete, then revisit their operation after the structure has settled into everyday use.
Where a wall-side position offers convenient access, consider a full-size regular Lean-To greenhouse while planning drainage and a suitable supporting surface with equal care.
Inspection 03 · Inspection sheet three
Look after the frame and finish
Regular cleaning is simple but useful. Rinse away loose dust and garden residue, then use mild soapy water and a soft cloth or sponge for more persistent marks. Avoid abrasive pads, harsh solvents and tools that might scratch surfaces or affect neighbouring components. Cleaning is also an inspection opportunity: it makes it easier to spot loose caps, tired seals, accumulated debris and marks that deserve a closer look.
Pay particular attention to junctions where debris can collect, including lower frame channels and areas around doors. Leaves and compost fragments hold moisture and can impede drainage, while soil splashed from beds may make a frame look neglected long before there is a structural issue. Work methodically around the greenhouse rather than only cleaning its most visible elevations. The less conspicuous sides often need the same attention.
- Use a soft brush to remove dry debris from channels before washing, rather than forcing grit along the frame.
- Rinse carefully after cleaning and make sure drainage routes are clear, especially following periods of leaf fall or heavy pollen.
A traditional freestanding form gives you straightforward all-round cleaning access with a standard Classic greenhouse with all-round access positioned with a comfortable gap from fences and planting.
Inspection 04 · Inspection sheet four
Protect glazing, seals and fixings
Glazing needs thoughtful handling throughout the greenhouse’s life. Clean panels with suitable gentle materials, and avoid leaning tools, pots or ladders against them. Inspect edges and retaining components during routine cleaning, particularly after a storm or accidental impact. A panel that appears shifted, chipped or insecure deserves attention early, before continued movement affects adjacent parts or allows unwanted draughts and water ingress.
Seals, clips, fasteners and other small components may be less conspicuous than the glass, but they are central to a tidy, secure enclosure. Do not over-tighten fittings in an attempt to solve a problem without checking the product guidance. If something has changed, record where it is and when it was noticed. Clear photographs can be especially helpful when discussing a potential replacement component with a supplier.
- Check that glazing is seated evenly and that retaining pieces are present, secure and free from obvious damage.
- Remove fallen branches and loose garden objects nearby before unsettled weather, rather than leaving them where they may strike panels.
For a structure beside the house, allow room to inspect exterior panel edges on a full-size regular Lean-To greenhouse by the house rather than placing storage tightly against the glazing.
Inspection 05 · Inspection sheet five
Keep doors and vents working freely
Doors and roof ventilation are used frequently during the growing season, so they deserve a regular operational check. Sweep out grit from tracks, look for leaves around hinges or openings, and notice whether movement has become stiff, noisy or uneven. A greenhouse that opens and closes smoothly is easier to ventilate in response to daily conditions, while a reluctant door can encourage an owner to postpone a small adjustment until it becomes inconvenient.
Never force a door, vent or automatic accessory that is binding. First remove debris and review the relevant instructions; then look for a visible obstruction, loose fitting or sign that the surrounding frame has moved. If the cause is not obvious, seek appropriate support instead of improvising a substantial alteration. Gentle, early action usually protects both the component and the wider structure.
- Test every opening periodically rather than only during hot weather, when a problem may be most inconvenient to address.
- Keep shelves, pots and growing equipment clear of door swings and vent mechanisms so they cannot interfere with normal operation.
For gardeners who value a familiar freestanding layout, a standard Classic freestanding greenhouse can make routine checks of doors and ventilation part of the weekly garden round.
Inspection 06 · Inspection sheet six
Manage moisture, debris and airflow
A clean greenhouse is not only about appearance. Organic debris in gutters, channels and around the base can slow water movement, while overgrown planting outside can reduce access and keep surfaces damp. Build a short seasonal routine around clearing leaves, brushing away soil and checking that any rainwater routes are unobstructed. This is particularly worthwhile in autumn, when a small amount of material can quickly accumulate out of sight.
Inside, good housekeeping helps preserve access to the structure itself. Avoid packing every edge with pots, staging and supplies; leave enough room to inspect glazing, sweep the floor and reach moving parts. Attend to spilled compost and standing water promptly. Careful airflow and sensible spacing also make the greenhouse a more pleasant workspace, helping you notice condensation, draughts or a developing issue before it is overlooked.
- Clear gutters and lower channels before winter, then inspect them again after nearby trees have shed their leaves.
- Store tools and compost away from glazing and door routes, leaving a clear path for cleaning and seasonal inspection.
A wall-adjacent growing space can be particularly convenient when a full-size regular Lean-To greenhouse for wall-side growing is kept clear internally and accessible along its outer edges.
Inspection 07 · Inspection sheet seven
Plan for repairs and spare parts
Long-term ownership is easier when you can identify what you own. Keep the order information, installation guide and any model details in a dry, accessible place. Take photographs after installation, including the overall structure and close-ups of doors, vents and glazing fittings. These records create a useful reference if a component is damaged or if you need to describe a part accurately after several seasons of use.
When a repair is needed, diagnose rather than guess. Note the location, material, dimensions where relevant and whether the issue follows impact, wear or an operational problem. Check the manufacturer or supplier’s current spare-parts process and provide the details requested. Compatibility can depend on the model and component, so an apparently similar item should not be assumed to be an appropriate substitute without confirmation. Label photographs with the date and the side of the greenhouse shown, especially when documenting a damaged component. A simple record of changes after cleaning, severe weather or adjustment can make later conversations more precise. It also helps distinguish a new issue from a longstanding cosmetic mark.
- Create a simple ownership folder containing instructions, purchase details, photographs and a dated note of maintenance or replacement work.
- Address missing clips, damaged seals or difficult openings promptly, before weather and repeated use make the issue more complicated.
When comparing repair-ready designs, retain the model information for your standard Classic greenhouse with identifiable parts so any future parts enquiry starts with clear, useful identification.
Inspection 08 · Inspection sheet eight
Know when to seek further advice
Some maintenance is comfortably routine: cleaning, clearing debris and observing how the greenhouse operates. Other situations merit a pause. Seek appropriate advice if there is extensive glazing damage, a visible change in the base, repeated difficulty with openings, or uncertainty about a structural connection. Avoid relying on temporary fixes that conceal movement or place undue stress on panels, as these can make later assessment more difficult.
Before making major changes, consider the greenhouse as part of the wider property. An alteration, relocation or replacement may raise questions about site conditions, planning or insurance that vary by circumstance. Check with the relevant local authority and insurer where appropriate, and review current product guidance before proceeding. A considered decision is preferable to assuming that a garden structure will be treated the same way in every setting.
- Photograph a concern from several angles and stop using an affected opening if continuing to operate it could worsen damage.
- Ask for professional guidance where a base, connection or glazing issue is unclear, rather than attempting a speculative repair.
If you are reviewing a wall-side structure as part of wider garden works, examine a full-size regular Lean-To greenhouse design alongside access, drainage and any property-specific questions.
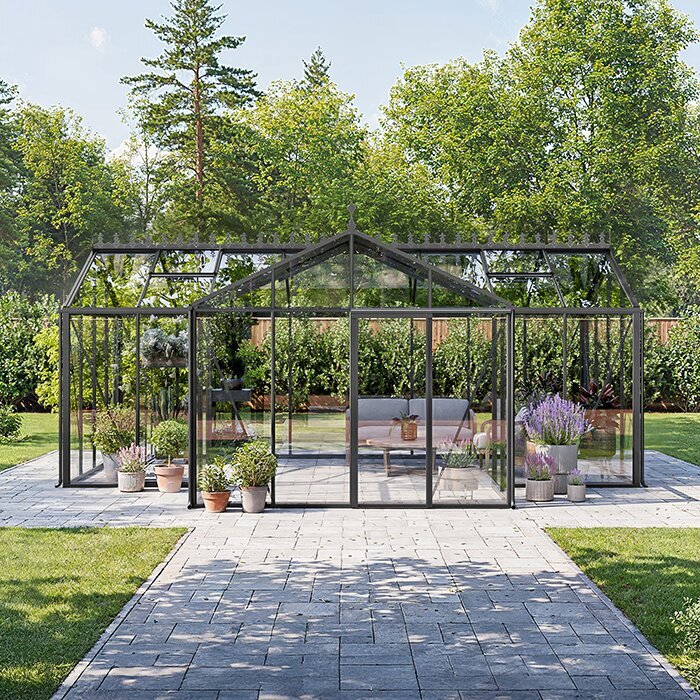
Comparison
Lifespan factors at a glance
Use this table as a practical inspection framework, not as a fixed lifespan forecast. It highlights what an owner can observe, why it matters and the sensible first response when a greenhouse needs attention.
| Area | What to look for | Why it matters |
|---|---|---|
| Base and frame | Level support, secure connections, no obvious movement | Alignment supports smooth operation and reduces unnecessary strain. |
| Glazing | Secure panels, intact edges, sound retaining components | Early checks help prevent a local issue affecting neighbouring parts. |
| Doors and vents | Clear tracks, smooth movement, no obstruction | Reliable openings make routine ventilation and access easier. |
| Drainage | Clear gutters, channels and ground around base | Water and debris management protects access and keeps inspection practical. |
| Records | Model details, instructions and dated photographs | Accurate identification supports more useful spare-parts enquiries. |
A practical long-term care plan
A modest, repeatable routine is more useful than an ambitious plan that is never followed. Set reminders around the garden calendar and adapt them to your site, nearby trees and how intensively you use the greenhouse.
01
Choose an accessible position
Allow enough space to walk around the structure, clean external glazing and reach gutters, doors and vents without disturbing planting.
02
Inspect after installation
Confirm that the base appears level, openings operate smoothly and glazing is seated correctly. Store instructions and take reference photographs.
03
Make cleaning seasonal
Wash frame and glazing gently, clear channels and remove leaf debris at regular intervals, with extra attention after autumn weather.
04
Check moving components
Operate doors and vents periodically, clear grit and identify stiffness early. Consult current guidance before adjusting or replacing any component.
05
Record and respond
Date any concern, photograph it and note the model information. Seek suitable advice for unclear structural, glazing or base-related issues.
Owner’s inspection checklist
Use this checklist during a calm, dry visit to the greenhouse. It is designed to help you notice changes early and prepare clear information if a repair or parts enquiry becomes necessary.
01. Walk around the base and check for pooling water, gaps, ground movement or new obstructions affecting access.
02. Brush leaves, soil and loose debris from gutters, lower channels, door tracks and the immediate perimeter.
03. Clean aluminium and glazing with gentle materials, avoiding abrasive tools and harsh products that may damage surfaces.
04. Inspect glazing edges, clips, seals and fasteners for displacement, visible damage or missing components.
05. Open and close each door and vent, noting stiffness, rubbing, unusual noise or interference from stored items.
06. Keep planting, tools and compost clear of moving parts, glazing and routes needed for routine cleaning.
07. File instructions, model details, photographs and maintenance notes together where they can be found easily.
08. Contact an appropriate source of advice before undertaking major repairs, relocation or changes to the supporting base.
Frequently asked questions
Does aluminium itself need painting or treating?
Aluminium does not call for the same routine painting approach as some greenhouse materials, but it still benefits from gentle cleaning and inspection. Wash away dirt and organic residue, avoid abrasive products, and check joints, channels and fittings while you work. The wider structure, not just the frame finish, determines how well it remains maintained.
What is the most important maintenance task?
There is no single task that replaces the rest, but clearing drainage routes and debris is a strong starting point. It supports clean inspection, reduces trapped moisture and helps doors, channels and the base remain accessible. Combine it with checks of glazing, fixings and moving parts for a more complete routine.
Can a damaged glass panel be ignored temporarily?
It is better to assess visible damage promptly rather than assume it is purely cosmetic. Avoid putting extra pressure on the affected area, keep people and tools away from it, and record clear photographs. Check the applicable product guidance and seek appropriate advice about safe next steps and compatible replacement options.
How can I make a spare-parts enquiry easier?
Provide the greenhouse model details, purchase information if available, photographs and a clear description of the component’s location and condition. Mention whether the problem involves a door, vent, glazing retaining piece, seal or frame connection. This avoids guesswork and helps establish whether a compatible part can be identified.
Will a greenhouse need attention after bad weather?
A visual check is sensible after notable weather or impact from nearby debris. Look at glazing, gutters, doors, vents and the base, then clear leaves or branches safely. If anything appears shifted, damaged or unusually difficult to operate, avoid forcing it and seek suitable advice before continuing normal use.
Do I need permission to repair or replace my greenhouse?
Requirements can depend on the property, location, conservation status, scale of the work and the nature of the alteration. Routine care is different from significant rebuilding or relocation. For a specific project, check with the relevant local authority and consider whether your insurer needs to be consulted.
Explore greenhouse options
A greenhouse built for attentive ownership
The most credible answer to how long an aluminium greenhouse lasts is found in its ongoing condition. A carefully prepared site, gentle cleaning, working drainage, secure glazing and freely moving doors all contribute to a structure that remains practical and enjoyable to use. Small checks made regularly are often easier than a large repair prompted by prolonged neglect.
Choose a greenhouse that suits the garden and can be comfortably accessed for care, then keep clear records from the outset. Bloomcabin can help you explore greenhouse formats while you consider space, maintenance access and the ownership routine that feels realistic for your garden.
Compare layouts with maintenance access, everyday growing and long-term care in mind.
