
How Long Does Window Replacement Take?

Planning window replacement
Window replacement is rarely disruptive for the same reason in every home. In a flat, the practical challenge may be moving units, tools and waste through shared areas or to an upper floor. In a family house, it may be keeping bedrooms usable while one room is opened up at a time. During a wider renovation, fitting may need to work around plastering, decorating, scaffolding or new flooring. The useful way to plan is to separate the lead time before work begins from the active work at each opening. Bloomcabin delivery is typically 4–6 weeks, subject to order confirmation; that is not a promise of an installation date or on-site duration. A reliable survey, realistic access plan and agreed finishing scope reveal far more about likely disruption than the number of windows alone.
Buyer’s checklist 1
Think in stages, not one promised date
Replacement begins well before an installer arrives. The usual path includes selecting the design, surveying each opening, agreeing measurements and configurations, confirming the order, arranging delivery, preparing the property and completing the installation. Every stage has dependencies. Opening direction can affect furniture clearance, while an unresolved choice about colour, glazing bars or hardware may prevent an order from being finalised. Keep procurement and site work as separate lines in the project diary. Bloomcabin delivery is typically 4–6 weeks, subject to order confirmation, but fitting should be scheduled only after the delivery position, installer availability and site readiness have been discussed.
On-site duration also has more than one component. Removal may be quick at a sound, accessible opening, but preparation and making good can take longer if the old frame conceals an uneven reveal or deteriorated surrounding material. A project is not complete when the replacement unit is merely standing in the opening. Fixing, perimeter detailing, operation checks, clearing the work area and any agreed finishing still matter. Ask the installer to describe the expected stages rather than offering only a start date. This makes it easier to distinguish active fitting time from later decorating or work by another trade and to plan when each room can return to normal use.
Build an opening schedule before choosing the sequence
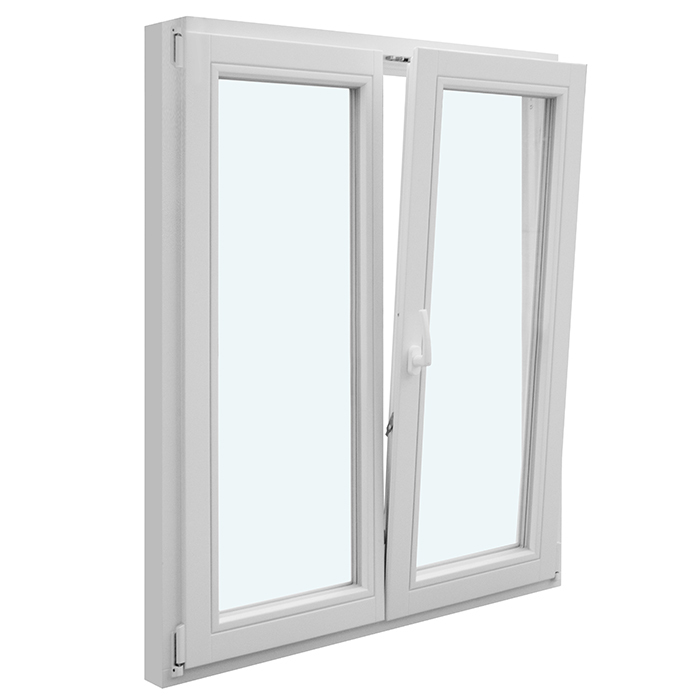
A useful survey record identifies every opening by room, floor, exterior position and intended product type. Add whether the unit opens inward or outward, whether it is fixed, and what sits immediately inside and outside. A configuration such as a two-sash inward-opening window needs space for installation and for the later swing of both sashes. Record radiators, fitted furniture, curtains, blinds, alarm contacts, planting, porches, conservatory roofs and narrow side passages. These notes distinguish a straightforward opening from one requiring extra preparation, access planning or a different position in the work sequence.
The sequence need not follow the order shown on a quotation. Working room by room can reduce repeated furniture movement and preserve a usable part of the home. Working by elevation may be more practical when several openings share exterior access equipment. A kitchen, nursery, home office or bedroom used by a shift worker can be prioritised if the installer agrees. Request the proposed order, the point at which each room should become usable again and the areas that must remain clear throughout the visit. A written plan also helps residents, tenants and neighbours understand when access, parking or noise may affect them.
Buyer’s checklist 2
Understand what happens while the old window is out
The most disruptive interval usually runs from protecting the work area to securing the replacement in the opening. Furniture may be moved back, floor coverings laid and blinds or internal trims removed where agreed. Taking out an existing frame can create dust, vibration and noise even when the work is carefully controlled. The exposed opening is then assessed and prepared before the new unit is positioned and fixed. The junction around it must be completed using the agreed installation approach. Before the room is handed back, the installer should check that relevant sashes, handles and locks operate as intended and remove installation debris from the immediate area.
Making good requires a separate conversation. Preserving an existing internal finish is different from repairing disturbed plaster, replacing timber trim, redecorating a reveal or completing external finishes. Ask what the fitting quotation includes, what condition the surrounding surfaces should be left in and who undertakes any follow-on plastering, painting, joinery or cladding work. Keep paint references and details of unusual finishes available, but do not assume an exact match is included without an explicit decorating scope. Agreeing this boundary prevents a fitted and operational window from being mistaken for a completely redecorated opening, and it allows later trades to be booked in a sensible sequence.
Let access shape the programme
A clear ground-floor route from vehicle to room is simpler to coordinate than an opening above a roof, behind a conservatory or reached through a shared stairwell. Consider practical pinch points beyond the window dimensions: gates, stair turns, lifts, corridors and internal doorways can all affect handling. Outside, identify parked vehicles, bins, planting, overhead obstructions and surfaces needing protection. Share photographs and access details during the survey, especially where entry depends on a neighbour, landlord or building manager. The installer can then consider how the unit reaches the opening and whether specialist access or a different handling plan requires separate arrangements.
Large glazed doors warrant their own access discussion. A Patio Life side-sliding patio door should be treated as a complete door configuration rather than an ordinary window because its delivery route, storage position and threshold area can influence the work. Confirm where the delivery can be placed, who will receive it and whether the units can remain secure and dry before installation. Ask how much clear space the fitting team needs inside and outside. Avoid scheduling new paving, decorating or landscaping immediately beside the opening until access responsibilities and the relationship between those finishes and the door installation have been agreed.

Buyer’s checklist 3
Match the specification to the opening
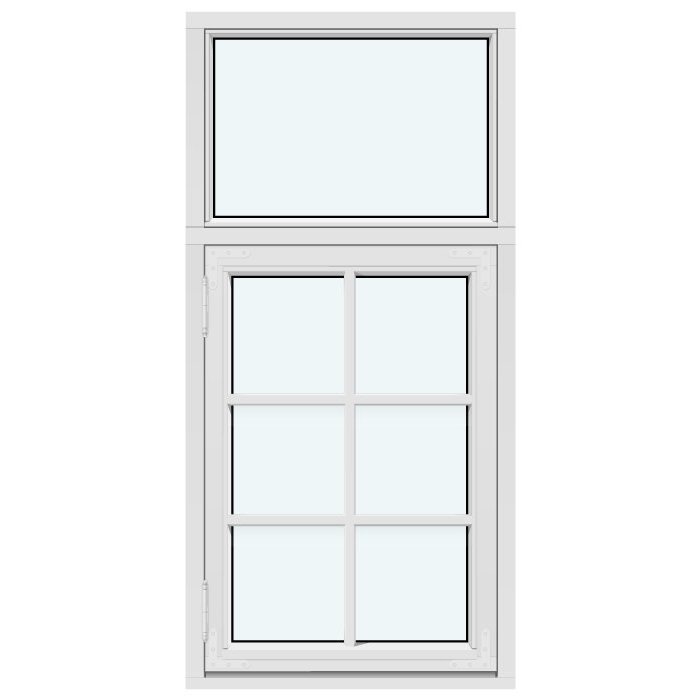
Product choice changes the work around an opening. Fixed glazing has no operating sash to adjust for daily use, but it still requires accurate measurement, controlled handling, secure fixing and perimeter finishing. A fixed non-opening window may simplify the eventual room layout without making the installation automatically simple. The size and location of the glazed unit can influence handling, while non-rectangular designs introduce additional measurement and lining checks. Confirm overall dimensions, visible proportions, opening style, orientation and any divided-glass arrangement before approving the order. A photograph can illustrate appearance, but it should not replace the final drawing or opening schedule.
Treat an unusual form as an individual work item rather than an incidental addition to rectangular windows. A fixed triangular or angled non-opening window may require particular attention to the survey, surrounding linings and external finish sequence. Decorative bars should be described as decorative bars unless confirmed as glass-dividing bars, because the distinction affects appearance, cleaning and the accuracy of the order description. Ask the supplier and installer to compare approved product information against the opening schedule before delivery. That check should cover orientation, dimensions, colour and arrangement, reducing the risk of bringing the intended style to the wrong opening or receiving the correct shape in an unsuitable orientation.
Prepare for dust, noise and temporary loss of a room
The aim is not to pretend that replacement is disruption-free, but to contain its effects. Move valuables, electronics, plants and loose objects away from the working area. Clear window boards and any sockets or routes identified by the crew. Curtains and blinds may need to come down beforehand; establish who is responsible and where they will be stored. Internal doors can help separate occupied areas where that suits the working plan, although the crew still needs an unobstructed route from the entrance to each opening. Arrange a separate secure space for children and pets because tools, removed frames and temporarily open apertures are incompatible with normal movement through the room.
Plan around the functions of the affected rooms rather than trying to keep the entire home unchanged. Someone working from home may need another location while an adjacent window is removed. A family may prefer bedrooms to be completed in an order that preserves one quiet space. Kitchens and bathrooms need special consideration if the access route crosses them. Tell the installer about appointments, accessibility needs, school collection times and parking restrictions before dates are agreed. Confirm toilet access, the site contact and how questions will be approved. One authorised decision-maker can prevent unnecessary pauses when an unexpected condition or small specification detail needs a prompt answer.
Buyer’s checklist 4
Make a practical weather and trade-coordination plan
Every opening is exposed for part of the fitting process, so weather matters even though it cannot be predicted perfectly. Rain, strong wind, low temperatures and difficult ground conditions may affect the safe or practical sequence, particularly on exposed elevations and upper floors. Ask what conditions could alter the plan, what temporary protection is available and who decides whether work should pause. On some projects the team may be able to move to a more sheltered opening, but this should be discussed rather than assumed. Keep the installer’s contact details available and avoid making room-dependent commitments until that day’s sequence has been confirmed.
Replacement can also conflict with scaffolding, roofing, rendering, painting, decking or landscaping. Coordinate the trades so access is not blocked and newly completed work is not immediately disturbed. If a window is being replaced after water ingress or visible deterioration, do not assume the old frame is the only cause. The adjoining construction may need assessment before installation proceeds. Agree how concealed decay, loose masonry, damaged trim or an uneven reveal will be documented, priced and authorised. A clear escalation procedure is more useful than a general assurance that every unexpected condition will be solved without affecting either scope or timing.
Allow separately for doors and roof windows
Replacing patio doors is not merely the same task on a larger scale. Threshold levels, floor finishes, exterior clearances, delivery routes and the temporary security of a wide opening all need attention. An outward-opening bifold door is an alternative where that opening arrangement suits the available space, but its relationship to paths, decking, planting and furniture should be reviewed before ordering. Discuss where panels and tools can be positioned during installation, how access through the property will be maintained and who completes adjacent flooring or exterior work. Define the scope around the threshold rather than relying on different contractors to interpret one another’s responsibilities on site.
Roof openings bring a separate access and protection plan. A pivot roof window should be coordinated with the roof-work sequence, internal linings and the safe access strategy appropriate to the property. Combining the work with other roof activity may reduce repeated disturbance, but only if the responsible professionals agree on responsibilities and timing. Indoors, consider protection along the route to the loft or upper floor; outside, identify how the work area will be reached without obstructing other trades. Combining product categories into one project may reduce repeated household upheaval, yet it can make each visit more complex if installers and finishing trades must hand work over to one another.
Buyer’s checklist 5
Check completed tasks, not just appearances
A frame standing in the opening is a milestone, not the entire handover. For each location, check that the installed product corresponds with the approved schedule and that its orientation and opening arrangement are correct. Relevant sashes, panels, handles and locks should be demonstrated. Examine the inside and outside from normal viewing positions, in daylight where practical, and raise questions while the crew can inspect the opening. Keep notes and photographs labelled by room on a multi-window project. This avoids confusing similar units and creates a clear record of which matters have been completed, which require review and which belong to later making-good work.
For an outward-opening arrangement such as a single-sash outward-opening side-hung window, check the exterior space in its normal state, including paths, planting, stored items and nearby doors. Ask for unfamiliar hardware to be demonstrated rather than forcing it. Collect keys, care information and purchase documentation supplied with the order. Record cosmetic follow-on work separately from questions about installation or operation. That distinction helps identify whether the next action belongs to the installer, decorator, joiner or another contractor. Before the team leaves, confirm how any outstanding items will be recorded, who will provide an update and whether access to the same room will be needed again.
Use the final planning call to remove uncertainty
Shortly before delivery or installation, check the practical plan again. Confirm the final opening schedule, product orientation, delivery arrangements, installer attendance, parking, access route, storage position and first room in the sequence. Reconfirm which furnishings will be moved, what protection is expected, how removed materials will be handled and whether the property has restricted working hours. If somebody other than the buyer occupies the home, make sure that person knows who is attending and how access will be granted. These details may sound mundane, but an unanswered question about keys, parking or storage can delay work before the first tool is unpacked.
Use the same call to verify any unusual item against its approved information. A round fixed non-opening window, for example, should appear as a distinct entry on the opening schedule rather than being grouped vaguely with standard fixed glazing. Confirm who can authorise extra work, what evidence will be provided if an unexpected condition is found and whether contact should be by telephone or in person. Where the project interacts with shared areas, external alterations or wider construction work, seek project-specific guidance from the appropriate qualified professional. A generic online duration cannot replace a survey, but a clear opening-by-opening plan can make the resulting programme credible and manageable.
Frequently asked questions
How long should I allow for replacing windows at home?
Allow for separate survey, order-confirmation, delivery and installation stages. Bloomcabin delivery is typically 4–6 weeks, subject to order confirmation. On-site duration then depends on access, opening condition, product type, making good and work sequence. Ask the installer for a programme based on the surveyed property rather than a generic per-window estimate.
Can I remain at home while the windows are replaced?
It may be practical to remain elsewhere in the property, but rooms under active work can be noisy, dusty and temporarily unusable. Keep the crew’s route clear, remove valuables and provide a secure separate area for children and pets. Discuss the sequence beforehand if bedrooms, kitchens or home-working spaces require priority.
Will the installer repair plaster and redecorate?
Do not assume that all making good is included. Fitting, perimeter detailing, repairing disturbed plaster, replacing trims and decorating may be separate responsibilities. Before work starts, ask what finish will remain immediately after installation, which existing defects are excluded and who will complete each part of any follow-on work.
What can interrupt fitting after work starts?
Difficult access, unsuitable weather, damaged reveals, concealed deterioration and conflicts with other trades can alter the sequence. The practical issue is how discoveries will be photographed, explained, priced and approved. Establish that procedure in advance and nominate one person who can make timely decisions for the household or project.
Should patio doors and windows be fitted together?
They can be coordinated, but doors may require separate planning for handling, threshold work, external clearance and temporary security. Combining the jobs may reduce repeated disruption while making access and trade coordination more complex. Review the delivery route, opening preparation and responsibilities for nearby floors and exterior finishes before choosing the programme.
What to do next
Window replacement is easiest to manage when it is planned opening by opening rather than reduced to a universal number of days. Separate Bloomcabin’s typical 4–6 week delivery period, subject to order confirmation, from the fitting programme. Then examine the factors that genuinely affect disruption: access, configuration, room sequence, protection, weather exposure, making good and the condition revealed after removal. Confirm responsibilities and the approval process for unexpected work before installation begins. Noise and temporary inconvenience remain realistic, but a documented sequence makes avoidable delays and disagreements much less likely.
