
How Much Can You Grow in a Greenhouse per Square Metre?
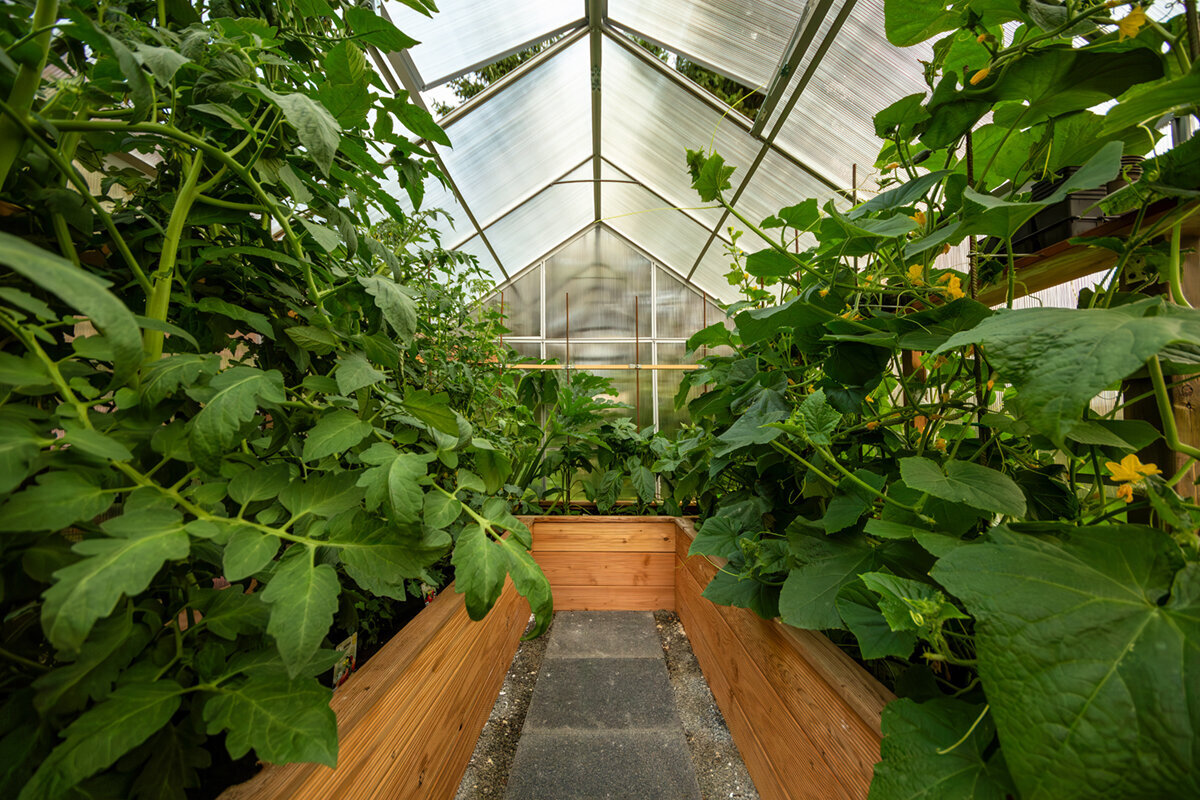
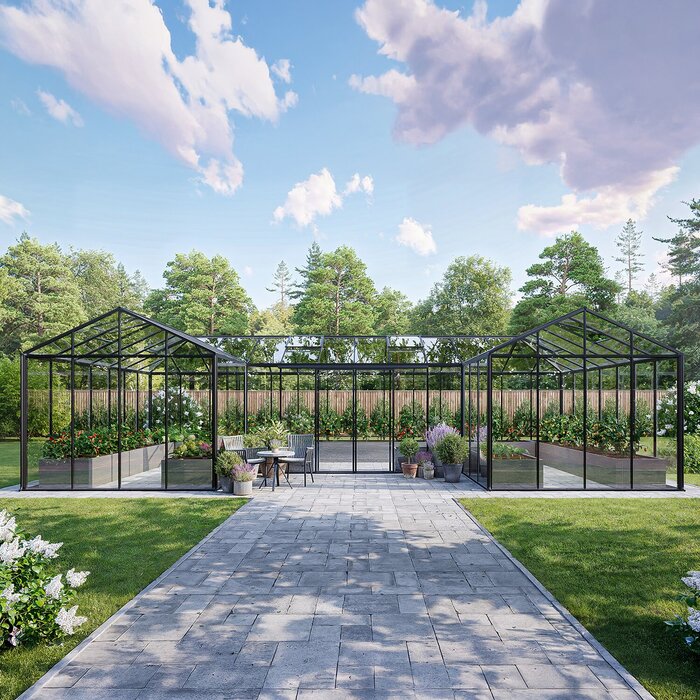
A greenhouse can make a modest garden feel remarkably generous, but its productivity is shaped by decisions made long before the first seed is sown. The position of paths, bench depth, bed size, watering routine and crop choice all influence how much usable growing space remains. A well-planned layout also makes tending easier, which matters because plants respond to consistent attention rather than ambitious sketches alone.
For British gardeners, the appeal is often a longer and more dependable gardening rhythm rather than a race for maximum output. A sheltered growing environment can help you start suitable plants earlier, protect the working area from unpleasant weather and keep tender crops close at hand. Yet each crop has its own appetite for light, root room, airflow and support, so crowded planting rarely translates into better harvests.
Think of square metres as a planning tool, not a promise. Map what you eat, identify when you want it, and decide whether the greenhouse will raise young plants, grow summer fruiting crops, shelter herbs, or do several jobs across the year. That approach gives you a credible picture of greenhouse productivity while leaving room to adapt to your garden, routine and seasons.
Stage one
Define what productive means to you
Before estimating output, decide what success looks like in your household. It may mean a steady handful of leaves for supper, enough tomato plants for summer lunches, or a reliable place to raise plugs before outdoor beds are ready. These aims require different layouts and levels of commitment. A greenhouse packed for peak summer harvesting may leave little room for spring propagation, while a flexible bench-led set-up can serve several smaller crops in sequence.
Keep the plan rooted in eating habits rather than catalogue temptation. Note the crops you buy frequently, the varieties that are hard to find, and the periods when garden harvests would be most welcome. Include failures and gaps from previous years: perhaps seedlings lacked a bright place, herbs became waterlogged outside, or tall crops blocked the door. Your own observations are more useful than a generic yield chart.
List the crops your household will genuinely use, then separate everyday staples from occasional experiments before allocating permanent space.
Record each crop’s start, main harvest and clearing period to reveal where one area could serve two purposes.
For a freestanding starting point, explore a standard Classic greenhouse that lets you organise beds, benches and access around your own crop priorities.
Stage two
Measure usable growing space
Total floor area is only the beginning. Productive area includes ground beds, staging, shelves and carefully used vertical supports, but it excludes the circulation that keeps all of those areas workable. Draw the inside of your proposed greenhouse to scale and mark the door swing, central path, water point and any fixed furniture. A narrow route that makes watering awkward can quietly reduce output by making routine jobs less likely to happen well.
Measure light as well as metres. The sun’s angle changes greatly through the year, and nearby fences, trees, walls and the greenhouse frame can cast shade at different times. Reserve the brightest positions for plants expected to crop for a long period, while using gentler locations for germination, temporary holding or shade-tolerant leaves. Avoid counting a surface as productive if you cannot reach it without moving several pots.
Leave sufficient room to carry compost, reach rear plants and open vents without stepping over beds or disturbing foliage.
Use a simple paper plan to distinguish permanent growing zones from flexible surfaces used only during busy sowing periods.
Where a wall-side position suits the garden, consider a full-size regular Lean-To greenhouse and plan its internal routes around the available depth and daylight.
Stage three
Match crops to their footprint
Plants do not merely occupy a pot or patch; they claim light and air around their leaves, as well as root room below. Fruiting crops can become dominant residents when their stems are tied upwards and side shoots managed. Cucumbers, tomatoes, aubergines and peppers have different habits, so follow seed or plant guidance for spacing rather than squeezing them together for an impressive early display. Crowding raises competition and can make inspection, watering and harvesting more difficult.
Balance these longer-term residents with quicker crops that fit between seasonal transitions. Early salad leaves, radishes, herbs and young plants can use a bench while summer crops establish, but they should not become a permanent obstacle to airflow or access. Succession is often more valuable than trying to grow every crop everywhere at once. Clear spent plants promptly, clean the surface and reassign the area with a definite next crop in mind.
Group plants with similar watering and temperature preferences so one routine does not compromise another crop’s needs.
Train suitable tall crops upwards, but check that their foliage will not shade neighbouring benches during their busiest growth.
A roomy standard Classic greenhouse for crop rotation can make it simpler to separate tall summer crops from shorter, repeat-sown plants.
Stage four
Design a layout that supports care
The best layout supports repeated small tasks. Place thirsty plants where watering is straightforward, keep frequently picked herbs close to the entrance, and give tall crops a sturdy line for tying in. Benches are valuable for raising trays and keeping pots at a comfortable working height, while ground beds suit crops that prefer deeper rooting space. Do not fill every edge immediately; a little elbow room helps you spot pests, remove yellowing leaves and harvest without bruising plants.
Air movement deserves its own place in the design. Dense leaves, wet surfaces and a blocked route can create a stuffy interior that is less pleasant to work in and harder to manage. Arrange containers so air can move between them, and avoid creating a solid curtain of foliage across doors or vents. The exact ventilation routine will vary with weather and crop stage, but easy-to-reach openings encourage timely adjustment.
Position staging for easy inspection from the path, rather than treating the back edge as storage for neglected pots.
Keep tools, labels and feed nearby but contained, so valuable bench space remains available for active growing.
A full-size regular Lean-To greenhouse layout can be especially effective when staging and a clear working route are planned from the outset.
Stage five
Use the season more than once
Annual output is shaped by time as much as area. A bed that holds one plant from spring until autumn can be satisfying, but it may produce less variety than a plan that starts with spring seedlings, moves into summer crops and finishes with hardy leaves. Make a seasonal calendar for each zone. It does not need to be rigid: its purpose is to reveal empty weeks, clashes between sowing dates, and opportunities to prepare the next crop before the previous one is cleared.
Protecting continuity means avoiding bottlenecks. If every bench is full of seedlings at the same moment, there may be nowhere to pot on plants or harden them gradually before moving outside. Keep a small flexible area for changeovers and use labels that show sowing date, variety and intended destination. This reduces duplicate sowing, makes it easier to compare results, and helps you learn which sequences earn their place next year.
Schedule sowings in modest batches where appropriate, creating a longer picking period instead of one sudden surplus.
Reserve one adaptable surface for potting on, temporary shelter and replacement plants when a crop disappoints.
With a standard Classic greenhouse for seasonal growing you can create dedicated zones while retaining a flexible bench for spring and autumn transitions.
Stage six
Turn vertical space into useful space
Vertical growing can improve greenhouse productivity when it respects the needs of the plants below. Tie suitable climbers to supports, use high shelving for lightweight trays, and choose hanging containers only where they will not shade a key bed or make ventilation awkward. Look upwards from each planting position: a high shelf may be useful in one bay yet cast an unwelcome shadow in another. Vertical surfaces should make the greenhouse more legible, not more cluttered.
Weight, reach and watering are practical limits. A shelf full of saturated compost is heavier than it appears, while pots above shoulder height are harder to check and water evenly. Keep daily-use plants within comfortable reach, and place short-lived propagation trays where they can be monitored closely. If you add supports, leave space to untangle, prune and pick without brushing against neighbouring crops or damaging tender stems.
Use vertical supports for crops that naturally climb, rather than forcing compact plants into awkward positions for the sake of density.
Check shade patterns after installing shelving, especially where low seasonal sun could leave lower plants underlit.
A carefully arranged full-size regular Lean-To greenhouse with staging can help layer propagation and pot culture without sacrificing a clear route for daily care.
Stage seven
Make routine part of the yield plan
Plants make their demands gradually, then all at once. Regular watering, feeding where appropriate, tying in, pollination support for suitable crops, ventilation and pest checks all influence how well a planting plan performs. Build these tasks into the layout: keep water close by, leave room to turn pots, and ensure every plant can be seen. A supposedly high-yielding arrangement that takes too long to maintain is likely to become uneven when work or holidays intervene.
Keep a brief record rather than relying on memory. Note sowing dates, varieties, first pickings, problems and the point at which a crop ceased to justify its space. These notes turn one season into a more accurate plan for the next. They may show, for example, that a smaller number of well-managed plants served you better than a crowded display, or that one bench was ideal for repeat salad sowings.
Set a realistic weekly inspection habit, including leaves, compost moisture, supports, labels and signs that plants need more space.
Review the greenhouse after peak season, identifying unused corners, awkward tasks and crops that delivered genuine household value.
Choose a standard Classic greenhouse for accessible care if a freestanding design helps you keep each growing area visible and easy to maintain.
Stage eight
Plan for change, not perfection
A productive greenhouse evolves with the gardener. Your first layout may reveal that you prefer pots to beds, need more propagation space, or grow fewer fruiting plants and more herbs than expected. Leave some capacity for those discoveries. Moveable staging, clearly defined storage and a sensible path make adjustment far easier than a densely fixed arrangement. The aim is not to extract a theoretical maximum from every square metre, but to create a place you will enjoy using throughout the year.
When choosing a greenhouse, assess the site, your intended crop mix and the way you expect to work inside it. Consider orientation, access from the house, room around the exterior for cleaning and maintenance, and whether nearby planting will alter light over time. If planning questions arise, check with the relevant local authority; for insurance considerations, ask your insurer how the proposed structure should be recorded. Confirm current product details in the quotation and written information.
Photograph the interior through the year to understand changing shade, congestion and which areas consistently earn their place.
Revisit your growing plan annually, retaining successful combinations while making one or two measured changes rather than rebuilding everything.
A full-size regular Lean-To greenhouse for evolving plans can provide a close-to-home growing space that you refine as your gardening habits develop.
Comparison
Choose space by growing role
Instead of comparing greenhouses by floor area alone, compare the work you need the space to do. This matrix helps distinguish layouts that favour long-season crops, frequent propagation or mixed household growing. Final suitability depends on the site, access and your preferred routine.
| Growing priority | Useful layout emphasis | What to protect from crowding |
|---|---|---|
| Summer fruiting crops | Ground beds, tall supports, broad path | Light, airflow and harvesting access |
| Seedlings and propagation | Staging, labelled trays, flexible bench | Potting space and daily monitoring |
| Repeat salad and herbs | Reachable shallow containers, succession zones | Consistent watering and clear picking access |
| Mixed household harvests | Separate crop zones and adaptable surfaces | Changeover space between seasons |
| Overwintering tender pots | Accessible shelving and uncluttered floor | Air circulation and inspection room |
Build your own space plan
Use this short process before choosing crops or furnishing the interior. It converts a vague wish for more home-grown produce into a workable greenhouse plan that reflects the way you cook, garden and move through the space.
01
Sketch the interior
Draw the footprint, door, route, potential beds and bench positions. Mark anything fixed before assigning crops to the most attractive-looking corners.
02
Track the light
Observe sun and shade at different times and seasons. Allocate the clearest positions to crops expected to occupy their places for longer.
03
Choose core crops
Select a manageable group based on what you will eat. Add experimental plants only after core crops have their required space.
04
Create a seasonal sequence
Give every zone a first, main and follow-on use. Include a deliberate pause for clearing, cleaning and preparing the next planting.
05
Test the routine
Walk the planned route with imaginary watering cans, compost and harvest baskets. Revise any area that cannot be comfortably reached or observed.
Before you count potential yield
A square-metre calculation becomes useful only when the practical conditions are in place. Work through this checklist to make sure your plan measures functional growing space, not simply an optimistic floor plan.
01. Measure paths, door clearance and working room before treating the remaining floor as available for crops.
02. Identify brightest areas across the season, including shade from trees, fences, walls and the greenhouse structure.
03. Match each long-season crop to sufficient root room, support, light and access for routine tying and picking.
04. Assign benches, beds and shelves distinct jobs rather than allowing every surface to become unplanned storage.
05. Plan succession sowings and clearing dates so a finished crop creates an opportunity instead of a neglected gap.
06. Keep watering, tools and labels convenient, while protecting active growing surfaces from clutter and accidental shade.
07. Allow airflow between plants and preserve access to vents, doors and the rear of every growing zone.
08. Review local authority guidance and insurer requirements where these may apply to your site or proposed structure.
Frequently asked questions
Is there a standard greenhouse yield per square metre?
No. A meaningful figure varies with crop type, planting density, light, season length, plant health and the time you can spend caring for it. A square metre used for tall tomatoes behaves very differently from one used for repeat-sown leaves or seed trays. Use your own records to build a realistic benchmark.
Does a larger greenhouse always mean more produce?
More space can create more opportunity, but only when the additional area has good light, sensible access and a clear role. An over-large or poorly organised interior can become storage or leave plants hard to reach. Choose a size and layout that you can routinely water, ventilate, clean and manage.
Should I grow in beds, pots or on staging?
Many gardeners combine all three. Beds can suit deeply rooted or long-season crops, pots offer flexibility and staging is useful for propagation and smaller containers. The best mix depends on your crop choices, the internal arrangement and how often you expect to rearrange the growing area through the year.
Can vertical growing increase productivity?
It can make better use of height for appropriate climbing crops and lightweight propagation, but it is not automatically beneficial. Supports and shelves must not deprive lower plants of light, obstruct ventilation or make watering unsafe and inconvenient. Assess the whole interior, including shade and access, before adding layers.
How do I avoid overcrowding plants?
Follow the spacing guidance supplied for each variety, then observe how mature foliage changes the room around it. Keep routes open and make sure you can inspect stems, leaves and compost. If plants begin competing for light or prevent airflow, removing or moving one early is usually better than waiting.
Do I need permission or insurance checks for a greenhouse?
Requirements can depend on the property, location, dimensions, boundaries and other circumstances. Before installation, consult the relevant local authority’s current guidance if you are unsure. It is also sensible to speak with your insurer about your policy and any information they may need regarding an outbuilding or garden structure.
Plan your growing space
Make every growing area earn its place
The most useful answer to how much a greenhouse can generate per square metre is a plan, not a universal harvest total. Measure the area you can genuinely use, select crops that fit your household, and give each zone enough light, air, root room and attention. Productive growing is usually orderly, observant and adaptable.
Bloomcabin can help you begin with a greenhouse format that suits the way you want to grow. Take time to assess the site, sketch your working layout and build a seasonal plan before choosing the final arrangement. The result can be a greenhouse that feels purposeful from the first trays of spring to the final autumn harvest.
Explore greenhouse options and use your crop plan to shape a practical, enjoyable growing area.
