
How to Grow Garlic in a Greenhouse
The greenhouse garlic almanac · United Kingdom
How to Grow Garlic in a Greenhouse
The best greenhouse garlic is not hurried into summer. It is built through a measured sequence of winter cold, rooting, leaf growth, lengthening days, careful drying and patient curing—with enough restraint under glass to let each stage happen properly.
For a productive cool-season bed, treat the greenhouse as a weather editor rather than a perpetual summer. It can shelter soil from persistent rain, improve drainage, provide reliable access and make spring irrigation more precise. Garlic still needs cultivar-appropriate cold before it can form properly divided bulbs.
01 · The premise
Garlic under glass succeeds when the structure protects the crop’s rhythm without erasing the winter signal that helps it become a divided bulb.
Garlic is easy in one sense: one sound clove can produce one future bulb. Yet the plant is exacting about sequence. The clove must establish roots and build foliage before bulb division begins. For many cultivars, a meaningful cool period is part of that instruction. Later, increasing day length and spring growth carry the plant towards bulbing and harvest.
That is why a heated greenhouse can be the wrong first instinct. Constant warmth may produce handsome leaves while weakening the necessary cold signal or encouraging disappointing single rounds. An unheated greenhouse bed is often more useful. It offers dry working conditions, controlled irrigation, shelter from wind and easier disease management while allowing seasonal temperatures to remain meaningful. Garlic benefits from protection, not cosseting.
Begin with the cultivar, then organise the greenhouse around it. Hardneck garlic commonly makes an edible flowering stem, or scape, and is valued for generous cloves and distinctive flavour, although it usually stores for less time. Softneck types tend to make more cloves, plait well and keep longer. These categories are useful rather than absolute: choose named planting stock from a reputable UK supplier and follow its timing advice.
If you are planning an orderly space around cool-season crops, consider the Classic Aluminium Greenhouse alongside the growing plan. Garlic rewards a layout with a ground-level or raised bed, clear access for lifting bulbs and roof ventilation that can respond promptly when winter sunlight raises the temperature under glass.
Before plantingSelect stock
Cool seasonChill and root
SpringBuild leaves
Longer daysForm bulbs
Early summerLift and cure
Think of this sequence as a crop clock rather than an inflexible monthly timetable. Start with large, firm cloves from named planting garlic. Cool soil and measured moisture encourage rooting; cultivar-appropriate cold supports later bulb development. Healthy spring leaves then provide the energy for clove division, while a controlled dry-down prepares the crop for lifting and curing.
Royal Horticultural Society guidance notes that most garlic varieties require one to two months at 0–10°C for good bulb development. The precise requirement varies by cultivar and may also be influenced by how the planting stock was stored before purchase. Use that range as a planning framework rather than a universal refrigerator prescription, and prioritise advice supplied with the named variety.
Colder UK gardens
Hardneck garlic is often well suited to colder conditions and can be autumn-planted in an unheated greenhouse bed. Do not seal the structure throughout winter. Let cool air reach the crop, ventilate during suitable weather and use protection only to moderate severe fluctuations. The greenhouse should reduce saturation and exposure without removing the cold chapter from the plant’s calendar.
Milder UK gardens
Softneck or locally recommended cultivars are often sensible starting points. Where winter cold is less dependable, ask the planting-stock supplier whether a particular variety needs additional conditioning. Do not improvise an extended refrigerator treatment: excessive pre-chilling may initiate bulb development before the plant has built enough leaves to support a worthwhile crop.
Bright, sunny houses
Vent early, even when the air outside still feels cool. Strong sunshine can raise the temperature beneath glass quickly, particularly in late winter and spring. Warmth combined with water stress is unhelpful during active growth, while stale humid air encourages leaf problems. Light is valuable; trapped heat is not the objective.
Clove assembly plate
Tunic
Point upwards
Roots downwards
Papery tunic. Leave the individual clove’s dry skin intact. It provides modest protection against drying and incidental damage while roots establish.
Growing point. Set the tapered end upwards so the emerging shoot has a direct route towards the soil surface.
Basal plate. The flat root-producing end faces downwards and rests against the prepared soil.
03 · Planting stock
Choose the bulb before you choose the bed.
Planting stock is the crop’s first disease decision. Buy named garlic sold specifically for planting by a reputable supplier rather than breaking up a cooking bulb of uncertain origin. Select full, weighty bulbs with firm cloves and intact dry skins. Reject anything soft, mouldy, unusually light, prematurely sprouted or marked by basal rot. A greenhouse cannot correct unhealthy or poorly adapted material; it can only help good stock fulfil its potential.
Hardneck
Hardnecks commonly form a stiff central flowering stem and an edible scape. Their bulbs often contain a relatively small number of satisfyingly generous cloves and may offer distinctive flavour, although storage is usually shorter than with softnecks. If bulb development is the priority, remove tender scapes after they curl, using a clean cut, and enjoy them in the kitchen.
Softneck
Softnecks rarely flower, generally form tighter bulbs with more cloves and are the stronger candidates for plaiting and long storage. They are often useful in milder British conditions, but cultivar-specific guidance still matters. Keep substantial, flawless outer cloves for future planting.
Not elephant garlic
Elephant garlic is a relative of the leek rather than true garlic. It has its own culinary merits, but its growth and bulb-forming habits should not be used to plan a crop of Allium sativum.
Separate each bulb only immediately before planting. Keep the individual wrapper around every clove and take care not to damage the flat basal plate. This limits moisture loss and avoids creating unnecessary wounds. Clean hands, trays and dibbers before moving between allium crops; cook any clove damaged during separation rather than planting it.
04 · The trench
Give every clove room for winter roots and a future bulb.
Garlic wants fertile, open soil rather than a shallow layer of rich compost over a compacted base. Use a sunny greenhouse border or raised bed where possible, incorporating well-rotted organic matter ahead of planting. For containers, choose stable pots at least 30cm deep with generous drainage holes and a soil-based, peat-free mix. Pots dry and warm faster than a border, so monitor them more closely.
Shallow
Correct
Deep
Too shallow: an exposed tip is vulnerable to disturbance, drying, uneven rooting and changing weather conditions.
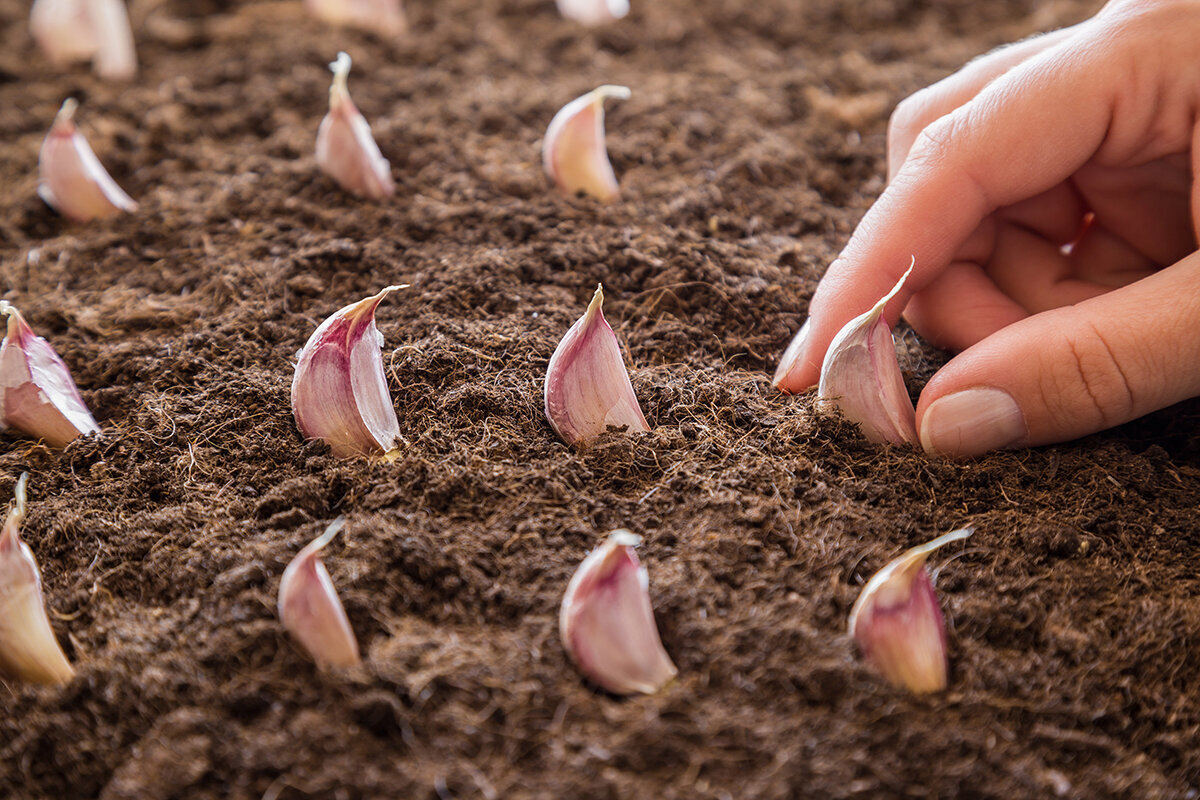
Correct depth: in typical UK garden soil, place the clove point upwards with its tip around 2.5cm below the surface; plant slightly deeper in lighter soil.
Too deep: excessive depth delays emergence and is particularly unhelpful in heavy, cold or slowly draining greenhouse soil.
Bed geometry that breathes
Space cloves approximately 15cm apart in rows around 30cm apart. This provides room for full bulbs while allowing leaves and soil to dry after watering. In a wide bed, retain a generous path so that you can weed, inspect and harvest without stepping on the root zone. Raised beds are useful where native soil drains slowly, but their fill should be stable and moisture-retentive rather than excessively loose.
Prepare the bed before planting with well-rotted organic matter, correcting compaction and drainage rather than disguising them beneath fresh compost. Garlic appreciates fertile soil, but fresh manure and heavy nitrogen feeding are poor shortcuts: they may encourage soft leaf growth at the expense of balanced bulb development. The finished bed should hold useful moisture while allowing surplus water to move away readily.
Planting checklist
- Plant the largest firm cloves; reserve small or damaged ones for cooking.
- Keep the pointed end up and basal plate down.
- Water once to settle dry soil, never to create a saturated trench.
- Use a dibber instead of forcing cloves into compacted soil and bruising their bases.
- Label every variety and planting date so harvest comparisons remain useful next year.
05 · The moisture pulse
Water the roots, not the greenhouse atmosphere.
Garlic needs evenly available moisture while it establishes and produces spring leaves. The aim is never permanent wetness, but a well-drained soil profile that lets roots remain active through bulb expansion.
Establishment
After planting, water sufficiently to settle soil around each clove, particularly if the bed or compost is dry. Then inspect beneath the surface before watering again. A cool greenhouse border may retain moisture much longer than an exposed raised bed, especially during short, cold winter days.
Leaf growth and bulb fill
As spring foliage gathers momentum, consistent soil moisture becomes more important. Water deeply enough to reach the root zone, then allow surplus water to drain. In a greenhouse, rainfall no longer contributes, but that does not justify an automatic watering schedule: container size, soil texture, sunlight and ventilation alter drying rates considerably. Slow hand-watering or a carefully managed drip line at soil level is preferable to overhead irrigation, which wets leaves and raises humidity around the crop.
Approaching harvest
As bulbs finish swelling, ease back from routine irrigation and allow the bed to move towards dry. This supports cleaner lifting and drier wrappers, but do not impose severe drought while the bulbs are still actively developing, especially in containers during hot weather.
Ventilation is irrigation’s essential companion. Open roof vents and doors on suitable days, particularly after watering, and improve circulation if the house remains humid or still. The Classic Aluminium Greenhouse provides a considered setting for planning light, ventilation and controlled watering through the garlic season. For details of its structure and configuration, consult the Classic Aluminium Greenhouse.
06 · Read the leaves
Bulb problems usually began earlier.
Before adding fertiliser or attempting a treatment, match the symptom to the season and inspect the whole plant. Garlic is a long crop, and the final bulb often records several small decisions made during the preceding months.
All leaf, little bulb
This commonly points to a mismatch between planting time, cultivar and cold exposure, although excessive nitrogen may also produce lush foliage. Check whether the named variety suits your schedule and conditions. More greenhouse warmth will not replace the meaningful cool period required by many cultivars.
Early yellowing
Check the root zone first. Saturated soil, inconsistent watering, depleted fertility and disease can all produce yellow foliage. Lift one affected plant carefully and examine its roots and base. White fungal growth with small black resting bodies may indicate white rot. Do not compost suspect plants or move contaminated soil between beds.
Small bulbs
Small planting cloves, crowding, weed competition, interrupted moisture, insufficient leaf growth and premature bulbing can all reduce size. A greenhouse helps by limiting rainfall extremes and making routine inspection easier, but only if the gardener also prevents overheating, poor airflow and a constantly wet root zone.
Split wrappers
Bulbs with cloves breaking through their outer skins were often lifted too late. Their storage potential is reduced because the protective layers are no longer intact. Use split bulbs first, and retain only firm, fully cured and unblemished bulbs as possible planting stock.
07 · Lift at the right edge
Harvest occupies a narrow, handsome window.
Garlic is ready neither while every leaf is green nor after the entire plant has collapsed. Timing varies with variety, planting date and weather, but lower leaves turning yellow and dry while several upper leaves remain green is a useful signal. Garden Organic suggests lifting once the first four to six leaves have yellowed. If uncertain, test one bulb: it should have defined shoulders and firm cloves while its outer wrappers still hold together.
Across the UK, the principal garlic harvest extends from late spring into summer. A greenhouse may alter that timing through shelter, temperature and irrigation control, so use leaf condition and the structure of a test bulb rather than a date alone. Waiting for complete browning often sacrifices protective skins and shortens storage life.
1
Pause routine watering
As harvest approaches, reduce irrigation and let the soil become moderately dry. Do not force drought during active bulb growth; this is a controlled finishing stage intended to support clean lifting and curing.
2
Lift; never pull
Loosen the soil with a fork or hand tool, working carefully beneath and beside the bulb, then lift it with leaves and roots attached. Pulling hard on the stem can bruise the bulb or tear the neck, creating damage that undermines curing and storage.
3
Protect the wrappers
Shake or brush away only loose soil. Do not wash bulbs intended for storage, and resist stripping away stained outer layers immediately after harvest. Those skins form the bulb’s storage envelope and should remain in place throughout curing.
4
Select next season’s planting stock
After curing, reserve only the largest, firmest and most uniform disease-free bulbs for replanting. Keep them separate from the eating crop and refresh stock from reliable suppliers regularly rather than perpetuating questionable material.
Curing bay elevation
Shade
No direct blazing sun.
No direct blazing sun.
Airflow
Leave room between bulbs.
Leave room between bulbs.
Time
Allow several patient weeks.
Allow several patient weeks.
08 · The curing room
Cure for storage, not merely display.
Freshly lifted garlic is edible, but curing is what makes it suitable for storage. Hang whole plants in small, loose bunches or arrange them in a single layer on slatted racks so air reaches every side. Choose a shaded, dry and well-ventilated position away from rain and direct sunlight. A greenhouse can serve beautifully as a curing room only if doors and vents remain open and shading prevents it becoming a fierce summer suntrap.
Allow several weeks and assess the bulbs rather than relying only on the calendar. Properly cured garlic has dry rather than pliable necks, crisp roots, papery skins and a firm feel throughout. Only then should you brush off remaining loose soil and trim roots and tops. Softneck stems can be retained for plaiting. Sort once more, using soft, split, damaged or exposed bulbs before sound ones.
Store cured garlic in open crates, net bags or another breathable arrangement in a cool, dry and dark room with good airflow. Never seal it in plastic. Keep hardneck and softneck harvests separate because their storage windows differ, and inspect the crop monthly for softness, mould or sprouting. Whole cured bulbs are not best kept routinely in the refrigerator; condensation and unsuitable conditions can shorten their useful life.
For a greenhouse designed to earn its place throughout the seasons, the Classic Aluminium Greenhouse creates an orderly setting for a cool garlic bed, measured watering and responsive ventilation. Once the crop is lifted, a shaded and airy bay can support curing before the space moves into its next phase of summer or autumn growing.
09 · Field questions
Garlic in a greenhouse: FAQ
Clear answers to the decisions that most influence bulb quality and storage.
Can garlic grow in a heated greenhouse?
It can certainly make leaves, but warmth is not a substitute for the cold exposure many garlic cultivars require before proper bulb division. If the structure is heated for tender plants, keep garlic in its coolest bright section and ventilate whenever conditions allow. For a household bulb crop, an unheated greenhouse is usually more straightforward because its advantage is shelter from saturation, not an artificially warm winter.
Do garlic cloves need pre-chilling in the refrigerator?
Not automatically. Autumn planting in much of the UK normally exposes garlic to a natural cool period. Requirements still vary by cultivar, and planting stock may have experienced cold before purchase. Artificial chilling without variety-specific guidance can initiate bulb development too early. Ask the supplier for advice before refrigerating cloves, and do not treat pre-chilling as a universal shortcut.
Can garlic grow in pots inside a greenhouse?
Yes. Choose stable containers at least 30cm deep, with generous drainage holes and a soil-based peat-free mix. Pots offer precise control but fluctuate in moisture and temperature faster than a greenhouse border. Maintain practical spacing of about 15cm between cloves, keep them in a bright cool position and never stand the container beside a heater or above a warm propagator.
Should I remove hardneck garlic scapes?
Many gardeners remove the scape once it curls, directing more of the plant’s resources towards the bulb. Make a clean cut while the stem is tender and use it in the kitchen. You may leave a few as visible indicators of development or for their architectural form, but remove any damaged material and do not allow it to clutter the crop.
Why has my garlic formed one undivided round bulb?
A single round commonly reflects a mismatch involving planting time, cultivar and cold exposure. It may also occur when the plant has not had sufficient time to establish leaves before bulbing, or when it is harvested while immature. The round remains edible. For the next crop, use named planting garlic and provide the cool period recommended for that variety.
What can follow garlic in the greenhouse?
After lifting the bulbs and removing debris, the bed can move into a suitable summer crop or a short succession of leafy vegetables. Avoid immediately following garlic with another allium in the same soil, particularly where disease has been suspected. Clean tools, maintain crop rotation and review the bed’s drainage before replanting. For greenhouse planning ideas, explore the Classic Aluminium Greenhouse.
Sources & further reading
Research behind the season.
More from Bloomcabin: aluminium greenhouse product information · aluminium greenhouse FAQ · custom aluminium greenhouses
- Royal Horticultural Society — How to Grow Garlic. UK guidance covering varieties, planting periods, cold exposure, spacing, care and harvesting.
- Royal Horticultural Society — Allium sativum plant profile. Cultivation notes, varietal characteristics and recognised garlic pests and diseases.
- Garden Organic — Garlic growing guide. Organic growing calendar, planting-depth adjustments, harvest cues and practical drying advice.
- Garden Organic — Organic disease control for fruit and vegetables. Identification, prevention and hygiene guidance for white rot, rust and downy mildew.
- AHDB — Crop damage caused by the allium leaf miner. UK lifecycle, symptom and non-chemical protection information for this allium pest.
- UK Plant Health Information Portal. Official plant-health information, biosecurity resources and routes for reporting relevant findings.
- Royal Horticultural Society garlic growing guidance. Further information on cold requirements, soil preparation, greenhouse starts, care and harvesting.
