
How to Grow Ginger in a Greenhouse
Classic Aluminium GreenhouseThe greenhouse crop dossier · UK
Stored warmth / slow expansion / aromatic harvest
How to Grow Ginger
in a Greenhouse
Ginger does not ask a British greenhouse for tropical drama, but for a long season of reliable warmth, airy moisture and the patience to let an underground stem travel outwards.
The greenhouse advantage
For ginger, a greenhouse is less a shelter than a way to hold summer in place.
Edible ginger is a tropical understory plant, and the culinary crop is a rhizome: an underground stem rather than a true root. Across much of the UK, the outdoor season is too cool and short for dependable mature growth. A greenhouse provides something more useful than occasional heat: a protected spring beginning, steadier summer conditions and a gentler finish as autumn nights cool.
That control matters because ginger develops sideways close to the surface. Its rhizomes do not respond well to repeated swings between cold compost, saturation and drought. They build most successfully in a broad, free-draining planting zone that remains evenly moist and warm without becoming sodden. Begin under controlled heat, then maintain growth while the weather outside remains hesitant.
Cooler northern gardens Start indoors on a heat mat, insulate pots from cold floors and use containers that can be moved before autumn chill.
Mild southern gardens An earlier season helps, but timely shading and ventilation become especially important in summer.
Exposed coastal gardens Protect the root zone from draughts and use the greenhouse to offset cool nights and wind.
Sheltered urban gardens Monitor sharp daytime heat beneath glass, ventilating early while preserving steady warmth around the compost.
01 / Begin with the underground architecture
Choose rhizomes as though the season depends on them.
It does. Ginger is propagated from pieces of rhizome rather than seed. Buy named, healthy planting stock from a reputable specialist supplier whenever possible. Supermarket ginger sometimes grows, but its handling history is unknown and it may have been treated to delay sprouting. A greenhouse concentrates warmth and care, so do not begin by introducing questionable tissue into clean compost.
Select
Firm, plump and alive
- Taut, uncollapsed skin
- Two or more swollen buds
- Dry, clean cut surfaces
- Fresh spicy scent and weight
Reject
Softness signals trouble.
- Mould, slime or sour odour
- Black wounds or mushy nodes
- Deep shrivelling or hollowness
- Tiny, weak or damaged pieces
Large rhizomes may be divided so that each substantial section carries at least one or two sound growth points. Use a clean blade, then leave fresh cuts in a clean, well-ventilated place until the surfaces become dry and callused. This pause reduces the opportunity for decay when the pieces enter warm, moist compost. Never divide material that already feels soft or smells sour.
02 / The concealed beginning
Pre-sprouting is a calendar of warmth, not a test of nerve.
Ginger can appear inactive for many weeks while roots form and buds swell. Pre-sprouting creates a controlled warm interval before an unheated British greenhouse becomes dependable. Lay whole pieces or callused divisions on shallow, lightly moistened, free-draining compost. A heated propagator or heat mat maintaining approximately 25–28°C around the root zone is the reliable UK approach.
Days 1–2Cut surfaces callusClean, dry airflow.
Weeks 1–2Warm stillnessHumid, never saturated.
Weeks 3–4Roots and budsLook for movement.
Weeks 4–6Shoots gather momentumPrepare for planting.
Keep the propagation medium humid but never waterlogged. A clear cover can retain moisture, but lift it briefly each day for air exchange and remove it when shoots begin moving strongly. Check weekly for mould. Do not discard a firm rhizome merely because emergence takes six weeks or longer; equally, do not continue watering one that has become soft. Sound ginger rewards patient warmth, whereas damaged tissue rarely recovers from rot.
03 / A broad room for a sideways crop
Plant shallowly, buds upwards, with space to expand later.
Ginger travels horizontally, so a broad container is more valuable than an unnecessarily deep one. Allow roughly 30–35cm of width and at least 10–15 litres of compost for one substantial starting piece; a larger vessel will remain more stable between waterings. In a trough, leave approximately 20–30cm between pieces. Ensure that every container has generous drainage holes and raise it slightly above a cold greenhouse slab so surplus water can escape.
Buds upwards
Growth points face the surface.
Growth points face the surface.
Shallow cover
Begin at about 3–5cm.
Begin at about 3–5cm.
Drainage below
Open compost, unobstructed outlets.
Open compost, unobstructed outlets.
Use quality peat-free compost enriched with mature garden compost, adding grit, perlite or another aerating ingredient if the mixture feels dense. Heavy garden soil is unsuitable in containers because it compacts and makes moisture difficult to control. Set each rhizome with its buds upwards, cover lightly and water once. Then resist keeping dormant material continuously wet. As new fingers swell near the surface, add a thin layer of fresh compost. This gentle hilling protects exposed tissue and supports expansion without burying the crown beneath a dense mound.
04 / The climate control room
Give ginger humidity in the air, oxygen at the roots and a route for excess heat to leave.
Greenhouse ginger is sometimes misread as a crop that wants perpetual wetness. It does not. It appreciates warm, moderately humid air and consistently damp compost during active growth, but it also requires drainage, ventilation and an irrigation rhythm that lets the upper layer breathe. Think of its climate as warm and sheltered rather than sealed, stagnant and swampy.
Warmth
Warm roots come first.
About 25–28°C while pre-sprouting
StartPeakFinish
Moisture + air
Moist below; never airless.
Water the compost, ventilate the structure.
Light
Bright, filtered and responsive.
Protect foliage from fierce glasshouse heat.
Warmth
During pre-sprouting, aim to keep the root zone close to 25–28°C. Measure the compost rather than relying entirely on an air thermometer: a bright greenhouse can feel hot at midday while a pot on a cold slab remains unproductively cool. Once leafy growth is established, avoid cold nights and prolonged chills. Steady warmth beneath the plant is more useful than an occasional extreme daytime temperature.
Moisture and ventilation
Before shoots appear, water sparingly because the rhizome has few working roots and is particularly vulnerable to rot. Once several leaves are active, water thoroughly at compost level and allow all surplus to drain. Reassess when the upper layer begins to dry, taking pot weight, sunshine and ventilation into account. Open roof vents and doors before heat becomes trapped. If condensation persists, foliage remains wet and pots dry slowly, reduce irrigation and increase airflow.
Light and summer heat
Ginger tolerates filtered conditions, but a gloomy position produces weak growth. Give it bright light while protecting foliage from fierce afternoon sun against hot glazing. During a heatwave, use shade paint, blinds or temporary external shading as needed, and ventilate early rather than waiting for leaves to scorch. Damping down paths can moderate dry heat, but it should never become an excuse to saturate the ginger container.
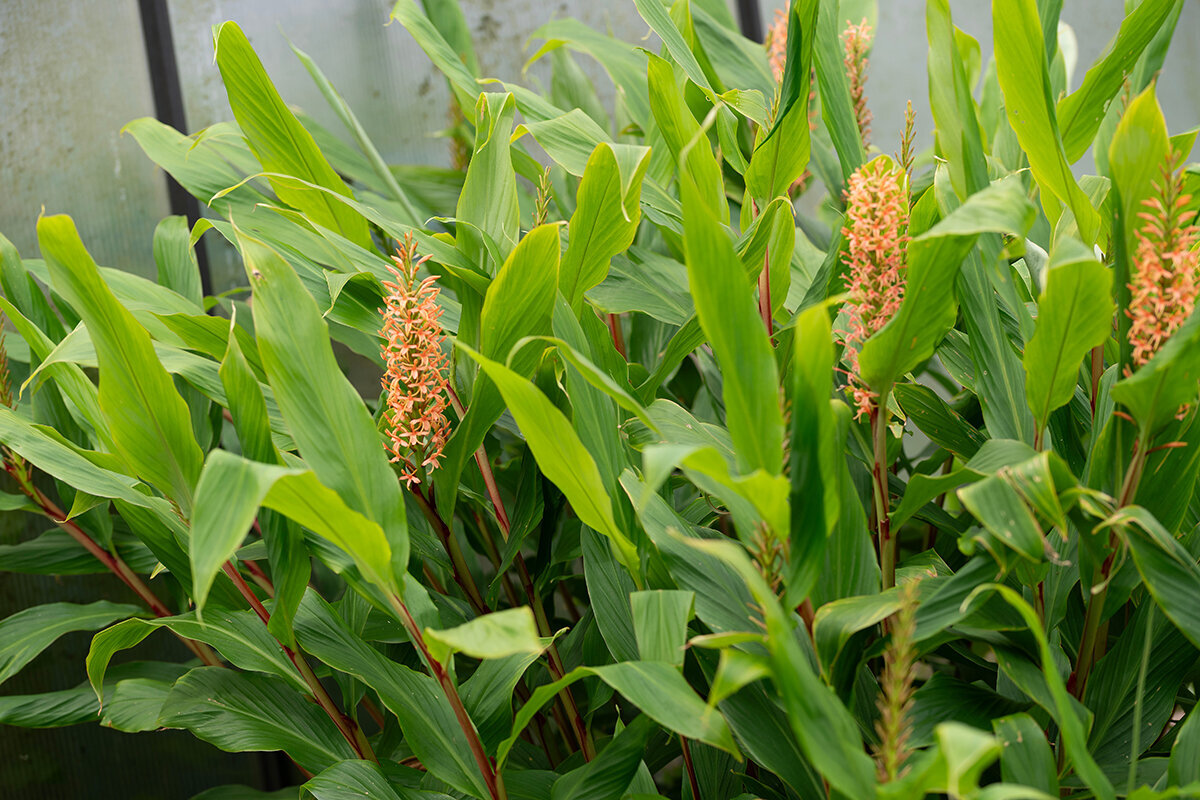
A Classic Aluminium Greenhouse offers a disciplined setting for ginger: protected spring propagation, adaptable ventilation on hot days and sufficient room to separate its upright foliage from lower crops.
05 / The active-growth journal
Maintain the crop through small, repeatable gestures.
Well-grown ginger looks composed above ground: upright green shoots, clean leaves and no dramatic daily fluctuations. That calm appearance comes from modest interventions made at the right time, rather than heroic corrections after stress has become visible.
Watering entry
Check the compost, then water slowly.
Use a finger to assess the upper compost and, where practical, judge a container by its weight. A drying surface is a prompt to investigate, not an automatic instruction to flood. Water around the base until the root ball is evenly moist and surplus begins to leave the drainage holes, then empty any saucer or outer pot. Frequency will change with container size, leaf area, sunshine and ventilation; consistent assessment matters more than a rigid weekly timetable.
Feeding entry
Feed growth without salting the container.
Ginger has a long active season, so begin modest feeding after leafy growth is established. Apply a balanced liquid fertiliser at a restrained rate, or incorporate mature compost and an appropriate slow-release organic feed when planting. Avoid feeding dry or waterlogged compost. White crusting around the rim can indicate accumulated salts, especially with hard water or poor drainage; flush the pot with clear water and review the feeding rate.
Hilling entry
Cover expansion, not the crown.
When new rhizome fingers rise towards the surface, add a light top-dressing of fine compost or leaf mould around exposed sections. Repeat only when necessary. A thin, loose mulch helps moderate moisture fluctuations, but it must not seal the surface or press heavily against emerging stems. Air remains important wherever soft, actively growing tissue meets the compost.
Keep a greenhouse notebook. Record the planting date, first emergence, notable heat events, feeding, watering changes and the first natural yellowing. Ginger’s long season makes memory unreliable; a few observations help distinguish normal maturity from a developing cultural problem. When planning a permanent propagation corner and accessible container zone, consider the Classic Aluminium Greenhouse.
06 / Let the local season change the choreography
A greenhouse plan should answer British weather, not an imagined tropical forecast.
Cool northern regions
Pre-sprout indoors in late winter or early spring and do not move containers beneath unheated glass until conditions are reliably mild. Insulate pots from cold floors using feet or staging, and keep them away from door draughts. Relocatable containers are particularly useful because they can return to a frost-free porch or conservatory before autumn cold interrupts the crop.
Sheltered southern regions
Earlier warmth may extend growth, but fierce temperatures beneath glass can arrive quickly. Vent before heat accumulates, provide filtered shade when foliage begins to bleach or crisp, and check compost moisture carefully instead of answering every hot afternoon with excessive watering.
Exposed coastal gardens
Cool nights, wind and draughts can keep the root zone below the temperature suggested by sunny daytime air. Position ginger away from frequently opened doors, elevate containers and retain the option to move them. Use the greenhouse as a reservoir of steady warmth, not merely protection from rain.
Heated and unheated houses
A heated greenhouse offers the strongest prospect of mature ginger. An unheated structure can still produce handsome foliage and tender young rhizomes, provided plants begin under indoor heat. Treat baby ginger in late summer as a successful, deliberate harvest rather than a compromise.
A well-proportioned structure makes that seasonal management easier. Explore the Classic Aluminium Greenhouse for space to organise broad containers, clear watering routes and effective ventilation around tall foliage. For another view of the same adaptable structure, consider the Classic Aluminium Greenhouse.
07 / Read the warning before treating it
Symptoms form a route, not a generic checklist.
Inspect the compost, rhizome and pattern of damage before intervening. A leaf that yellows gradually in autumn does not carry the same message as a green shoot collapsing in midsummer. Where rot is possible, isolate the container and avoid transferring compost, runoff or unclean tools to healthy plants. Correct the underlying condition rather than treating colour alone.
Autumn yellowing
Natural seasonal dormancy
Brown tips
Sun, heat or dry compost
Stalled growth
Cold roots or low light
Stippling or webbing
Check for red spider mite
Collapse or soft rhizome
Act promptly; suspect rot
Read the route
Gradual yellowing as autumn approaches: this is often normal dormancy after months of growth. Reduce irrigation, stop routine feeding and allow the pot to become somewhat drier between checks. Harvest when foliage has largely died back, or retain a flawless piece under suitable winter protection.
Crisp tips or pale scorch patches: look first at intense sunlight, excessive glasshouse heat or a root zone that has dried through. Add temporary shade, ventilate earlier and restore even moisture gradually. Do not compound the stress with a sudden heavy feed or permanently saturated compost.
Stalled growth with a firm rhizome: review night temperatures, warmth beneath the pot, available light and compost moisture. Do not excavate the piece repeatedly. If it remains sound, continued patient warmth is usually more useful than disturbance, overwatering or speculative feeding.
Fine stippling, webbing or dull foliage: inspect closely for glasshouse red spider mite, particularly in hot, dry corners. Isolate badly affected plants where practical, rinse leaves carefully, damp down paths rather than soaking pots, improve ventilation and examine neighbouring crops because mites spread quietly.
Rapid collapse, soft tissue or sour-smelling compost: suspect waterlogging and soft rot. Stop watering, remove the plant from its container and inspect the rhizome. Discard mushy, blackened or foul-smelling tissue and do not compost it. Clean tools and the container before reuse, then rebuild with fresh, airy medium. Prevention through clean planting stock, genuine drainage and appropriate root warmth is more reliable than attempting to rescue advanced decay.
08 / The moist-to-dry finish
Harvest according to the ginger you want to cook.
Ginger offers two genuinely different harvests. Baby ginger is pale, tender, juicy and mild, with skin so thin that little peeling is needed. Mature ginger is firmer, hotter, more fibrous and better suited to keeping. Greenhouse protection gives British gardeners greater freedom to choose, rather than accepting whatever the first cold night dictates.
Baby ginger
Tender and immediate
- Lift while foliage remains green
- Rinse very gently
- Use while fresh
Mature ginger
Firm and storage-minded
- Wait for natural dieback
- Air-dry away from sunlight
- Reserve flawless planting pieces
Baby ginger
Once the plant has formed a strong clump, commonly from late summer onwards, ease a few young fingers from the outer edge. Look for creamy, juicy rhizomes with pink or pale growing points. If the plant is to continue, disturb the central network as little as possible. Rinse gently because the delicate skin bruises easily, then use promptly in pickles, syrups, curries or finely sliced fresh preparations.
Mature ginger
For a firmer, hotter crop, leave healthy plants until the foliage yellows and dies back naturally. Reduce regular watering for several weeks beforehand so the compost is not heavy and saturated at harvest. Tip a container carefully or ease the clump from a bed, brush away loose compost and cut the stems cleanly. Dry the rhizomes briefly in a shaded, airy place before selecting pieces for cooking or storage.
Do not bake freshly lifted rhizomes in direct sun or place them on a radiator. Refrigerate fresh culinary pieces for short-term use, or freeze suitable portions for longer storage. Keep one or two flawless rhizomes for the following season, avoiding unnecessary washing, cuts and bruises. Label them and store them cool, dry and frost-free so they can rest without rotting or shrivelling before pre-sprouting begins again.
Questions from the potting bench
Greenhouse ginger FAQ
Can ginger grow year-round in a UK greenhouse?
Only where reliably warm conditions can be maintained. Most British home gardeners obtain better results by treating edible ginger as a long warm-season crop: start under controlled heat, grow vigorously through summer and harvest deliberately as light and warmth decline. A cold greenhouse may leave dormant pots exposed to damaging wet chill. Move selected material to a frost-free place rather than trying to sustain weak winter growth.
How much sunlight does greenhouse ginger need?
Bright light is valuable, but relentless direct summer sun can scorch leaves and overheat the compost. Choose a bright position with filtered light, particularly during hot afternoons, and add shade where leaf response indicates stress. Ventilation and actual root-zone conditions are more useful guides than one fixed rule about daily sunshine.
Can ginger grow in a raised greenhouse bed?
Yes. A raised bed can work well if its compost is loose, disease-free, freely drained and warm enough in spring. Keep each planting position accessible, allow roughly 20–30cm between pieces and leave room to top up around swelling rhizomes. Broad containers remain easier when plants may need moving indoors or when moisture must be managed independently.
Why is my greenhouse ginger not sprouting?
Common causes include a dormant or sprouting-inhibited rhizome, insufficient warmth, saturated compost and simple impatience. Confirm that the piece remains firm, keep the medium only lightly moist and measure the root-zone temperature. The RHS recommends approximately 25–28°C for propagation. A healthy rhizome can still take six weeks or longer to produce a visible shoot.
Should I mist greenhouse ginger every day?
Not as a substitute for correct watering. A cover or light mist can help retain humidity during pre-sprouting, but perpetually wet leaves and stagnant air invite trouble. Prioritise evenly moist, aerated compost, free drainage and ventilation. On very hot days, damp down paths rather than repeatedly soaking the foliage and pot.
Which greenhouse arrangement works best for ginger?
Ginger does not require an enormous footprint, but it benefits from generous container width, a warm propagation point and circulation around its upright foliage. A Classic Aluminium Greenhouse is particularly practical when planned with broad containers along one side, staging for spring warmth and a clear path for watering, ventilation, hilling and harvest.
Sources & further reading
A concise working library for a long-season crop.
These horticultural resources informed the propagation temperatures, planting method, greenhouse ventilation, crop care and harvest guidance in this article. Conditions vary between domestic UK greenhouses, so apply the recommendations alongside close observation of your own structure, compost and local weather.
More from Bloomcabin: greenhouse design options · UK greenhouse gardening guide · Bloomcabin greenhouse collection
- Royal Horticultural Society — Zingiber officinale plant details
- Royal Horticultural Society — greenhouse ventilation and shading
- University of Florida IFAS Extension — ginger, galangal and turmeric production
- University of Wisconsin–Madison Extension — Ginger, Zingiber officinale
- Virginia Cooperative Extension — Growing Ginger at Home
- University of California Agriculture and Natural Resources — Ginger
- Royal Horticultural Society — Zingiber officinale growing information
