
How to Grow Microgreens in a Greenhouse
Greenhouse production notes / 27
How to Grow Microgreens in a Greenhouse
The greenhouse’s fastest harvest requires an exact routine: clean seed, even coverage, measured darkness, tempered light, moving air and prompt refrigeration after cutting.
Classic Aluminium Greenhouse7–21 days Typical crop-dependent harvest window
1 tray / crop Keep germination behaviour consistent
Clean → chilled Protect quality after the cut
The production principle
Not miniature vegetables. A short, disciplined crop cycle.
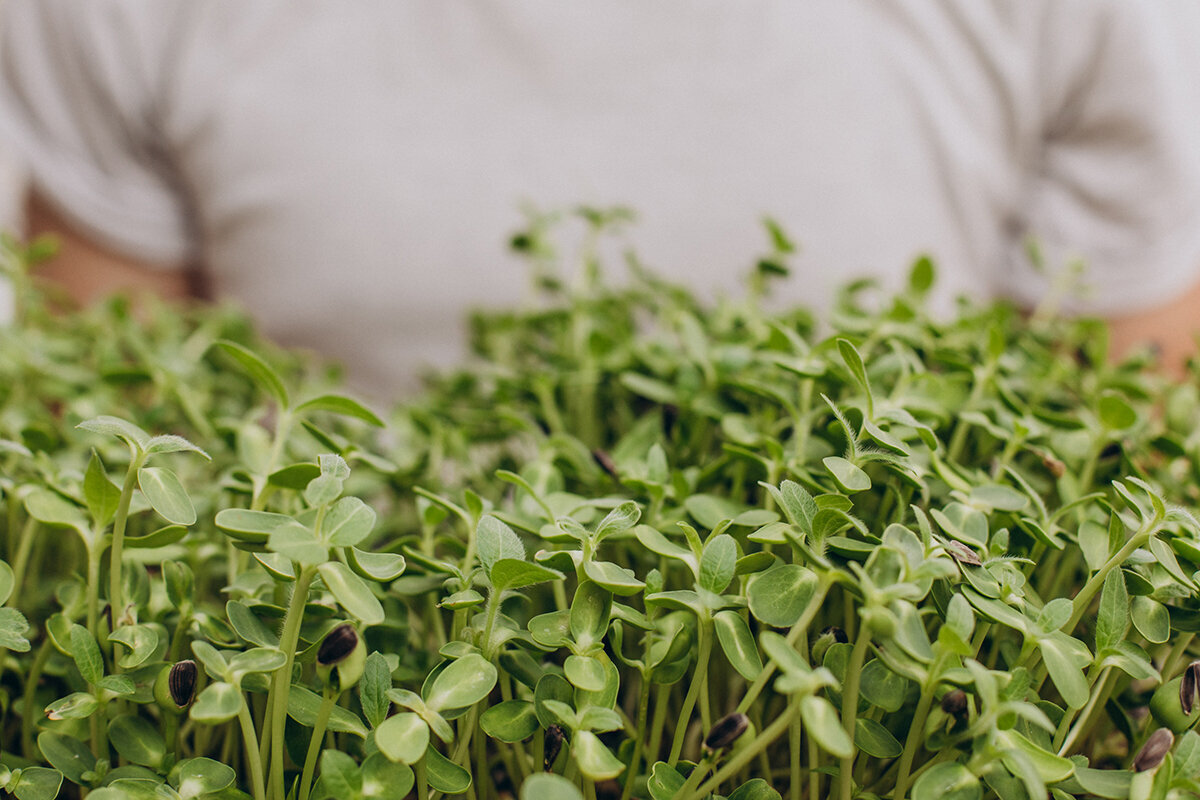
Microgreens are densely sown edible seedlings harvested young, generally after their cotyledons open and, depending on the crop and preferred finish, around the arrival of the first true leaves. Unlike sprouts, they grow in a clean medium or suitable mat and are cut above it. The roots, seed remnants and growing medium remain in the tray.
That distinction determines how the greenhouse should be organised. A tomato bench rewards space, warmth and a long season; a microgreen bench rewards clean repetition. The cycle is so short that small errors become conspicuous. Excess seed creates a damp thicket, a pleasant greenhouse morning can become a hot afternoon behind glass, and unclean scissors can compromise an otherwise carefully managed crop intended to be eaten raw.
For the serious home gardener, precision need not mean complexity. Begin with one dependable tray format, potable water, a clean peat-free seed compost or coir-based medium, and one straightforward crop. Inspect it at the same time each day. Treat the first month as calibration and note the crop, supplier, seed weight, soak time where relevant, sowing date, emergence, first light and harvest condition. These records will soon describe your particular British greenhouse more accurately than any universal day count, especially as cloud, night-time chill and seasonal light alter the pace.
Microgreen quality is designed before sowing—and protected until the harvested greens are chilled.
01 / Seed behaviour
Choose by rhythm, not by colour alone.
Begin with a crop whose seed size and germination pattern are easy to understand in one tray. Fine brassica seed forms a quick, shallow canopy, making broccoli or radish useful first crops. Larger peas and sunflowers produce a more substantial cut but require more headroom, closer moisture judgement and disciplined removal of hulls. Avoid mixed trays until you know how rapidly each species emerges, how much water it uses and when its stems become too tall or fibrous for your preferred harvest.
Buy accurately identified seed sold for edible microgreen or sprouting use, never treated or coated field seed. Retain the supplier and batch information where possible, then label every tray with its crop and sowing date. That simple record helps you isolate a doubtful tray, repeat a successful result and recognise when a batch is responding differently during a colder or cloudier greenhouse week.
Fine seed / fast
Broccoli and kale
- Soak: Usually unnecessary.
- Darkness: Brief and monitored.
- Character: Mild, with gentle brassica notes.
- First tray: Excellent for learning an even sow.
Fine seed / vivid
Radish
- Soak: Usually unnecessary.
- Darkness: Short; uncover when seedlings lift.
- Character: Peppery, crisp and colourful.
- First tray: Forgiving, but watch density.
Large seed / substantial
Pea shoots
- Soak: Often useful; drain thoroughly.
- Darkness: Gentle weight may improve anchoring.
- Character: Sweet, juicy and generous.
- First tray: Easy to read; needs airflow.
Large seed / robust
Sunflower
- Soak: Common, using clean water.
- Darkness: Lift the cover as growth strengthens.
- Character: Nutty, crunchy and full-bodied.
- First tray: Best once sanitation is routine.
Do not grow tomato, pepper, aubergine or potato seedlings as microgreens. These nightshade crops can contain undesirable alkaloids in their young tissues. A single-crop tray is also easier to manage and harvest correctly than a mixture of seedlings with different germination rates, water needs and finishing stages.
02 / Coverage is the variable
Dense enough to form a canopy. Open enough to breathe.
Underseeded
Productive coverage
Overcrowded
Seed should create a nearly even field rather than piles surrounded by bare islands. In a productive tray, cotyledons close into a harvestable canopy while individual stems and leaves can still dry after watering. Thick ridges trap humidity close to the medium, shade weaker stems and make tangled, stretched growth or mould more likely.
Tray, medium and calculation
Measure once. Record the result.
Compact trays are practical in a small greenhouse because they are easier to rotate, lift, inspect and clean than one broad tray. Place a perforated growing tray or insert inside a matching solid tray to create a simple bottom-watering arrangement. The lower tray should act as a temporary reservoir, never as a permanent pond around oxygen-hungry roots.
Starting seed weight = tray area × the crop’s proven rate.
There is no universal grams-per-tray rule. Seed size, cultivar, germination percentage, tray area, medium, light and preferred harvest stage all affect the correct amount. Begin with the microgreen seed supplier’s guidance or a recognised density calculator, weigh every sowing, and adjust only after comparing canopy coverage, surface dryness, stem quality and usable yield.
Use a fresh, clean and lightweight soilless medium, such as peat-free seed compost, coir or another material suited to edible production. Moisten it evenly before sowing so it feels damp without releasing a stream of water when squeezed. Ordinary garden soil is unnecessarily dense for this shallow, fast crop. Avoid raw manure and media of uncertain origin: microgreens are often eaten raw, so contamination prevention must begin before the seed reaches the tray.
03 / Tray anatomy
Separate roots and water from the edible, ventilated canopy.
Keep the entire system simple enough to wash completely. Water rises from below, roots occupy the medium, and the leafy crop remains as dry and well ventilated as practical between irrigations.
Canopy airflow
Even seed zone
Root mat and medium
Perforated insert
Bottom reservoir
Place a solid tray beneath a perforated insert so that the medium can draw up clean water and any excess can then be drained. Keep the growing layer shallow, level and evenly moist, distributing weighed seed in a consistent layer rather than mounds. Roots should establish within the medium, while open space around the tray allows the edible leaves to dry. Never leave the root zone submerged beneath a covered crop in a warm greenhouse.
Food-contact surfaces Choose sound, food-safe and washable trays. Reserve them for edible crops instead of using cracked containers that retain compost, moisture and residues.
Medium depth A modest, level layer suits many quick crops. Peas and sunflowers may require more anchorage than fine-seeded broccoli, kale or radish.
Water route Add a shallow amount of water to the lower tray, allow the medium to wick up what it needs, then drain the excess instead of leaving roots submerged.
Canopy route Leave visible space around every tray. Air must pass gently across the leaves, not merely circulate elsewhere in the greenhouse above or below them.
04 / Darkness to daylight
Blackout is a germination tool, not a fixed ritual.
A second tray, humidity cover or crop-appropriate light weight can help retain even moisture and improve contact during early germination. Its purpose is not to impose an automatic number of dark days. Crop type, temperature, seed vigour and the strength of emergence determine when pressure is removed and the cover comes off.
Stage 01
Sow and settle
Even seedStage 02
Anchor
Daily inspectionStage 03
Introduce light
Moderated daylightStage 04
Finish with airflow
Dry, upright leavesLevel the pre-moistened medium, distribute weighed seed in two passes and press only enough to establish contact. Mist gently if it helps settle fine seed; never create puddles.
Inspect the tray daily. If roots lift the insert or seedlings push firmly against a cover, reduce the pressure or uncover. A sour smell and warm, stale air are warnings.
Move the tray into bright, moderated greenhouse light as the cotyledons begin to open. Avoid exposing pale new growth suddenly to intense direct sunshine through hot glazing.
Bottom-water when necessary, drain completely, ventilate the greenhouse and harvest when the crop is crisp, upright, well coloured and true to its intended stage.
Stop and inspect: A tray that smells sour, develops irregular grey or fuzzy growth, remains saturated at the surface or shows patchy stem collapse should not be nursed towards harvest. Fine white root hairs occur close to healthy roots, whereas mould can spread across seed, medium and stems and may smell unpleasant. When uncertain, isolate and discard the crop, clean the surrounding area and review seed density, water, temperature and airflow before sowing again.
05 / Greenhouse management
Give the fastest crop the calmest part of the greenhouse.
A greenhouse is efficient because daylight, water, tools and the route to the kitchen can sit close together. It also creates the central climatic risk for microgreens: heat and humidity can rise quickly inside a closed glazed structure. The objective is not maximum warmth. It is a stable, cool-to-moderate environment in which the canopy colours evenly and dries without scorching or becoming desiccated.
A simple thermometer-hygrometer positioned at tray height is more useful than judging conditions from the doorway. For many microgreens, a practical target is around 16–21°C, accompanied by fresh air rather than sealed-in humidity. Check conditions during the brightest part of the day as well as on a cool morning. In British late spring and summer, open roof vents and doors before the greenhouse overheats. During heatwaves, a shaded bench, pale blind or shade netting can be more effective than adding water; wet roots cannot correct leaf stress caused by excessive heat at the glazing.
During darker British months, supplementary LEDs may support a steadier winter succession when daylight is weak, but they cannot compensate for stale air or poor hygiene. Keep electrical equipment clear of moisture and use products suitable for the setting. If using a circulation fan, move air gently around the trays rather than blasting one edge dry. Keep crops away from condensation drips, dirty pots, cold door draughts and stagnant corners beneath taller foliage.
Classic Aluminium GreenhouseSeed
storage
storage
Sowing
zone
zone
Growing
bench
bench
Cut and
chill
chill
Arrange a small greenhouse bench as a food-production station.
Leave open space beside the trays, keep hoses and nozzles away from the floor, and reserve a clean shelf for labels, scissors and empty harvest containers. The configurable interior of a Classic Aluminium Greenhouse can be arranged as a compact growing studio. Use that flexibility to prioritise washable surfaces, airflow, seasonal shade and clear access rather than forcing another tray into a crowded corner. A productive bench can be cleaned, inspected and harvested without moving compost bags, ornamental pots or unrelated garden equipment through the food-handling area.
06 / Food safety
Move one way: dirty work never returns to the harvest end.
Microgreens are commonly eaten raw, so cleanliness is a production practice rather than a final polish. Purchase reputable seed intended for edible microgreen or sprouting use and never use treated or coated seed. Use potable water, food-safe trays and clean medium. Wash hands before sowing and again before cutting; exclude pets, wildlife, open compost and chemicals from the work area. If you sell microgreens or supply them beyond your household, check your local authority’s current requirements and register the food business where required.
Cleaning and sanitising are separate steps. First remove roots, medium and visible residue using detergent and water; then apply a food-safe sanitiser exactly as its label directs. Sanitiser cannot work effectively through dirt. Establish an end-of-cycle sequence: discard used medium, clear debris, wash trays and tools, rinse, sanitise, rinse again if directed, air-dry fully and store clean equipment away from compost, hoses and outdoor footwear. Do not reuse spent medium for another food crop.
Stop: never carry dirty trays, hose ends, compost debris or outdoor footwear into the clean cutting, packing and chilled-storage end of the workflow.
01Receive
02Clean
03Sow
04Grow
05Cut and chill
Store seed dry, sealed, labelled and away from chemicals. Inspect each batch for moisture, pests, damage, unusual dust or an off smell. Clean trays, tools and the bench before food contact, then handle medium and seed in a designated sowing zone. During growth, bottom-water carefully, drain standing water and remove waste promptly. At harvest, use sanitised cutting tools and clean food-safe containers, then refrigerate dry greens without delay. Direction matters: compost handling, used trays and dirty equipment must never cross back into the clean cutting and packing end.
07 / Harvest windows
Harvest by condition, not by a calendar promise.
A supplier may provide an approximate day range, but greenhouse light, temperature, cultivar, density, desired stem length and cold British nights all alter the finish. Look for fully opened cotyledons, clear colour, dry leaves, stems tall enough to cut above the medium and an upright canopy that remains airy rather than tangled. Taste a small sample. Harvest in the cooler part of the day, ideally before sunshine has accumulated heat inside the greenhouse.
Use clean, sharp scissors or a knife and cut just above the growing medium without pulling the plants. Keeping the blade clear of the surface reduces debris and prevents compost from entering the container. Unless the greens are visibly soiled, do not wash automatically after cutting: added handling and retained moisture can shorten storage life. If washing is necessary, use potable water and dry the leaves thoroughly before refrigeration.
Cut only what can be eaten or packed in excellent condition. For a household, one or two small trays sown each week usually create a more manageable and hygienic succession than a large sowing that matures all at once. Sow the replacement before the details of the previous harvest are forgotten.
Radish
Crisp cotyledons
Broccoli
Even canopy
Pea
Tender shoots
Sunflower
Paired leaves
Radish is best with open, crisp cotyledons and its characteristic peppery finish. Cut broccoli when the canopy is tender, upright and evenly green. With pea shoots, select the stem length you enjoy before the crop becomes fibrous. Harvest sunflower at a robust paired-leaf stage after inspecting and removing loose hulls, but before stretching or leaf damage diminishes its clean, nutty character.
Refrigeration is part of the crop.
Move harvested greens out of greenhouse warmth as soon as practical. Pack them loosely rather than compressing warm, wet leaves in a sealed mass, use clean food-safe containers and refrigerate promptly. Keep batches identifiable and grow only what can be used at peak quality; microgreens are best when the journey from bench to kitchen is short.
08 / Diagnostic review
Read a failed tray as evidence—not as a request for more water.
Negative evidence
Long, pale stems
Long, pale stems
Stretching and leaning
The likely causes are insufficient or uneven light, excessive warmth, or a tray left covered after strong emergence. Uncover earlier and move the crop into bright but moderated light, rotating it if one greenhouse side is brighter. Do not assume that additional heat or fertiliser will correct a weak, elongated canopy.
Positive evidence
Dry, upright canopy
Dry, upright canopy
Surface remains wet
Reduce the water volume, use careful bottom watering and drain the lower tray. Increase gentle air movement and inspect the sowing pattern: overcrowded fine seed forms a moisture-retaining layer even when the wider greenhouse appears well ventilated.
Negative evidence
Patchy emergence
Patchy emergence
Uneven germination
Examine medium moisture, seed age, distribution and coverage first. A tray with dry edges, a saturated centre or clumps of seed cannot mature evenly. Pre-moisten and level the medium, then record whether the particular crop benefited from a short soak, light pressure or a brief covered phase.
Positive evidence
Clean cut, chilled finish
Clean cut, chilled finish
Short storage life
Harvest sound, dry-looking greens using sanitised tools. Minimise warm handling, avoid tightly packing wet leaves and refrigerate promptly. If storage life remains poor, audit both the dirty-to-clean workflow and the time between cutting and effective cooling.
Questions from the bench
Microgreen FAQ
Do microgreens need direct sun in a greenhouse?
No. Bright natural light is valuable, but strong direct sunshine through greenhouse glazing can overheat shallow trays and stress tender leaves. Choose a position with moderated light, early ventilation and seasonal shade when necessary. Supplementary LEDs are most useful when winter daylight is too short or inconsistent for a dependable succession.
Should every microgreen be soaked and weighted?
No. Large seeds such as peas and sunflowers are commonly soaked briefly, whereas fine brassica and radish seed usually does not require soaking. A humidity cover or light weight is also crop- and condition-specific. Follow reputable seed guidance, inspect daily and respond to emergence rather than imposing a universal blackout timetable.
Can several species share one tray?
They can, but begin with single-crop trays. Species differ in seed size, germination pace, water use, height and ideal harvest condition. Once you have reliable records, combine the crops after harvesting, when each component has been grown at its own suitable density and timing.
Do microgreens need fertiliser?
Usually not during a short microgreen cycle in a fresh, appropriate medium. The seed provides the plant’s early energy reserve. Do not add nutrients automatically; first establish sound seed, even moisture, adequate light, moderate temperature, airflow and hygiene. Longer baby-leaf production has different nutritional requirements and should be treated as a separate growing method.
Can microgreens grow in an unheated UK greenhouse?
Yes, during suitable periods, although cold, low-light conditions slow growth and frost can damage trays. An unheated British greenhouse is generally most productive from spring into autumn. Dependable winter succession may require protected warmth and supplementary light, alongside potable water, clean trays, reputable seed, ventilation, hygienic handling and prompt refrigeration after harvest.
Sources and further reading
Build your own production notes.
These UK and university extension resources informed this guide. They are particularly useful for distinguishing microgreens from sprouts, selecting suitable seed and media, managing moisture and greenhouse conditions, establishing traceable hygiene routines and understanding the responsibilities attached to supplying food beyond your household.
More from Bloomcabin: aluminium greenhouse product information · Bloomcabin guide to custom aluminium greenhouses · Bloomcabin greenhouse collection
- Royal Horticultural Society — Growing microgreens— Practical RHS guidance on sowing, raising and harvesting microgreens at home.
- Royal Horticultural Society — Grow micro greens— An accessible RHS introduction to choosing seed, sowing a tray and cutting young greens.
- Food Standards Agency — Sprouted seeds guidance— UK food-safety context covering prevention, hygiene and traceability for seeds intended for sprouting.
- Food Standards Agency — Register a food business— The official starting point for checking registration when supplying food beyond your household.
- University of Maryland Extension — Growing microgreens indoors— Detailed university guidance on trays, seed, growing media, moisture, light and harvesting microgreens and baby greens.
Begin with one clean, shaded tray cycle—and make the routine repeatable.Classic Aluminium Greenhouse
