
A Minimalist Garden with a Pergola: Creating a Coherent Design
Garden design
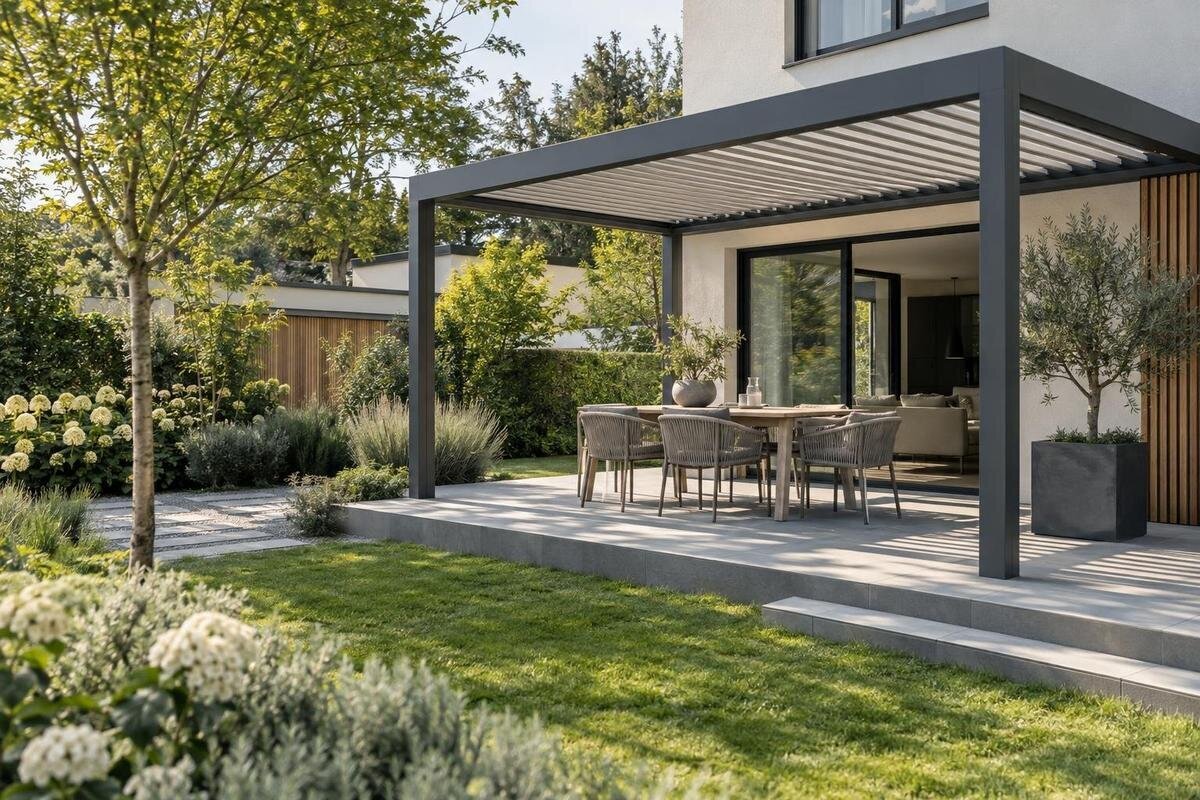
Minimalist garden design is less about leaving a space bare than deciding which lines and elements deserve attention. A pergola can give an outdoor seating area a clear centre, but it looks integrated only when its position, paving, planting and surrounding edges have been planned together. This guide develops one coherent composition: a route from the house, a defined place to sit, a restrained planted boundary and enough open ground to keep the layout legible. The practical work lies in proportion and junction details, then checking the drawing against the real site.

Design checks 1
The seating area, route and planted boundary
Treat the garden as a sequence rather than a collection of features. In a restrained scheme, the house is the starting point; the pergola defines one main seating or dining area; a planted edge supplies depth; and an open strip of lawn or paving lets the eye continue beyond the frame. That hierarchy gives each element a role without filling every corner. Decide which activity deserves the strongest spatial definition, then place secondary functions where they do not compete with it. Minimalism is not a ban on detail; it is a reason to choose which details should repeat and which can stay quiet. A bench or storage area need not become another focal point.
An illustrative layout might carry a clear route from a rear door to a paved terrace, put the pergola over one part of the sitting area, and continue the route beside a planted bed towards the garden’s far end. The bed gives a long edge a softer boundary; open ground leaves a pause in the view. This is a composition to adapt, not a standard plan: an existing tree, window, boundary or level change may shift the axis. Keep the principal view, seating zone and route visibly related, so the garden reads as one arrangement from indoors as well as from the gate. If every feature draws attention at once, edit the hierarchy.
The house, views and everyday routes
Record the garden before drawing the pergola: the house elevation, door and window positions, boundaries, steps, existing trees, inspection covers, storage areas and changes in level. Note which openings are used daily and which frame views from inside. Measure the available space, including the route to the gate, and mark fixed features that cannot simply be moved. A measured base plan is more dependable than designing from a photograph, while pictures from the main rooms and entrance reveal how a structure and planted edge sit against the house. Include door swings and thresholds; they affect usable space even when the plan looks generous.
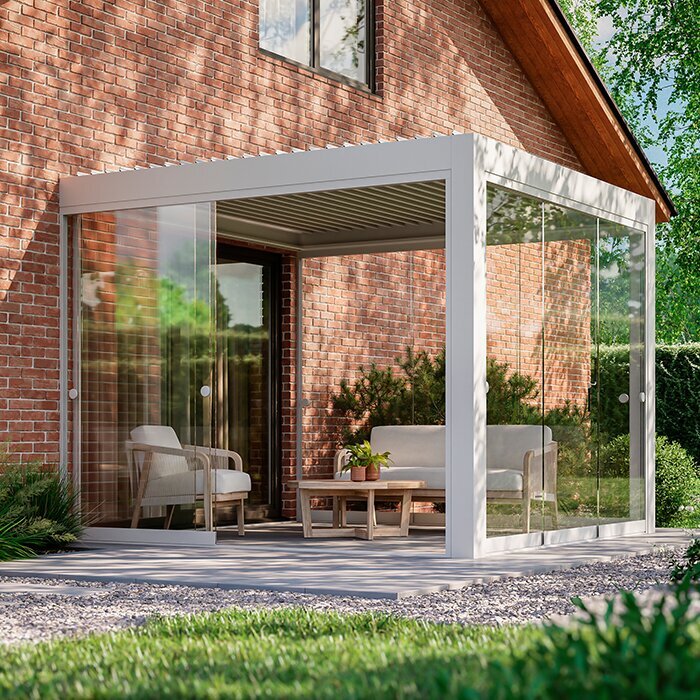
Trace how people move between the house, table, gate, storage and any everyday service area. Allow for a door opening, chairs being pulled out and people passing, then reserve that movement space before fixing the pergola outline. A wall-mounted arrangement such as the Bloomcabin Lean-To Pergola can be plotted beside the façade, but whether the actual wall is suitable and how the structure is fixed need a project-specific assessment. A freestanding layout places the frame within the garden instead, so compare both on the same measured plan. Check whether either blocks a window view, narrows a route or leaves an awkward strip behind it; keep the path to the gate clear when the seating area is in use.
Design checks 2
The pergola within the garden sequence
Give the pergola a clear role in the sequence: it may be the destination at the end of a route or a place passed on the way to a garden beyond. That decision affects how open each side should remain and where planting can sit. Relate the structure to a house opening, path and far boundary rather than centring it by habit. A central position can look deliberate when surrounding edges support it, but arbitrary when paving, sightlines and access point elsewhere. The pergola need not occupy the geometric centre; an offset position may bring the route and the open view together. Leave a visible interval between the seating area and any separate lawn or planted space.
Draw the pergola footprint and each post position, not just a shaded rectangle for the roof. Compare the dimensions for the chosen configuration with the space available, then mark the outline temporarily on site. Use those marks to test the approach: can someone enter the seating area directly, or must they weave around a post and the end of the table? The Bloomcabin bioclimatic pergola is one listed option to compare with this layout, using confirmed dimensions for the configuration under consideration. Give each open side a purpose, whether it provides access, faces a view or meets a planted edge. Keep the path and planting boundaries visible around the footprint, and revise them together rather than squeezing them in afterwards.
Aligning posts, paving and garden edges
Once the position is settled, coordinate the frame with the lines already visible in the garden. Mark the pergola’s outer edges, post positions and paving joints on one dimensioned plan. A post landing on a narrow paving joint, or just outside the paved area, can make the arrangement appear accidental even when each part was chosen well. It is often clearer to let one dominant line govern the terrace: for example, align a long edge with a house opening or straight garden boundary, then use other edges as supporting lines. State which line controls the layout. Avoid adding small offsets without a practical reason.
Show the finished paving edge, any bed border and the pergola posts together in plan and, where levels differ, in a section. That reveals whether a border will cut across a route or leave a thin remainder that is difficult to finish. A product reference such as the Bloomcabin Pergola can be compared with the layout using the dimensions for the selected configuration; a product image cannot establish post positions or site fit. Ask the designer or installer to confirm relevant base and fixing details for the actual ground, rather than moving posts on site to solve a clash. Resolve these relationships before materials are ordered, and make the reference dimensions clear to everyone setting out the work.
Design checks 3
A limited palette with deliberate transitions
A limited palette means more than picking two colours. Choose which surface is visually dominant, which material relates to the house or pergola, and where planting softens the transition. One paving material can carry across the main terrace; reserve a different finish for a path or threshold only when it clarifies how the space is used. Repeat the same boundary treatment at related beds rather than introducing a new edging at every turn. Check samples outdoors against brickwork, render and the proposed pergola colour in daylight. A small sample can look very different when it becomes a broad, continuous plane.
At the junction of terrace and planting, decide whether paving meets a crisp edge, a narrow gravel strip or a planted border. Choose one detail and continue it where the same condition occurs. At the house, show how the patio meets the threshold and wall, so a remaining strip or change in finish looks intentional. For a scheme with a wall-mounted structure, the lean-to pergola format makes the façade connection important to draw alongside the paving joint and border. Do not rely on a matching colour to hide an unfinished junction. A concise materials schedule naming each finish and its location helps the people carrying out the work follow the same design intent.
Planting at its mature size
Planting supplies the softer part of a minimal composition, but it still needs a clear structure. Choose a restrained number of plant forms or species and repeat them in groups, rather than making every bed a separate collection. Relate height to the view: lower plants near the seating edge can preserve openness, while a taller repeated group can give a boundary a calmer backdrop. These are design choices, not fixed rules; existing shade, soil, exposure and maintenance capacity affect what is suitable. Show expected mature width and height on the drawing, rather than relying on the neat appearance of young plants at purchase. A simple planting key also makes repeated groups clear.
Document the needs of each planned plant, including light, soil and moisture preferences, mature spread, pruning and seasonal appearance. This helps prevent a tidy initial layout from becoming crowded or demanding more maintenance than intended. Distinguish the space occupied by foliage from the space needed to tend the bed: a planting group may fit on paper yet leave no convenient way to reach its far side. When plotting the aluminium pergola option, show planting extents around its selected footprint and preserve access to posts, fittings and service covers. If climbing plants form part of the design, check their support and attachment requirements separately. Consider the beds outside the peak growing season too, including which stems or evergreen forms will remain visible from the house.
Design checks 4
Boundaries, levels and drainage
Boundaries and changes in level are where a simple plan can become visually messy. Decide which line is primary at the garden edge: the boundary wall, a straight bed, the lawn edge or the terrace. Let other edges meet it cleanly instead of running several parallel lines with narrow leftover strips between them. Show where paving terminates, how a bed is contained and whether a route continues behind or beside the pergola. These junctions are particularly noticeable at corners and along long runs, where a small misalignment is repeated in the view. Label each change of surface rather than leaving it to be inferred from colour blocks.
Record existing and proposed levels, threshold relationships and the intended direction of surface water on the landscape plan. A visually simple arrangement can still be undermined if drainage, raised edges or retaining details are decided after the paving geometry. Do not assume a pergola or adjacent wall resolves these matters: site drainage and construction interfaces need checking by the appropriate landscape or building professional. When considering a wall-mounted option such as the Bloomcabin lean-to model, include its position in the coordinated plan and have the fixing and water details assessed for the actual wall and site. Mark drain covers and access points so they remain reachable. A clean junction comes from resolving practical details, not omitting them.
Furniture and lighting in the plan
Furniture is part of the composition because its footprint affects whether the pergola feels proportionate. Draw the table, chairs and loungers at realistic sizes, including space for chairs to pull back and a clear route around the occupied area. A carefully aligned structure can still feel cramped if furniture fills every bay or sends people through the middle of a seating group. Use one main arrangement as the reference, then keep secondary pieces limited and visually quiet. Check the layout from the house and garden path, not only from above: chair backs, legs and table edges create additional lines that influence the view.
Plan lighting as a small number of deliberate points rather than an afterthought added wherever a cable can reach. Decide what needs to be visible for ordinary use, where fittings would be seen from indoors and whether a light would draw attention away from the main garden view. On a plan showing the Bloomcabin pergola option, distinguish lights intended for the table from those marking the route or highlighting planting. That makes it easier to identify overlapping effects and unnecessary fittings before buying them. Include the visible position of each fitting in an elevation, especially where it sits near a post or beam. Leave electrical selection and installation to a suitably qualified professional, and confirm any proposed attachment to the structure against the selected model’s documentation.

Design checks 5
Testing the composition from key viewpoints
Use the dimensioned plan to prepare simple views from the positions where the garden will actually be seen. A view from the main room should include the window frame and the house threshold, not just an isolated image of the pergola. This shows whether posts overlap important sightlines and how much of the planted boundary remains visible. A view from a seated position reveals a different composition: the table, nearby foliage and lower parts of the frame become more prominent. Draw plants at their expected mature height and spread, and show any steps or raised edges. Even a plain line drawing can expose competing horizontal lines or a boundary that appears disconnected from the terrace.
Review the scheme from at least three positions: the main room looking out, the usual approach from the house and the far end looking back. Temporary upright markers, placed safely, can help indicate post locations; ground marks alone do not show how vertical elements interrupt a view. Look for accidental overlaps, such as a post appearing directly in front of a doorway or a short bed edge seeming to continue an unrelated paving joint. Then ask whether each visible object supports the seating area, route or planted boundary. Remove decorative additions that compete with those elements without serving a useful purpose. Record any proposed changes on the same drawing, so improving one view does not quietly create a cramped approach elsewhere.
Selecting a pergola after the layout is settled
Compare pergola forms only once the broader composition is clear. A wall-mounted arrangement can continue the architecture of the house, while a freestanding frame creates a defined element within the garden; neither is automatically more minimalist. The right relationship depends on the building, the route, the views and where the supports can be incorporated in the plan. Compare the outline of each option at the same drawing scale, and note how its sides meet the terrace, planting and open space. Do not decide from a photograph alone: its angle and setting can make a frame appear lighter or more compact than it will feel on site.
Before committing, obtain the exact dimensions for the selected model and configuration and compare them with the finished layout, including posts and clearances. If the bioclimatic pergola model is on your shortlist, request the information needed to place that specific configuration accurately in the design; the catalogue name alone does not establish its fit or suitability. Keep the landscape drawing, planting schedule and product details together through the final review. Ask the relevant professional to confirm site-specific structural, wall or drainage interfaces, and record any resulting changes before ordering paving or plants. If the chosen size leaves a narrow path or an impractical bed, revisit the position or model rather than reducing plant spacing or assuming the furniture will fit.
Frequently asked questions
Does a minimalist garden need to be mostly paving?
No. A restrained scheme can include plenty of planting, lawn or open ground. Its clarity comes from a deliberate layout and repeated forms, not from removing greenery. Plan plants at their mature size so they contribute to the composition without crowding paths or seating.
Should the pergola be centred on the house?
Not necessarily. Relate it to a useful doorway, route, view or garden boundary. An offset position may connect those elements more clearly than a central one. The drawing should explain the alignment rather than impose symmetry for its own sake.
Can an existing patio form part of the design?
Yes, but do not assume it can support a pergola or suit a proposed fixing. Have the ground, levels, drainage and installation requirements assessed for the selected system before positioning supports or finalising the paving layout.
How many plant types should I use?
There is no fixed number. A small, repeated selection can make the layout easier to read, but suitability depends on the site and the maintenance you want to manage. Record each plant’s mature size and documented growing requirements before setting bed widths.
Is a wall-mounted or freestanding pergola better for a minimalist garden?
Neither is automatically better. A wall-mounted option makes the relationship with the house important; a freestanding one needs to sit comfortably within the garden plan. Compare both against the routes, views and site conditions, then check the chosen model’s dimensions and installation requirements.
A coherent minimalist garden is not defined by a bare surface or a fashionable frame. It comes from a readable order: the house opens onto a clear route, the pergola marks one purposeful place to sit, planting gives the boundary depth and each change of material has a reason. Dimensioned drawings, mature planting extents and deliberate junctions help preserve that order as the design moves from idea to installation. When these relationships work together, the pergola belongs to the garden rather than sitting on top of it.
