
Planning Pergola Drainage Without Sending Water to a Neighbour
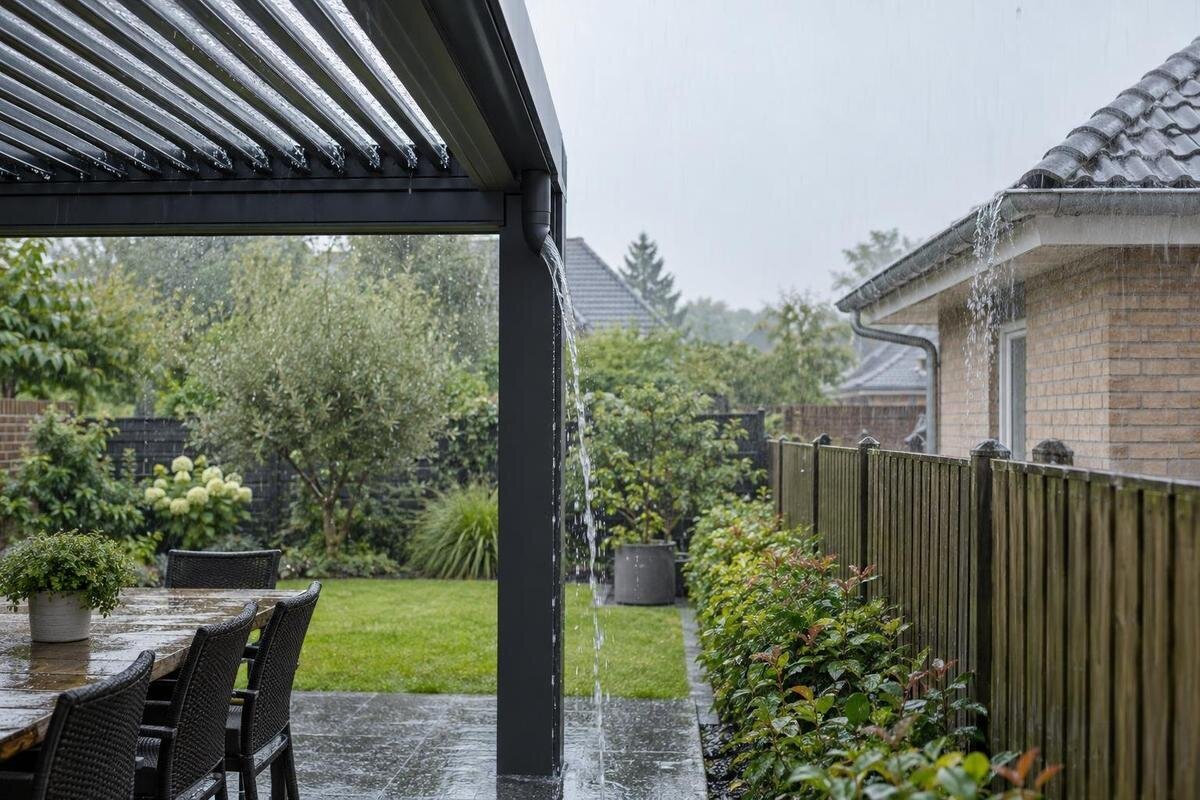
Pergola drainage planning
Pergola drainage planning has to follow water beyond the frame. An outlet can clear the structure yet still send concentrated flow across paving, into a low corner or towards a neighbour’s garden. Before settling the pergola position or connecting an outlet, map existing runoff, check the ground’s fall and identify a destination with a planned overflow route. Then compare that site plan with drainage information for the exact pergola model and check any local requirements that apply to the project. The key is to assess both the pergola’s discharge and water already moving across the site.

Map the garden’s existing water paths
Start with a site sketch, not a preferred outlet location. Mark the proposed pergola footprint, boundaries, house and outbuilding downpipes, doors, paved areas, planted beds, drains and places where water already sits. Note whether the garden falls towards the house, a boundary or a lower part of the plot. A patio, path or compacted strip can guide water differently from adjacent soil, so draw the surfaces as they are rather than treating the whole garden as one level. Include slopes, steps, retaining edges and raised beds; each can interrupt or redirect surface flow. This first pass is about where water is likely to travel, not calculating how much the pergola will discharge.
If possible, observe the garden during and after rain on more than one occasion; a dry-weather glance can hide a shallow channel or a low point. Record where water arrives from uphill or from other roofs, where it slows, and where it leaves or remains. Photographs and direction arrows on the plan can help you explain the site to an installer. Note uncertain areas too, such as a covered drain or a boundary hidden by a hedge. A single brief shower cannot prove that a route will cope in every condition, but repeated observations can show where further assessment is needed. If water already crosses the boundary, understand that pattern before adding a concentrated outlet.
Confirm the pergola’s outlet arrangement
The outlet cannot be planned accurately from a product photograph or from the word ‘pergola’. Designs may collect rain in different ways, and a louvred, covered or other roof configuration can have different operating and drainage details. Use documentation for the exact product and configuration: look for a drainage diagram, intended outlet positions, the direction water is carried within the structure and any stated limits on performance. If the drawing does not show where water leaves the frame, ask before deciding which side should face a drain. Check whether the roof’s operating position affects the route. Do not assume that an outlet can be moved, extended or connected to any pipe; establish the permitted arrangement for that model.
Keep the model name, size and configuration together when requesting clarification. If the Bloomcabin Bioclimatic Aluminum Pergola is on your shortlist, ask for the drainage information that applies to the version being considered; a diagram for a different pergola is not a safe substitute. Confirm whether the documents identify the actual discharge point and whether any connection or accessory is included or separately specified. A product page can identify the item, but it cannot show the levels, boundaries or receiving surfaces at your home. Those need a separate site plan and, where unclear, an installer’s or drainage professional’s assessment.
Check ground levels between the outlet and boundary
Once you know where water leaves the structure, check the ground between that point and the boundary. Surface water follows the available fall, but the route may be subtle: paving may slope one way while a lawn or side passage falls another. Sketch high and low points, steps, kerbs, retaining edges and thresholds. A raised bed or fence base can hold water temporarily, then send it around an end or through a gap. If the fall is difficult to read, or the outlet is close to a neighbouring garden, ask an installer or drainage professional to establish the levels rather than guessing from eye height. Include the route past, not just the point directly below, the outlet.
If you are considering the Bloomcabin Lean-To Pergola, mark its proposed position on the plan and compare the documented discharge point with the surrounding levels. Check the whole route towards the receiving area, including any narrow passage between the house and boundary. A pipe ending within your garden can still release water onto paving that slopes towards adjoining land. If a wall or edging separates the gardens, check where water would go when it met that obstruction, including gaps and either end. Record nearby doorways and lower ground too. The important relationship is between the outlet, the finished ground levels and the receiving area, rather than the distance from the outlet to the fence alone.
Separate pergola discharge from wider site runoff
Separate the pergola’s collected water from runoff that already travels across the garden. Rain falling on a patio, a shed roof, a sloping path or a larger area of hard surfacing may arrive at the same low point, but it is not automatically part of the pergola’s drainage route. Mark each source and existing downpipe on the plan. This helps avoid choosing a route on the mistaken assumption that one outlet serves the whole plot, or using a nearby channel without knowing what else feeds it. It also shows whether the pergola would add concentrated flow to a surface that already carries water. Note any water arriving from higher ground so it can be considered separately.
Before using an existing drain, gully, channel or downpipe, establish what it connects to and whether it is suitable for additional water. A visible grate does not prove that it leads to a system with spare capacity or that a connection is acceptable. When planning a site for the Bloomcabin Pergola, label existing drainage separately from proposed connections, so the installer can see what needs investigating. Record any known blockages, standing water or other roof outlets feeding the same system. Ask a qualified drainage professional to assess the proposed connection and identify any further enquiries needed. Do not assume that a public route or adjoining plot can receive the water.

Choose a suitable destination for the water
Possible destinations include a rainwater tank, a purpose-designed infiltration feature or an existing surface-water system, but none is suitable just because it is close to the outlet. A planted bed or permeable area may also be an option if the levels and ground conditions allow. The choice depends on the site, the quantity the arrangement must manage, the route into the destination and what happens when it is full or unavailable. A water butt needs a planned overflow route; it cannot be treated as the whole drainage plan unless its capacity and overflow arrangements have been checked for the project. For the initial plan, keep the destination on your own plot; have any other proposed route checked before relying on it.
Check ground conditions, available space, nearby buildings, trees, boundary levels and existing drainage before settling on infiltration or storage. Soil that seems to absorb a little water does not establish whether a designed system will work as intended; do not judge capacity from a quick pour. Ask a competent drainage professional to assess the relevant site information and local constraints. When considering the Bloomcabin bioclimatic pergola, include the documented outlet position in that assessment. Compare destinations by how water reaches them, where excess water would go and whether they remain accessible for inspection. A bed beside the outlet may look convenient, for example, but its edging or surrounding paving could send excess water straight towards the boundary.
Coordinate drainage with paving and planting
Plan the outlet around the finished garden, not just the ground as it is today. Paving, decking, steps and door thresholds can redirect surface water, while a new channel or raised edge can create a low point. Show the paving contractor where the pergola outlet will finish and how the adjoining surface is intended to fall. Avoid directing a concentrated stream onto a main walking line, against a threshold or across a route that leads to the boundary. If the destination is a planted bed or permeable area, confirm that it can receive the flow and that edging will not send overflow elsewhere. Coordinate these details before surface levels are set.
Think about how the area will be used and altered. Leave access to inspect the outlet and any visible channel; do not bury a junction beneath paving or a fixed planter without a documented way to reach it. Consider whether furniture, pots or seasonal planting could obstruct a surface route, and keep access covers clear of permanent garden features. If you choose the Bloomcabin lean-to model, include its documented discharge point in the paving layout before agreeing the finishes. The installer and landscaper should work from the same drawing, showing where their respective work meets. This helps prevent a pipe terminating behind new edging or a drainage access point being covered by a step.
Drainage near boundaries and shared drains
Treat the boundary as a line to keep clear of uncontrolled discharge, not as a convenient place to end a pipe. An outlet should not be aimed at a fence, passed through a gap or allowed to shed water onto adjoining ground as the default route. Water can follow the ground around barriers, so a fence or low wall is not a reliable substitute for a suitable receiving point. Where a shared channel or drain sits near the boundary, identify how it is used and who looks after it before proposing a connection. If capacity or responsibility is unclear, pause and obtain local, project-specific advice rather than relying on assumption.
Discuss a route near neighbouring land while the layout is still flexible, especially if the garden falls towards the boundary or the proposed discharge point is close to it. A short plan showing the footprint, outlets, paving levels, destination and overflow is more useful than a verbal description such as ‘it runs into the garden’. If you are comparing positions for the regular Bloomcabin pergola, show each proposed layout on the same boundary sketch. This makes differences in the downstream route easier to explain. Record any shared access or maintenance arrangements that need clarification. Confirm a proposed shared connection or crossing with the people responsible and relevant local professionals; informal neighbourly agreement does not establish drainage capacity or resolve every project requirement.
Use drainage information for the exact pergola configuration
Review the drainage plan again if the pergola configuration changes. Adding side panels or an enclosure may introduce thresholds, tracks or other details that affect surface water around the sheltered area. Ask for drawings of the proposed arrangement and check how those details meet the paving, outlet route and access points. Do not assume that enclosing the sides makes the space watertight or prevents roof runoff reaching the surrounding ground. Keep weather-performance information separate from the site drainage assessment: any stated limits or controlled observations apply to the documented model and conditions. They cannot establish how a different configuration or your garden’s receiving area will behave in every storm.
For the Bloomcabin wall-mounted model, request information matching the proposed configuration rather than transferring details from another pergola. Establish whether any selected enclosure components change access to outlets, channels or connections, and identify where surface water could collect beside them. If the relevant drawings do not answer those questions, resolve them with the supplier and installer before ordering the configuration. Keep the agreed drawings together and record subsequent changes, including alterations to paving or panel positions. This avoids one contractor working from the original open-sided layout while another installs an enclosed version. The final review should cover both the product arrangement and its junctions with the finished garden.

Plan for overflow as well as normal flow
Design the route for normal flow and for overflow. A receptacle may become full, an outlet may be obstructed or rainfall may exceed the conditions covered by product information. Do not rely on a single point that, if unavailable, would send water over a boundary or towards a doorway. The secondary path needs to lead to a suitable area on the site and be considered alongside surface levels, not improvised after paving is complete. Ask a drainage professional to assess capacity and overflow for the actual design; a product name or image cannot establish a universal storm threshold.
On the plan, draw both the intended route and the route water could take if it cannot pass through the normal outlet or storage point. Note where water might pond, cross a path or escape near a fence, and decide whether that is acceptable before construction. Ask the installer to explain what should remain accessible and how the overflow is intended to behave. A walkthrough can expose a missing link: trace the path from the product outlet to its final destination without skipping the downpipe, channel, connection or overflow. Do not test the arrangement by discharging water towards a neighbour; any commissioning checks should follow installation instructions and the responsible contractor’s advice.
Check local requirements before installation
Before work begins, check the project’s local requirements with the relevant local authority and a qualified drainage or building professional. The checks may depend on where water is sent, whether it connects to existing drainage, ground conditions and the structure’s configuration. Do not assume that a route suitable on one site is suitable on another, or that a nearby drain can receive additional water. If a proposal involves a shared feature, a watercourse, an infiltration system or a connection beyond the property, ask which approvals, permissions or technical checks apply in your locality. This is a project-specific question, not a general product specification.
Keep a final drawing with the pergola footprint, model and configuration, outlet positions, surface levels, boundaries, destination, connections and overflow. Have the installer identify which details come from the manufacturer’s documents and which have been designed for the site. If you select the Bloomcabin Bioclimatic Aluminum Pergola, record the exact version and agreed options with the drawing, rather than keeping only a generic product image. At handover, ask for the locations of concealed connections and accessible inspection points to be recorded. Note who will maintain any shared channel or storage system, and keep that information available for future paving work. Resolve outstanding questions before outlets are concealed or surrounding surfaces are finished.
Frequently asked questions
Does a pergola drainage diagram show where water will go in my garden?
It can help establish how the selected model collects and releases water, but it cannot show your garden’s slopes, boundary levels or the suitability of a receiving area. Use the model-specific information alongside a site plan, and ask a drainage professional to assess uncertain levels or a proposed connection.
Can I let the outlet discharge onto the lawn?
Only if the ground and outlet arrangement make the lawn a suitable destination and the water will not pool or travel towards a neighbour’s property. The fact that soil absorbs a small amount of water is not proof of capacity. Check the route and plan where overflow would go.
Can I connect the outlet to the nearest gully?
Not without checking what the gully serves, whether it can accept extra water and whether the proposed connection is suitable. A visible grate does not confirm capacity. Ask a qualified drainage professional or the relevant local authority before relying on an existing drain.
What should happen if a tank or channel overflows?
The overflow needs a planned route to a suitable area, taking account of ground levels and boundaries. Do not leave it to run towards a neighbour, doorway or other low point. Ask a drainage professional to check the capacity and fallback route for the actual design.
When should I check local requirements?
Check them while the pergola position and outlet route are still being planned, before connections or paving are finalised. This is especially important for a shared drain, infiltration feature or route near a boundary. The relevant local authority or a qualified professional can advise which project-specific checks apply.
A sound pergola drainage plan follows water from the model-specific outlet, through the proposed pipework or surface route, to a suitable destination. It also accounts for what happens when that route cannot accept more water. A site sketch showing existing runoff, finished levels and the boundary makes it easier to spot a design that could send water next door. Settle the receiving arrangement and any project-specific requirements before installation, while outlet positions and landscaping details can still be coordinated.
