
Planning Pergola Footings Beneath Porcelain Paving
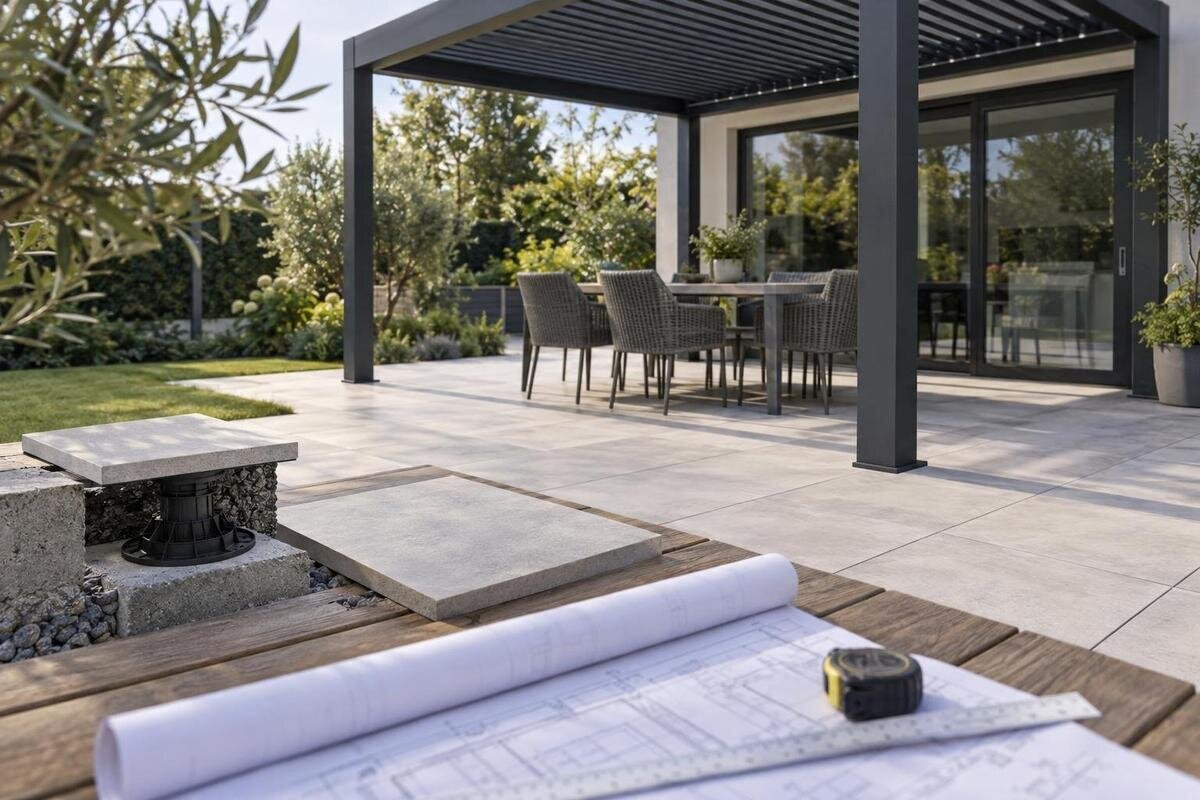
Pergola foundations and paving
Porcelain paving gives a patio a finished surface, but the tile and its bedding should not be treated as a fixing base for a pergola. A reliable plan coordinates two separate layouts: the structural route that transfers the pergola’s loads to suitable ground, and the paving arrangement that determines joints, cuts, drainage and final levels. Whether the tiles are still to be laid or are already in place, the post positions and footing details need to be resolved before the finish is committed. This guide covers that interface, not a one-size-fits-all footing design.

Information to gather before work 1
Structural support beneath porcelain paving
Porcelain paving is the visible surface, not a layer that should be assumed to resist a pergola’s concentrated loads or anchoring forces. Beneath a tile there may be bedding, a supporting base, a slab, pedestals or several layers; their presence and condition cannot be judged from the finish alone. A post or fixing that bears on a tile can crack it or loosen the surrounding paving, even when the surface feels firm underfoot. Plan a continuous load path from the pergola, through its approved fixing arrangement, into suitable supporting ground or structure. The footing, anchor and post base work as one designed connection; the tile is not the missing link.
Agree which exact pergola configuration is being considered, then request its model-specific anchoring drawing and a site assessment. The drawing should establish support centres, the fixing footprint and the required interface; the assessment must establish whether the actual substrate can accept that arrangement. If you are considering Bloomcabin Pergola, use its model identity in that discussion rather than scaling a base from a photograph or borrowing a generic post plan. Ask the designer to state what evidence the footing design relies on. Neither tile size nor grout grid is a reliable substitute for approved support dimensions.
Identify the paving build-up
Establish how the patio is built before anyone marks out a footing. Porcelain may be bonded over a bedding layer and rigid base, laid on pedestals above a supporting deck or slab, or installed over a prepared base with a different drainage route. These arrangements do not offer the same access to the ground or the same way to investigate what lies below. A neat, level surface cannot show whether a structural layer continues beneath every proposed support, where its edge sits, or whether a membrane or drainage layer needs protection. The footing detail must suit the construction actually present, not a presumed standard patio section.
Ask for a section or written description that names each layer, notes its depth where known and identifies the material actually supporting it. For an existing patio, look for installation records and have the relevant trade assess the build-up instead of treating a tile as proof of concrete beneath it. Note the positions of edges and channels, and any membrane that could be affected by the planned work. When you compare Bloomcabin Bioclimatic Aluminum Pergola, state that porcelain paving is involved and whether its substrate is known. The model name alone establishes no footing detail or ground suitability; keep unverified points visible as questions.
Information to gather before work 2
Set post positions from the chosen pergola layout
Use the approved layout for the exact model to set the support centres; do not derive them from a picture or assumed standard spacing. Transfer the centre lines to a site plan and relate them to fixed references, such as a building face or boundary, then check them on site. Note the post footprint as well as its centre: a base plate, trim or required clearance can extend beyond the visible post. Check access past doors, steps, gates and circulation routes without moving a structural support informally. If a measured position conflicts with a site feature, obtain an approved revised layout before the paving is set.
A lean-to and a freestanding layout should not be treated as interchangeable. If the chosen unit is Bloomcabin Lean-To Pergola, give the exact model and arrangement to the person preparing the anchoring detail; do not transfer post positions from another pergola or assume that a wall-side connection fixes the position of every other support. The drawing should identify each support that affects the paved area. Record the orientation as well as the measurements, so the plan cannot be mistaken for a mirrored layout. Make this drawing the reference for tile design, not the grout lines or the easiest places to drill.
Coordinate tile joints and cuts with the posts
Once support positions are fixed, set out the tile grid around them on a scaled plan or full-size dry layout. Mark existing or proposed grout joints, tile edges, post outlines and base-plate footprints. This reveals where a support lands at a joint, close to a tile edge or within a complicated cut. A small remnant or narrow strip may be awkward to bed, cut and replace cleanly; consider adjusting the paving pattern while keeping the approved supports in place. Include thresholds and the patio perimeter in the layout. Avoid shifting a post simply to make the cuts symmetrical: the structural set-out takes priority, and the paving design should respond to it.
Show the whole interface, not just a circle around the post. The opening must allow for the actual post or fixing plate and whatever clearance the approved detail requires; its dimensions cannot be guessed from a tile module. Agree with the paving contractor how exposed tile edges will be finished and how the surrounding surface will accommodate movement and drainage. Do not use grout or a tight tile cut as a substitute for anchoring. For the Bloomcabin Pergola model, identify the exact configuration on the drawing, then set the cuts from its approved layout and site measurements. A product image is not a cutting template.

Information to gather before work 3
Agree finished levels before setting footings
Take levels from one fixed datum and distinguish the finished patio surface from the rough footing excavation. The finished level is the top of the porcelain after its bedding, pedestal or other specified support layer is in place; include any intended fall across the patio. Record that level beside each planned support and show how the approved footing and anchoring detail relates to it. A support set out against the bare base can end up too low, proud of the tile or out of alignment once the surface build-up is complete. The relationship between footing and paving must come from the project detail; no universal projection or recess suits every system.
Compare the proposed levels with thresholds, steps and drainage channels, and confirm that later paving adjustments will not create an unintended lip or interfere with the support detail. If the project references the bioclimatic model, put the model name, post plan and proposed finished paving level on the same drawing revision so each trade works from the same reference. Confirm changes to tile thickness, bedding or pedestal height before setting support heights. Do not correct a mismatch by forcing a post, packing an anchor or changing a footing on site without the responsible designer’s approval.
Keep drainage routes clear around supports
Map how water is meant to pass through or off the paving area. Depending on its construction, a porcelain patio may rely on surface falls, channels, joints or a drainage layer. Show the intended route and outlet, including any point where water could collect at a base or cut-out. A projecting footing, raised tile edge or poorly planned surround can interrupt a route or create a place where water and debris gather. Check the support and drainage details together, so one does not undermine the other. Do not assume that a grout joint or a particular sealant will provide drainage; the correct interface depends on the paving build-up.
For an existing patio, note the position of gullies, channels and thresholds, and look for areas where water tends to collect after rain. Include both the wall-side and paving-side interfaces when assessing a lean-to pergola option; the model name alone does not establish how water moves across a particular patio. Keep drainage outlets, inspection points and relevant joints accessible. If a proposed cut is close to a channel, drain or patio edge, ask the paving installer and responsible designer to resolve the conflict together before the support layout and tile cuts are finalised.
Information to gather before work 4
Choose the work sequence before paving begins
For a new patio, coordinate the structural set-out before final paving work begins. The person designing or installing the footings needs the confirmed pergola arrangement and site information; the paving contractor needs the agreed footing locations, finished levels and interface details. Give both the same dimensioned plan before excavation or tile setting. Establish how support positions will be checked and what information the paving crew will receive after the footing work is complete. If locations or levels change during construction, update the drawing rather than relying on a verbal handover. The exact construction order and any waiting periods should follow the project specification.
If porcelain is already down, decide whether tiles will be lifted, selectively cut or accessed another way only after the footing method and substrate have been assessed. Cutting a tile in place can affect neighbouring edges or a layer beneath; lifting may reveal a different build-up from what was expected. Identify any spare matching tiles, the area to reinstate and who will restore the joints, bedding and drainage. If you are assessing the regular pergola model, check its exact support layout before choosing a retrofit route. Ask the paving contractor whether tiles can be recovered intact and whether suitable replacements are available before agreeing the extent of the work.
Check services, edges and site access
Before excavation, plot anything hidden or fixed around the patio: utility routes, drains, inspection chambers, lighting or irrigation cables, existing foundations, slab edges and changes in level. Use available records as starting information, not proof of exact locations, and arrange an appropriate site check where a proposed footing could conflict with something below. A footing close to a boundary or patio edge may need specific design attention; do not move or reduce it to clear an obstruction without review. Put known restrictions directly on the site plan so they are considered alongside the support layout, rather than discovered after the tile cuts have been planned.
Access is part of the plan too. Consider how the work area can be reached for investigation, excavation, spoil removal, footing installation and tile reinstatement, and whether a narrow route or finished threshold needs protection. State whether paving is proposed or existing and provide a measured plan showing tile size, joints, levels, drains and known layers. When enquiring about Bloomcabin’s bioclimatic model, include those site facts rather than only a patio photograph. A site assessment can then focus on the real interface and identify which unknowns still need investigation.

Information to gather before work 5
Use structural drawings and site evidence
Footing dimensions cannot be selected from porcelain thickness, tile size or a general rule for pergolas. The solution depends on the exact pergola and anchoring arrangement, the substrate and ground conditions, and a site-specific structural assessment. Request the applicable approved anchoring drawing, evidence about the supporting substrate and an assessment of the actual site from a suitably qualified professional. The person responsible for the design should confirm how loads reach suitable support and how the fixing relates to the planned paving. If evidence about an existing base is missing, record that as an open question rather than filling the gap with a guessed footing size.
Agree responsibilities before work begins: who confirms support positions and footing design, who checks the substrate, who supplies and installs the anchors, who sets levels, and who cuts and reinstates the porcelain. The pergola installer, structural designer and paving contractor may each hold different parts of the information, so share one current plan with all of them. Agree which details need inspection before the paving conceals them and who will record that inspection. This keeps interface questions with the person qualified to answer them and provides a clear handover between the footing work and the paving work.
Verify and record the set-out before covering it
Before the work is concealed, compare the marked-out centres and footing positions with the approved plan, check the orientation, and confirm that the intended tile cuts, finished levels and drainage routes still fit. A joint review between the structural installer and paving contractor can catch a shifted support, unexpected base edge or level change while there is still an opportunity to resolve it. If the site differs from the drawing, pause the affected work and obtain a revised detail from the responsible designer. Do not resolve a discrepancy by moving the post to the nearest convenient grout line.
Keep an as-built record of the final support locations measured from fixed references, the agreed surface level and tile layout, photographs taken before footings or interfaces are covered, and the drawing versions used. This helps with future tile repairs and shows where the structural support sits beneath the finished surface. At handover, confirm that the cuts are stable, the agreed clearances and drainage details are present, and the area matches the plan. A tidy cut is a finish check, not evidence that the underlying footing or anchoring design is correct.
Frequently asked questions
Can I fix a pergola post directly through a porcelain tile?
Not by relying on the tile or its bedding as the anchor. The post and fixing must connect to a substrate or footing shown as suitable in the approved design. Plan the tile opening and its edges around that connection, including any required clearance. Drilling through a finished surface alone does not establish a safe load path.
Do the footings need to be installed before the paving?
For a new patio, agree footing positions and levels before the tile layout is finalised; that makes it easier to coordinate the structure and cuts. The construction order depends on the designed footing method and site. With existing paving, assess the build-up and agree whether tiles will be lifted or cut before work begins.
Is there a standard footing size for a pergola beneath porcelain paving?
No single size or depth suits every pergola and site. The design depends on the exact model and fixing arrangement, the supporting ground or structure, and the site assessment. Tile dimensions and the appearance of the patio are not a basis for choosing footing dimensions.
How much space should I leave around each post?
There is no universal cut-out size. Use the approved fixing detail to establish the post or base-plate footprint and any required clearance, then coordinate the edge finish with the paving system. Grout or a tight tile cut should not be used as a substitute for the designed fixing.
What should I include when requesting a site assessment?
Name the exact pergola model and say whether the porcelain paving is planned or already installed. Include a measured plan showing the tile size and joints, proposed support positions, finished levels, drainage points and known services. Add any available information about the paving build-up, and ask which remaining details need to be checked on site.
Planning footings beneath porcelain is a coordination job: confirm the pergola arrangement and patio build-up, establish a shared datum, then draw the supports beside the tile grid before work is committed. Let the structural design govern footing positions, and let the paving plan produce a clean finish around them without transferring loads into the tiles. If site conditions or levels differ from the agreed drawing, resolve the detail before covering the work.
