
Planning a Pergola for Outdoor Film Nights
Garden planning
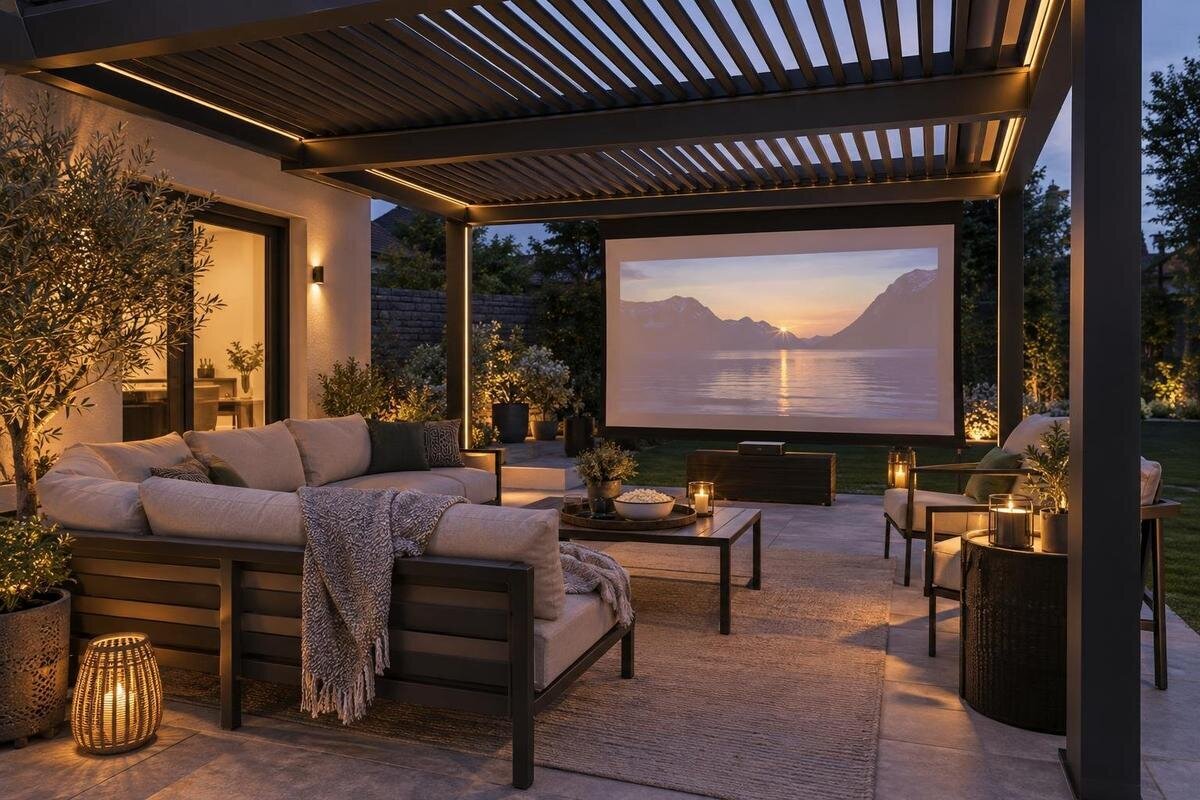
An outdoor film night works best when the screen, seats, projector and light sources are planned as one arrangement. A pergola can define the viewing area, but its footprint alone does not guarantee a clear picture, a dry setup or a quiet evening. Mark the screen and intended seating on the actual patio or lawn, then assess the view after dark, equipment instructions, walking routes and what neighbours may hear. This gives you a practical plan to compare with a pergola configuration before you commit.

01
Screen position and seated sightlines
Decide where the audience will look before arranging chairs. Mark the intended screen area with removable tape, a sheet or a temporary screen, then place seats where people would actually sit. Work with the usual group size first; trying to squeeze in every occasional guest can push regular seats into awkward angles. Check the view from the two outer seats as well as the middle. A post, tall planter, tree branch or open door may interrupt the picture even when the centre line looks clear. If viewers sit at noticeably different heights, check those positions separately. Keep the screen centred on the main group if the garden allows, but leave room to adjust either end of the row.
Test sightlines at sitting height, not while standing with a tape measure. Ask someone to sit in the furthest seat while another person follows the normal route to the house; neither should have to cross the image or squeeze between chairs. Note where people will stand to let others pass and whether a table would cut across the view. Mark the complete screen width, including its feet or frame, so it does not end up across a doorway or path. If the screen needs to be moved for daytime use, include that change in the plan. A quick ground layout is a concept for comparing positions, not a construction drawing; final placement still needs to suit the actual screen and site.
Check evening light at the proposed screen position
Outdoor brightness depends on more than whether the garden feels dark. A pale sky, low sun, security light, neighbouring windows or reflections from pale paving can wash out the picture. Look at the proposed screen position at the time films would begin and again later in the evening; contrast can change as daylight fades. Repeat the observation in the season when you expect to use the pergola most, since trees and the sunset point may differ. There is no reliable compass direction for every garden: buildings, fences and planting alter the light. The useful test is whether a strong source falls on or near the screen, and whether the image remains clear from the seats.
When comparing Bloomcabin Lean-To Pergola, plot the proposed wall-mounted arrangement alongside the screen on your site plan. Map fixed lights and glazed doors, then try a temporary display where the image would sit. Check whether light from inside the house reaches that position when someone opens the door, and whether reflections change when curtains are open or closed. If the spot remains bright, moving the screen may help more than adding decorative lights around the seats. Keep the entrance and windows accessible while comparing positions, rather than solving glare by blocking a daily route. Ask about any proposed light-control accessories separately, including their compatibility with the configuration you are considering.
02
Match screen size, viewing distance and projector placement
Choose screen size and seating distance as a pair. A screen that looks generous on a product page can feel intrusive at the front, while a smaller image may be hard to follow from the back. Mark the actual screen width and height, then put chairs at the planned distances and view an image from the side seats. If you use a projector, follow its maker’s guidance for throw distance, image size, focus and alignment; do not assume every projector can fill the same screen from the same position. A television has different placement needs, so decide which display you intend to use before fixing the pergola layout. Check captions from the furthest seat if they matter to your group.
Leave room for the screen’s stand, frame or feet, not just the visible picture. The projector also needs a clear line to the screen and a stable location that does not become a head-height obstacle or a table people must move during the film. Measure with the equipment you own or with dimensions in its manual; a generic diagram cannot confirm compatibility. Compare the marked seating arrangement with Bloomcabin Pergola, but check the details for the configuration you are considering rather than assuming a pergola’s area predicts a particular screen distance or row count. This helps prevent roof coverage being mistaken for usable viewing space.
Give the projector and its controls a practical position
Put the projector where its image reaches the screen without forcing the beam across faces or the main entrance. Its exact position depends on the device, so note the maker’s guidance for throw, alignment and ventilation before deciding whether a table or other support is practical. Keep controls within reach for focusing or pausing, but away from a walkway where a guest could knock the unit. Avoid treating a pergola beam as a ready-made mounting point: a support that looks convenient is not proof that a fixture is approved for it. A stable temporary base is easier to move while you refine the layout.
Plan the source device, remotes and sound controls alongside the projector; searching for a cable or moving a chair midway through the film interrupts the viewing. Check that the source device can play your chosen film in the intended position, including any connection it needs. Keep power and signal cables out of seating and walking routes, and check each device’s permitted operating conditions. If the setup depends on permanent outdoor power, consult a qualified electrician rather than improvising it. When considering Bloomcabin Bioclimatic Aluminum Pergola, include the equipment positions in your enquiry so that any proposed mounting or electrical provision can be assessed separately from the seating footprint.

03
Screen glare and lighting for access
Separate the light needed to watch from the light needed to move around. Test the picture with decorative lights, porch lights and nearby room lights switched off one at a time; a bright doorway behind the audience can distract even when the screen itself is clear. Keep light sources outside the image area, and avoid aiming a lamp at a glossy screen surface. If an existing security light switches on unpredictably, note its coverage and consider whether the screen can be repositioned; do not obscure a light needed for another purpose. The aim is a readable picture without making the rest of the garden unusably dark.
Mark the route from the house to the seats and provide enough light to find it without shining into viewers’ eyes or onto the screen. Carefully directed path lighting can be less intrusive than a bright fitting at eye level; check that it reveals obstacles without creating glare for seated viewers. Map these lights against the proposed footprint when comparing the Lean-To Pergola layout. Include steps, changes in paving level and the point where guests enter the seating area. Try the arrangement from the first row and from the path before settling on positions. A late arrival should be able to reach a seat without walking through the projected image or needing a bright phone torch.
Choose sound levels with nearby homes in mind
Sound that is clear in the middle of the audience may be too loud at the edge, so choose speaker positions with viewers in mind. A speaker near the seats may be easier to hear at modest volume than one left beside the screen at the far end of the garden; test the arrangement rather than relying on the equipment’s headline output. Dialogue is a useful check: if speech is difficult to follow, increasing the overall volume can make effects and bass intrusive. Keep speakers directed towards the group where practical, and do not assume a pergola roof will contain sound.
Walk to the nearest boundary or the place where sound is most likely to reach neighbouring homes, then listen during a representative scene. Ask someone else to stay with the audience so the check covers both listening positions. If the soundtrack carries, reduce the volume, move speakers closer to viewers or consider headphones, checking that the system supports everyone who needs them. On the site sketch used to compare the regular Bloomcabin Pergola model, mark the audience, speakers and nearest neighbouring outdoor spaces or windows. This makes their relative positions easier to assess. Choose a considerate finish time as well as a volume; a quiet dialogue scene alone is not a useful test of a whole film.
04
Check fixings and weather protection separately
Before attaching a screen, projector or speaker, have the pergola supplier or a qualified installer confirm that the proposed support and fixing are suitable, and check the equipment maker’s mounting requirements. A convenient-looking beam is not evidence of an approved fixing point. If you are considering the bioclimatic pergola model, include the equipment’s dimensions, weight and intended position in that enquiry. A freestanding screen avoids attachment to the pergola, but its base still needs to fit without obstructing people. Check its instructions for securing it and for limits on use in windy conditions. Leave room to take it down safely rather than positioning its feet tightly between furniture.
A pergola is not automatically a waterproof enclosure. Rain can reach open sides, and wind-driven weather or condensation may affect equipment beneath a roof covering. Establish which items are permitted outdoors and under what conditions; protection suitable for a screen may not be suitable for the projector, speakers or power equipment. Plan a dry indoor storage place and a clear route to it before bringing anything outside. Keep cases available, but do not cover an operating device in a way that conflicts with its ventilation requirements. If rain arrives, end the screening rather than trying to preserve the picture at the expense of safety. Equipment whose outdoor suitability is unclear should remain indoors until the manufacturer confirms otherwise.
Allow clear routes around seats and equipment
Draw the route people will use from the house or garden gate, then check it with the chairs in place. Allow for someone standing up, another person passing and a seat being pulled back; a plan with chairs pushed tightly together can be misleading. Keep the main way through clear of screen feet, side tables and equipment cases. If the pergola is near a frequently used door, confirm that the viewing arrangement does not interfere with its normal use. People who move less easily may need a wider, simpler route, so check the actual needs of your guests rather than relying on a standard clearance figure.
Measure the usable ground as well as the roofed area when comparing a configuration. Place screen and seating marks around the supports shown in the plan you are considering, and set aside somewhere for equipment bags and cushions when they are not in use. The route to indoor storage should not cut through the projector beam or force someone to weave between viewers. Compare the route and door swing with the wall-mounted Bloomcabin option, but confirm the exact model dimensions and support positions before treating a sketch as a fit. A layout that leaves access clear is easier to use for everyday garden traffic too.

05
Compare the measured layout with pergola configurations
Use a measured plan when comparing pergola sizes and configurations. Record the screen position, widest seating arrangement, projector location, doors, fixed lights and routes that must remain open; then mark the usable ground within each candidate footprint. The product information for Bloomcabin’s Pergola configuration states an area range of 97–258 ft², but that figure alone does not reveal the clear space between supports, the shape of each version or whether your furniture fits. Check the dimensions and drawings for the exact configuration. Do not compare a screen plan with a headline area without knowing where its edges and supports fall.
Think about how the pergola will be used when no film is showing. If the screen is portable, the space may remain available for other garden use; if it stays in place, confirm that it does not take over an entrance or block routine access. The preferred screen position may favour one side of a patio, while a door, fixed light or neighbouring boundary points to another. Check those conditions against the real site and the selected configuration rather than choosing from a photograph alone. For a wall-attached or other model option, confirm the proposed installation position and any requirements with the appropriate supplier or professional.
Rehearse the setup before the first film night
Run a rehearsal at roughly the time you expect to start the film. Set up the actual screen, projector and seats; view a test image from the back and edge positions, then wait as the sky darkens. Check whether lights come on, a neighbour’s window catches glare or moving foliage changes the view. Confirm that the projector’s specified position works without a guest or support post in the beam, and test the controls before people arrive. If the garden only becomes dark enough later in the evening, decide whether that start time works for your household and neighbours. Note any adjustment while everything is still easy to move.
Rehearse the whole sequence as well as the picture: bringing equipment outside, arranging the seats, managing sound, turning on route lighting and packing items away. Notice which tasks make people cross the screen or stand close to delicate equipment, then change the order or location. Check the forecast and the instructions for each item; postpone or move indoors if conditions fall outside its stated use. An indoor alternative is more dependable than leaving devices exposed to save a film night. Once the arrangement works, keep a simple plan or photograph so set-up is repeatable without obstructing the garden when it is not in use.
Frequently asked questions
Which direction should the screen face?
There is no direction that suits every garden. Check where the strongest light falls at your usual viewing time, then test the screen in a position where direct light and reflections are less likely to wash out the image.
Can I attach a screen or projector to the pergola?
Do not assume a beam or post is a suitable fixing point. Before attaching equipment, have the pergola supplier or a qualified installer confirm the suitability of the proposed support and fixing, and check the equipment maker’s mounting requirements. A freestanding screen is another option.
Will a pergola roof keep the projector dry?
Not necessarily. Weather can reach equipment from the sides, and a roof does not establish that a particular item is suitable for outdoor use. Follow each manufacturer’s instructions and store equipment indoors when appropriate.
How much space do I need for a garden film night?
Measure the screen and its stand, the projector position, the seats you will use and the routes people need to walk. Check the projector’s own placement guidance; a pergola’s stated area alone cannot confirm that the layout will fit.
How can I keep the sound considerate for neighbours?
Keep speakers close to the audience where practical, use a moderate volume and listen from the nearest boundary with someone else checking from the seats. If sound carries, reduce it, reposition the speakers or consider headphones for individual viewers.
A successful garden film night depends on more than finding space for a screen. A clear view, manageable light, considerate sound and an unobstructed route make the setup work for both viewers and neighbours. When those needs are mapped against the actual site, it becomes easier to judge which pergola configuration fits the viewing plan—and which equipment must remain independent of the structure.
