
Pergola Gutters Overflowing: A Step-by-Step Diagnosis
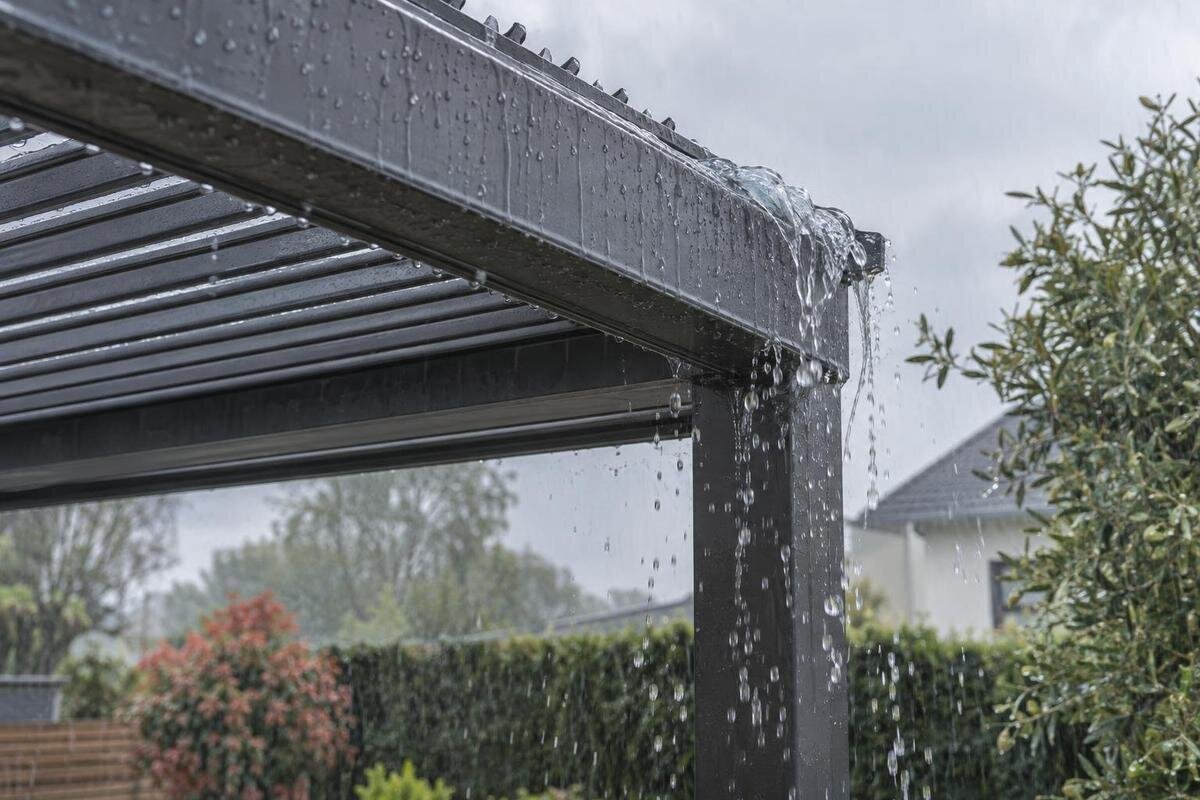
PERGOLA DRAINAGE
An overflowing pergola gutter is a symptom, not a diagnosis. Water may be held back by debris in the collection channel, restricted at the outlet or downpipe, diverted by an installation or configuration issue, or arrive faster than the particular system is designed to manage. The most useful clue is where the water first escapes and what happens immediately beforehand. This guide follows the rainwater route in order, helping you distinguish a local blockage from a downstream restriction or a weather event that needs to be checked against the model’s documents. It focuses on fault-finding, rather than a routine cleaning schedule.

1. Record where and when the water spills
Record the first point where water escapes, not just where it ends up on the patio. Distinguish water crossing the channel edge from water appearing at a joint or outlet; these indicate different places to investigate. Note whether it spills along a long stretch, appears at one joint, sits beside an outlet, or starts only after the channel looks full. Write down when it begins relative to rainfall, whether it stops soon after the shower eases, and whether wind is driving rain from one side. A ground-level photograph or short video can preserve the sequence. If you cannot see the route safely from below, leave close inspection to an installer.
Compare the pattern across separate events. The same spot overflowing in ordinary showers suggests a persistent local restriction, alignment or connection issue; overflow only during a particularly intense, wind-driven downpour may raise a capacity or exposure question, but neither pattern proves the cause. Note any roof position or enclosure setting specified by the manufacturer, and whether it was the same each time. Avoid comparing events from memory: duration, intensity and wind direction can change how water reaches the system. A short log helps distinguish a recurring fault from a one-off event and gives an installer something concrete to investigate.
2. Inspect the collection channel
Before investigating pipework, identify the collection channel using the term in the manual: it may be described as a gutter, trough or built-in drainage channel. From ground level, look for leaves, seed pods, moss, twigs or other debris across the route, particularly upstream of where water first spills. A partial obstruction can hold water back and make it overflow some distance from the actual blockage. If a section remains wet after the rain has passed, note its location and how long it stays that way. This is useful evidence, but does not by itself prove that the channel is incorrectly levelled.
Look for dents, displaced covers, separated joints or a visibly narrowed section without lifting or removing anything. Do not stand on furniture, lean over the frame, scrape a surface or push debris towards the outlet. A visible blockage at the spill point is not the only possibility; a clear-looking channel can still feed a restricted outlet or downpipe. Keep these observations separate so you do not label the whole system blocked before tracing the next component. If you are identifying a Bloomcabin Pergola, match the product to its own assembly and drainage information rather than borrowing a diagram from another model.
3. Map the intended drainage route
Find the drainage or assembly diagram for the exact model and installed configuration before testing anything. Trace the intended route from the roof collection area to the channel, outlet, downpipe and final discharge, marking each connection you can identify. Names and layouts are not universal: a pergola may use an integrated path that does not resemble a conventional external house gutter. A photograph or the appearance of a similar model cannot confirm which outlet serves which section. If the document does not make the route clear, ask the supplier or installer to identify it rather than guessing.
This map helps separate an upstream blockage from a restriction below the outlet. Material before an outlet can stop water reaching it; a restriction afterwards may allow water to back up into the collection channel. That distinction affects where an installer needs to look and prevents unnecessary work on a clear section. Check whether the affected area has a specified outlet and whether the diagram shows an internal connection you cannot see from outside. For Bloomcabin Bioclimatic Aluminum Pergola, use the exact model documents; do not apply a channel layout or operating assumption taken from a different roof type.
4. Check the outlet opening
Inspect the outlet mouth and the area immediately around it for a visible plug of leaves, grit, insect debris or a displaced part. Material can collect at this narrow point even when the channel above looks clear. Conversely, an unobstructed opening does not show that the pipe below is clear. Compare the shape and position with the manufacturer’s drawing; an outlet may be recessed, screened or integrated into the frame, and appearances alone can mislead. Take a photograph from a safe position and note whether the obstruction is visible at the mouth or seems to sit farther inside.
Do not push a rod, screwdriver, wire, pressure washer or forceful hose jet into an unknown outlet. It may damage a hidden connection or push debris deeper, while removing a fixed cover could alter the intended water route. If loose material is visible and safely reachable, use only the clearing method specified for that component; otherwise stop and ask an installer or drainage professional. The Bloomcabin Lean-To Pergola should be checked against documentation for its exact model and installed layout, not an outlet position assumed from its product name.

5. Follow the downpipe to its discharge point
If the route includes an exposed downpipe, follow it visually from its connection to the discharge point, where it is safe to do so. Look for a crushed or sharply bent section, a loose joint, an object or cap left in place, a visible blockage, or water escaping from a coupling. Record where the pipe ends: it may discharge at an open surface, into a gully, a drain or a collection system. Do not assume what lies beneath a grate or paving, and do not remove a connection just to find out. A pipe that looks sound outside can still have a concealed restriction farther down.
During rain, a downpipe that barely runs while the channel overflows may point to a restriction, but flow alone is not conclusive: little water may be reaching that section, or the event may exceed what the route accepts. If the pipe feeds a drain or tank, note whether its destination is full or visibly backing up; a downstream problem can affect the outlet above. Do not disconnect the pipe or pour water into a concealed drain as a test. Use the Bloomcabin Pergola model page to help identify the product when requesting a drawing that shows both the pergola drainage and its connection to the site’s discharge route.
6. Use only a permitted test
A test can help locate the first restriction once the visible route has been checked, but only if the manufacturer’s instructions allow one. The simplest evidence is often observation during ordinary rain. If a controlled water test is explicitly permitted, use the specified test point and gentle, limited flow, with the roof in the prescribed position. Watch one part of the route at a time and stop at the first unexpected escape. A hose aimed across the whole roof can deliver water faster than normal rainfall, bypass the intended collection route or wet connections that were not meant for that test, making the result hard to interpret.
Record the order in which water appears: at the outlet, a joint, along the channel or at the downpipe’s discharge. Do not use a pressure washer or forceful jet, open concealed joints, or change the roof position contrary to the manual while testing. If no approved procedure is available, ask the installer to perform the check. When requesting test guidance for the Bloomcabin bioclimatic pergola, include the model reference and installed configuration. Ask which parts of the route the test will assess; a successful check of one outlet does not establish that every channel and connection drains correctly.
7. Compare the event with documented weather limits
Rainfall conditions can change how quickly the collection route fills. A short, intense shower may deliver water differently from a long, light spell, while wind can affect which parts of the roof receive rain. These factors may explain why one event differs from the usual pattern, but they do not prove that a spill was harmless or that the system exceeded capacity. Record the conditions as carefully as possible, including duration and wind direction, then compare like with like. A storm at another property is not a reliable performance test for your pergola.
Check the documented drainage and weather limits for the exact model, roof position and approved enclosure configuration. There is no single storm threshold or watertightness assumption that applies to every pergola, and a general product category cannot supply one. If overflow occurs only in conditions outside the stated limits, ask the manufacturer or installer how that configuration is intended to behave. If it recurs in ordinary rain, continue checking for an obstruction, connection fault or installation issue. When reviewing Bloomcabin’s regular pergola model, treat the documentation—not its name or appearance—as the evidence for any stated limit.
8. Check the roof position and enclosure configuration
An altered or incomplete installation can change the route water takes. Ask whether a roof part has been repositioned, an accessory added, a channel or cover disturbed, or repairs made since the pergola last drained normally. Compare the current arrangement with the installation instructions instead of assuming that every opening or joint should be sealed. Side screens, panels or other enclosure elements may affect wind-driven rain and where water reaches the structure; use the approved configuration documents to establish what is intended for that model. Record recent changes even if they seem unrelated to the gutter.
Look for a visibly shifted connection, damaged seal, altered slope or uneven support, but do not try to correct alignment by tightening parts or packing supports. An apparent low point is difficult to judge from below, and adjustments may affect more than the one area that overflows. If the pergola is wall-mounted, check the instructions for that arrangement rather than transferring assumptions from a freestanding installation. For Bloomcabin’s wall-mounted pergola, ask for documentation matching the model and installed site before deciding that the wall junction is the source.

9. Know when to stop and call a professional
Stop if the only way to inspect the channel is from the roof, if a loose part is above you, or if reaching the outlet means leaning over the frame. Do not climb, remove fixed covers or dismantle a concealed channel to continue the diagnosis. Ground-level observations are enough to establish that access needs a professional. Avoid carrying out a water test around a powered mechanism or wet electrical components; a pergola installer can assess the arrangement safely. If water is entering a building or causing damage, keep people clear without creating a fall or electrical hazard, then arrange help.
Ask the pergola installer or a competent drainage professional to investigate repeated overflow, hidden pipework, leaking joints, visible deformation, or a problem that remains after an obvious obstruction has been cleared using an approved method. Provide the model, roof position, enclosure components, first spill point, weather notes and a sequence of photos or video. If you own Bloomcabin’s bioclimatic model, include its model reference and any installation records with your enquiry. Explain whether the problem began suddenly or has occurred since installation, and whether earlier repairs changed the spill location. Those details help the installer decide which connections and sections need closer inspection.
10. Match the remedy to the diagnosed fault
Choose a remedy only when the evidence points to a cause. Loose surface debris may call for the approved clearing method; an outlet restriction, hidden pipe blockage, separated joint, altered installation or capacity question needs a different response. Clearing the visible channel will not fix a blocked downpipe, and sealing the point where water escapes can divert it into a less visible joint or towards an adjacent structure. Avoid improvised sealant, extra holes, outlet extensions or changes to the frame until the manufacturer or installer confirms that a proposed repair is compatible with the drainage design.
After a repair, recheck the same part of the route that failed, using a method the manufacturer permits. Observe where water leaves the system, not merely whether the patio stays dry; water may be redirected without the underlying restriction being cleared. If the first spill point moves, record the new location rather than repeating the same clearance. Keep the original notes and photos with the repair record so later inspections can distinguish a recurring fault from a new event. The aim is to verify the route from collection channel through outlet and downpipe to the intended discharge, while keeping weather limits separate from blockage diagnosis.
Frequently asked questions
Does an overflowing pergola gutter always mean it is blocked?
No. Debris is one possible cause, but a restricted outlet or downpipe, a faulty joint or alignment issue, or rainfall beyond the model’s documented drainage limits can produce similar symptoms. Note where water first escapes and trace the route before deciding. A channel that looks clear from the ground does not rule out a restriction farther along.
Can I pour water into the outlet to test it?
Only if the manufacturer’s instructions specify a test and explain how to do it. Watching the system in ordinary rain may give you more useful evidence. Do not use a pressure washer or force a large volume into the channel: an improvised test could overwhelm the route or wet a connection that is not meant to be tested that way. Ask an installer if no method is documented.
Why does the pergola overflow at just one corner?
That corner may be near a restricted outlet, a joint or a low point, but its position alone does not identify the cause. Check whether water crosses the channel edge or appears to come from a connection, then look for visible obstructions and compare the route with the drainage diagram. Leave inspection or adjustment of inaccessible or apparently misaligned parts to an installer.
Should I seal the place where the water escapes?
Not until you know why it is overflowing. Sealant might conceal a faulty joint or redirect water into the frame or an adjacent structure without clearing a blockage. Use only a repair confirmed as suitable for the exact model and installation. If a joint is damaged or the overflow returns, arrange a professional inspection.
What information should I give an installer?
Give them the model and installed configuration, the first point where water escapes, whether it crosses an edge or comes from a joint, and what happened before the overflow began. Include notes on rainfall and wind, any recent changes to the roof or enclosure, and photos or video taken safely from the ground. This helps focus the inspection on the right part of the route.
Overflow is easier to resolve when the first escape point, the outlet and the downstream discharge are treated as separate checkpoints. Trace them in order, compare what you observe with the exact pergola’s documented drainage route, and choose a repair only when the evidence points to a cause. That keeps a visible obstruction from distracting you from a restriction farther along—or from a weather event that needs to be checked against the model’s limits.
