
Pergola Splashback: Keeping Rain Off the Seating Area
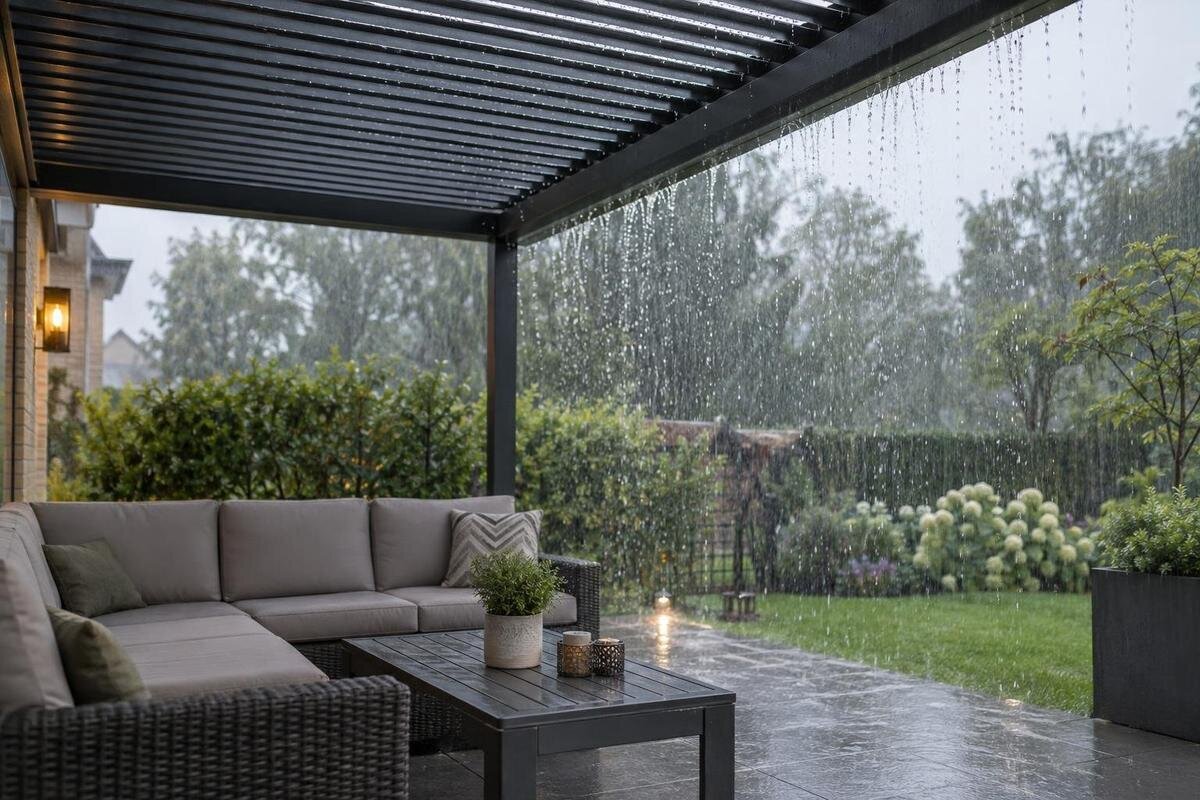
Pergola weather planning
Rain does not have to pass through a pergola roof to leave its chairs wet. Drops can hit exposed paving and rebound towards a seat, while runoff from adjoining ground may travel into the covered footprint. Wind can carry rain through open sides as well, creating a pattern that looks like splashback. The useful first step is to locate where the water lands, then separate paving, layout and screening decisions from the pergola’s own documented weather limits.

Why rain can reach furniture under the roof
Rain hitting a hard patio can scatter in several directions. When drops strike close to an open side, some may rebound upwards or outwards far enough to wet chair legs, table edges or the lower part of cushions. The distance and pattern vary with rainfall, wind, surface texture and whether the paving is already wet, so there is no universal strip of patio that can be labelled splash-free. A roof above the seat changes direct rainfall from above; it does not stop drops landing on uncovered paving or travelling laterally at ground level. The effect is easiest to see near an exposed patch with no separation from the seating.
Not every damp seat is splashback. Wind-driven rain may enter through an open side and reach furniture directly, while water from a roof edge or nearby ground can leave a narrow wet trail across the paving. Splashback is more likely when a wet patch sits beside a hard, exposed surface and small droplets appear on the lower, outward-facing parts of furniture, but these clues overlap. Check the floor around the chair, the exposed edge and the direction the rain was blowing; one wet cushion by itself does not identify the source.
Trace the water’s route on the patio
Observe during or soon after ordinary rain, from a safe place, and note which sides are exposed, where the first wet patch appears and how far it spreads. A simple sketch of the pergola outline, paving joints, furniture and wet areas is more useful than a general note that the seats get soaked. Record the wind direction and whether the problem follows one particular side; compare your notes after another shower if possible. Water can move or evaporate before an inspection, so take a photo while the pattern is visible. One event is useful evidence, but it cannot show how every shower will behave.
Separate three routes in your notes: wind-driven rain crossing the sides; roof water landing on paving and bouncing; and surface runoff arriving from elsewhere. Each calls for a different response, so do not buy a screen until the source is clearer. If the Bloomcabin Pergola product page is on your shortlist, ask for a drainage diagram showing the intended discharge points. Mark these on your site sketch alongside the places where water already collects. This helps you identify whether concentrated discharge could meet an existing wet patch near the furniture. Keep the distinction between water landing on the patio and water travelling across it: the same chair can be exposed to both during one shower.
How paving and joints influence splash
Material names alone will not tell you whether a patio sends water towards a seat. A smooth slab may shed water quickly yet still receive raindrops directly; a rougher or jointed finish can scatter droplets differently, and shallow hollows can keep water in place. The condition matters too: a surface that is already wet may behave differently from one at the start of a shower. Treat texture as one factor to observe, not a promise that a particular stone, tile or finish will stop splashback. Look at the whole paved area, including the strips beyond the table.
Shallow depressions, uneven joints or a lip where two surfaces meet can hold water or redirect it towards the seating. Permeable paving or gravel can let water pass only when the layers below and the wider drainage arrangement can accommodate it; the surface label alone does not prove that water will disappear. Watch what happens after a shower rather than judging a sample in isolation. Adding a coarse strip is not a complete answer if water simply gathers along its edge. If you are considering resurfacing, show the contractor where puddles begin and how long they remain, and ask how the proposed construction deals with that water. Discuss transitions between new and existing paving as well as the main surface. Those junctions may sit directly beside the chairs, and a new edge must not become a barrier across an existing runoff route.
Check the route of runoff around the seating area
Rain may reach the seating area from beyond the pergola footprint. Water can travel across paving from a higher part of the patio, spill from a lawn or planted border, or arrive from an outlet that discharges at ground level. Watch the route during rain and look for a line of wetness, a small stream or a puddle that forms before the seats get splashed. These observations help distinguish water arriving across the ground from droplets rebounding where rain first hits the patio. Avoid judging the route only by the apparent slope when the surface is dry.
Check that existing drains or channels are not covered by furniture or debris, and note where their outlets lead. For the Bloomcabin Pergola listing, request the proposed layout and discharge details so that you can compare them with the routes observed on the ground. Consider the point where discharged water first meets the surface, not merely whether a drain is somewhere nearby. A route that crosses the seating area before reaching a channel may still leave chair legs standing in water. If water repeatedly pools beside a doorway or wall, ask a competent drainage or landscaping professional to assess the site before changing surface levels or redirecting flow. Include neighbouring ground in that assessment if runoff appears to arrive from beyond the patio.

Place furniture outside the observed splash zone
Once you have identified the wet patch, try moving chairs and the table away from its edge before changing the patio. A modest shift may put the seats beyond the main area of rebound, especially if the furniture is close to an exposed strip of paving. The useful position will depend on where rain lands and how it is blown, so a generic clearance from the pergola frame is not a reliable guide. Check the lower parts of chairs as well as cushions, and note whether a table or chair leg sits directly in a puddle or runoff route.
Plan with the furniture in use, not just its stored footprint. Allow for a chair being pulled back, people walking past, and access to doors or other routes through the space; a seat that avoids the splash but blocks circulation is not a practical solution. For the Bloomcabin Bioclimatic Aluminum Pergola, ask for a dimensioned plan for the exact version under consideration. Plot the usable seating space rather than relying on an overall area figure. Include projecting chair arms, reclining backs and the position of cushions when someone is seated. Where the arrangement is tight, test whether turning the table gives the most exposed seat more separation from the wet edge. Keep a convenient route for bringing cushions indoors without having to squeeze between furniture and a wet border.
Use landscape borders without trapping water
A planted strip, gravel border or other low landscape separation can interrupt the direct path between an exposed patch of paving and nearby furniture. Its value depends on its position and construction: it may reduce low-level rebound along one edge, but it will not stop wind-driven rain or water flowing across the surface. Check what happens at both ends of the border and after rain. A raised edge that holds water against the seating, or a border that covers an existing drainage route, can move the problem rather than solve it.
Pay particular attention where a patio meets a wall, lawn or garden bed. Water can track along an edge and emerge beside a chair, even if the paving immediately around the seat looks sound. If you are considering the Bloomcabin Lean-To Pergola beside a wall, include the wall-to-paving junction in your site sketch and ask for the proposed installation details. Do not assume that this edge will remain dry simply because it is close to the building. Look for soil or mulch washed onto the paving after rain, which can help reveal water arriving from a border. Planting also needs room to grow without obstructing access to drainage channels or the seats. Discuss any raised border with the landscaper before installation, particularly where it could trap water against the wall.
What side screens can and cannot do
A suitable side screen may intercept rain blowing horizontally through an exposed side and make the seating area less exposed in those conditions. Depending on its design and position, it may also intercept some rebounding droplets, but it does not necessarily prevent floor-level splash. Drops can still rebound from paving on the seating side, and surface water can still cross the floor. Rain may reach gaps at the bottom or edges. Look at where the screen would sit relative to the impact patch: stopping rain farther out is a different task from shielding furniture beside wet paving. Water intercepted by a screen must also go somewhere, so ask how it reaches the ground. A concentrated drip line near a chair could leave a local splash problem even when less rain enters horizontally.
Before choosing a screen, confirm that it is intended for the exact pergola model and configuration. If the Bioclimatic Aluminum Pergola product page is part of your comparison, ask which side arrangements are available for the version you want, rather than assuming that an illustrated accessory is included. Request details of the bottom and end gaps, how the screen is operated, and any stated restrictions on its use in wind. These points help you judge the proposed arrangement against the exposed side you observed. Consider access too: a panel or screen should not make the usual route to the garden awkward. Compare its intended rain protection with those practical consequences before treating enclosure as the answer.
Read weather evidence for the exact pergola
Information about roof performance answers a different question from whether the patio will splash onto a chair. For the precise model and configuration, look for stated weather limits, controlled observations and drainage diagrams. Check what roof arrangement and side enclosure were in place during any observation, and what conditions it describes. Useful details include the rain and wind conditions reported, the duration of the observation, and where water was recorded. A statement about water passing through a roof does not establish that furniture beside an open edge stayed dry. Likewise, an observation made without your surrounding paving cannot resolve a site-specific splash problem. If those details are absent, treat the remaining uncertainty as a question to clarify rather than filling it with assumptions.
Use the documentation to understand where roof water is expected to reach the ground, then compare that point with your paving and furniture plan. Avoid turning a limited observation or a broad weather description into a promise of watertightness in every storm. If Bloomcabin Pergola is under consideration, keep the information for the exact proposed configuration with your site notes. Record which questions it answers and which remain open, particularly whether any evidence covers exposed edges or side accessories. This separates documented product performance from the behaviour of your patio and makes comparisons between proposed arrangements clearer.

Test changes in real rain and keep routes clear
Try a provisional furniture position before paying for permanent landscape changes. After a shower, note which paving is wet, whether droplets reached the furniture, and whether the wind was blowing towards the affected side. Change one aspect of the layout at a time so that you can tell what made the difference. Check the chair in its normal pulled-out position as well as tucked under the table. Repeat the observation after rain from a different direction if you can; a layout that works in one set of conditions may not deal with another. Record whether the improvement kept the seat dry or merely reduced wetness on the legs. That distinction helps you decide whether the result meets your intended use, rather than declaring the whole area dry.
Keep existing drainage channels and outlets accessible, and remove leaves or other debris that could obstruct the intended surface-water route. Avoid covering a persistent puddle with a loose mat or building up an edge without checking where the water will go. Maintenance access matters when comparing products too. If the bioclimatic pergola listing is in your comparison, request the relevant care instructions and identify which drainage components need routine attention. Distinguish accessible patio channels from parts of the pergola that require a different maintenance procedure. Follow the supplied instructions rather than dismantling components to investigate a splash problem, and leave enough space in the furniture layout for the specified access.
Put the site details into your buying brief
Before comparing models, make a concise plan of the area: mark the pergola outline, exposed sides, paving type, wet patches, nearby lawn or beds, walls, doors and existing drainage points. Add the furniture positions you would like, including the space needed to pull out chairs and walk past them. This gives a clearer picture of whether the problem is a splash zone, water crossing the patio or rain entering from a side. It also makes it easier to ask focused questions instead of relying on a general claim about keeping the area dry.
For the Lean-To Pergola listing, use that brief to ask how the proposed configuration fits the site, including any junction with the building. Keep the responsibilities clear: ask which drainage connections, paving work and side accessories form part of the proposal, and which need separate assessment or provision. Request that unresolved points are identified before you commit to the arrangement. A useful proposal should distinguish the pergola itself from changes needed around it, rather than presenting a roof or screen as a cure for every source of wetness. Where the patio already has a persistent pooling problem, settle how that will be addressed before choosing furniture positions that depend on the affected area staying dry.
Frequently asked questions
Why do chairs get wet beneath a closed pergola roof?
Rain can hit the exposed paving and rebound towards the furniture, or run in from surrounding ground. Wind can also carry rain through open sides. A roof changes exposure from above, but it does not control water arriving at floor level.
Can a different paving material prevent splashback?
No material is a guaranteed fix. Texture, joints, shallow depressions, surface falls and the way water drains all affect what happens. Observe the patio in rain before deciding whether a surface change would address the actual cause.
Will a side screen stop water splashing up from the paving?
A suitable screen may reduce rain blowing horizontally through an exposed side, but it does not necessarily stop droplets rebounding from the ground or runoff travelling across the patio. Check compatibility and performance for the exact pergola configuration.
How can I tell splashback from a leak?
Look for where wetness appears first. Scattered droplets beside exposed paving may indicate splash, while rain entering from a side or a wet trail beneath a roof edge may have another source. Patterns overlap, so note the weather and inspect the floor as well as the furniture.
How far from the pergola edge should I put the seats?
There is no universal distance. The splash zone depends on the paving, rain and wind direction, and surrounding surfaces. Use observed wet areas to test a furniture position, then leave enough room for chairs to be pulled out and for people to pass.
A drier seating area depends on understanding what happens at ground level, not just on choosing a roof. Find the impact patch, follow water across the surrounding surfaces and test the furniture layout against the conditions you actually observe. Paving changes, landscape borders and side screens may each have a role, but they address different routes of exposure. Matching those measures to the site—and checking any pergola configuration on its own evidence—gives a more dependable plan than relying on a general promise of rain protection.
