
Shading a Pergola Without Losing the Garden View
Pergola shade planning
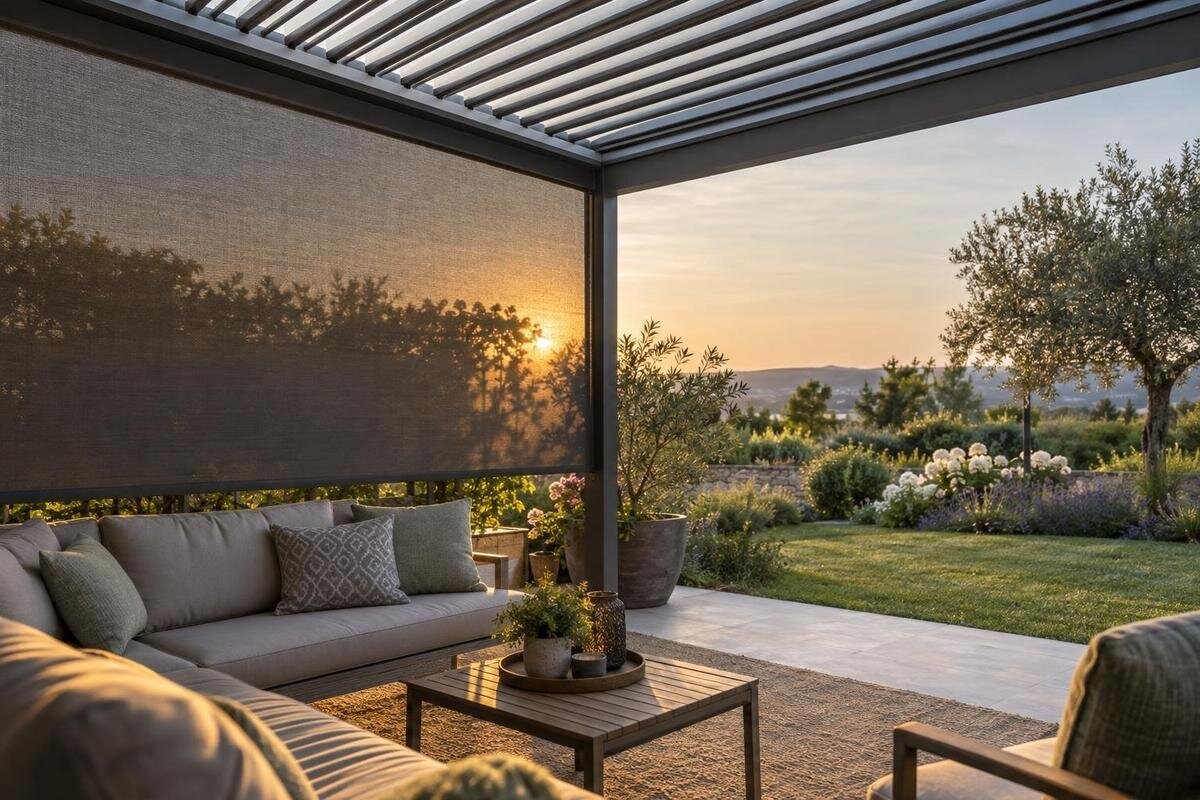
Shading a pergola seating area need not mean screening off the garden. The key is to decide which view matters from the chairs, then compare that line of sight with the sun's direction at the time the space is used. A side panel that stops low-angle glare can also obscure a lawn, border or distant feature if it crosses the seated view.
01
Choose the garden view you want to keep
Begin with an actual seat in its usual position, not the centre of the structure on a plan. Choose one or two features people naturally look towards: a lawn, a particular tree, a border or the open end of the garden. The straight view from a seated person's eyes to that feature is the line you want to retain. A broad outlook from the back door can look generous, yet disappear when a chair is tucked behind a table or close to a side edge. Note which seat is used most and what its occupant needs to see; a garden view may mean preserving one focal point, not keeping every boundary open. If the feature is low, identify it specifically rather than relying on a general impression of openness.
If several people use the area, test more than one chair and posture. A dining chair, a low lounge seat and a reclined position put the eyes at different heights, so a panel that clears one view can cover another. Decide which position has priority and mark any secondary outlooks that matter, such as seeing across the lawn while talking to someone at the table. Where people sit opposite one another, their views pass through different openings; shading one person's seat need not mean screening the outlook for everyone. Note any disagreements about the preferred view before choosing a panel position. Make these checks with the furniture arranged as it will be used, rather than judging the view from a standing position.
Draw sightlines from seated eye level
Put the chosen view on both a plan and a side-on sketch. On the plan, mark the pergola supports, chair positions, table, wall and garden feature. On the side view, mark a seated eye point and draw a line to the target. Add the proposed side-shading plane at its intended distance: if its solid area crosses the line, it will hide some or all of the feature. For a broad view across a lawn, check the left and right limits as well as the central point. This simple elevation catches a problem a top-down drawing cannot show. The aim is to record relationships clearly, not to produce a technical drawing.
Repeat the line from each seat that matters, using the actual chair and a normal seated eye position rather than assuming everyone looks from the same point. A screen close to a chair occupies more of the field of view than an equally sized screen farther away, so its position can matter as much as its height. For the model shown on the Bloomcabin Lean-To Pergola product page, request confirmed layout details before placing supports on the sketch. Include the house wall and the outward view together, so you can see which openings each chair faces. If accessory dimensions are not available, leave the proposed screen edges provisional rather than treating an illustration as a measured plan.
02
Record when and where the sun causes glare
Observe the seating area at the times you expect to use it, especially when sun reaches faces, the table or the garden view. Note the time, where direct light comes from, which seats are affected and whether the problem is glare in the eyes, sun on the table, or both. Check more than one point in the day: the sun's direction and height change, so an opening that is shaded at lunchtime may be exposed later. A short record over several clear days is more useful than choosing a side from one afternoon. Keep the observation tied to the chair and view, not just the garden as a whole. You may want to block direct glare while keeping the rest of the garden bright.
Include times of year when you expect to use the pergola, because the sun angle and resulting shadows change seasonally. Low rays can pass beneath an overhead roof line and enter from the side, while a higher sun can make the roof more relevant. You do not need a precise solar model to make a useful record: note when glare crosses the sightline and which opening it comes through. When considering the Bloomcabin Pergola, use those observations to describe the shade you need: for example, protection for the dining seats during an afternoon meal rather than shade across the entire terrace. Record the start and end of the troublesome period, since a brief interruption of the view may be more acceptable than permanent screening.
Shade the opening that admits the sun
Once the problem opening is clear, treat that side as the first candidate for shade. If low sun enters from one edge, a panel on the opposite edge may do little for glare while closing off a better view. On a sketch, draw the sun's approach as well as the eye-to-garden line; the useful position is where the shade interrupts incoming light without sitting across the priority sightline. Because sun direction changes, check the candidate side at more than one logged time. If the source shifts between openings, decide which period matters most rather than trying to block every angle at once.
Shading every side is rarely the first idea to test when an open outlook matters. Compare a concept with one targeted edge against one with several shaded edges; even if a particular system offers only defined options, the sketch shows which opening is most important to leave clear. Also show the table: a screen aimed at one chair may not address sun reaching the whole dining area. When enquiring about the Lean-To Pergola from Bloomcabin, identify the opening on your drawing rather than referring only to the left or right side. Those descriptions can reverse depending on whether you look from the house or the garden. Ask which supported arrangement corresponds to the marked opening.

03
Screen height and the garden view
Screen height is a sightline decision, not a number that works for every garden. Draw the top and bottom edges at their intended position and compare them with the seated view to the feature. A panel below the main eye-to-target line may still cover low planting or the base of a view; a taller panel may cut across the lawn, tree canopy or horizon. Its closeness to the chair changes the apparent obstruction, so a height copied from another garden is a poor guide. Measure the actual separation as well as the vertical position, and note whether the view you want is near ground level or in the distance.
Then compare that outline with the height and angle of the glare you are trying to block. If the sun lies directly in the line of sight to your chosen garden feature, an opaque screen cannot block those rays while leaving that same line unobstructed. In that situation, test moving or turning the chair, preserving a different part of the outlook, or using shade only during the troublesome period if a supported adjustable option exists. Distinguish sun reaching the eyes from sun falling on the table: the latter may be intercepted without crossing the main view. Use this distinction when asking about side-shading options for the Bloomcabin Pergola model, rather than requesting a screen height without explaining its purpose.
Consider roof shade and side shade separately
Roof shade and side shade address different paths of sunlight. An overhead covering can intercept sun coming from above, but low-angle rays may enter through an open side and fall across a seat or into someone's eyes. Conversely, a side panel placed to catch those rays may restrict the garden view even when the roof provides shade from above. Sketch each problem separately: show where the roof's shade falls at the relevant time, then trace the side opening through which glare still reaches the seating. Repeat for more than one point in the day because the shadow's position moves.
If the roof arrangement can change, ask how its positions alter shade and what remains open to the garden; if it is fixed, assess the actual covered area and side exposure. These details depend on the model and configuration, so do not base the view plan on a generic pergola image. The Bloomcabin Bioclimatic Aluminum Pergola product page identifies a model to compare, but confirm the specified roof operation and approved side-shading options before judging how the chosen setup will behave at your seating area. The word bioclimatic alone does not describe the shade at a particular hour.
04
Keep entrances and secondary views clear
A side shade takes up visual and physical space, so keep the normal entrance to the seating area clear on the plan. Check the route from the house, a garden path or the door people actually use, and show where chairs are pulled out. If a nearby door opens towards the seating area, include its movement in the drawing. A panel that solves afternoon glare but sits across the usual route or makes the space feel boxed in may not be a good compromise. Mark proposed edges alongside the furniture before settling their position; this can reveal a panel in line with a secondary view.
Think about how the furniture changes during use. A chair may turn towards the garden for a quiet break, then towards the table when people are eating; a panel outside one view can cross the other. Decide whether you are planning for one fixed seating orientation or want chairs to move. With a flexible layout, keep the main garden feature visible from the likely chair positions rather than optimising a single perfect pose. It may be worth leaving the side that connects most directly to the garden open, even if that means accepting some sun from that direction at a less important time.
Confirm which side-shading options are supported
Before planning around side shade, establish what is available for the exact pergola model and configuration. Ask which side or sides can take an approved accessory, whether the proposed size and position are supported, and whether the shade element is included or supplied separately. Request a drawing or dimensions that let you place its edges on the plan: a product name alone cannot tell you where it sits relative to the supports or seated eye line. A product image is not enough to establish compatibility. Keep this check specific to the model variant and chosen side.
Give your sketch and sun record to the supplier, then ask for confirmation against that layout. Use the bioclimatic pergola model page as the model reference and mark the required opening, seating position and garden sightline on the drawing. Ask for the accessory's outline in its usable positions, including any parts that remain in view when the shade is not needed. That information lets you distinguish temporary screening from a permanent obstruction. If an accessory cannot cover only the area you have marked, compare its actual outline with the view before accepting it. Keep the confirmed drawing with the model details so a later change of configuration does not go unnoticed.

05
Mock up the proposed screen before deciding
Test the proposed view at full scale before committing to a panel position. Mark the seat, table and support locations on the ground with removable tape or chalk, then sit in the chair at normal eye level. A helper can hold a lightweight board at the proposed panel plane, or you can use a freestanding marker and a measured top edge to judge how much of the garden it would cover. Try the outline at more than one height and distance if those options remain open. This is a sightline mock-up only; it does not establish that a real screen can be fitted there.
Repeat the test from each important seat and at the times when glare matters, including a low-sun period if that is the problem. Look past the mock-up to the chosen tree or lawn feature, not just at whether it blocks the bright patch; then turn your head towards any secondary view. Photograph from seated eye height with a normal camera view rather than relying on a wide-angle phone setting. For an enquiry about the Bloomcabin wall-mounted pergola model, label the photographs with the seat position, time and proposed screen edge. Include an unobstructed photograph from the same position so the supplier can see both the view you want to retain and the area you propose to shade.
Review the view in different seasons
A shade decision made on a single bright afternoon can miss changes in the garden. Repeat the sightline check at the hours and seasons that matter, and consider whether nearby planting is fuller or thinner at those times. If your view depends on a deciduous tree, check it both in leaf and when bare. The outlook may also change as a chair moves or a feature sits behind summer growth. Record the compromise plainly: which seat gets shade, which part of the outlook stays open, and when some direct sun is acceptable. A specific trade-off is easier to judge than expecting full shade and an unobstructed view at every hour.
Bring the observations together by comparing the shortlisted layouts on the same basis. For each, record whether the main garden feature remains visible, which seats receive shade during the troublesome period, and whether access stays clear. These are separate tests: a layout can preserve the view yet leave a frequently used chair exposed. If the regular Bloomcabin Pergola model is on your shortlist, assess its confirmed configuration using the same seat positions and viewing targets as the alternatives. Avoid moving the furniture between comparisons unless that move is part of the proposal. This makes the final choice a practical balance between shade and outlook rather than a judgement based on the most attractive illustration.
Frequently asked questions
How do I choose the right height for pergola side shade?
There is no single height that works for every garden. Sit in the usual chair, identify the view you want to keep and draw the line from your eyes to that feature. Compare the proposed screen edges with that line and the angle of the sun you need to block. A full-size mock-up can reveal the trade-off before you decide.
Can I shade just one side of a pergola?
As a planning approach, it makes sense to focus on the opening that admits the troublesome sun rather than closing every side. Whether a particular model supports that arrangement depends on its configuration and approved accessories. Check the chosen side on a plan and leave the main garden view open.
Will overhead shade stop low evening sun?
Not necessarily. Overhead shade can intercept sun coming from above, while low-angle light may enter through an open side and reach the seating or the eyes. Record when and where glare occurs, then check whether an approved side-shading option is available for the model you are considering.
How can I check that a screen will not block the garden view?
Choose a garden feature from the usual seat, draw the sightline to it and compare that line with the proposed screen. Test from each important chair, as different eye heights can produce different views. Also check whether an open side needs to remain clear for movement or a second outlook.
Can any screen be fitted to a pergola?
Do not assume so. A side-shading accessory may be supported only in defined positions or for particular configurations. Confirm the model variant, the side and position it fits, and whether it is included or supplied separately. A product image alone does not establish compatibility.
The best balance is clear from a simple test: from the main chair, the chosen garden feature stays in view while the opening that admits troublesome sun is shaded for the hours that matter. Plan the seated sightline and the sun's path together, then check any proposed side shade against the exact configuration. Some direct light may remain, but that can be a better compromise than closing off the garden unnecessarily.
