
Will a Pergola Fit Under Low Eaves?
Pergola planning guide
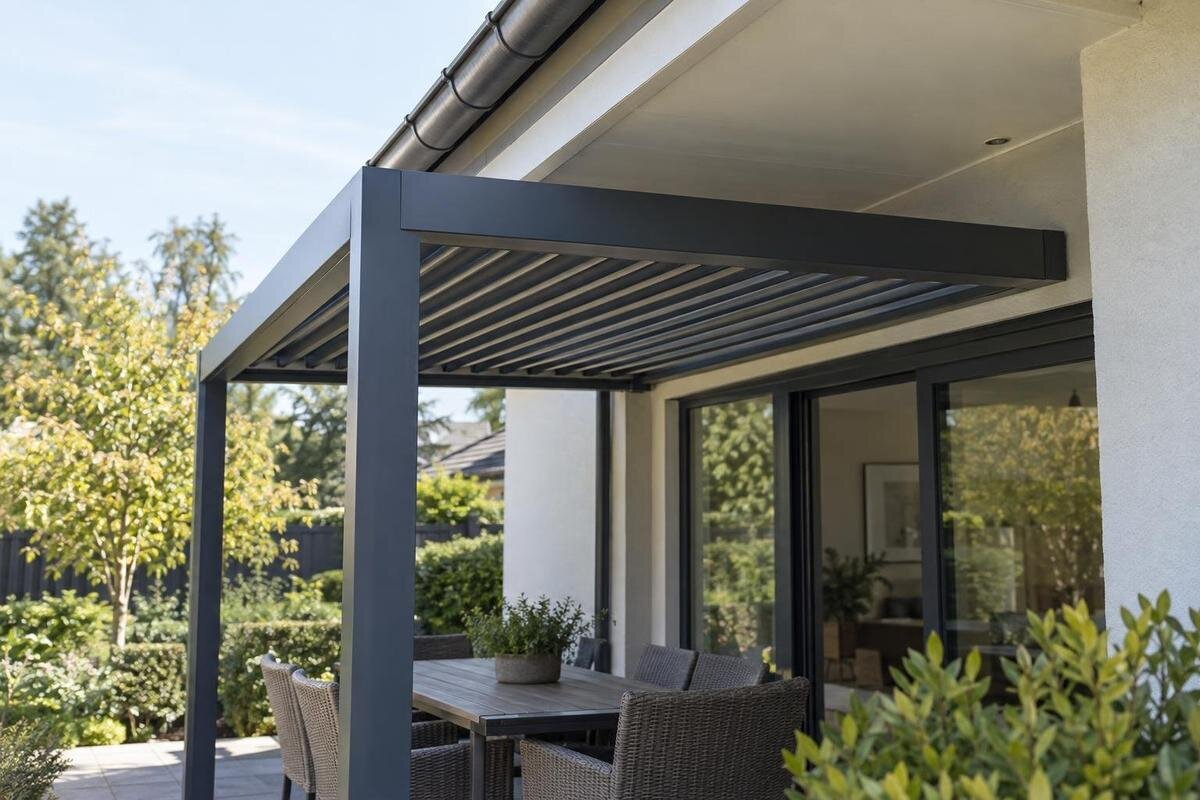
Low eaves do not automatically rule out a pergola, but checking the gap above its frame is not enough. The roof edge, moving parts, wall fixings, posts and gutter access all compete for space. Measure the site and compare it with the exact model drawings before choosing a position or placing an order.

01
Measure the lowest point across the whole site
Start by measuring the exact footprint, not just the point where the eaves meet the wall. Record the vertical distance from the intended finished surface to the underside of the lowest obstruction at the wall, at each proposed post position and across the outer edge of the pergola roof. Include the gutter, fascia, soffit, roof brackets, downpipes and any fittings that project into the space. Note changes in paving level, slopes and steps: ground and eaves can both vary along the same run. A single reading beside the wall can miss the tightest point over the planned frame, particularly at an end or corner.
Make a simple side view and label where each reading was taken. If the patio will be resurfaced, measure from the intended finished level rather than today’s surface; a raised finish reduces the space available above it. Repeat measurements along an irregular or pitched eaves line instead of averaging them. Use a consistent reference level on the sketch so the supplier can distinguish a change in ground height from a change in the roofline. Photographs taken from the side and at each end can help explain projections that are difficult to show, but they should accompany measurements rather than replace them. The Bloomcabin Pergola model page identifies the product, but its listing and photographs do not establish whether it will fit beneath your eaves. Request a dimensioned drawing for the exact size and layout. Mark any overhead points that you cannot measure reliably, so they can be checked during a site visit.
Compare the complete installed dimensions
A catalogue height is useful only if you know what it measures. Depending on the model and configuration, the installed outline may include a top rail, roof edge, end caps, feet or brackets; a drawing may show some of these separately. Ask for the overall assembled height measured from the finished support surface, and confirm which projections it includes. Check whether the drawing also gives the underside height: overall height alone does not tell you how much headroom remains below the frame. Any adjustment or levelling arrangement should be accounted for when considering the final position.
Look at a plan view as well as a side elevation. Plot the eaves projection and gutter against the full pergola footprint, including roof edges that extend beyond the posts. A sloping or stepped roofline may cross the frame at one corner even when a straight-on view suggests there is room. When comparing the Bloomcabin Bioclimatic Aluminum Pergola with your site, request the drawing for the exact configuration and orientation you intend to buy. Keep the wall face, post positions and outer roof edge clearly distinguished on your sketch: the distance from the wall to a post is not necessarily the distance to the roof edge. Also identify which end of the drawing corresponds to each end of the patio. An asymmetric arrangement or a projecting fitting can make that distinction important. Ask the supplier to explain any dimensions whose reference points are unclear before using them to judge the fit.
02
Allow for the full movement of the roof
Where a pergola roof can move, check its complete operating envelope rather than only its resting position. Depending on the design, parts may open, pivot, slide or otherwise travel; movement can change the roof’s height or how far it projects. Ask for a model-specific diagram showing the permitted positions and the required clearance above and around them. Check whether any part comes close to the gutter, fascia, roof covering or wall as it moves. A gap that looks sufficient when everything is still may not be clear throughout operation.
Include any controls, drives or service points in the layout where they apply to the chosen configuration. Do not plan to limit or alter a mechanism to make the pergola fit, or assume that an obstruction can be avoided by leaving the roof in one position. For the product on the bioclimatic pergola model page, ask which operating and servicing clearances apply to the configuration under consideration. These are different questions: a component may have room to move but still be difficult to reach for inspection or replacement. Ask whether the drawing shows intermediate positions as well as the fully open and closed positions, and have any missing information clarified. Where the eaves cross only part of the roof, identify that area on the drawing rather than treating the whole roof as having the same clearance. This gives the supplier a specific potential clash to assess.
Check headroom on everyday routes
Clearance above the pergola roof is only one part of the fit. Mark where people will enter, walk and stand, then check the usable headroom beneath the frame along those routes. Include access from the house and any doors or windows that need to open. A structure can clear the eaves yet still put a beam across a doorway or create an awkward low point on a regular path. Use the drawing’s underside dimensions, not an impression of height from a photograph, to assess those areas.
Consider how the space will be used, not just its empty footprint. Planned seating or a table may put people beneath the lowest section of the frame, while lights, vents or wall-mounted fittings may occupy the same space. If you are considering the Bloomcabin Pergola, compare its underside dimensions with the intended walking and seating routes. Mark the proposed furniture positions and allow for chairs being pulled out and people standing up beside them. Check outward-opening doors and windows through their full travel, including handles or other projecting parts, rather than measuring only the closed opening. A position that looks workable from the garden may feel restrictive when stepping out of the house. Include any planned accessories in this check, but use their confirmed dimensions rather than assuming they fit within the frame. Decide whether existing fittings need relocating before settling on the pergola height.

03
Check the wall connection beneath the eaves
An attached layout has a second height to consider: the position of its wall connection. A fixing point below an eave may leave too little room for the top frame, while a higher position could coincide with the fascia, gutter or another part of the roof edge. The drawing should show both the intended connection and the finished roof position. Compare them with the actual eaves profile; do not assume that a wall-mounted description means the fixing can be moved freely up or down without affecting the design.
Treat the fixing surface as a structural question, separate from physical clearance. Do not regard a fascia, soffit, gutter or decorative cladding as a suitable fixing point unless the specific approved installation details say so. For the Bloomcabin Lean-To Pergola, request the approved anchoring drawings and have a qualified installer or structural professional assess the actual substrate. Provide information about the wall construction where available, together with photographs showing coverings, openings and the proposed connection area. A visible wall finish does not necessarily identify the material into which anchors would be secured. Ask the assessor to confirm both whether the connection is suitable and whether it can be installed at the height needed beneath the eaves. If the proposed connection sits behind or close to the gutter, establish how it would be reached during installation. A connection that is suitable in principle may still require a different position to remain accessible.
Keep gutters accessible for maintenance
Plan gutter access as a maintenance task, not as a small gap between two structures. Someone may need to inspect and clear the gutter, check its joints and brackets, and reach the downpipe connection. A pergola roof or beam close beneath the eaves can restrict both the view and the working space. Ask the person responsible for gutter maintenance how that section is accessed, then check whether the proposed roof and posts would obstruct their usual method. Visibility from the ground does not prove that the gutter can be serviced.
Include corners, end sections and downpipe junctions in the access check; these can be less convenient to reach than a straight length of gutter. Consider future roof-edge repairs as well as routine cleaning, and do not assume that pergola parts can be removed unless the model information confirms that. Use the outline of the regular pergola model to discuss access with the maintenance provider. Ask them to distinguish work that can be done from outside the footprint from tasks that require reaching the gutter from above or alongside it. Keep any necessary access route clear of permanent furniture or planned side panels. Do not count the pergola roof as a working platform unless its documentation explicitly permits that use. If gutter replacement would require dismantling part of the pergola, establish whether that is an approved, practical procedure before ordering. This avoids making routine building maintenance dependent on an unverified removal method.
04
Trace the building’s rainwater route
Follow the water from the house roof before settling on a position. Note where the gutter ends, where downpipes discharge and whether any part of the proposed footprint lies beneath a known leak or overflow. A roof edge that fits above the pergola can still leave runoff falling onto the frame or the space below it. Keep support positions clear of downpipes, and check any outlet locations against the full layout. If the existing gutter already leaks or overflows at the proposed site, resolve that issue before placing a structure beneath it.
Check the pergola’s own water-management information separately from the house drainage. If the chosen configuration has drainage components, ask where their outlets are and whether they will remain accessible for inspection and clearing. For the listed bioclimatic model, request a drainage diagram for the proposed arrangement and mark any outlets on the site plan. Do not assume that a wall-adjacent position connects to the house gutter or that water from the building can be routed through the pergola. Compare the proposed discharge points with door thresholds, walking routes and the existing patio drainage. Where water would be directed towards the building or into an area with no suitable drainage provision, ask the installer how that will be addressed. Also clarify what happens at the gap between the house and pergola: being close to the wall does not establish a sealed junction or mean the space below will stay dry.
Check support positions as well as roof height
A roof that clears the eaves may still have support points that conflict with the site. Mark each post and the base or anchor area shown in the installation drawing. Check these positions against doorways, downpipes and access covers, as well as the route needed to reach the gutter. Use the model drawing for the support layout rather than estimating from a product image; the visible post position does not necessarily show the dimensions of the base or fixing area.
Compare the specified support arrangement with the actual surface and substrate. A wall-mounted description does not by itself show whether a particular installation relies on ground supports or how those supports need to be anchored. Use the Lean-To Pergola listing to identify the model, then obtain its support and anchoring drawings for assessment against the site. Distinguish the visible paving from the structure or ground beneath it; a neat patio finish is not evidence of a suitable anchor location. Provide any available information about the patio construction and tell the assessor about proposed resurfacing or changes in level. If the supporting material is unknown, ask what further investigation is needed before the positions can be agreed. Do not choose a footing size from the eaves height or apply one generic size to every site. Confirm support positions before finalising the layout, since moving a post may also change the roof’s relationship with the gutter.

05
Test the layout in plan and elevation
A simple plan and side elevation can expose clashes before an order is placed. On the plan, mark the wall, eaves projection, gutter, downpipes, proposed post positions and the full roof outline. On the elevation, show the finished ground levels, lowest overhead points and the pergola’s installed top height; add the movement envelope if the roof can move. Label each measurement with the point it refers to. This makes it easier to spot a tight corner or sloping surface that a single height measurement would miss.
Mark the post positions on the ground with a removable marker and review the route from the house, door openings and access to the gutter. Then compare your sketch with the exact model drawings and ask the installer or supplier to clarify any unshown dimensions or required clearances. Do not plan for the two structures to touch just because their nominal dimensions appear to meet. If the available space is tight, get the required installation tolerance confirmed for the particular model rather than inventing a margin.
Arrange a site assessment when constraints overlap
A site assessment is especially useful when the eaves are pitched or uneven, the ground changes level, or the gutter sits close to a proposed wall connection. It is also sensible when there is no clear drawing of a moving roof’s operating envelope, when gutter access seems restricted, or when the fixing substrate is uncertain. These issues interact: shifting the pergola to avoid one obstruction may move a post, reduce headroom or put the wall connection in a different position.
Before a final decision, assemble the drawing for the exact model, size and orientation; the overall and underside dimensions; any movement and drainage information; and the approved anchoring details for the proposed support surface. Ask a qualified installer or structural professional to assess the actual site where wall connections or anchoring are in question. If the drawings cannot confirm the fit and access before ordering, reconsider the position or model rather than relying on a photograph or modifying the structure to suit the eaves.
Frequently asked questions
How much clearance do I need beneath low eaves?
There is no single figure that suits every pergola and roofline. Compare the lowest measured point with the full installed dimensions and any clearance required for roof movement and installation. Also check the usable headroom beneath the frame and the space needed to maintain the gutter.
Can I put a pergola directly beneath a gutter?
Possibly, if the finished structure clears the gutter and does not obstruct its inspection, cleaning or drainage. Check the gutter’s joints and downpipe access as well as the frame height. Ask the person responsible for gutter maintenance whether the proposed position leaves room for their access method.
Can I fix a pergola to the fascia or soffit?
Do not assume either is a suitable fixing point. Use the model’s approved anchoring details and have the actual wall or other substrate assessed. A fascia, soffit, gutter or decorative covering should only be used as a connection point if the specific approved installation details allow it.
Is the closed roof height enough to check a pergola with a moving roof?
No. Where a roof opens, pivots, slides or otherwise moves, check the whole operating envelope and the clearances specified for that model. A closed-position measurement may miss a clash with the eaves, gutter, fascia or another part of the building.
What should I ask for before ordering?
Ask for a dimensioned drawing for the exact model, size and orientation, plus any roof-movement and drainage information relevant to its configuration. If the pergola is attached or the support surface is uncertain, request the approved anchoring drawings and evidence that the actual substrate is suitable.
A pergola fits beneath low eaves only when its full installed outline and any roof movement work with the building’s roofline, support points and maintenance needs. Measure the lowest points across the intended footprint, check the exact drawings, and keep drainage and gutter access in view. Where a wall connection or anchor surface is involved, have the actual site assessed rather than assuming that a clear gap proves the installation is suitable.
