
Buying a Pergola Before the Patio Is Built: What to Decide
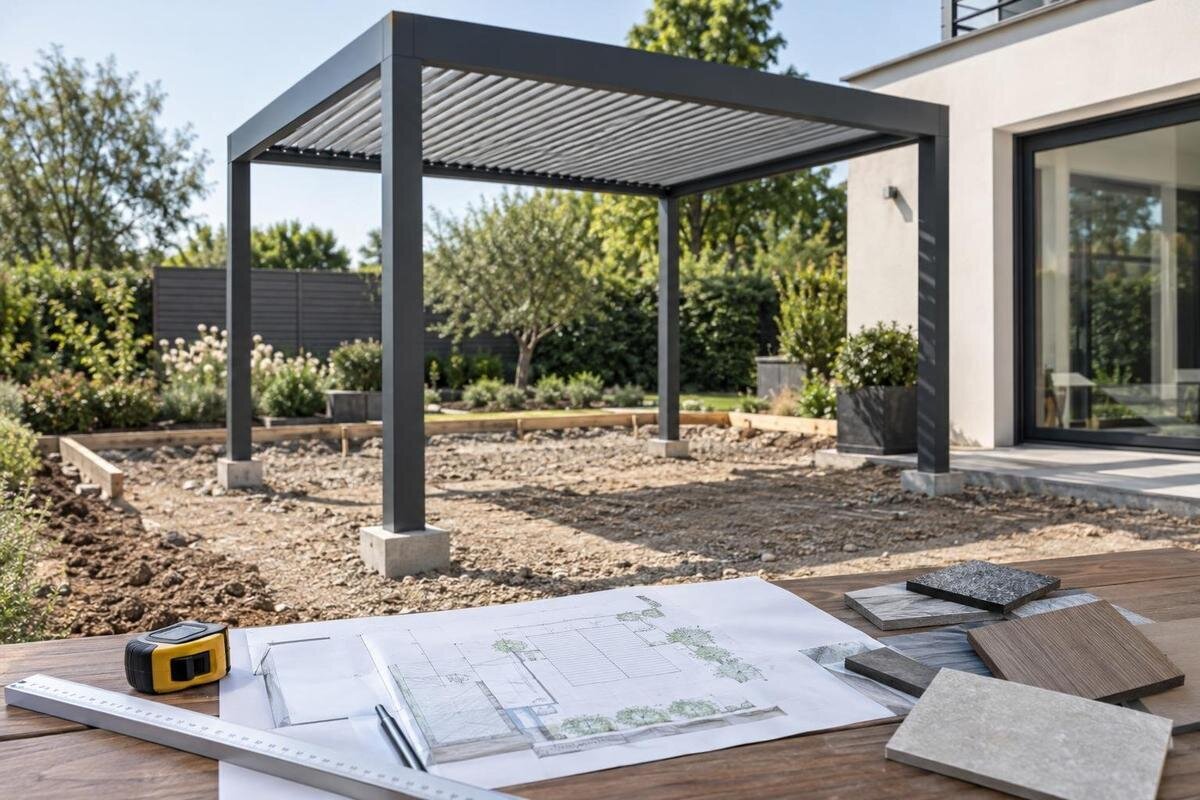
Pergola project planning
Buying a pergola before the patio is built can prevent an expensive mismatch, but only if the product decision reaches the people doing the groundworks in time. The patio plan needs more than a nominal roof area: it must accommodate the chosen structure’s dimensions and supports, the finished surface level, drainage, any planned services and the installer’s access. Agree those interfaces while the layout can still change, then carry them through on one dated drawing.

Choose the pergola footprint before setting out the patio
Treat the pergola footprint as a design input, not a finishing touch to choose after the paving. Request a dimensioned drawing for the exact model and configuration under consideration. It should distinguish the overall structure from the post-centre positions and identify any projection or clearance the supplier says affects the layout. Confirm which dimensions are outside-to-outside and which are centre-to-centre; they are not interchangeable when transferred to site. Ask how the drawing defines its orientation and reference edge, so the landscaper is not setting out from a different datum. Record the selected version and drawing revision before the patio plan is fixed.
Overlay those dimensions on a measured sketch of the house and garden. Include the wall, thresholds, doors, steps, existing paths and the intended paved edge, then draw the furniture and a clear route between the house and garden. Decide which side should align with the building or a paving joint, and where people will enter the covered area. A roof may cover a larger or differently shaped area than the space that remains comfortable to use, so allow for chairs to move and people to pass. Settle the orientation while the landscaper can still amend the layout, rather than trying to make a finished patio fit a later product choice.
Mark post positions and keep access routes clear
The area under the roof is not the only space to plot. A support post can miss the furniture yet obstruct a door, a garden path, access to a drain cover or the route used to move bins. Transfer each post centre from the supplier’s drawing using an agreed fixed point, such as a house corner, and label the dimensions on the plan. Note door swings, thresholds, downpipes, outdoor taps, inspection covers, steps and other fixed items. Ask the landscaper to flag anything that cannot be moved before the patio outline is treated as settled. Check the site as well as the drawing: walls, drains and other features may not sit where an old plan suggests.
Mark the proposed centres on site with removable markers or lines, then walk the routes as you would use them: open relevant doors, carry a chair through and stand where the table will sit. Check that no post narrows an important passage or makes a cover difficult to reach, and allow for furniture to be pulled out rather than measuring only when it is pushed in. If the regular pergola option is on your shortlist, use its product-specific drawing—not the listing alone—to confirm the exact post positions and chosen configuration with the supplier. Record any agreed move before the paving design is issued.
Agree finished levels and pergola supports
The patio’s top surface is only one level in the build-up. The landscaper and pergola installer need the intended finished height, existing ground level and relationship to any steps or door thresholds, so they can coordinate the supports and paving. Ask the supplier for the base or anchoring requirements for the selected configuration, then have the appropriate contractor or structural professional assess the actual ground and design the support arrangement. A product photograph or generic sketch does not establish what a particular site needs. Do not guess a footing, base or fixing from a picture or from advice given for a different pergola and surface.
Put the support detail on a section drawing as well as the plan: show existing ground, the support arrangement, finished paving surface and their relationship to each post. Confirm whether the installer needs a clear support zone, a prepared base or access to a fixing, and what tolerance is allowed at the finished surface; these details depend on the product and site. Keep the paving build-up and any edge details in the conversation, since a late change in surface height can affect the agreed set-out. If you choose the Bloomcabin Pergola, coordinate its confirmed support positions with the paving joints and cuts, so the landscaper can plan the finish around each post without altering the support arrangement.
Plan patio drainage around the pergola layout
Show water routes on the same plan as the paving and post positions. Mark the existing ground levels, the intended surface falls, door thresholds, gullies, channels, downpipes and any known drains or discharge points. Ask the landscaper to explain where surface water will go and who is responsible for any connection or disposal arrangement. Do not assume that the patio’s fall, a nearby drain or the pergola itself will deal with every flow. The planned route needs to work with the actual site, including the building edge and any low points. If the position of a drain or outlet is uncertain, have it checked before setting out or excavating.
For the bioclimatic pergola option, ask whether the exact configuration includes any water-management feature and, if so, request its outlet positions and product-specific guidance. The model name or a photograph does not establish where water leaves the structure. Coordinate any confirmed outlet with the patio fall and the intended discharge route, and have a drainage professional check any connection or disposal detail. Show pipes and channels on the drawing before groundworks begin, and keep access to items that may need inspection. Even without a confirmed water-management feature, the patio drainage plan should account for rain reaching the paved area beneath and around the pergola.

Plan services before groundworks start
List services already in the garden as well as anything you may want to add. These could include buried electrical cables, water pipes, irrigation or drainage; a new route can conflict with a post support or excavation area. Identify existing routes with the relevant trades before work starts rather than relying on memory or an old sketch. If you hope to add lighting, sockets or controls, first confirm whether each item is compatible with the selected pergola and who will supply and install it. A general intention such as “leave power nearby” is too vague for coordinated groundworks: the position and responsibility need to be clear.
If you are considering the Bloomcabin Bioclimatic Aluminum Pergola, list each intended electrical item separately and ask the supplier to confirm whether it is compatible and whether it is included, optional or supplied by another contractor. Have a qualified electrician specify any provision, route, access and connection point before paving closes the ground. Put agreed routes and crossings on the coordinated drawing, and confirm who installs and records them. Distinguish provision for a possible future accessory from equipment being installed now, so the quote and groundworks brief describe the same scope. Keep other buried services on the same plan, with positions supplied or verified by the trades responsible for them.
Check the house-wall interface for a lean-to pergola
A wall-mounted layout introduces a building interface that a freestanding plan does not resolve. Record the wall dimensions and the positions of doors, windows, vents, gutters, downpipes and visible service routes. The wall’s construction and finish also matter: the suitability of a fixing cannot be established from its appearance alone. Request product-specific fixing information and have the proposed attachment assessed by the appropriate installer or structural professional for the actual building. Include any relevant details such as cladding, insulation or the damp-proof course in that discussion. Do not assume that a wall is suitable simply because the chosen product is described as a lean-to model.
For the lean-to model, ask for a drawing that shows its position against the house elevation, including the intended height and relationship to openings and rainwater goods. Agree who is responsible for checking the wall, forming any permitted penetration and making good the surrounding finish; do not leave these tasks implicit between the supplier and building trades. Check that the patio level and the wall-side arrangement have been considered together, rather than setting one and expecting the other to fit. If the wall or proposed attachment changes during the project, refer the new detail back to the supplier and the professional assessing the building interface.
Give every contractor the same dimensioned plan
Use one coordinated plan as the shared reference for the pergola supplier, landscaper, installer and electrician. It should show the site outline, house wall, openings, patio edge, post centres, agreed finished levels, drainage routes and known services. Add a section or elevation where a height, wall attachment or surface build-up needs explanation. Put written dimensions on the drawing rather than asking trades to scale them from a screen or printout. Identify the reference point, orientation, date and revision, so everyone knows which version is current. Include clear notes for any item that remains undecided, instead of letting different contractors make different assumptions.
Send the same plan and useful site photographs with a quote or configuration request, then ask for the proposed product arrangement to be checked against it. If the Bloomcabin regular pergola is being considered, include its exact model reference and the drawing revision used for the patio layout. Nominate someone to maintain the current drawing and circulate updates to every contractor, not just the person who requested the change. Mark superseded versions clearly so they cannot be mistaken for the agreed plan. This simple document control matters when a post moves, a door position is corrected or a service route changes: the paving team should not be working from an earlier version.
Write down who supplies and installs each element
A pergola project can involve several separate scopes of work, so list the handover points in writing. Clarify who supplies the pergola, who assembles it, who prepares the supports, who lays and finishes the paving, and who handles drainage or electrical work. These are questions to settle, not tasks to assume are included in a product price or contractor’s brief. Note any work that another trade must complete first, along with who checks that the area is ready for the next stage. If one contractor expects another to provide a base, opening or service route, name that responsibility and record the required drawing or approval.
For a quote involving the bioclimatic pergola model, ask the supplier to state which configuration is being quoted and to classify each relevant accessory or interface as included, optional or provided by others. Do the same for groundwork, paving reinstatement and any electrical or drainage connection. Ask each contractor to list their assumptions against the shared plan, including who takes site measurements and who confirms the support area is ready. If a change could affect another trade’s work, agree how it will be authorised and communicated. A written scope prevents an unpriced gap from appearing when one contractor expects another to finish the interface.

Agree the work sequence and delivery access
Do not assume there is one correct order for installing the pergola and laying the patio. The sequence depends on the selected support and installation detail, so ask the installer and landscaper to agree it against the drawings. Identify the points at which dimensions, levels, supports, service routes and drainage must be checked before another layer of work makes them harder to inspect or change. Record who gives the go-ahead at each handover. The aim is not to prescribe a generic build method, but to avoid completing a surface before the people responsible for the pergola have confirmed that its planned interfaces are ready.
Check delivery and installation access early. Ask the supplier or installer what information they need about the route to the garden, gates, unloading, temporary storage and the space available to work, rather than assuming that a clear patio plan means the site is accessible. For the Bloomcabin Lean-To Pergola, confirm whether the proposed sequence leaves the installer access to the wall and working area when required. Decide how finished paving will be protected if it is already in place, and who is responsible for arranging that protection. Put any access restrictions or storage arrangements on the project schedule so they are not discovered on the day.
Approve the set-out before the patio is finished
Before the final paving is laid, compare the on-site set-out with the latest agreed drawing. Have the relevant contractors check the pergola position, support zones, finished levels, surface falls and any planned service routes against their own requirements. Resolve discrepancies while there is still time to revise the work; do not cover a support area, drain or planned service crossing that has not been checked by the person responsible for it. Confirm any change in writing and update the plan for everyone involved. A small adjustment on site can affect more than one interface, so it should not be treated as an informal instruction to the paving team.
Keep the approved drawing, exact model and configuration, support information, written scope, service plan and photographs of routes before they are covered. Note the final revision and any agreed changes, so later work is based on what was actually built rather than the first sketch. If the pergola position, product choice or patio level changes, ask the supplier and relevant contractors to review the revised arrangement before continuing. Where planning, ownership or insurance questions could affect the design, verify the specific point locally with the relevant authority, owner, insurer or qualified adviser before work proceeds.
Frequently asked questions
Can I order a pergola before the patio is built?
Yes, provided the choice is specific enough to coordinate the work. Confirm the exact model and configuration, a dimensioned drawing, support requirements and any drainage or service interfaces. If those details are still open, discuss the project with the supplier and share the site plan before the patio layout is fixed.
Can the pergola stand directly on the paving?
Do not assume that the paving surface is also suitable as the pergola’s support. The required anchoring and base depend on the selected product and the conditions on site. Ask the supplier for the relevant details, then have the appropriate contractor or structural professional confirm the support arrangement.
Should paving go under or around the pergola posts?
There is no universal answer: the correct paving line depends on the chosen support and installation detail. Show the post positions, base requirements and finished surface level together on a drawing, and agree the sequence with the pergola installer and landscaper before the final paving is laid.
Can I add lighting after the patio is finished?
It may be possible, but adding services later can mean visible routes or disturbing finished paving. First confirm whether the intended lighting or controls are compatible with the chosen pergola. Ask a qualified electrician to specify any provision and route before groundworks are closed up, including what is needed now if you intend to install the lighting later.
What if the patio dimensions change after I order?
Ask the supplier, installer and landscaper to review the change against the approved drawing before work continues. A changed position or level can affect supports, clearances, drainage and service routes. Get the revised arrangement confirmed in writing rather than moving posts or altering finished surfaces by assumption.
When the pergola footprint, support arrangement and service routes appear on the same approved plan as the patio levels, each contractor can see where their work begins and what must be ready for the next stage. If a dimension or configuration changes, revise that shared plan before the surface is closed. The benefit of deciding early is not that every detail can be predicted; it is that the people building the patio have verified information before the difficult-to-change work is complete.
