
Pergola and Outdoor Fireplace: Planning Separation and Heat Exposure
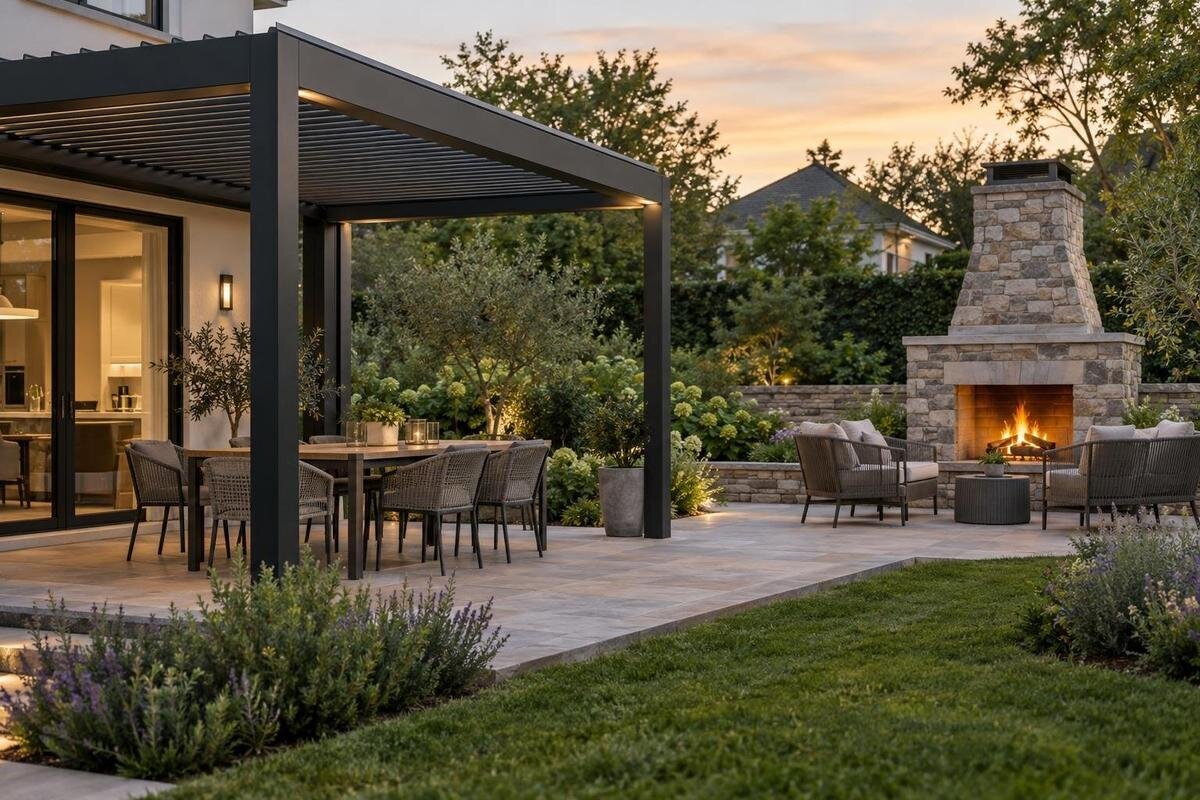
Garden planning
Planning a pergola beside an outdoor fireplace is a question of verified separation, not just visual fit. An open-looking roof, a generous patio or a product name alone does not prove that the arrangement is safe. Heat, flame, sparks, exhaust and access all matter, and the installation limits for the two pieces of equipment may differ. Treat them separately on the garden plan. Compare the exact manuals and obtain qualified fire advice before ordering, fixing positions or using the appliance. If compatibility cannot be confirmed, do not assume that placing the fire just beyond a roof edge makes the layout acceptable.

Identify the fireplace before planning the pergola
An outdoor fireplace may mean a built-in masonry hearth, an open wood-burning unit, a gas fire, an electric appliance or a model with an enclosed firebox and flue. These have different heat sources, and combustion appliances also have fuel and exhaust requirements. Identify the exact make and model, its intended setting and any fuel or outlet arrangement, then obtain the installation instructions before deciding where the pergola belongs. Note any specified firebox, flue, guard or enclosure components. The description “outdoor” does not establish which clearances apply. If instructions are missing, request the correct document from the manufacturer or supplier. Keep the complete manual: siting diagrams alone may omit requirements for operation and maintenance.
Do not begin with the assumption that a pergola can be made into a fireplace shelter. An ordinary pergola is not automatically designed to house enclosed-combustion equipment, carry a flue, shield the roof from heat or provide a mounting point. A closed firebox still has an exhaust route and hot surfaces, and open-sided construction does not answer how either behaves beside the structure. Ask a suitably qualified fireplace installer or fire professional to check the actual appliance and proposed setting. Find out whether overhead siting is permitted at all; a side clearance on its own cannot answer that. Any gas, electrical or flue work should be handled by the appropriate qualified installer under the appliance instructions. Until the combination and clearances are confirmed, treat the plan as unapproved; do not test it by lighting the appliance in place.
Use the appliance’s documented clearances
Use the fireplace maker’s written clearances as the starting constraint, not a gap copied from a different model, a neighbour’s patio or a retailer’s photograph. Requirements can vary around the appliance and may cover overhead surfaces, adjacent walls, flues, outlets and combustible objects separately. A measurement from the firebox to the nearest pergola post can therefore miss a roof edge directly above it, a beam or a fitted screen. Read the whole installation guidance for the exact model and ask the installer to interpret it in the context of the proposed pergola. Pay attention to the stated measurement points and terminology; do not replace a reference to a particular surface with a guessed distance to the frame. There is no universal gap that applies to every fireplace and roof.
Mark each stated clearance on both a plan view and a side view, using the appliance’s real position and the pergola’s roof outline, supports and attachments. Include any permitted roof or screen positions rather than relying on one attractive configuration. If considering Bloomcabin Pergola, request the current technical information for the exact version and use its documented dimensions in that drawing. Label the points from which each clearance is measured so the installer can compare the drawing with the appliance manual. Where the documents use different reference points, ask the installer to resolve them before the layout is used to set out foundations.
Assess radiant heat exposure
Radiant heat is not limited to the visible flame or the nearest post. Depending on the appliance and its location, exposed surfaces may include the roof underside, beams, support posts, an adjacent wall, glazing, door frames and furniture. Heat may also reflect from nearby hard surfaces, so measuring only the shortest horizontal gap can give an incomplete picture. Ask the fire professional to identify which parts of the pergola and surrounding garden fall within the appliance’s specified exposure area. Include the seats people will actually use: being outside the direct flame path does not establish that a position is comfortable or safe. The assessment should consider the arrangement specified for use, not just a cold visual inspection.
Materials and finishes respond differently to heat, and a structure is an assembly: covers, seals, coatings, fasteners and later-added items may not share the same properties as the main frame. Check the documentation for the exact components rather than inferring resistance from appearance or a material name. For the Bloomcabin Bioclimatic Aluminum Pergola, request component information and any documented limits relevant to the proposed exposure. A heat shield or reflective panel is not a shortcut to compatibility; it needs assessment as part of the complete arrangement. Record the components reviewed so that a substituted finish, cover or fitting is not mistaken for the original specification.
Consider smoke, exhaust and changing wind
Smoke and exhaust need a route that remains clear in the real garden, not just in a still-air drawing. Wind can carry a plume sideways or back towards the structure; a roof, wall or side screen can redirect or hold it. Open sides do not, by themselves, prove that combustion products will disperse as intended. Follow the fireplace maker’s instructions for the outlet or flue and have an installer assess its proposed route, nearby roof surfaces and the site’s wind exposure. A layout that looks clear during a still-day survey may behave differently in ordinary wind, so do not assume a vertical plume. Do not add a flue extension or change its direction to make it fit the pergola without professional approval.
Map doors, openable windows, air inlets and neighbouring seating or openings around the proposed fire. Smoke drawn towards a house opening or into a sheltered seating zone can make an otherwise spacious patio unpleasant and may conflict with the appliance’s siting instructions. Show which openings can be used, rather than marking only the wall itself. A wall-mounted arrangement deserves particular scrutiny: Bloomcabin Lean-To Pergola identifies a product option, not permission to position a fire or exhaust beside a façade. Ask the fireplace installer to consider the wall, eaves, roof edge and outlet together, and record any restrictions before the landscape layout is fixed.

Allow for sparks, embers and stored materials
With solid fuel, include the path sparks or embers could take in variable wind, not only the fireplace footprint. Nearby cushions, outdoor furniture, dry leaves, stored logs, planters, screens and surface finishes may all need to be shown for the professional assessment. A spark guard or closed-looking firebox should not be treated as proof that every surrounding surface is protected; its use and limits come from the appliance instructions. Note vertical as well as ground-level exposure, since embers may travel above furniture or settle on higher points. The area around a fire can also collect leaves or other debris, so planting and cleaning access belong on the plan. Do not settle this by watching one calm-weather test.
Storage and maintenance need their own space on the drawing. Show where fuel, tools and any ash-handling equipment will be kept, alongside the route used to reach them. Follow the appliance manual for handling ash and items that may remain hot; sheltered space beneath a roof is not automatically suitable. If Bloomcabin’s regular pergola model is part of the proposal, show how these activities relate to its occupied seating area. Consider whether carrying supplies would require moving chairs or crossing the space beside the fire. This helps the reviewer distinguish a workable storage location from an empty corner that will become obstructed during use.
Keep access routes and seating unobstructed
Plan everyday routes as carefully as equipment clearances. People should be able to reach seats, doors and other parts of the garden without squeezing between a hot appliance and a post or crossing an area reserved for servicing. Show likely chair positions, table edges, steps and the route for carrying fuel or maintenance items; furniture often changes after installation, so draw realistic sizes rather than token symbols. Keep access to any controls, connections and inspection points in view, as required by the manual. Think through ordinary use, such as opening doors and carrying dishes, so that the route does not pass unnecessarily close to the fire. The professional reviewing the fireplace should see how the space will be used, not just an empty paved rectangle.
Measure the pergola footprint and mark every support in its actual position before setting seats or circulation routes. A shaded patch on a product image is not a measured plan, and a nominal area does not show where posts or the fireplace will sit. If the bioclimatic pergola listing is under consideration, ask for the drawing and dimensions for the precise version being quoted; use those to test the layout on site. Check that clearances remain when chairs are pulled out and when an access panel or appliance door needs to be opened, if the manual calls for it. Keep the area needed to inspect or maintain the fireplace accessible without moving the structure or squeezing past the fire.
Include roofs, screens and later additions
Treat every roof or side component as part of the installation. If the chosen pergola has a movable roof, awning, blind, side panel or glazing, a changed position can alter exposure, airflow and the way smoke moves. A gap visible with a panel retracted may disappear in the configuration used during a meal; a screen may also affect ventilation even if it appears to block sparks. Obtain confirmation for the positions in which the appliance will be used. Ask the installer to record whether any approval applies to all roof positions or only one. Do not assume that opening a roof or raising a blind creates a safe arrangement unless the product instructions and fire professional specifically support that configuration.
Later additions need to be recorded too. Curtains, privacy panels, plants, lighting, outdoor heaters, a fan or decorative cladding may sit close to hot surfaces or affect ventilation. When reviewing the regular pergola option, distinguish the proposed accessories from items that are merely ideas for a future purchase. Ask the reviewer to identify which additions would require a fresh assessment. Any proposed appliance or flue attachment, or protective lining, needs explicit manufacturer guidance and professional review rather than a DIY alteration. Keep an accessory schedule with the drawing so future owners or installers can see what was included in the original assessment.
Assess freestanding and wall-mounted positions separately
Freestanding and wall-mounted pergola layouts create different nearby conditions, not automatic safe and unsafe categories. A freestanding position may move the roof away from a façade, yet it can still put the fire near a post, planting, windows or the main route. A wall-mounted position brings the wall and its openings, eaves and finishes into the assessment; its supports do not make that wall suitable for a fireplace or flue. Plot the actual roof edge and the appliance’s outlet rather than judging from the plan label. Check measurements in plan and elevation, since a roof may overlap an appliance even when the supports look distant. Have the installer assess the complete site, including any boundary or neighbouring space affected by smoke.
When considering a wall-mounted pergola model, separate the questions about attachment to the building from those about the fireplace. A suitable fixing location does not establish acceptable heat or exhaust exposure for the nearby façade. If the fireplace is fixed, its service access and exhaust route constrain where the roof can go. Compare possible roof positions using the same wall elevation, including eaves, windows and doors, rather than separate product sketches. If either item is movable, show each proposed location for review. This makes it clear whether the assessment covers one fixed arrangement or several permitted positions.

Put both structures on one dimensioned plan
Use a dimensioned landscape drawing to show the full relationship: garden edges, façade, doors, windows and air inlets; the fireplace body and flue or outlet; pergola posts and roof projection; furniture, paths and existing planting. Mark the manufacturer’s stated clearances on the drawing instead of describing the gap as “a little way away”. Show vertical height and the flue or outlet in an elevation, since a plan alone cannot explain overhead relationships. Include documented planting requirements so shrubs or climbers are not planned into an area that needs to remain clear. A rendered perspective helps with appearance, but cannot replace dimensions, elevations and the written appliance instructions.
Give the designer or consultant the exact product names, manuals, fuel type, outlet details and intended roof or screen positions. Use Bloomcabin’s bioclimatic model page to identify the product being discussed, then request its relevant dimensioned drawing and instructions. Make sure the fireplace installer receives the same version of the site plan as the pergola supplier. Assign a date and revision number so an earlier roof position cannot be confused with the final proposal. Ask the appropriate professional or authority whether local planning, building or fire requirements apply, and retain their responses with the drawing.
Pause if the proposed combination cannot be verified
If a manual omits the proposed combination, the manufacturers give conflicting advice, or a critical distance cannot be measured, pause the design. Ask for written clarification that identifies the exact configuration and the unresolved point. A qualified fireplace installer or fire professional should then review the response alongside both sets of instructions. Do not select whichever requirement seems less restrictive or borrow a clearance from a similar model. If the arrangement cannot be verified, revise the layout or defer one element. A revised position needs its own assessment; moving the fire beyond the roof edge does not, by itself, resolve questions about heat, exhaust or access.
The final record should identify the fireplace model and fuel, flue or outlet, pergola model, roof and side configuration, clearances, furniture and access. Include any conditions attached to the professional assessment, rather than recording only a general statement of approval. Make sure everyone who uses the garden knows which equipment positions and configurations the record covers. Keep the manuals and written advice available when equipment is replaced or the garden is altered. This gives future decisions a clear reference point while recognising that a drawing cannot establish the safety of a change that has never been assessed.
Frequently asked questions
How far should an outdoor fireplace be from a pergola?
There is no single safe distance for every model. Use the exact fireplace instructions for overhead and side clearances, then have the proposed roof, posts, walls, outlet and accessories checked in plan and elevation. A gap that works for one appliance or pergola cannot automatically be transferred to another.
Can an outdoor fireplace go under a pergola?
Only if the documentation for the exact fireplace and pergola supports that configuration and a suitably qualified installer confirms it. An open-sided structure does not prove there is adequate ventilation, and an ordinary pergola is not automatically a flue support, enclosure or heat shield. Do not operate an appliance under a roof on appearance alone.
Does a louvred or bioclimatic roof make the arrangement safer?
Not necessarily. A product name does not establish a fire clearance or heat-exposure rating. If the roof has adjustable parts, different positions can change which surfaces are exposed and how exhaust moves. Use only a configuration covered by the relevant instructions and professional assessment; opening the roof is not a substitute for either.
Can a pergola screen keep smoke or sparks away?
Not without confirmation. Screens can change airflow and may not stop heat, smoke or embers as intended. Treat each panel as part of the proposed installation, check whether it is permitted near the appliance and have the full arrangement assessed. Do not add a screen or barrier to compensate for an unverified distance.
What should I give a fire professional to review?
Provide the fireplace and pergola make and model, manuals, fuel and flue or outlet details, a dimensioned plan and elevation, roof or screen positions, and the locations of walls, doors, windows, planting, furniture and access routes. Ask whether the exact arrangement is supported and what clearances apply, then keep the response with the final drawing.
An outdoor fireplace and a pergola can share a garden plan only when their actual installation requirements have been reconciled. Judge the relationship by documented clearances, heat and exhaust behaviour, sparks, access and the full roof-and-screen configuration—not by an open appearance or an estimated gap. A dimensioned drawing makes conflicts visible; manufacturer guidance and qualified assessment decide whether the proposed arrangement is acceptable. If that answer is unavailable, keep the combination on hold rather than treating the pergola as a fireplace enclosure.
