
Where Should You Position a Pergola Heater?
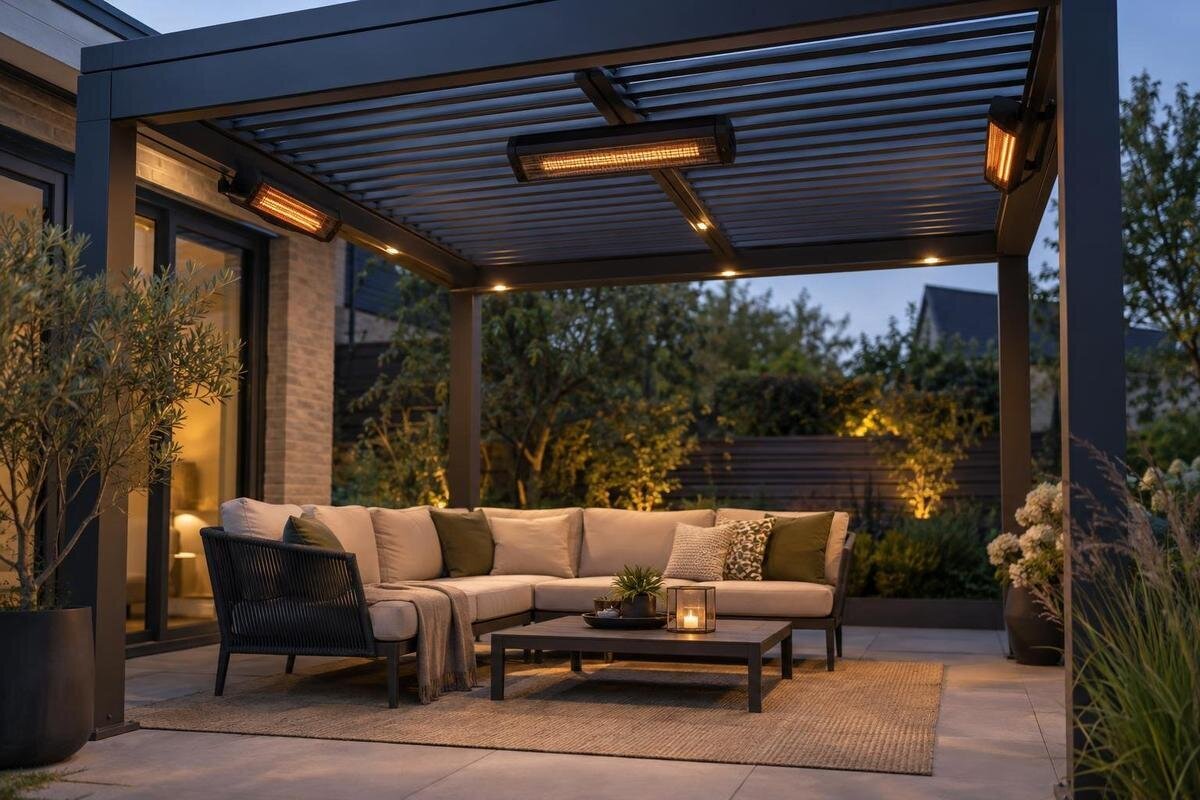
Pergola heating guide
There is no universal best spot for a pergola heater. Plan around the seats people use, then check the exact heater’s coverage, required clearances, weather suitability and approved fixing points against the pergola instructions with a qualified installer.

Map the seats people actually use
The best place to begin is the seating plan, not the visual centre of the pergola. Mark the table, sofa or chairs in their usual positions and show where each person sits, including chairs pulled out for use. Decide whether the priority is dining, lounging or a mix of both: the occupied area can shift with the activity. A heater centred under the roof may therefore miss the seats people use most. If the pergola serves different groups at different times, choose the arrangement you most want to heat and note any secondary one. Name the structure on the sketch too; Bloomcabin Bioclimatic Aluminum Pergola is one catalogue option to identify when asking about a particular layout.
Show more than the seated footprints. Mark the route from the house door, the space needed to pull out chairs and the places where someone stands to serve food or move around the table. This helps distinguish the heating zone from circulation space and makes potential conflicts easier to spot. If furniture is rearranged often, draw the usual and alternative layouts separately. A position that works only when chairs stay in one exact place may become awkward later. Keep the plan realistic: include bulky cushions, side tables and other items normally present rather than designing around an empty terrace. State which arrangement matters most so the installer can assess the intended use.
Match the position to the heater’s heat pattern
Work out how the exact heater delivers warmth before choosing a fixing point. A radiant model directs energy towards people and surfaces in its path, while a heater that warms air has a different pattern of use. These designs do not create identical comfort zones outdoors. Read the heater’s instructions for its intended mounting orientation and any coverage guidance; treat illustrations as specific to that model, not as a template for another unit. Height, angle, nearby surfaces and open sides can all affect whether people are in the intended area. If you have not chosen a heater, mark the preferred seating zone first, then compare it with the arrangements the candidate models allow.
The roof centre is not automatically the best position. An off-centre location may relate more closely to a group seated to one side, but only if the heater’s instructions and the pergola’s approved mounting points allow it. Draw the direction of the heat field on your plan and compare it with each regular seat. Do not rotate or tilt the unit beyond its permitted positions to improve coverage. If you are discussing a wall-mounted arrangement, name the exact structure, such as Bloomcabin Lean-To Pergola, so the question about the roof area and seating position is clear.
Check coverage across the seating area
Assess every regular seat, not just the one closest to the heater. Mark the end chairs, the far end of a sofa and any other position people use routinely, then compare them with the coverage information for the exact heater. Follow any orientation shown in its instructions rather than assuming warmth spreads evenly in every direction. The pergola’s overall footprint is not the same as the heater’s stated coverage area. The practical question is whether the intended seats fit within the manufacturer’s guidance for the proposed position, not whether the heater appears to sit above the geometric middle. Also note which way each person faces. Two chairs at a similar distance from a radiant heater may present different sides of the body to it, and a high-backed chair or other obstruction may interrupt the heat path. Include these details when discussing coverage rather than treating each seat as a dot on the plan. Where the manufacturer provides a coverage diagram, check which mounting height and orientation it describes before comparing it with your seating layout.
If the seating is split into two groups, decide which area takes priority and ask whether one permitted installation can serve both. Do not assume that raising, angling or moving a heater beyond its instructions will extend its reach. Adding another unit is not automatically a simple fix either, because its mounting and electrical requirements also need checking. If you are discussing a particular structure, Bloomcabin Pergola gives the installer a product identity to pair with the seating sketch. Any assessment should take account of both exact products and the furniture arrangement you actually plan to use.
Plot clearances in three dimensions
Clearance is a three-dimensional zone, not just a clear patch on the floor plan. Look in the exact heater instructions for every clearance and condition they specify, such as above, beside or behind the unit, towards the mounting surface and around nearby objects. Which measurements apply varies by model and mounting orientation, so do not borrow a figure from another heater or assume the same spacing applies in every direction. If the instructions give separate requirements for particular materials or surfaces, use those requirements as written. A convenient-looking gap is not a substitute for the clearances specified for the appliance.
Draw the proposed location on a plan and a side view, then mark any restricted zone shown in the instructions. Include the roof, walls, screens, curtains, umbrellas, cushions and plants that will normally be nearby, not just permanent parts of the structure. Consider occupied seating as well as furniture: people may be closer to the unit than a bare floor plan suggests. If a chair or screen falls within a required zone, change the layout or ask about another approved arrangement rather than relying on moving it only on installation day. Account for items in their different everyday positions: an umbrella folded beside a post, cushions stacked on a chair or a curtain gathered at one end may occupy more space than they do in use. Show these positions on the sketch so that the assessment includes storage habits as well as the layout when everyone is seated. Use the bioclimatic aluminium pergola listing to identify the structure if that is the model being considered.

Confirm the fixing point is approved
A fixing point cannot be approved by appearance alone. Check the pergola documentation, or seek written confirmation from its manufacturer, for the specific frame member and attachment allowed for the heater under consideration. Do not assume that a beam, post, trim piece, roof louvre or decorative panel is suitable because it looks substantial. Moving parts need particular care: do not treat them as mounting points unless the relevant instructions explicitly permit that use. The heater’s own instructions also matter, because they set out its permitted bracket and orientation. The proposed position has to work for both products, not just one.
Keep the pergola’s mounting guidance separate from the heater’s requirements: each answers a different part of the compatibility question. Ask a qualified installer to assess the actual proposed position and to raise any uncertainty with the relevant manufacturer. If the documents conflict or do not identify an approved point, do not improvise an attachment. For a wall-mounted configuration, name the product accurately, for example with the lean-to pergola product page, then ask which fixing points and orientations are permitted for the exact arrangement.
Account for wind, rain and open sides
A pergola is an outdoor setting, so exposure matters when you compare possible positions. Wind and open sides can affect how warmth is experienced; airflow is especially relevant to designs that warm air, while radiant heaters still need to be positioned according to their own coverage guidance. A corner that looks sheltered is not automatically the right location, and moving the unit towards a more enclosed area does not remove the need to check clearances. Describe the actual setting to the installer, including which sides are open and where people will sit, rather than relying on a general description such as sheltered or exposed.
Check the heater’s stated outdoor suitability and installation conditions against the site. Note possible exposure to rain, splash or irrigation where relevant, and ask the installer to assess whether the intended position meets the equipment requirements. A roof overhead does not by itself establish that a heater is suitable for every condition beneath it; an open side may leave it exposed from another direction. Do not assume that adding a screen will solve an exposure issue unless the heater and pergola documentation allow that arrangement. In a written brief, identify the structure too: Bloomcabin’s pergola product page is one specific product reference to include.
Check moving roofs, screens and furniture
If the pergola has an adjustable roof or other moving parts, assess the heater position through the full range of normal operation. Check that the heater does not obstruct movement, become caught in a changing gap or rely on a moving part for support unless that installation is explicitly approved. A location that appears clear with the roof open may not remain clear when it is closed or angled. The installer should assess the relevant positions against the heater’s clearances and the pergola’s operating instructions; do not assume that one view of the roof proves the location is suitable.
Screens, curtains, awnings and furniture can change the space around a heater. Record the positions in which these items are normally used and check that they do not enter a restricted zone or obstruct the intended heat path. A screen should not be treated as a way to create an enclosed space or alter the heater’s outdoor suitability unless the product instructions permit it. If you are assessing a bioclimatic arrangement, name the exact structure, such as Bloomcabin’s bioclimatic pergola page, so the relevant roof details can be checked against its instructions.
Plan the electrical route with the position
The most convenient-looking heater position may not be practical once its electrical supply and controls are considered. Discuss the exact heater model and proposed location with a qualified electrician before settling the layout. They can assess the supply, the route needed for the installation and the outdoor conditions for the actual site and equipment. Do not choose a position simply because a connection is nearby, and do not carry out electrical alterations yourself. The aim is to review the heater and its location together, rather than picking a point first and assuming the electrical side can be resolved afterwards.
Include control access in the plan. Note where a switch or other control would be convenient to use, and consider whether someone would have to reach across the heater or pass through an awkward part of the seating area to operate it. Ask the electrician to assess the route and control position for the specified equipment; cables should not obstruct ordinary walking routes. If more than one seating group is being considered, explain whether you expect to heat them together or separately. This is a requirement to discuss, not a reason to assume that a particular heater supports separate controls. Also identify who will normally operate the heating and from where. A control that is easy to reach from the dining table may be less convenient when the terrace is arranged for lounging. For a structure attached to a building, the wall-mounted pergola listing can identify the configuration in the brief without relying on a generic description.

Review the proposed layout on site
Before work begins, compare the plan with the actual terrace and furniture arrangement. Put the furniture in its normal positions and use removable marks on the floor to show table and chair footprints if that helps reveal tight routes. Check the view from seated and standing positions, including access to the door and space to pull out chairs. Look at the proposed heater location from each regular seat too. It may sit prominently in a view towards the garden or appear above someone’s usual eye line; record any preference about its appearance before the approved position is finalised. Photographs from these viewpoints can help explain the layout to an installer, but cannot establish mounting suitability or replace measured clearances. This is a way to review the layout, not to trial an unapproved heater position: do not suspend or power a temporary unit as a substitute for checking the product instructions and fixing approval.
Walk through the uses that matter: a meal with chairs pulled out, a lounge arrangement, or the usual position of any screen or awning. Make sure the plan still reflects how the space will be used, rather than an ideal arrangement that is rarely kept. Record any changed furniture positions or site details for the installer, and have the clearances checked against those real conditions. If the layout changes after the proposed location has been reviewed, revisit the position rather than assuming that the earlier assessment still applies.
Give the installer a precise brief
Make the final discussion specific. Provide the exact heater and pergola identities, the relevant product instructions, a seating plan and a side view showing the proposed mounting point. Note nearby walls, screens, moving parts and the normal furniture arrangement, as well as the site’s exposure to the weather. Label a preferred position and any alternative separately, so that a response about one location is not mistaken for approval of another. Include model references and document versions where available, especially if several heaters are being compared. Keep unresolved questions beside the relevant drawing rather than leaving them in separate messages. This gives the installer and manufacturer a concrete setup to assess. A broad question such as whether pergolas can take heaters is less useful than asking whether this heater, in this orientation, can be installed at this particular approved point on this structure.
Ask the relevant professionals to confirm the separate parts of the proposal: whether the seating is within the heater’s stated coverage, whether its clearances are met in normal roof and screen positions, whether the fixing point is approved, and whether the electrical arrangement suits the equipment and site. If a manual is missing, instructions disagree or mounting approval is unclear, get clarification before choosing a final location. Changing the layout is preferable to relying on an unverified fixing point or reducing a required clearance.
Frequently asked questions
Should a pergola heater go in the centre of the roof?
Not necessarily. The centre may not be above the seats people use most. Mark the usual seating first, then check the heater’s coverage guidance, permitted orientation and approved mounting point for that exact pergola.
How high should a heater be above a dining table?
There is no height that suits every heater and pergola. Follow the exact heater instructions for mounting height and clearances, and have the proposed position checked against the pergola’s approved fixing points by a qualified installer.
Can I attach a heater to a roof louvre or beam?
Only if the relevant product documentation explicitly approves that point and arrangement. A component that looks sturdy, or stays still in one roof position, is not proof of suitability. Check the exact fixing and orientation before choosing the location.
Will one heater cover the whole seating area?
Do not assume so from the pergola’s footprint. Compare every regular seat with the coverage guidance for the exact heater and its permitted position. If the seating is spread out, ask an installer whether an approved layout can serve it.
Should the heater be close to a wall or screen?
There is no universal best distance. A wall or screen can affect clearances, exposure and the direction of heat. Check the heater instructions for the exact arrangement and confirm that the proposed position suits the pergola and site.
A good position serves the seats people actually occupy without compromising required clearances, normal movement or access to the pergola. A seating plan, the exact heater instructions and documented approval for the chosen fixing point give an installer a location they can properly assess. If those details do not agree, change the layout rather than the safety margin.
