
Reducing Glare from Pergola Lights: Shielding and Placement
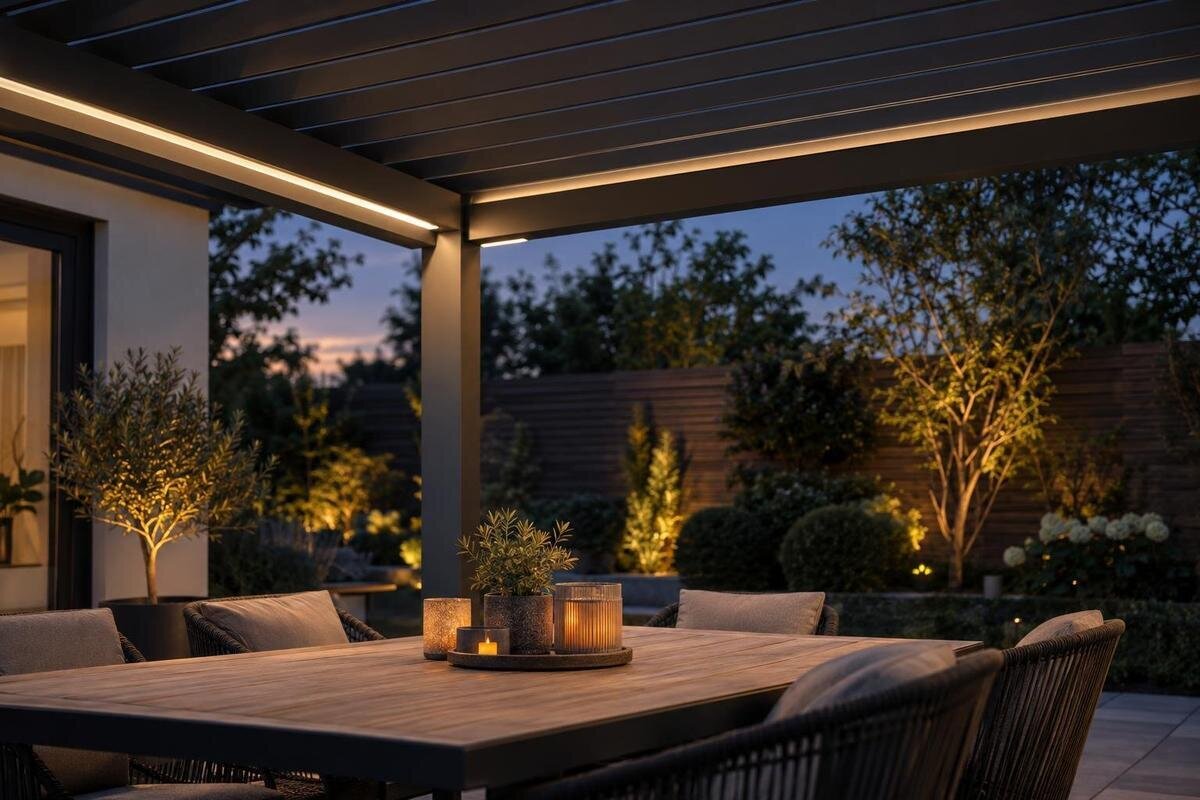
Pergola lighting
A pergola light can seem unobtrusive from the garden and still feel uncomfortable from a dining chair or sofa. Glare often comes from a bright source sitting in a direct view, a beam aimed towards the eye, or a reflection on glass and polished surfaces. The most useful planning tool is a light-placement sketch that shows real seated positions as well as fitting locations. This guide focuses on that check, on choosing suitable shielding and on what to confirm for the exact fitting and pergola configuration.

Why pergola lights can cause glare when you are seated
Glare is discomfort caused when a bright source, or a bright reflection, competes with what you are trying to see. Under a pergola, a fitting may sit above the standing view yet fall directly into a seated line of sight. Someone at a dining table usually looks across the structure, while a person reclining on a sofa sees a different part of its underside. The same fitting can seem unobtrusive as you walk into the garden and harsh once you settle down. The problem is the relationship between the light, the eye and the surrounding scene, not simply whether the lamp looks attractive or whether its light reaches the patio.
At night, an exposed bright point against a darker garden can draw the eye even when the table itself is well lit. A source hidden from direct view may still show as a sharp reflection in glazing, a polished tabletop or damp paving. Adding a brighter or extra fitting before locating the source can increase contrast and make the problem worse. When discomfort occurs, separate three questions: can you see the luminous part of the fitting, is its beam directed towards your eyes, and is a nearby surface returning a bright image? The answers indicate whether placement, aiming, shielding or output needs review. Note whether the problem changes as the sky darkens or indoor lights are switched off; that context can alter the contrast.
Map the seats before choosing fitting positions
Draw the furniture as it is used after dark, rather than treating the pergola footprint as a guide to where people look. Mark each dining chair and sofa seat, including a chair at the end of the table, a corner seat and any position where someone tends to lean back. Note the direction people normally face, whether chairs move for meals, and where someone stands to serve or pass through. Include regular layouts, not every imaginable rearrangement; otherwise the drawing becomes too busy to guide a decision. If seating moves seasonally, make a second sketch or use a clearly labelled alternate position. Give the most-used seats and occasional seats different marks so you can see which views deserve priority.
Eye position matters more than chair outline, so note the approximate seated head position and whether a person is upright or reclined. A side view can show these differences; do not assume that a fitting above the top of a chair will automatically be outside the field of view. If you are considering the Bloomcabin Lean-To Pergola, include the house wall and doors alongside the seating plan when discussing the configuration. Someone facing the garden will have a different view from someone facing back towards the house, even at the same table. Note cushions, bench backs or chair angles if they noticeably change posture, and identify seats that face glazed doors.
Trace the view from each seat to each light
On the sketch, mark the luminous face of each proposed fitting, not just the support, rail or bracket that holds it. Use the exact fitting information to identify the exposed lamp, lens or diffuser and its orientation. Draw a line between each seated eye position and each proposed source. If no opaque part of the fitting or structure blocks that line, the bright face may be visible from the seat. Check whether any shield conceals it from that particular angle, rather than assuming the fitting is screened in every direction. This is a first screening check, not an optical calculation: it identifies views that deserve closer review with the actual fitting and its instructions. Reflections need a separate check.
Repeat the check from the seats most likely to be occupied, not just from the centre of the patio. Look along the table, diagonally across a corner and towards the open side of the pergola. Include reclined views if that is how the sofa is used, as well as a person’s view from an entrance or kitchen door. If you are comparing a Bloomcabin Pergola configuration, request the relevant layout details so you can plot proposed source positions relative to the furniture. Label uncertain locations rather than estimating them from a catalogue photograph. Recheck the affected sightlines if the furniture, pergola orientation or proposed fitting position changes.
Use a plan and a seated-height view
A top-down plan helps locate seats and fittings, but it cannot show whether a source sits above, at or below eye level. Add a side view of the most exposed seating position: include the seated eye point, table or book, proposed light and any frame edge between them. If views differ on the two sides, draw both. Label nearby glazed doors and reflective surfaces where a bright point may appear. Use measured dimensions where available and label estimates clearly. The purpose is to make sightlines understandable, not to create a structural or electrical installation drawing.
For a visual check before equipment is ordered, take a photograph from a normal seated position and mark possible source locations on the image. The photograph can show whether a fitting would sit in the view, but it is not a reliable measure of perceived brightness because a camera’s exposure can change how lights appear. If the proposed location is uncertain, mark it as a question for the supplier or installer rather than treating a picture or sketch as approval. The same drawing can be annotated with the seats where a direct view would be most distracting, making it easier to compare alternative positions without relying on memory.

Choose shielding made for the exact fitting
Shielding can help when the direct view of the bright source is the problem, but it needs to work from the angles where people sit. A baffle, louvre or cut-off edge can block a low-angle view; a diffuser may soften a bright patch without fully hiding it. The result depends on the precise fitting and its light distribution, so a general description is not a guarantee of comfort from every seat. Sketch likely views from above and from the side, then compare them with the manufacturer’s information or ask the supplier which angles the proposed shield is designed to screen.
Use only a shield or accessory approved for the exact outdoor fitting and mounting arrangement. Avoid improvised covers, tape, foil or paint: an alteration can interfere with heat release or protection from weather, so the fitting’s stated suitability may no longer apply. Check that the selected shield does not block the area that needs light. When discussing the Bloomcabin Bioclimatic Aluminum Pergola, ask whether any supported lighting options have shielding information that can be compared with your drawing. Request a view or diagram showing the accessory fitted, rather than judging a loose shield by its appearance. Its depth, orientation and relationship to the luminous face determine which seated views it can screen.
Reposition a visible source before adding more lights
When the bright face falls directly into a seated view, moving it is often a more targeted fix than adding another light or asking people to turn away. Compare several approved positions on the drawing: one may be screened by a frame edge from a particular seat but become visible from an angled chair or the other end of the table. Moving a fitting towards a task area may put light over a book or serving space, but check that the source itself does not then sit in the reader’s forward view. The final position must be permitted for the exact structure and fitting, not merely a convenient point on the sketch.
Keep the whole use of the space in view. A fitting shifted away from a face may cast a stronger shadow across a plate, create a bright pool at the edge of the table or leave a route less clearly lit. Mark the surface that needs light and compare alternatives from each seat, rather than judging the fitting by its position alone. For a proposed Lean-To Pergola layout, show the wall, seating and door on the same drawing. Compare a position near the house with one farther out only if both are supported mounting locations. Note which seats gain a clearer view and which acquire a new exposed source; this makes the trade-off explicit.
Beam direction and seated sightlines
Direction matters as much as location. Where a fitting allows aiming, its useful beam should reach the table or other task without travelling across faces or shining horizontally into the usual seated view. A source directed at a pale surface can sometimes provide softer reflected light, but a glossy finish may return a distinct bright image. Inspect the receiving surface from each seat instead of assuming that reflected light will solve glare. If the fitting cannot be re-aimed, note that constraint before choosing a position. Do not judge only by the illuminated patch: the exposed lamp or lens may still be the brightest point in the scene.
A light that misses one face may still point into the next seat, so review the complete seating plan rather than relying on a single view. If the task surface cannot be lit without putting the source in a forward sightline, discuss a different approved fitting or position instead of improvising an adjustment. For a regular Bloomcabin Pergola configuration, record whether each proposed fitting has a fixed direction or an approved range of adjustment. Show alternative beam directions on separate copies of the drawing so they remain easy to compare. Assess both the illuminated surface and the source seen from the opposite side of the table.
Check reflections and views beyond the table
Treat reflected glare as a separate line of sight. A source may not be directly visible from a chair but can appear in a glazed door, window, glossy tabletop, polished metal or wet paving. At night, that reflection can look like a second lamp and compete with the table or the garden beyond. Mark glass and shiny surfaces on the plan; in the side view, consider whether a likely reflection could reach a seated eye. The angle changes with the seat and the light position, so a view that is clear from one chair may not be clear from another. Check these surfaces from the positions people actually use.
Look from the route into the house, an open doorway and any nearby seating outside the pergola as well as the main dining spot. These viewpoints matter if someone can see the fitting through glazing or if its light spills beyond the covered area. When planning a Bloomcabin bioclimatic pergola, include nearby windows and reflective boundaries even if they lie outside its footprint. Note whether doors will normally be open or closed during evening use: moving a glazed panel can change where a reflection appears. If a bright reflected image is troublesome, identify the surface returning it before reviewing the source position, angle or an approved shield.
Dimming and control compatibility
Once the source is sensibly positioned, controls can help match output to the activity. A lower setting may make a bright point less intrusive, but dimming does not remove it from the line of sight or eliminate a reflection. Reducing the output too far can also make food, steps or reading material harder to see. Separate switching may let you use task lighting without turning on every other fitting, if the selected system supports it. Treat these as options to verify for the actual equipment, not guaranteed features of every pergola or light.
Read the instructions for the exact fitting, driver and control together; a dimmable label on one component does not prove it will work with every dimmer or control method. Confirm outdoor suitability and compatibility with the actual equipment, and leave electrical design and installation questions to a qualified electrician. For a proposed wall-mounted Bloomcabin model, record which lights you would want to operate together and which you would want to use separately. This gives the supplier a specific control requirement to assess without assuming that any particular system is included. Keep general supply and wiring preparation separate from the sightline drawing.
Review the finished layout from the usual seats
Before the installation is finalised, prepare a concise handover: the seating plan, side view, proposed fitting and shield, intended task surface, and positions where the source should not be directly visible. Include the exact manufacturer’s instructions and confirm what mounting arrangement is approved. Ask the supplier to confirm supported lighting options, and have qualified electrical input review the selected fitting, its outdoor rating and controls. A sketch communicates sightlines; it cannot approve a fixing, establish that a structure is suitable for a fitting or replace the product manual.
Once the approved lights are in place, assess them at the times you expect to use the pergola and from the usual seats, not only while standing directly underneath. Look for the luminous face, its reflection in glazing or on a table, and any beam that meets the eye when you lean back or turn. Record an uncomfortable view by seat number, viewing direction and control setting, changing only one setting at a time when comparing results. For a Bloomcabin regular pergola configuration, retain the agreed drawing with the fitting details so any proposed adjustment can be checked against the installed arrangement. A precise observation is more useful than simply reporting that the lighting is too bright.
Frequently asked questions
Where should pergola lights go to reduce glare?
There is no single position that works for every layout. Mark the usual seated views first, then place fittings so the bright source is not directly in those sightlines and the beam reaches the surface that needs light. Check the result from every regular seat and use only positions approved for the chosen fitting and pergola.
Will mounting a light above head height prevent glare?
Not necessarily. Someone sitting or reclining may look upwards or across the pergola, bringing a high fitting into view. A fitting can also create glare through a reflection on glass or a shiny table. Check from seated positions rather than judging height from the standing view.
Does a diffuser or shield always remove glare?
No. A diffuser may soften the bright area without hiding it from every angle, while a shield may block a direct view but change where light falls. The effect depends on the exact fitting, shield and seating positions. Check the manufacturer’s information and ask which angles the accessory is designed to screen.
Can dimming solve pergola light glare?
A lower setting may make a source less intrusive, but it does not move it out of a direct line of sight or eliminate a reflection. Dimming also needs to leave enough light for the task. Check that the exact fitting and control are compatible, and have electrical questions reviewed by a qualified electrician.
Can I cover an existing outdoor light to shield it?
Do not add an improvised cover, tape, foil or paint. Altering a fitting can affect heat release or protection from weather, so its stated outdoor suitability may no longer apply. Ask whether a shield is approved for that exact fitting and mounting arrangement, and use a qualified professional for electrical or installation questions.
Comfortable pergola lighting depends on the view from the seat, not just the position of a fitting on the frame. A placement drawing should show where the source is visible, where reflections may appear and which surfaces need illumination. Use it to compare approved positions and shielding, then assess the installed lights from the usual seats after dark. The aim is useful light without a distracting bright source in the views you use most.
