
Which Pergola Side Should Screen Low Evening Sun?
PERGOLA PLANNING
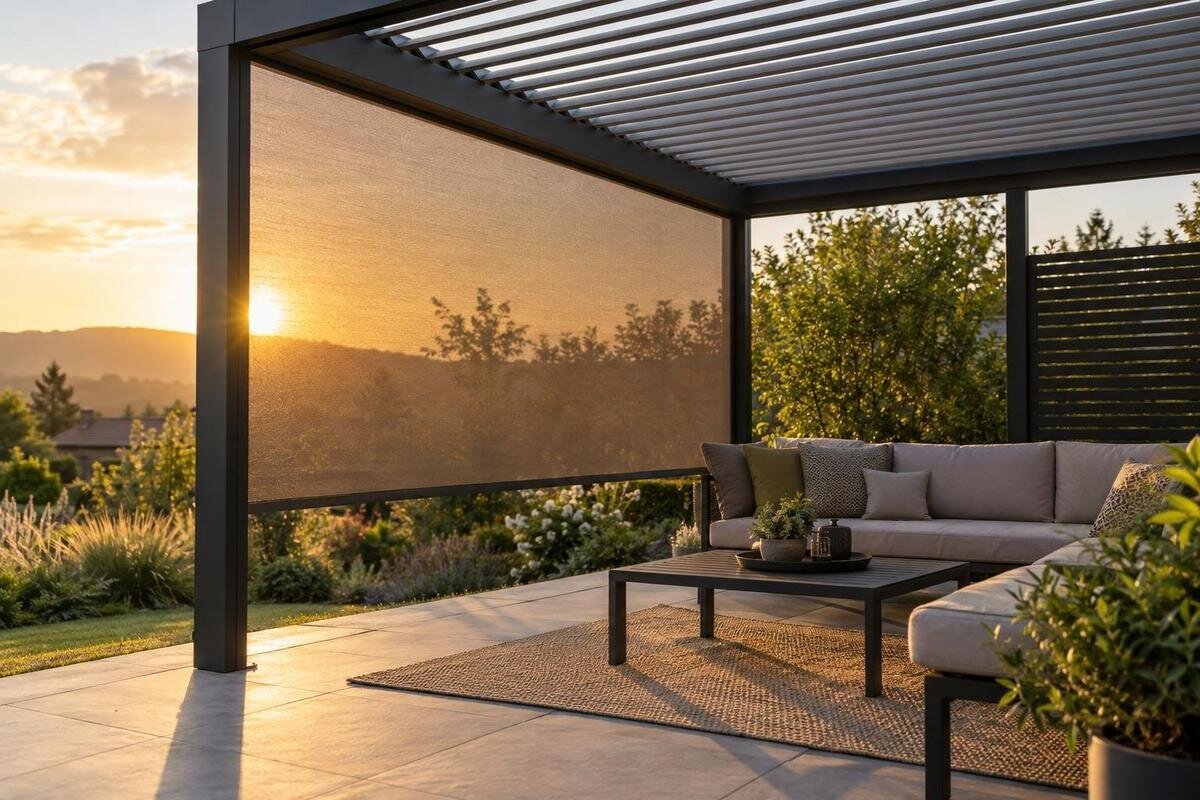
Low evening sun is usually a side-entry problem: a pergola roof may cast useful shade from above while a low beam still reaches the table or catches someone’s eyes. The right place for a screen is not automatically the side labelled “west”. It is the open edge that the sun crosses on its way to the seats, at the time you actually use the terrace. A simple plan and one or two observations on site can show whether that is the west edge, a south-west corner or a different opening. This guide focuses on that decision, then explains what to verify before choosing a compatible screen.

01
Where evening sunlight reaches the seating
A midday photograph is a poor guide to late-afternoon comfort. When the sun is low, its rays can travel beneath a roof edge and reach the seating from the side, even if the area was shaded earlier. Begin with the actual seat rather than the pergola as an abstract rectangle: note whether light reaches a face, the top of the table, a laptop or another surface where glare matters. Record when the beam first arrives and whether it moves on quickly or stays across the seats. A short-lived strip crossing one chair suggests different coverage from light spanning the table throughout dinner.
Separate direct sunlight from general brightness. A bright western sky may remain visible around a structure after the direct beam is blocked, while a translucent or open-weave screen may soften glare without removing every ray. Write down exactly what needs protection—a single chair, the dining table or the whole sitting area—and how long you normally use it. A screen selected for one chair does not automatically need to enclose the entire side. Keep the question about the sun’s path distinct from a separate wish for privacy: those aims can call for different coverage and should not be assumed to need the same panel.
Label each pergola edge by compass direction
Across the UK, the late-day sun is generally in the western half of the sky, but its position changes by hour, season and location. Near midsummer it sets farther towards the north-west; near midwinter, farther towards the south-west. That shift can matter: a west-facing edge may catch one ray, while a more southerly or northerly approach may slip past the adjoining corner on another date. Treat these as broad bearings, not a forecast for your particular garden. Nearby houses, trees, fences and the local horizon can alter when direct sunlight reaches the seats.
On a simple plan, draw an arrow for north and label each pergola edge by compass direction. Avoid “left” and “right”: those labels depend on where you stand and look, while a compass direction remains useful when you compare notes or explain the problem to a supplier. If the pergola sits against a house, label the wall side as well as the open sides; the house may block one approach but does not tell you what enters through another. When considering the Bloomcabin Pergola product page, keep this site plan alongside your shortlist so that an enquiry can identify the intended screen position clearly.
02
Observe the terrace at the hour you use it
Watch the terrace at the time you normally sit outside, not only at sunset. Note the start, middle and end of that period: the sun moves across the sky, so the beam can shift from one opening to another while you are still using the space. Record the date and approximate time, where the sun appears relative to the house, and which chair or table surface is lit. If you cannot watch continuously, take a few photographs from the same place and include a fixed reference such as a post or door. Repeat on another clear evening if clouds obscure the sun.
One clear evening gives a useful snapshot, not a year-round guarantee. If you mainly use the terrace in one season, prioritise those dates; if you want shade in spring and autumn as well, check those periods separately because the sun’s angle and setting direction change. Note temporary obstructions too: a leafy tree can screen summer light differently from a bare one, and a neighbouring building may block a narrow line of sun. The aim is not to create a precise astronomical chart. It is to establish which opening admits the uncomfortable beam at your chosen time and whether that answer changes during the evening.
Plot the ray from the seat to the sun
Place the target on your plan. Mark the chairs and table, then draw a straight line from each point that needs shade towards the observed sun direction. Follow that line outwards from the seat: the first open boundary it crosses is the candidate side for a screen. Sunlight travels along the same route in the opposite direction, from outside towards the seat. Start with the chair where glare is strongest, then repeat for the other seats. The result may be a long west edge, a short end or the corner between them; the rectangle’s orientation and the target’s position both matter. Mark separate lines if people sit in different places.
A sun bearing alone cannot settle the choice. Imagine the sun in the south-west and the protected seat towards the centre: depending on the structure’s position, the ray may enter over the south-facing edge, the west-facing edge or diagonally at their junction. Mark the route rather than assuming that the side named after the broad direction will catch it. If a model such as the Bloomcabin Bioclimatic Aluminum Pergola is on your shortlist, confirm the actual footprint and orientation for the intended layout before drawing a final line; the model name does not supply those site-specific facts.

03
Which side needs screening during dinner?
Consider an illustrative dinner layout with a table near the centre of a pergola whose edges face north, south, east and west. At the start of dinner, the line from the most exposed chair towards the sun crosses the west edge. Later, the line crosses nearer the north-west corner, while the opposite chair remains shaded. In this example, the west side is the main candidate for screening, but its northern end needs particular attention. Record both crossing points on the plan rather than simply writing “screen the west side”. This shows which stretch needs cover throughout dinner and which seats would benefit.
Now check what happens if the table sits closer to the northern edge. The later line might cross that edge instead of the west side, changing the coverage needed even though the sun has not changed direction. This is why the seating position belongs on the drawing. For a wall-mounted layout under consideration, such as the Bloomcabin Lean-To Pergola, include the house wall, the open end and the long open side. Note which route admits the light in your dinner observations. Moving the table may keep the troublesome rays behind one proposed screen; if it does not, the sketch will show why an adjoining side also needs assessment.
Check the diagonal ray at a pergola corner
An angled beam can expose a weak point at a corner. A screen across one side may intercept a ray that meets it close to a right angle, yet a beam coming from farther around the corner may pass the screen’s end before reaching the seat. On your sketch, mark the two edges that meet at the junction and extend the sunlight line to the target. If it enters near the corner, check how much of each adjoining edge needs cover. Do not assume that one panel wraps around or that two panels meet without a gap unless the proposed arrangement confirms it.
Check the proposed screen’s end points against posts, access routes and any door or gate that must remain usable. A screen that blocks direct sun but leaves the marked corner exposed may not solve the problem; a longer span may obstruct the route you use to enter. Ask which side lengths and corner combinations are available for the exact model rather than estimating from a photograph. The regular pergola listing from Bloomcabin can identify the base structure on your shortlist; ask separately whether a compatible screen can cover the edge and junction you have marked.
04
Balance glare control against views and airflow
A side screen changes more than the sunlight line. A close, opaque surface can provide a stronger visual barrier, while a more open or translucent material may soften glare but allow some light through. The right balance depends on whether you want to stop a beam reaching faces, protect a whole dining area or maintain a view across the garden. Ask for the screen’s documented description of its opacity or light transmission rather than relying on a photograph. Do not assume that screening will darken the whole terrace or remove every bright reflection; other surfaces and the open sky can remain visible.
Consider airflow and access at the same time. One targeted side may leave the remaining edges open, whereas screening several sides can make the space feel more enclosed or restrict a useful view or route. Air movement depends on the site and the screen, so an open opposite side is not a promise of a particular breeze. If you are considering the bioclimatic pergola listing, ask which side-screen options have been verified for that exact model. The model title alone does not confirm accessory fit or how a screen can be operated.
Separate roof shade from side screening
Roof shade and side screening address different parts of the problem. A roof can intercept sunlight from above, but a low beam may pass beneath its edge and reach the chairs. Where a product has an adjustable roof, changing its setting can alter light from above; it cannot be assumed to close an open side. That is why a pergola can feel shaded around midday yet still have a glare problem late in the day. The tell-tale sign is direct sunlight entering at a shallow angle through an open side, rather than a bright patch coming down through the roof.
Check this distinction by watching where the light lands. If it comes through the open perimeter, a correctly placed side screen is the relevant option to investigate. If the problem is light through the roof, changing the side will not address it and the roof configuration needs a separate review. For a wall-mounted choice, Bloomcabin Lean-To Pergola is the product name to use when asking about that base structure; do not infer from the name that the exposed side is enclosed or that a screen is included. Keep the question specific to the route the beam takes.
05
Confirm the screen fits the exact pergola model
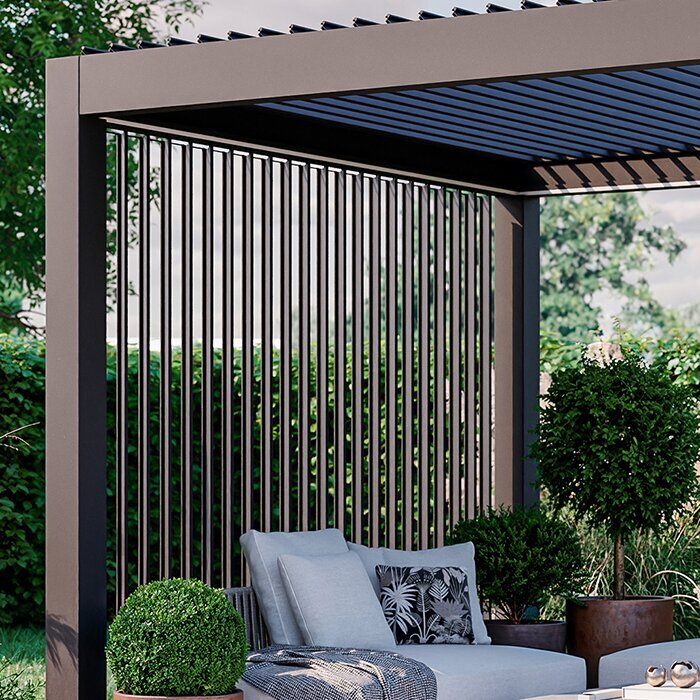
Once you have identified the side, verify compatibility before treating a screen as part of the pergola choice. Ask about the exact model and configuration, the approved side-screen or accessory options, the edge they attach to, and whether the item is included, optional or sold separately. Confirm the usable span and any post or corner requirements from the supplier’s information; a photograph cannot establish these. If you need a screen on a specific compass-facing edge, describe that edge in the layout rather than asking only for “a west screen”, since the structure may be oriented differently on another site.
Request the instructions that govern operation and installation, including any documented restrictions for the chosen screen and structure. Do not assume a third-party curtain, blind or mesh can be attached simply because it appears to fit between posts; the attachment and operation must be suitable for that model. The Bloomcabin Pergola model listing is a starting point for identifying one structure on a shortlist, not evidence that a particular screen is supplied or approved. If the attachment or installation is unclear, ask the supplier or a qualified installer to confirm the arrangement before buying.
Test the proposed screen line before ordering
Before ordering, test the proposed screen line visually. Mark its position on the paving with removable tape or another temporary marker, then sit in each usual seat and check the view, access and sun direction recorded earlier. A helper can hold a piece of card upright at the proposed edge to show what that plane would hide, but treat this only as a sightline aid, not a test of a real screen’s light filtering, wind behaviour or fit. Do not fix a makeshift sheet to the pergola: it can behave differently from an approved product and is not a compatibility check.
Repeat the check at the troublesome time and, if possible, on a second date that matters to you. If the beam misses the seats when you move a chair slightly, a small furniture adjustment may be preferable to screening another side. Check that the new position still leaves enough room to pull chairs out and walk around the table. If the line consistently crosses the same edge, use your sketch to ask for the exact approved configuration. For an enquiry about the Bloomcabin Bioclimatic Aluminum Pergola, give the seller the orientation, target seat and required side, with the observed times marked on the drawing.
Frequently asked questions
Is the west side always the best side to screen?
No. It is often the first side to check for evening sun, but the sun may approach from the south-west or north-west, and a diagonal ray can enter through a different edge or corner. Map the ray to the seat at the time you use the terrace, then consider the boundary it crosses.
Will a pergola roof block low evening sun?
Not necessarily. A roof can intercept sunlight from above, while a low beam may travel beneath its edge through an open side. If direct light reaches the seats through the perimeter, investigate a compatible side screen rather than assuming the roof will solve it.
Should I screen the west and south sides together?
Only if your observations show that direct sun reaches the seats through both edges or around their corner. Two screens may cover more of the sun’s path, but can also narrow access or restrict a useful view. Mark each beam and check that a suitable corner arrangement is available for the exact model.
How can I tell which side the sun crosses?
Draw a north arrow and the pergola outline, then observe the terrace at your usual seating time. Note where the sunlight first enters before reaching the seat or table, and repeat as it moves across the evening. A few notes or photographs from a fixed viewpoint are more useful than judging the side from a midday shadow.
Can a product photograph show whether a screen is included?
No. An image cannot establish which accessories are supplied or whether a screen is compatible with a particular model. Check the product information and ask for confirmation for the exact structure, screen and attachment, including whether the screen is included, optional or sold separately.
Choose the screen side from the ray’s route to the seating: observe the terrace at your usual time, plot the sun’s direction and mark the target, then identify the first open boundary the beam crosses. In the UK, west is a useful starting bearing, but seasonal shifts and a south-west or north-west approach can bring the sun through a neighbouring edge or corner. Keep the plan with your product enquiry and confirm compatibility for the exact structure. The result is a decision tied to your evening routine, rather than a general rule based only on the word “west”.
