
How to Set Pergola Height for Headroom, Roof Movement and House Proportions
Pergola planning
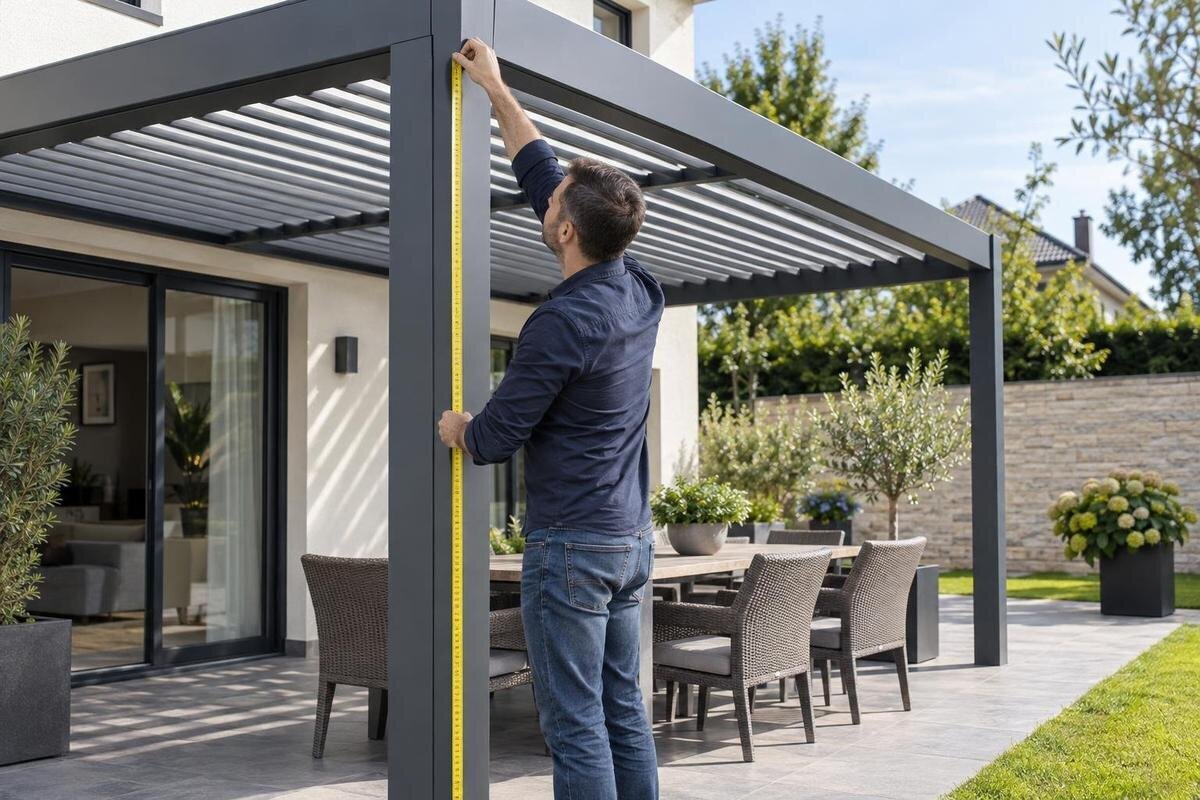
Choosing a pergola height by eye can leave important questions unanswered. The top of the frame, the underside of its lowest fixed part and the clear space people can use are different measurements. With a moving roof, that usable space may also change during operation. The paving matters too: a dimension taken from an unfinished base can give a different clearance once the patio is complete. A measured cross-section brings these relationships together, so you can compare roof movement, walking headroom and the house façade before confirming a configuration rather than relying on floor area or a product photograph.

Read the height from a side section
A plan view is useful for posts and footprint, but it cannot show how the roof sits beneath a bedroom window or relates to the house eaves. Ask for a dimensioned side section through the proposed pergola and the part of the house beside it. It should mark the intended finished patio surface, the underside of the lowest fixed frame member, the top of the structure and any roof component whose position changes. For a freestanding arrangement, include its gap from the façade; for a wall-mounted arrangement, show the wall junction. A front elevation can complement this view, but it cannot replace the section where headroom is concerned.
Keep three readings separate: overall height to the highest fixed point, usable headroom to the lowest obstruction, and the envelope needed for roof movement. Ask where each number starts and ends, and whether it describes the exact configuration in the quotation. The Bloomcabin Pergola listing can identify which product you are discussing, but a site-specific drawing must connect that model to the proposed patio and façade. If a quote gives only an overall height, request the missing underside and floor references before comparing it with another proposal. Use the same definitions on later revisions so a changed roof option does not quietly alter what “height” means.
Measure from the finished patio level
Begin with the surface people will stand on when the project is complete, rather than a footing, bare slab or existing soil. Show today’s level and the planned finished patio level as separate lines if paving, decking or another finish is still to be laid. Each layer between the base and walking surface changes the clearance measured above it; a dimension taken from unfinished work can therefore misstate the usable opening. Ask whoever is coordinating the patio to confirm its intended finish and level before the pergola dimensions are agreed. Record the reference level in words as well as on the drawing, and include any step or threshold that affects the route.
Check the datum at relevant positions instead of assuming one level applies throughout. A terrace may fall towards drainage, meet a step or rise at a threshold; the surface at one post can differ from the surface at another. Have the section or setting-out drawing state the assumed finished level at the points that matter and show exactly where the clear dimension is measured. If you are considering a wall-mounted Bloomcabin pergola, document the relationship between the patio datum, façade and proposed roof line; the product name does not establish that vertical setting. If levels are still provisional, mark that assumption clearly so a later patio change triggers a review.
Define clear headroom along the route
Define headroom from the finished walking surface to the lowest point a person could encounter, not to an abstract roof plane. Depending on the chosen arrangement, that point may be an underside beam, a local projection or an included fitting, so use the drawing for the actual configuration. Mark the clear dimension at entrances and along the routes people will use, not solely at the centre. A comfortable measurement in the middle can conceal a lower edge at a doorway, a turning point or beside a post. Ask for the minimum clear height over the relevant route as well as the overall frame height; those figures answer different questions.
Trace ordinary movement through the space: walking in while carrying something, standing beside a table, moving a chair or reaching the garden door. Use the plan to locate each route, then check the section at likely pinch points; furniture placement can make an apparently open corner important. These are prompts to test your own use, not universal clearance rules. When comparing Bloomcabin’s regular pergola model with another option, ask for the underside dimension for the selected layout and note which point it refers to. A model name or area figure alone does not establish usable headroom. Consider seated as well as standing views if both are part of everyday use.
Show the roof’s movement envelope
An adjustable roof has a movement envelope as well as a resting position. A section showing only a closed roof can miss the path followed by a louvre, panel, arm or other moving part; a plan view may also hide vertical movement. Ask for drawings or dimensions for the relevant positions, including fully open and closed where those states apply, and identify the highest and lowest points in each. If an intermediate position changes the clearance, show it too. Do not assume mechanisms in the same product category move in the same direction or occupy the same space. Describe the actual path rather than adding an arbitrary allowance to a catalogue height.
Record items that occupy or alter that envelope only if they are included in the quoted configuration: for example, a drive housing, gutter, lighting fitting or screen cassette. Clarify whether each sits below the frame, projects at an edge or moves with the roof, then keep the relevant dimension on the same section. For the Bloomcabin Bioclimatic Aluminum Pergola, request the drawing for the selected arrangement rather than inferring movement from the product name. A closed-position height by itself cannot prove that operation will leave the headroom unchanged. The supplier’s drawing should identify which roof position each measurement describes.

Check doors, windows and wall details
Plot each door, window and nearby wall feature in relation to the proposed roof line. A hinged door needs its swing represented; a sliding door needs its opening path and access kept clear. Check how the pergola sits beside window heads, external vents, gutters, downpipes and lights, including anything that may need inspection or maintenance. The purpose is not simply to avoid physical contact: a roof that sits across a useful opening or blocks access can change how the adjoining room and patio work. Mark these details on the elevation or section rather than relying on notes such as “above the doors”.
A wall-mounted proposal makes this relationship especially visible because the height line meets the façade. If the Bloomcabin Lean-To Pergola is on your shortlist, compare its proposed line with actual wall openings and existing features; its name does not state a fixing height or confirm that a particular wall is suitable. Have the supplier or an appropriately qualified installer confirm the proposed attachment position and support. For a freestanding option, still check the roof edge against windows and eaves, and preserve maintenance access where the project requires it. Do not raise or lower a connection solely to align it with a convenient window line.
Compare the pergola with the house façade
House proportions are judged from several lines rather than one height number. Compare the pergola’s upper edge with the eaves, fascia, lintels, window heads and any strong horizontal bands on the façade. A roof can sit below an eaves line yet still dominate a low extension, or align neatly with one opening while cutting across another; its width, depth and position also affect the impression. There is no universal ratio between pergola and house that guarantees a balanced result. A scaled side elevation helps you see whether the proposed top line feels intentional alongside the actual building.
Look from the garden and from the rooms that open onto the terrace, not only from the spot where the drawing is viewed. Interior sightlines reveal whether the roof masks part of a window; the garden view shows how much of the façade remains visible. If the Bloomcabin Pergola model is one of the options, assess its drawn height against your house rather than assuming a product photograph has the same scale as your setting. Compare plausible heights on the same elevation, with the same posts and roof arrangement, so you do not confuse the effect of height with a change of model or viewpoint.
Account for slopes and mounting points
A level patio beneath a level roof gives a straightforward reference; a sloping or stepped surface can make usable clearance vary across the space. Record ground and finished paving levels at the relevant post positions and show the proposed roof line independently. Where a level roof spans sloping paving, measure the clearance at both the higher and lower ends rather than quoting one value for the whole area. A slope does not automatically dictate a particular pergola height or foundation arrangement. The section needs to distinguish the walking surface, the post support levels and the roof line. A second section may be needed where a step or a change in the direction of the slope is not visible in the first.
Separate your preferred visual height from the structural design needed to achieve it. A planning sketch can show roof levels, ground levels and attachment points, but it does not establish suitable fixings, supports or foundations. Have those details assessed by the supplier and an appropriately qualified installer or structural professional for the actual site and building. If a support or attachment position must change, ask whether that changes the roof height or usable headroom before accepting the revised arrangement. If a bioclimatic pergola configuration is among your options, include its selected roof positions and clearances in that review. Neither a product category nor the appearance of the site establishes structural suitability.
Make quotation drawings directly comparable
Two quotations are comparable only when their heights use the same datum and refer to the same parts. Ask each supplier to identify the model and chosen configuration, finished patio reference, topmost fixed point, lowest obstruction and clear headroom along the route. If the roof moves, include its relevant positions and any included fittings that affect the vertical envelope. Mark the measurement endpoints on the drawing; labels alone can be read differently. For a quote involving the Bloomcabin bioclimatic model, have the values tied to the exact arrangement being proposed rather than assuming the category name supplies them. Keep alternative roof arrangements on separately labelled drawings.
Read the drawing alongside the written quotation or order confirmation. Check that the height shown corresponds to the agreed finished patio level, that each accessory affecting clearance is listed, and that site assumptions or exclusions are visible. If a supplier gives an overall measurement but no clear headroom, ask for the latter in writing; if drawings differ, have the discrepancy resolved before approval. When comparing revisions, note what changed—roof option, fitting, wall position or patio level—so the reason for a new dimension is traceable. A drawing date or revision reference can also help everyone distinguish the current proposal from an earlier version.
Test the height at full scale
Once the section looks plausible, make a simple full-scale visual check at the property. Mark the proposed underside and upper line with removable tape on a wall, or use a safely supported temporary marker where there is no suitable wall. Show both the fixed frame and the relevant roof movement envelope; a single line cannot represent a moving component. Stand at the main garden approach, the doors and the rooms overlooking the terrace. This can reveal a height that seemed unobtrusive on a page but feels low at an entrance or visually heavy beside a window. It is a sense-check, not a replacement for the dimensioned drawing.
Put familiar items in the positions shown on the plan and move through the route you expect to use. Check from seated and standing viewpoints if both matter, open the doors and note whether the frame changes the view from inside. Ask other regular users to look too; one person’s eye line is not a household-wide test. Take photographs from the same positions for each height option, noting which line each represents, so you are comparing like with like. Avoid relying on a wide-angle phone image to judge scale: the marked dimensions and in-person view should remain the reference. This exercise is especially useful when two drawn options are close.
Confirm the agreed dimensions before setting out
Before treating the order as final, keep one approved section that states the finished patio datum, overall height, minimum clear headroom and roof positions. Name the exact configuration and note fittings or options that change the height. The written agreement should make clear which drawings form part of the agreed specification and which site levels are still assumptions. If the patio finish or roof arrangement changes, revise the section rather than carrying forward an old height figure. This gives the installer and anyone completing the paving the same vertical reference, and prevents a correct measurement on paper being set out from the wrong surface.
Resolve any applicable consent, lease or boundary questions for the property before committing to the order, rather than discovering a restriction when the installation is ready to begin. At the setting-out stage, compare the proposed site marks with the approved drawing before installation proceeds. If an opening, level or attachment position differs from the recorded survey, refer the discrepancy to the responsible supplier or professional and obtain a revised drawing where necessary. Do not improvise a different height to make the structure fit. Record who has accepted the revision and ensure the installer is working from that version. This keeps the agreed vertical dimensions traceable from the order through to their position on site.
Frequently asked questions
Which pergola height should I compare?
Compare the overall height to the highest fixed point, the clear headroom beneath the lowest obstruction and, for a moving roof, the space occupied during movement. Each describes a different part of the design.
How much headroom should a pergola have?
There is no single figure that suits every layout. Consider the routes people use, the furniture beneath the roof and any low edges or fittings. Ask for the clear dimension on the drawing for your chosen configuration.
Should I measure from the existing patio?
Use the planned finished patio surface as the reference. If paving or decking is not in place, show its intended level separately from the current ground or slab and confirm the assumption before agreeing the height.
Does an adjustable roof need extra clearance?
Its movement needs to be shown, but there is no reliable extra allowance to apply to every design. Request dimensions or drawings for the relevant roof positions and check whether any included fittings affect the clear space.
Can I set the height by matching the house eaves?
The eaves are a useful visual reference, not a universal setting rule. Compare the proposed height with the façade, openings and views from indoors and outside, then check the actual headroom on a dimensioned section.
A useful pergola height is not simply the distance from the ground to the roof’s highest point. Tie every dimension to the finished patio, check the minimum headroom along walking routes, and show the roof’s movement on the same section. Then compare that measured profile with doors, windows and the house’s main lines. When the drawing, quotation and site levels use the same references, you can judge both day-to-day clearance and visual scale before the design is set out.
