
How a Pergola Can Anchor a Long Garden
Pergola planning
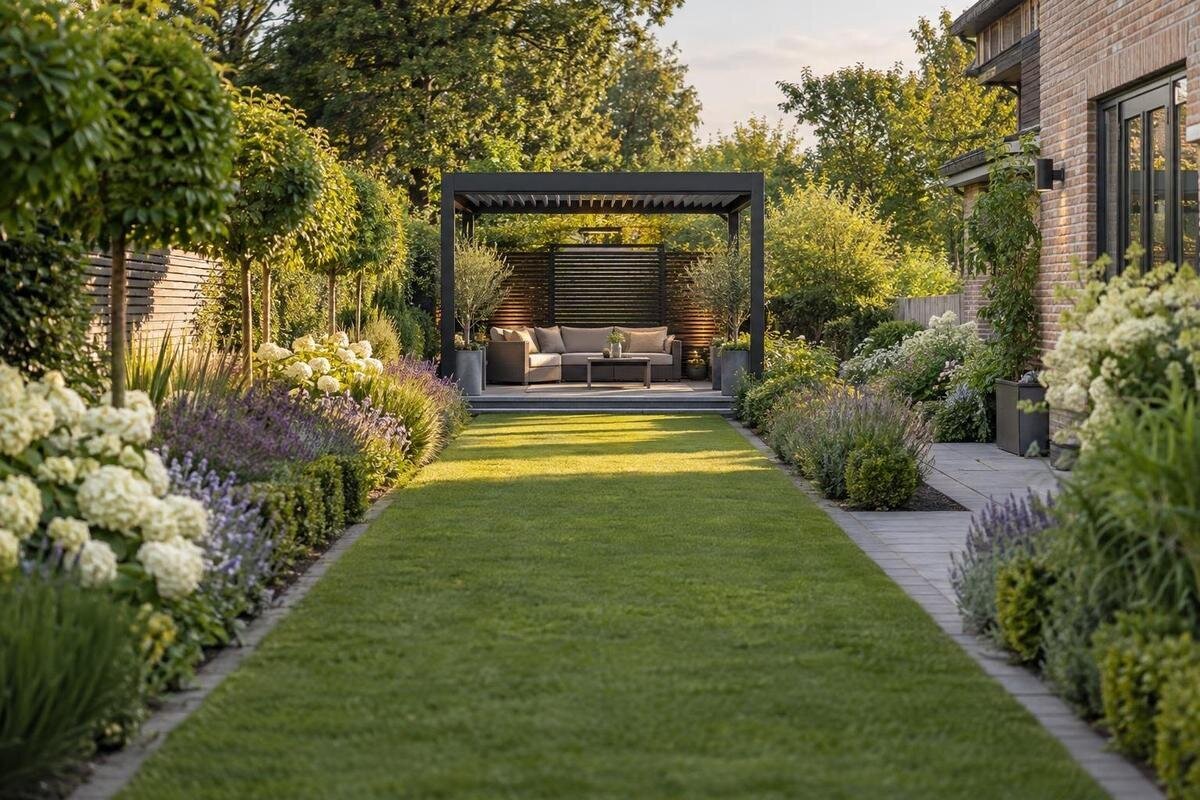
On a long plot, a pergola can give the eye a destination and turn the route towards it into part of the garden’s design. Its position needs to work from more than one viewpoint: the house, the entrance and the places where you actually sit or walk. Aligning it with a path or planting can strengthen perspective, while a poorly placed frame can interrupt a useful view or narrow the route. A measured plan helps balance sightlines, approach space and planting depth before the structure becomes the dominant feature.
Planning checklist 1
Why a focal point helps in a long garden
In a long garden, the length can be more noticeable than the individual spaces within it. Parallel boundaries, a path that runs straight to the back and repeated planting may pull the eye along one uninterrupted line, making the plot feel more like a passage than a sequence of places. A pergola can provide a recognisable destination: its outline gives the view a definite point and can mark a change from open lawn or route to a sitting area. That alters how you perceive the length, not the garden’s actual size. The effect depends on where the pergola sits within the layout; the structure alone cannot make the garden feel deeper or better arranged.
Decide what the pergola should do before choosing a position. It might frame a view through its opening, sit beyond a stretch of lawn, or mark a place to pause alongside the main route. Ask what should remain visible behind it; a focal point does not have to block the garden at its furthest boundary. If it appears in views from both the house and the entrance, it can connect those parts of the plot. If it is visible from one corner only, give it a clear relationship to that particular route or use, so it feels intentional rather than simply distant.
Read the garden from several viewpoints
List the viewpoints that matter in everyday use: a kitchen or sitting-room window, a door onto the garden, a favourite seat and the point where you enter from the house. Stand at each position and note what catches the eye, which route feels obvious and where a view disappears behind a hedge or building. A pergola that looks central on a plan may appear off-centre from indoors because the sightline approaches at an angle. Mark each viewpoint and its line of sight on a simple drawing. Repeat the check while seated as well as standing, since the structure may sit differently against the view.
Look back towards the house from the garden entrance too. The pergola may frame one direction and interrupt the other, so decide which view matters most and whether a view through or beside it can keep the plot connected. When considering the Bloomcabin Pergola, use temporary markers to identify the proposed corners on site. Photograph them from the main indoor position and the garden approach, keeping the camera position consistent when comparing alternatives. Ground markers show location rather than the full structure, but they can reveal whether a corner overlaps a valued tree or whether the proposed seating area looks disconnected from the route.
Planning checklist 2
Align the pergola with the garden’s main lines
An axis is the visual line formed by the house, route, pergola and strong edges such as a lawn or border. If every line runs straight towards the far boundary, the garden may feel longer but also more tunnel-like. A modest shift to one side, or a crosswise planting bed before the pergola, can introduce a pause without losing the overall direction. This is not a rule to place the structure off-centre: compare an aligned position with an offset one from the viewpoints that matter. A diagonal can break up a rigid view, but may leave awkward spaces beside the route, so assess the whole layout rather than the angle alone.
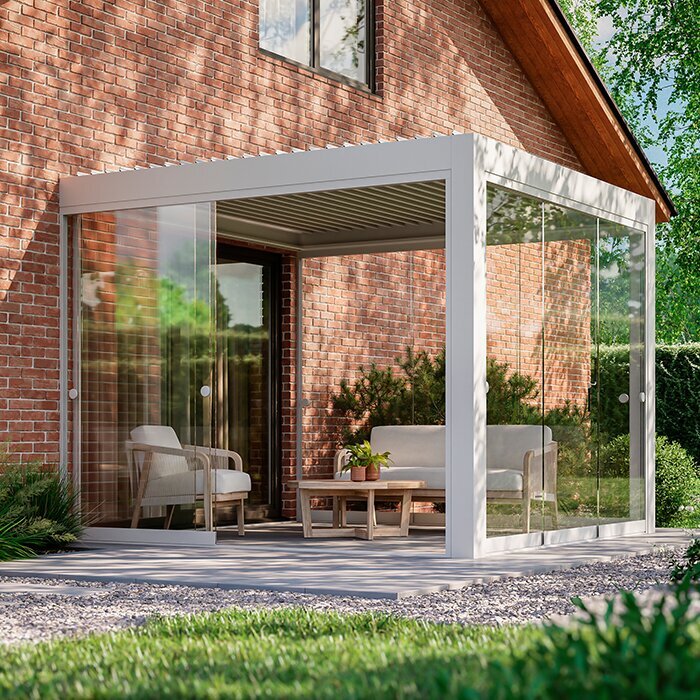
Sketch two or three alignments: directly in line with the house, parallel with the main route, and offset towards one side of the plot. Include the Bloomcabin Lean-To Pergola among the options to investigate if your composition includes a structure beside the house. In that layout, consider how the edge of the pergola relates visually to the path continuing into the garden. It need not share the path’s centre line to give the view a clear beginning. Check the spaces left on both sides of each outline; narrow wedges of lawn or isolated planting pockets may be difficult to use and maintain, even when the alignment looks attractive.
Make the approach path part of the design
A focal point feels inviting when the route leads to it without making the rest of the garden awkward to use. Trace the approach from the door or gate, including the route people will take around chairs and planted edges. A direct path suits a clear destination; a gentle change of direction can reveal the pergola gradually, but a detour that exists only for effect soon becomes irritating. Keep everyday movement distinct from the place where people stop, and check that access to sheds, gates and other useful parts of the garden remains uncomplicated. The path should lead into usable space, not end at a post or planted obstruction.
Show the path as its own measured strip on the drawing, not as spare space left around the pergola. Mark where people turn, pass one another or move a chair, and note any pinch point created by existing walls, fences or planting. If the regular Bloomcabin Pergola is on your shortlist, obtain the selected model’s dimensions and plot its outline beside the route. Then draw furniture in use, with chairs pulled back rather than tucked neatly under the table. Consider carrying a tray from the house or taking a wheelbarrow to the far beds. The approach should serve these ordinary journeys without sending people through the seating area.

Planning checklist 3
Use planting to create depth around the pergola
Layered planting gives a long plot more to look at than a single distant endpoint. Keep the near foreground relatively low if you want the pergola to read clearly from the house; use a middle layer to soften the route and place taller planting where it can frame, rather than mask, the structure. A view through the opening or beside a post can show another planted area beyond, keeping the eye travelling. Consider mature height and spread, not just what a new plant looks like in a pot. Repeating a few plants can create rhythm, while a continuous high screen may make the garden feel enclosed.
Record plant heights, spreads, growth habits and support needs alongside the structure’s outline. Also document the soil, light and moisture requirements of the plants you are considering, so the visual arrangement does not depend on species unsuited to their positions. If Bloomcabin Bioclimatic Aluminum Pergola is on your shortlist, establish its planting clearances and any restrictions on attaching supports before choosing climbers. You can frame the view with plants in surrounding beds without attaching them to the structure. Leave room to reach the back of borders for pruning, and avoid placing the tallest plants where their mature growth would hide the entrance from the approach path.
Let paths and surfaces reinforce the route
Edges in paving, lawn and gravel also shape the perspective. A single straight edge can draw the eye towards the pergola and make the route easy to follow, but repeating parallel lines all the way to the back may exaggerate the corridor effect. Use a change of surface or a defined edge where the garden genuinely changes use, such as where a path meets a sitting area. That gives the focal point a setting without requiring a band of paving across the full width of the plot. Existing surface lines can be as important as any new material you introduce.
Draw the route and gathering area separately, then decide which lines should continue and which should stop at the pergola. A path that reaches the seating zone is a useful visual cue; a border edge that runs uninterrupted past it may pull attention elsewhere. Keep surface changes proportionate to the garden and coordinate them with planting edges, rather than adding several competing stripes. If the existing layout already has strong paving lines, test whether the pergola sits within that pattern or works better with a slight shift. A plan can show this relationship before you commit to new materials.
Planning checklist 4
Preserve views through and around the structure
A focal point should give the eye something to land on without hiding everything beyond it. Check whether the pergola sits in front of a view worth keeping, such as a mature tree or a further garden area, and whether its supports or any planned side screening would overlap that view from the house and principal seat. The space between the structure and the boundary matters too: a view beyond the frame can keep the plot visually connected, while a solid backdrop creates a clear stop. Decide which effect you want rather than assuming the far end of the garden must be concealed.
A simple elevation sketch can help you assess what will remain visible beneath, beside and above the structure. Use the actual outline of any shortlisted option, including the Bloomcabin bioclimatic model, rather than a generic rectangle that omits its upper profile. Place the distant tree, boundary or garden feature in the same sketch and identify which parts you want to retain in view. A tree canopy visible above the pergola creates a different relationship from a trunk framed beneath it. Check any optional screening separately: enclosing a side may change the composition substantially, even if the pergola stays in exactly the same position.
Choose which garden feature should stand out
One dominant destination generally gives a long garden more coherence than several equally strong objects scattered along its centre line. A sculpture, specimen shrub, brightly coloured planter or seating area can still be part of the composition, but choose which feature is meant to attract attention first. Smaller details can lead the eye towards the pergola or provide interest on the way without competing with it. If another feature already anchors the view, decide whether the pergola should take over that role or sit more quietly beside it. The answer may differ between a view from the house and one from the far end.
Consider prominence as well as location: outline, colour contrast, surrounding leaves and the amount of open space all affect which feature stands out. When comparing Bloomcabin’s Lean-To option with other candidates, use drawings or photographs of the exact finishes available rather than assuming a particular appearance from the model name. A house-side structure may remain visually secondary while a tree further along the plot attracts attention first; that can be a deliberate choice. Review the composition in a small photograph as well as on site. If several features compete, simplifying a nearby bed or removing one contrasting accessory may be more effective than moving the pergola.

Planning checklist 5
Draw the complete layout before choosing a position
Turn the idea into a dimensioned landscape drawing before settling on the final position. Include property boundaries, the house and its openings, gates, existing trees, changes of level, routes, the pergola outline and intended furniture. Then add planting zones with documented mature heights, spreads, supports and maintenance access. A scaled drawing can reveal whether the route has been squeezed or a bed occupies space needed to sit around a table. Keep the frame footprint separate from circulation and planting areas: they do different jobs and should not be treated as interchangeable space.
Use dimensions verified for the exact product model under consideration. Include Bloomcabin’s regular pergola model in a comparison drawing only once you have its dimensional information, and distinguish confirmed measurements from details still awaiting clarification. Keep a separate record of site matters that affect whether the layout can be built, such as ground conditions, existing drainage and access for installation. A landscape designer can coordinate the proposed levels and routes, while the supplier and a qualified installer can establish the structure’s installation requirements. Resolve these matters before fixing the position of paving or beds; a visually convincing plan is not, by itself, confirmation that the installation is suitable.
Review the design as the planting matures
A garden changes as planting grows, is pruned or replaced, so judge the focal point against the intended mature layout rather than only the day of installation. Record which plants are expected to screen a boundary, frame the route or remain low beside a sightline. Consider whether seasonal gaps will reveal an unhelpful view or whether the pergola will remain legible when surrounding foliage is full. These are useful planning questions, not reasons to avoid planting: they help you choose a position that still makes sense as the garden becomes established.
Use photographs from different seasons, where available, to compare bare branches with full foliage. Note which parts of the proposed composition depend on leaves and which remain clear throughout the year. For a house-side candidate such as the Lean-To Pergola from Bloomcabin, consider whether the planting nearer the house introduces the distant focal point or conceals it as growth fills out. Include pruning access and the intended maintenance pattern in your planting notes. If keeping the view open would require frequent cutting back against a plant’s natural size, choose a smaller plant or move the bed rather than relying on continual pruning to preserve the design.
Frequently asked questions
Where should a pergola sit in a long garden?
There is no universal position or distance from the house that works for every plot. Compare possible locations from the house, the garden entrance and the main sitting area, then check that the approach path remains clear and the view beyond the pergola still works.
Does a pergola need to be centred?
No. A centred position can reinforce the garden’s main line, while an offset position may create a more natural sequence. Draw both options and assess them from the viewpoints you use most, rather than choosing by symmetry alone.
How can I stop a long garden feeling like a corridor?
Avoid making every boundary, path edge and planting line run in parallel towards the far end. A focal point, a change in the route and planting at varied heights can create pauses, while a view through or beyond the pergola helps keep the plot visually connected.
How should planting relate to the pergola?
Plan planting by its expected mature height and spread. Lower plants can preserve a view, while taller planting can frame the structure. Keep the route, access for pruning and any plant support requirements separate from the pergola’s measured footprint.
What should a pergola layout plan include?
Show the boundaries, house openings, gates, existing trees, paths, intended furniture and the pergola’s dimensions. Add planting areas with documented requirements, then check the drawing from the main viewpoints as well as from above.
A successful focal point is not simply at the far end or exactly on the centre line. It is a structure that can be seen, approached and read in relation to the house, path and plants, with enough view left beyond it to keep the garden connected. Put the proposed position and documented planting requirements on a dimensioned plan, then test the sightlines on site. That makes the pergola part of a sequence through the plot rather than a barrier at the end of it.
