
Windows and Doors for Coastal Homes: Finishes, Hardware and Maintenance

UK coastal homes buying guide
Replacing windows and doors in a coastal home is as much a coordination project as a product choice. A narrow side passage may limit delivery, scaffolding may be needed for survey and cleaning access, and planned render, cladding, paving or drainage work can change how the new frames meet the building. Salt-laden air, wind-driven rain and airborne grit then place extra emphasis on accessible finishes, hardware and thresholds. Start with an opening-by-opening schedule rather than a favourite colour. Record exposure, operation, cleaning reach, surrounding work and everyday use for each location. This separates a sheltered kitchen window from a sea-facing terrace door and gives the surveyor, installer and other trades a shared brief before dimensions, finishes and hardware are confirmed.
01 / Survey and coordinate
Coordinate the retrofit before selecting finishes
List the work that will touch each opening before the detailed survey. External insulation, render repairs, replacement sills, roof-edge work, decking, paving and rainwater goods can all affect reveals, threshold levels or access. Photograph the existing junctions inside and outside, including cracked sealant, staining, uneven finishes and places where water gathers. Ask how old frames will be removed, who will make good the reveals and when surrounding weathering details will be completed. A window should not be expected to correct an unresolved roof, wall or terrace problem. Giving the surveyor this context makes the final specification more dependable.
Treat physical access as part of the order brief. Measure gates, passages, stair turns and any area intended for unloading or temporary storage. Establish whether upper-floor openings require access equipment for surveying, fitting or future cleaning, and decide how occupied rooms will be protected while work proceeds. Delivery is normally 4–6 weeks, subject to order confirmation, so only book scaffolding, decorators and landscaping around an agreed programme. For every opening, record handing, opening direction, finish, glass layout, sill or threshold interface and hardware position. Drawings and a written schedule are safer than relying on photographs or verbal preferences when the order acknowledgement arrives.
Map exposure opening by opening
Do not treat the whole property as one coastal exposure. An unsheltered elevation may receive direct wind and rain, while a recessed entrance, courtyard or wall behind planting experiences different deposits and drying conditions. Walk around after poor weather if it is safe to do so. Note salt residue, sand, roof runoff, damp corners, vegetation touching the façade and debris collecting near thresholds. Indoors, record rooms with regular moisture generation, such as bathrooms and utility spaces. Mark these observations against opening references so cleaning access and operating choices respond to the actual location rather than a broad coastal label.
Operation changes both exposure and upkeep. A fixed non-opening window can suit a view-led position where an opening sash is unnecessary within the wider ventilation plan. It removes opening hardware from that location, but the external glass and frame still need a safe cleaning route. For an opening unit, check whether gusts could catch the sash, whether it crosses a path and whether both sides can be reached without improvisation. Discuss project-specific fixing, weather performance and compliance with the appropriate qualified professionals. Proximity to the coast alone does not confirm that a particular configuration, glass selection or installation detail is suitable for the building.
02 / Map the exposure
Choose a finish with its care routine in mind
Compare finish samples outdoors beside the actual masonry, cladding, roof covering and metalwork. Colour can appear different against bright sky, pale render, exposed stone or shaded recesses, so view it from the distances and directions that matter. Decide whether frames should recede into the façade, match existing trim or deliberately outline the openings. Also consider how windows, doors, sidelights, external trims and visible hardware will relate to one another. Limiting unnecessary colour changes can simplify the visual scheme and future maintenance discussions, although every exposed surface will still need inspection and appropriate cleaning.
Request the care instructions for the proposed finish before approving it. Ask which cleaning products, cloths and methods are suitable, which solvents or abrasive materials must be avoided, and what procedure applies if building work marks a surface. No colour can be assumed to conceal every salt deposit, pollen trace or hand mark; visibility changes with light and the type of residue. Protect frames from mortar, render, paint and adhesive while adjacent work continues, following the relevant instructions for applying and removing protection. Keep the exact finish name and care guidance with the order paperwork so future cleaners or decorators do not have to guess.
Specify hardware for use, access and servicing
Handles, hinges, stays, cylinders, locking points and sliding gear combine daily operation with exposure. Ask what hardware is included in each quoted configuration, where its accessible components sit and how they can be visually checked. Consider use rather than appearance alone: a bathroom window may be operated repeatedly, a side door may be handled with wet or sandy hands, and a terrace opening may be used by people with different reach or strength. Confirm handle positions and clearances on the drawings. A finish sample or broad hardware description is not a substitute for identifying what will actually be supplied on each unit.
Ask for the care and adjustment guidance applying to the selected product. Establish whether any lubricant is specified, which cleaners are unsuitable and who should make adjustments. Do not force a stiff handle, slam a wind-caught leaf or repeatedly move a sliding panel through visible debris; remove accessible loose dirt as instructed and report continuing changes. Panelled outward-opening entrance doors identify a particular entrance-door configuration, but the buying decision must still account for approach direction, shelter, external clearance and the effect of an open leaf on paths. Confirm glass, hardware, security choices and other project details in the quotation rather than inferring them from the title.
03 / Choose the operation
Match door operation to the terrace or path
Opening direction determines how a door uses space. An outward-opening leaf preserves room inside but needs an exterior arc clear of pots, furniture, railings and pedestrian movement. An inward-opening leaf keeps the landing clearer but can conflict with curtains, radiators or seating. Draw each open position on a scaled plan and test ordinary situations, such as arriving with shopping or holding the door while wind acts on it. Check that an open leaf will not obstruct a narrow side route or create an awkward clash with another door. This practical test often reveals more than comparing closed elevations.
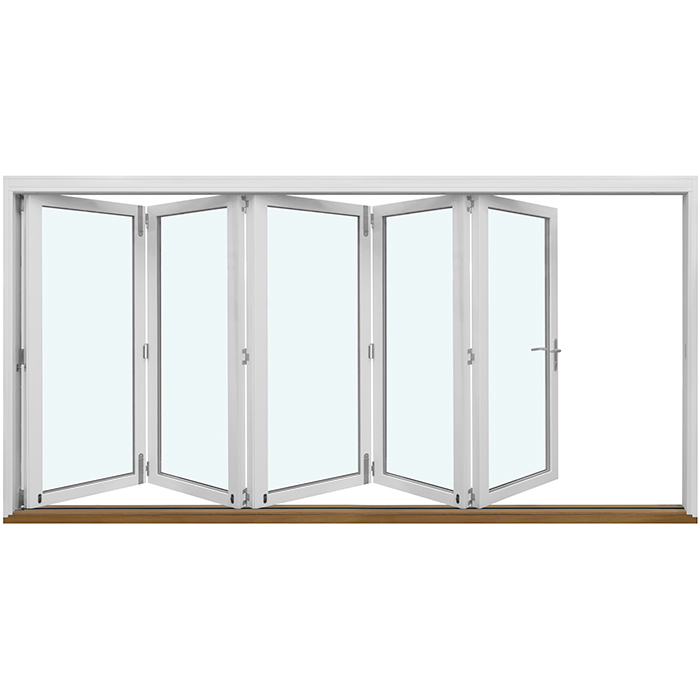
For a wide glazed opening, compare folding, sliding and conventional hinged arrangements against real daily use. Outward-opening bifold doors are an alternative when an outward-folding glazed configuration and a suitable stacking area are wanted. Sliding doors offer a different movement pattern where panels travelling along the opening suit the layout. Neither title establishes the detailed threshold, glass, hardware or performance specification. Ask how often the full opening will genuinely be used, whether a smaller everyday access route is needed, and where panels sit when open. Include track cleaning, drainage access, curtains, furniture and outside circulation in the comparison before choosing the largest possible opening.
Plan glass layouts and safe cleaning access together
Start the glazing design with the purpose of each opening: an uninterrupted view, privacy from a path, borrowed light, ventilation or a focal feature. Decorative bars can introduce visual rhythm, while glass-dividing bars are a different construction choice; name the intended arrangement clearly in the schedule. Check elevations from inside and outside because bar alignment, mullions and adjacent door lines affect the whole façade. A period-influenced pattern may connect an extension with existing openings, whereas simpler glass can keep a view less interrupted. Neither approach is inherently more appropriate beside the coast; it should answer the architecture and room use.
Cleaning access is the essential reality check. Identify who can reach the exterior of upper-storey glazing, panes above roofs and glass behind balustrades. A fixed triangular and angled non-opening window may follow a gable or roofline, but its shape must be considered alongside external access and the room’s separate ventilation arrangements. Do not approve feature glazing that depends on unsafe improvised cleaning. Consider where spray, bird deposits or overhanging planting may increase attention, and agree a practicable access method with the project team. Project-specific glass selection, safety considerations and compliance should be assessed by appropriately qualified professionals rather than assumed from a catalogue image.
04 / Check the order
Keep thresholds, tracks and drainage areas accessible
Thresholds and lower frames collect material carried by shoes as well as leaves, sand and wind-blown dirt. Learn which track, sill and drainage areas are accessible on the chosen system and follow its cleaning instructions. Remove loose material carefully before repeated door movement compacts it; do not simply wash debris into concealed spaces. After storms, look for changed water behaviour, damaged adjacent sealant or an unusual build-up where panels travel. Record what you see rather than dismantling the unit. Clear photographs and an opening reference give an installer or service professional useful information if investigation is needed.
A Patio Life side-sliding patio door is a side-sliding patio-door option whose travel path should remain unobstructed. Arrange mats, furniture and planting so they do not channel grit into the threshold or prevent inspection. The project team should coordinate paving levels, falls, drainage features and adjacent finishes around the opening; a new door cannot remedy poorly managed water elsewhere on a terrace. Inside, avoid concealing the threshold behind heavy furniture. Add an inspection after dusty building work and particularly severe weather rather than relying only on a fixed annual date. Any cleaning frequency should reflect actual deposits and the supplied product guidance.
Build a useful maintenance record
A simple maintenance diary is more valuable than an elaborate routine that is soon abandoned. Record cleaning dates, products used and observations about handles, hinges, tracks and seals. Note any change in closing effort, sound, locking, condensation pattern or water marking, and use dated photographs where they clarify a developing issue. The aim is not to diagnose a technical cause yourself but to recognise when routine care has become a service question. Keep invoices, approved drawings, care sheets and installer details together so the exact opening and configuration can be identified when advice is requested.
Let conditions determine timing. A sheltered guest-room window may collect less residue than a sea-facing door used several times daily, while nearby building work or an unusually windy period can temporarily increase deposits. Use gentle methods permitted by the manufacturer and inspect seals without pulling them out or applying unapproved substances. If operation changes, report precise symptoms: when they began, whether they occur only in wet or windy conditions, and whether the concern involves locking, movement, appearance or water. This creates a more useful service conversation than applying increasing force or trying several unverified cleaners and lubricants.
05 / Plan routine care
Separate warranty cover from project responsibilities
Bloomcabin windows and doors have a five-year warranty. Read the supplied terms and care information to understand what records to retain and how a concern should be reported. Warranty cover is not a substitute for correct installation, suitable surrounding construction or routine care. At handover, request operating instructions for every distinct configuration and confirmation of the products supplied. Open and close units with the installer where practical, identify keys and accessories, and record agreed snagging in writing. Also establish whether installation queries go to the fitting contractor, supplier or another project contact, because responsibilities may differ.
A product name confirms only the named arrangement. For example, outward-opening top-hung windows describe an outward-opening top-hung configuration; the title does not settle dimensions, glass, handles, fixing method or suitability for an exposed location. Confirm these matters in final drawings and the quotation. Ask who will perform post-installation adjustments, whether access equipment could be needed for later service and how frames will be protected during subsequent decorating. Where staining or moisture appears near an opening, keep an open mind about roofs, walls, drainage and external finishes. Arrange assessment by the relevant professional instead of assuming the visible frame is necessarily the source.
Convert the survey into an order-ready schedule
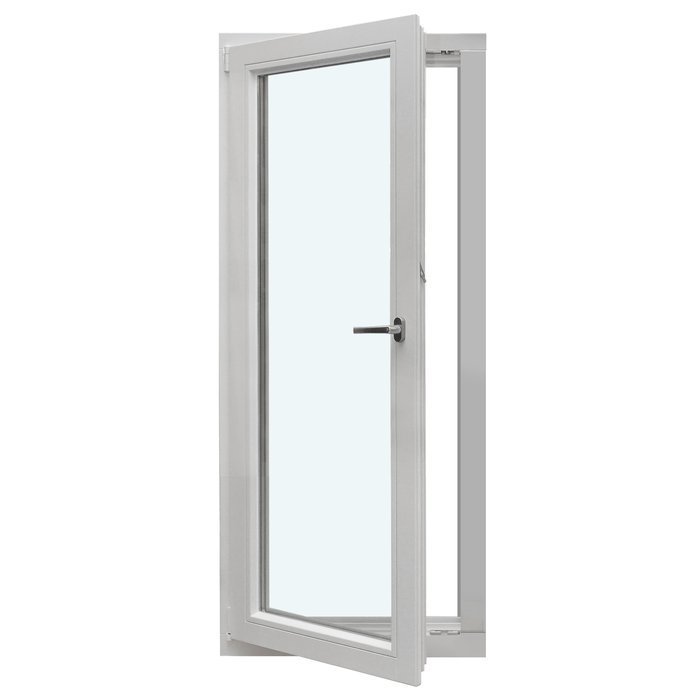
Review all openings together before approval. Check consistent finish names, internal and external colours where applicable, opening direction, handle position, decorative-bar or glass-dividing-bar patterns, sill treatment and threshold interfaces. State which rooms need regular ventilation, privacy, everyday access or primarily daylight and views. A single-sash outward-opening side-hung window may suit a location with appropriate exterior clearance and a workable cleaning route, while another operation may fit a constrained path or furniture arrangement better. Mark decisions on drawings and give each opening a reference; email descriptions alone can become ambiguous when several similar units are involved.
Finish with matters outside the product itself. Confirm measured openings, wall build-up assumptions, internal reveal treatment, external render or cladding sequence, completed floor levels, terrace surfaces and nearby balustrades, blinds or curtains. Ask the surveyor to identify uncertainty where existing openings are irregular or concealed conditions may affect installation. Check the order acknowledgement line by line against the approved schedule before production and query altered wording, handing or finish references. A concise, accurate handover pack then becomes part of the maintenance plan: it tells owners, cleaners and service professionals what was installed, how each unit operates and which surrounding details were intended to work with it.
Frequently asked questions
Which finish is best for a coastal house?
There is no single best finish based only on a coastal postcode. Compare samples at the property, ask for the care requirements of each option and choose a finish you can inspect and clean appropriately. Coordinate its colour with the façade and protect it from mortar, paint, adhesive and other materials during surrounding building work.
Do coastal windows require different hardware?
Hardware should be specified for the precise opening, exposure and pattern of use. Ask what is included, where components can be inspected, which care products are permitted and who should undertake adjustments. Do not assume a product title provides a complete hardware specification, and report a noticeable change in operation rather than forcing the mechanism.
How often should frames and door tracks be cleaned?
Follow the supplied care guidance and respond to actual deposits rather than relying on one universal interval. A frequently used exposed door may need attention sooner than a sheltered window. Remove accessible loose grit gently, especially after storms or dusty work. Document changed movement or drainage behaviour and obtain advice instead of dismantling components.
Are bifold doors suitable for an exposed terrace?
They are one possible configuration, but suitability depends on the site, stacking space, threshold interface, cleaning access and intended use. Compare them with sliding or hinged alternatives on a scaled plan. Review exposure and project-specific performance with the relevant professionals, and confirm the detailed specification rather than judging suitability from the product name alone.
What documents should I retain after installation?
Keep the order acknowledgement, approved drawings, configuration schedule, care instructions, warranty information, keys and installation contacts. Add photographs of completed thresholds and external interfaces plus a brief maintenance diary. These records make later questions easier to explain and reduce the risk of cleaners, decorators or future owners using unsuitable products or methods.
Practical next step
Coastal windows and doors should be chosen as maintainable parts of the whole building, not as isolated colour samples. Coordinate the retrofit sequence and access first, then map exposure, test opening movements and confirm finish, hardware, glazing and threshold details in writing. Safe cleaning reach and accessible service points matter as much as the closed appearance. After installation, use the supplied care guidance, keep tracks free of visible debris and record changes before they become difficult to explain. A final review with the surveyor, installer and relevant qualified professionals helps turn an attractive selection into a practical, clearly documented order.
