
Designing a Comfortable Winter Route Between Home and Sauna
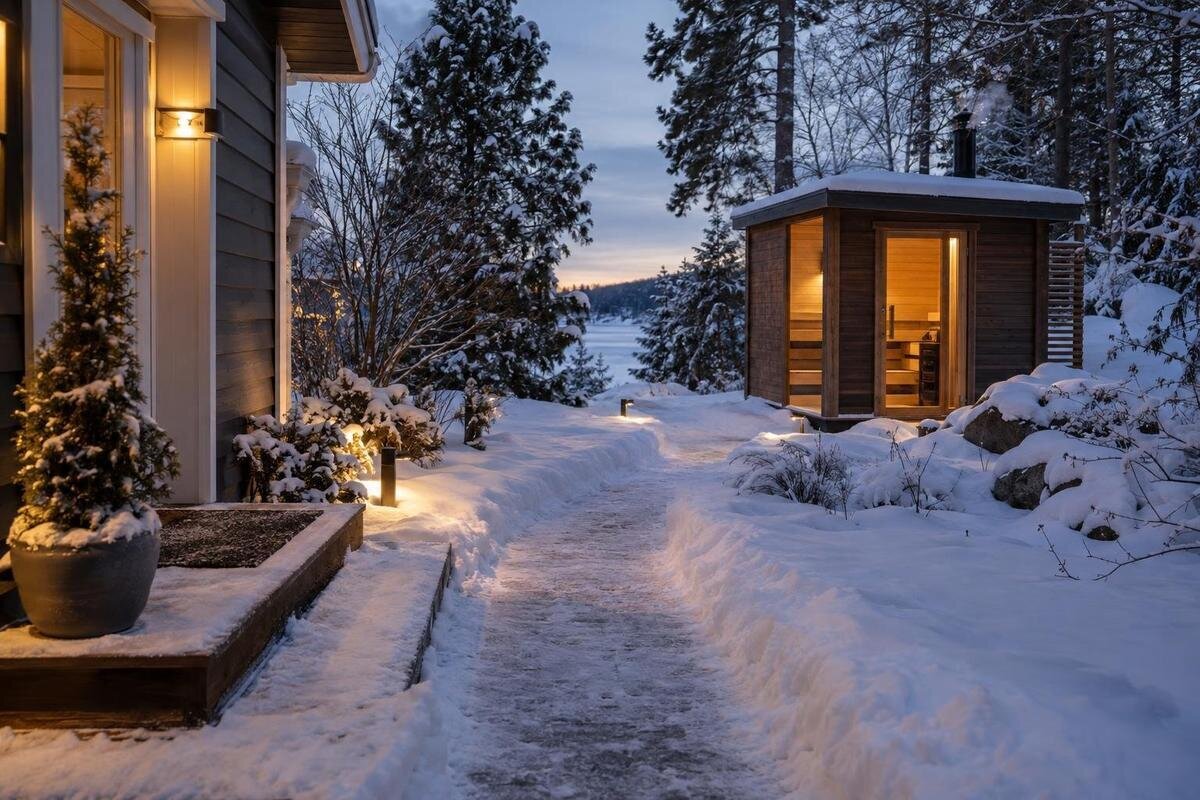
Outdoor sauna access
An outdoor sauna can feel close to the house on a plan and still be awkward to reach when the ground is wet, the wind is up or visibility is poor. South African winter conditions vary from property to property, so a useful route responds to the weather and ground you actually experience, not to a generic idea of winter. Plan the walk from the house door you use, across the path and onto the sauna entrance area. Direct access, dependable footing, managed runoff and a straightforward cleaning routine usually matter more than elaborate shelter.
01
Assess the winter conditions on your property
South African winter does not create one set of conditions for every property. Yours may face repeated rain, cold wind, frost, occasional ice or snow, or mainly damp ground and shade; let observation decide which matters. Walk the proposed route early in the day and after wet weather, not only on a dry afternoon. Note where water sits, where the ground stays dark and damp, where leaves collect, and whether wind drives rain across the path. Also notice whether dew, irrigation or roof overflow keeps an area wet even without rainfall. If you have notes from earlier winters, use them; otherwise, keep a brief record during the season before fixing the route.
Mark the house exit and proposed sauna entrance on a simple site sketch before choosing the path line. A listing such as Thermowood Barrel Sauna LCF 300 gives a model reference and a catalogue area of 6.89 m², but it is not a dimensioned site plan. Obtain the current manufacturer drawing for the exact configuration to confirm the unit's position and entrance details. Then map the walk around gates, garden beds, taps and places that become muddy. Consider whether someone will carry towels or move in a robe; a shorter route is useful only if it remains clear and safe in the conditions you have recorded.
Keep the route direct and easy to follow
Choose the line from the actual house door to the sauna entrance, rather than drawing a straight line through the garden. A few extra steps can be preferable to crossing a muddy lawn, squeezing through a narrow gap or stepping over a hose. Keep turns easy to see and avoid routes that pass close to sharp edges, low branches, stored equipment or gates that are awkward to open. Think about whether people approach from the kitchen, back door or another regular exit, and whether the route will still make sense in low light. If it meets a gate, make sure it can be opened without stepping backwards into a wet patch.
Mark the proposed line with temporary markers and walk it from each end before paying for paving or a deck. If you are comparing the Thermowood Barrel Sauna S-140, confirm the entrance location and orientation for the exact configuration instead of inferring them from a product photograph or model name. The sauna's position determines whether the path meets the doorway naturally or arrives at a difficult angle. Check each gate and corner, and allow room to pass without brushing wet planting or pushing stored items aside. If the route only works when a gate or object is moved, include that change in the plan rather than treating it as an afterthought.
02
Choose a surface for wet, dirty conditions
Footing depends on finish, water, dirt and use, so assess a surface in the conditions it will meet. Compare samples when damp and consider whether they remain stable, are comfortable for the footwear people actually use, and can be swept or washed as their maker allows. Textured exterior paving or a suitable deck finish may be options, but an outdoor label alone does not prove good grip when wet. Smooth stone may become slippery, loose gravel can shift underfoot, and grass may turn muddy. Ask the supplier about wet-use suitability and cleaning requirements for the exact finish; there is no single surface that suits every plot.
Pay close attention to the joins between surfaces. A change from paving to decking, lawn or a threshold can create an uneven edge that is easy to miss in poor light or wet conditions. Keep transitions secure and as even as the site allows, and avoid loose mats that curl, slide or hold water. If you are planning around a Thermowood Barrel Sauna HC-150, use the exact entrance details to decide where the path ends and how it meets the threshold. Consider this junction when choosing the surface, rather than leaving an awkward gap to fill later. Where a raised deck or ground alteration is involved, have a suitable professional assess the construction rather than guessing at levels or supports.
Plan drainage before the path is laid
Drainage belongs in the route plan, not as a repair after the first puddle. After rain, follow the water from the house, garden and proposed sauna position. Note low spots, roof edges, downpipe outlets, soil washed onto the path and places where runoff crosses the walking line. Avoid a layout that traps water or directs it towards the house, sauna or a neighbouring property. A permeable surface does not guarantee that the ground will drain well; soil, existing levels and outlets all affect the result. Photograph problem spots after rain if that will help a contractor understand what is happening. If water repeatedly collects or the site needs regrading, ask a qualified landscaper or drainage professional to assess it before the finished surface is installed.
When planning the route to a Thermowood Barrel Sauna HC-225, confirm its final position before coordinating the base, nearby path and roof-water arrangements with the installer and landscaping professional. These elements need to work together so that water does not collect where people step onto or off the path. Keep existing drains, channels and inspection points accessible rather than paving over them. If the proposed line crosses a natural flow of water, do not improvise a channel or change ground levels without advice; an unsuitable fix can move the water problem elsewhere. A simple site drawing with the path, low points and outlets marked gives everyone involved the same reference.
03
Decide whether the route needs overhead shelter
Consider shelter where rain or wind makes the walk uncomfortable, but do not assume that the entire route needs a roof. A house overhang, wall or existing covered area may offer some protection, while exposed sections still need a surface that copes with wet weather. Check whether trees or walls also keep the path shaded and slow to dry. Any cover changes where water lands, so account for its runoff rather than letting drips fall onto the walking line or collect at the entrance. Keep the route open enough to see and use; dense planting or stored items can make a sheltered passage feel cramped and obscure its edges. Screening wind should not block access to doors, drains or service areas.
If you add a separate covered walkway, have its design and installation specified for the conditions at your property. Do not assume that a sauna roof or a general garden structure is suitable for covering the route, or that a cover can be attached to the sauna without the manufacturer's approval. If you are considering the Thermowood Barrel Sauna N-210, include its proposed position in the shelter plan so the designer or installer can account for runoff, clearances and access to the unit. Plan the shelter and walkway together rather than fitting a cover over a completed path. Where a cover is not practical, a direct path with good drainage and a maintainable surface may be the simpler plan.
Allow clear space at both doorways
Leave a clear landing at both the house door and sauna entrance. At the house, you may want room to put on or remove footwear and gather a robe or towel without blocking the doorway. At the sauna, allow enough stable space to open the door as specified, step clear and put down belongings without standing in a muddy bed or on loose ground. Keep planters, hoses, stools and storage out of the walking line. An outdoor mat or tray must stay secure and drain as intended; otherwise it can become a slipping or tripping point. A space to pause is useful if someone needs to close a door or adjust footwear before moving on.
Check the actual threshold, door-opening direction and clear area in the manufacturer's drawing or manual for the chosen configuration before you set the path. If you choose a Thermowood Barrel Sauna N-250, use those details to position the entrance landing and work out how people will approach it from the path. Keep enough space for the door to operate without a wall, fence or storage item obstructing it, and make sure the route does not narrow where people need to step around the open door. Check the approach in both directions, including where someone will stand while closing the door. If the supplied information is unclear, ask the supplier or installer to confirm the dimensions before paving.
04
Plan for everyone who will use the route
Plan for the people who will actually use the sauna, not only an idealised walk by one person in dry shoes. Some may carry towels or other items, wear a robe, use sandals, or need a steadier, wider approach. Steps, uneven joints and sharp changes in slope can make an otherwise short route difficult to negotiate. If a household member or guest uses a mobility aid, discuss the required clear width, turning space and levels with a qualified designer before work begins; do not assume a typical garden path will suit. A continuous, firm route is generally easier to follow, but the details must match the site and the needs of its users.
If the Thermowood Barrel Sauna LC-260 is on your shortlist, discuss any access needs while reviewing its exact threshold and layout information. Consider the whole approach: a firm path alone will not resolve a difficult junction at the doorway. Plan how the path meets the entrance and whether any slope, level change or deck edge needs professional attention. Do not add a ramp or handrail by guesswork; its position and construction need to suit the route and structure. Raise these requirements before choosing final levels or materials, so the sauna placement, landing and path can be considered together rather than altered separately after installation.
Make seasonal care part of the design
Keep the surface dependable with condition-based care. Remove leaves, grit and mud before they build up, since debris can hide a raised edge and retain moisture. After storms or garden work, look for standing water, soil washed across paving, loose joints, movement in boards and mats that have shifted. Organic matter can also obscure wear, so check areas where planting presses against the path. Where your site experiences frost, ice or snow, plan how to clear it using a method compatible with the material and nearby planting. Do not assume that a de-icing product, abrasive tool or coating is safe for every finish. If a path becomes slippery, look for the cause, such as shade, runoff or surface wear, before adding a treatment.
Keep the sauna's care instructions separate from those for the path. Whether you choose the Thermowood Barrel Sauna HCF-300 or another model, use the manual for the unit you buy and the surface maker's instructions for paving or decking. Keep both sets of guidance available when choosing cleaning products or treatments. Do not apply a product intended for one material to another unless the manufacturers confirm compatibility. Check that drains remain clear and that water from any shelter does not keep one section wet. A short check after weather that affects your site is more useful than assuming every surface needs the same cleaning method or maintenance schedule.
05
Coordinate the path with sauna installation
Coordinate installation and landscaping before any permanent work begins. Confirm the exact sauna position, entrance direction and any access or maintenance clearances in the relevant manufacturer information. Then agree how the base, ground levels, drainage and path will meet, and who is responsible for each part. This helps prevent a finished paving edge from clashing with a threshold or a landscaping change from blocking an outlet. Keep access for installation and later work in mind, but do not assume the route itself is suitable for moving equipment. If digging or changing ground levels is required, ask the relevant professionals to identify constraints, including buried services and water movement.
A simple site plan can record the house exit, sauna entrance, path line, surface changes, landings, drains, shelter and any areas that need to stay clear. Add the decisions that still need confirmation, such as exact doorway details or where roof runoff will go, and share the plan with the installer and landscaper. This is more useful than choosing a surface first and asking others to fit their work around it. If the route depends on an unresolved level or drainage issue, settle that before ordering or installing the finish. The aim is not a complex drawing; it is a shared, accurate picture of how people and water will move through the space.
Test the route in real conditions
Before treating the route as finished, walk it in the conditions and at the time of day when you expect to use the sauna. Check it from the house to the door and back, carrying the things you normally take, and make sure corners, gates and transitions remain easy to negotiate. After rain, observe the route from a safe position before walking on any surface that may be slippery. Notice where water settles, whether the threshold landing stays clear, and if a shelter drip falls on the path. If the route will be used in darkness, make its visibility part of a separate, professionally planned lighting arrangement rather than relying on memory of the daytime layout.
Review the plan after the first weather that tests it and make small corrections before a problem becomes routine. A puddle may call for a drainage assessment; leaves may show where planting or cleaning access needs attention; a loose mat may be better removed than replaced with another. Check the walk in both directions, since turning back changes how you approach a gate, threshold or corner. Keep a simple seasonal routine based on what the site experiences, without assuming a fixed schedule or chemical treatment suits every surface. When everyone can follow the route, use the doorway without obstruction and avoid persistent mud or pooled water, the plan is doing its job. It should be practical to maintain as well as pleasant to use.
Frequently asked questions
How long should the path between the house and sauna be?
There is no single ideal distance. Choose a route that is convenient without crossing muddy ground, awkward gates or areas where water collects. Measure from the door you actually use to the exact sauna entrance, then check the required clearances and site conditions before fixing the position.
Does a winter sauna route need to be covered?
Not necessarily. First consider how much wind and rain the route receives and whether the surface drains and stays easy to use. Existing shelter may help, but a new cover changes where water falls. Have any separate structure specified for your site rather than assuming a sauna roof or garden structure can cover the walkway.
Which surface is best for an outdoor sauna path?
There is no material that suits every property. Compare exterior-suitable surfaces for grip when wet, stability underfoot, comfort for the footwear people will use and ease of cleaning. Check the maker's advice for the exact finish, and pay particular attention to joints and transitions between materials.
What should I do if my property gets frost, ice or snow?
Plan for the conditions your site actually experiences. Consider how the path can be cleared safely and check that the method is compatible with its surface and nearby planting. Do not assume that a de-icing product or abrasive tool is suitable for every material; follow the surface maker's instructions.
Should I build the path before choosing a sauna?
You can sketch a possible route early, but confirm the exact sauna position and entrance details before installing a permanent surface. Use the manufacturer information for the chosen configuration, and coordinate the path, landing, drainage and any shelter with the people responsible for the installation and landscaping.
A winter route works well when it makes sense in ordinary use, not just on a dry site plan. Set its line around the actual sauna entrance, choose a surface that suits your property's wet and shaded areas, and deal with drainage before finishing the path. Clear landings and a realistic care routine help keep the walk usable as conditions change. The result can be simple: a route the household can follow without negotiating mud, puddles or avoidable obstacles.
