

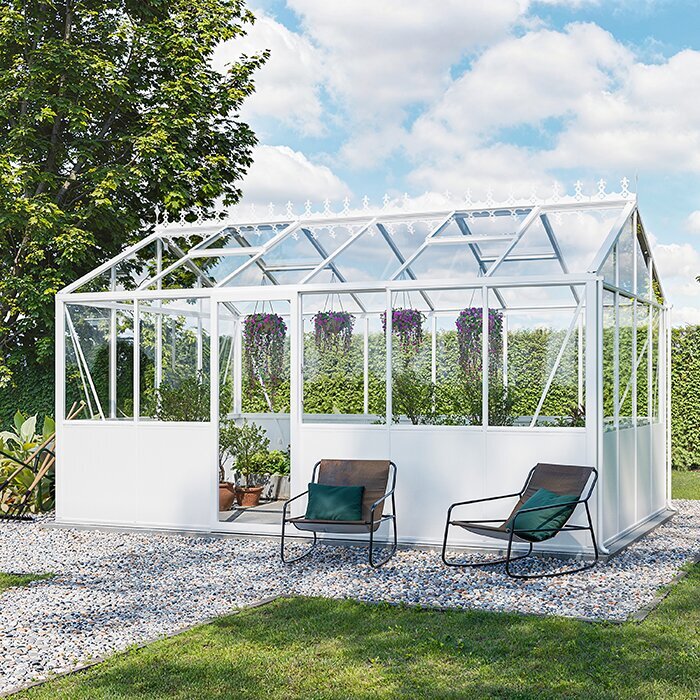





Bloomcabin Prestige Premium Greenhouse
Prestige Premium – aluminium greenhouse with enclosed base panels and combinable glazing options
The Bloomcabin Prestige Premium Greenhouse combines productive growing with enclosed aluminium base panels. Unlike a structure glazed to ground level, plant pots, growing media and working materials are less visible in the lower section. Beside the home or patio, it creates a calmer-looking garden space while the glazed roof and wall areas retain their bright character.
The range includes compact and generous models. Alongside floor area, the models differ by width in ridge and door height . This lets you match the greenhouse to available space, planned paths and planting areas.
Before choosing, consider summer sun, winter use, views from the house, the foundation and rainwater routing together. These points influence not only glazing but also the position of the door, roof vents and work areas. Establishing future use first helps you select permanent components purposefully while keeping the interior flexible later. More about Bloomcabin.
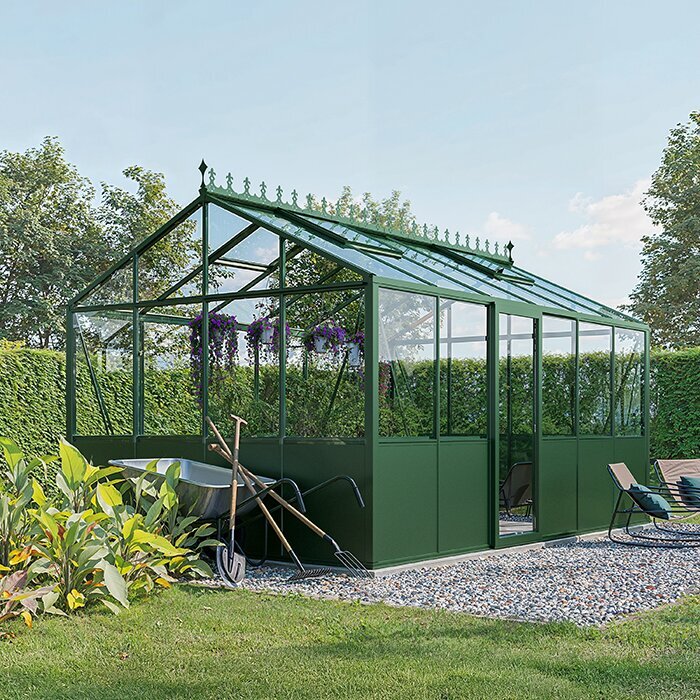
Sheltered base area
Enclosed aluminium base panels for greater privacy at lower level
The aluminium cladding creates an enclosed backdrop at lower level. In front of it, potting benches, shelving and larger containers look tidier, while everyday working items are less immediately visible from outside.
This is especially useful when the greenhouse stands beside a patio, along a regularly used garden path or within view of living areas. The cladding offers more privacy at lower eye level. Assess the intended position from the house, garden and key seating areas.
Upper wall sections and the roof remain glazed, so abundant daylight still reaches the growing area. The transition to the enclosed base is nevertheless important for interior planning: small light-loving plants should not stand permanently right at the edge where they receive less side light.
Choose the right size
Compact to spacious models for different garden layouts
Enclosed base panels
Conceal low-level work and storage areas
Glazing to suit
Balance daylight, privacy, sun control and maintenance
Coordinate the colour
Blend the frame with house, patio and garden
Choose glazing wisely
Select glazing for plants, privacy and sun exposure
Prestige is available with polycarbonate, 4 mm toughened safety glass and selected specialist glazing, including self-cleaning, mirrored, solar-control and matt white glass. Each option has a different emphasis. Decide whether maximum light, reduced visibility, protection from intense sun or lower cleaning effort matters most.
Roof and sides can use different glazing. For example, the roof can prioritise high light levels while an overlooked side gains more privacy. Consider each greenhouse side separately, because the sun’s path, neighbouring property, patio and existing planting do not affect every direction equally.
The right combination depends on the site, orientation, plants and intended use for cultivation, relaxation or plant collections. Light-loving crops need suitable illumination; for a seating area, glare and overlooking may matter more. Resolve this trade-off before ordering permanently installed panes.
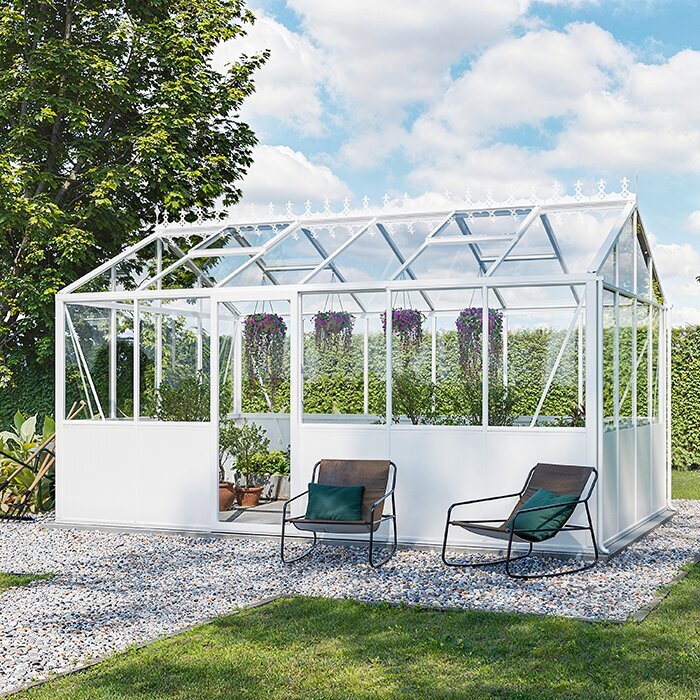
Prestige at a glance
Key dimensions and features
Model variety
22 configurations, 3.77–28.08 m²
Options for gardens and uses of different scales
Narrower model range
235 cm wide
Ridge height approx. 231 cm; door height approx. 165 cm
Wider model range
310 cm wide
Ridge height approx. 267 cm; door height approx. 185 cm
Base area
Enclosed aluminium base panels, 79 cm high
More privacy in the lower interior
Glazing and door options
Polycarbonate, 4 mm toughened safety glass and specialist glazing
Single sliding door or double sliding door from 310 cm wide
Equipment and colour choice
Roof vents, gutters, integrated aluminium base frame and 37 RAL colours
12-year warranty
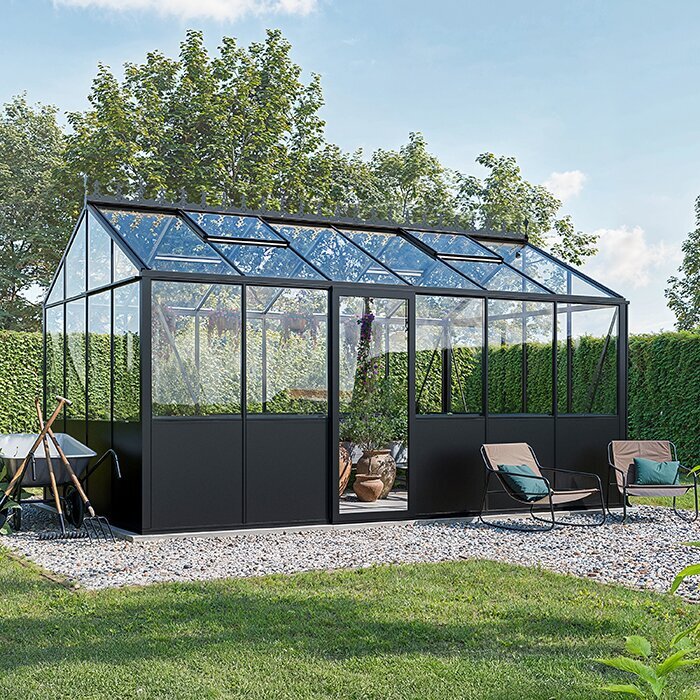
Ventilation and temperature
Coordinate roof vents, glazing and optional heating
Every Prestige includes roof vents. They open manually as standard; automatic temperature-controlled openers can make daily operation easier. Plan paths and interior fittings so manual openers remain accessible at all times and can be operated without moving items.
At highly sunny sites, solar-control glass or temporary shading can be useful. Where light levels are lower, avoid reducing the brightness available to plants unnecessarily. Optional heating can extend use, but must be regulated for the plants and professionally installed.
During site planning, decide where water from the integrated gutters will go. Outlet, fall and overflow must be arranged so water does not collect by the foundation and paths stay clear. Easy-to-reach connections simplify future inspection and cleaning.
Ways to use it
Four ideas for the Prestige interior
01
Vegetables and propagation
For vegetables, young plants and an extended growing season, divide the interior into beds, potting benches and accessible paths. The enclosed base panels provide a backdrop for work areas, while taller crops can grow into the glazed upper zone. Plan irrigation and ventilation together with planting from the outset.
02
A garden seating space
With suitable seating, the interior can serve at times as a sheltered garden retreat. The base panels reduce low-level overlooking and make the area feel more orderly. Movable furniture is more practical than fixed fittings because it can be repositioned during intensive growing periods, cleaning or overwintering larger plants.
03
Sensitive plant collection
For citrus, tropical species or other collector plants, glazing, ventilation and optional heating can be tailored to plant needs. Different requirements should not be treated as identical. Separate zones, movable containers and adequate space allow sensitive specimens to be positioned nearer to, or further from, the door as needed.
04
A garden design feature
The wide colour choice lets you coordinate the aluminium frame with the façade, window profiles, patio or other garden elements. View colour samples in natural light where possible, as surroundings, shade and glazing alter their effect. The enclosed base makes the frame colour more prominent than with a fully transparent base.
Site and use through the year
Site, foundation, sunlight and water routing determine whether the chosen version will suit its use over time. Also check the route to the installation site, access through the door, clear maintenance space and possible service runs. The position must support not only plants but also installation, cleaning and future servicing.
Heat at sunny sites
North- and west-facing positions can heat up significantly on clear summer days. Choose glazing, shading and ventilation according to the actual sun exposure at the intended site. Observe shade from buildings and trees throughout the day: a sheltered morning position may remain in direct sun for long periods in the afternoon.
Roof vents release rising warm air. Tall crops, shelving and supports should not obstruct airflow. On very hot days, the door may also be opened briefly for ventilation. Regularly monitor temperature and plant condition.
Solar-control glass is particularly suited to permanently sunny surfaces, while movable shading can be adjusted seasonally. Match the solution to your crops, as young plants, fruiting vegetables and overwintering container plants have different light needs. Glazing is permanent; temporary shading remains flexible.
Frost and foundations
The integrated aluminium base requires a level, load-bearing base suited to the site. The greenhouse is rated for wind resistance up to 30 m/s and a snow load of 210 kg/m². These figures require professional anchoring and assembly in accordance with product instructions; they do not replace an assessment of local ground and site conditions.
Frost-related ground movement can affect door travel, frame alignment, glazing and drainage. Have the foundation design determined professionally for local soil conditions. A continuously level bearing surface and secure anchoring are particularly important. Correcting a structure already under stress is more demanding than careful preparation.
Foundation depth, drainage and finished assembly height must be defined before installation. Include the future internal floor and the doorway transition. This avoids unexpected steps and directs water away from the greenhouse. Changes to ground level after assembly can affect access, door operation and connection details.
Privacy near house and patio
The base panels mainly shield the lower interior from direct views; plants and furnishings remain visible above through the glazing. Consider what will stand below glazed areas and which tall plants or shelving will extend above them. Arrange the interior around sightlines from the patio, paths and home windows.
Position potting benches and storage so frequently needed items are near the door and paths remain clear. Work zones can sit on the side facing away from the main viewpoint, provided they still receive required light. This combines short working routes with a neat exterior appearance.
Nearby plants can soften the transition between greenhouse and garden. Keep sufficient clearance from gutters, glazing and base panels so cleaning and maintenance are not hindered. When selecting plants, consider their eventual width and height, not only their size at planting.
Collecting and directing rainwater
Integrated gutters can lead rainwater to storage or drainage. Plan the route so hoses or pipes do not obstruct the door, care paths or later maintenance. Storage should stand securely, remain accessible and allow short runs to the growing area.
For a larger model, appropriately sized rainwater storage can be practical. Capacity depends on roof area, local rainfall, available space and plant water demand. Choose a solution with reserve capacity and a controlled overflow for heavy-rain periods.
The overflow must reliably direct excess water away from the foundation without causing puddles or erosion on adjacent surfaces. Connections, downpipes and cleaning points should remain permanently accessible. Accessible filters or leaf guards can simplify care when checked regularly.
Plants and interior
A considered interior layout makes plant care, air exchange and later changes easier. Start with fixed points such as the door, vents and water connection. Then arrange the main path, work zone and standing areas without furniture concealing technical components or restricting necessary movement space.
Plan the interior
The enclosed base panels create a calm backdrop for worktables, shelving and raised planting areas. Because less side light enters at the lower edge, small light-hungry plants should stand at a suitable height. Heavy containers need a stable, load-bearing surface where watering can be contained or drained.
Leave sufficient central space for watering, repotting and carrying trays. A scaled plan helps assess path widths, table sizes and turning areas realistically. Draw in open doors, projecting shelves and mature plants so the passage is not only wide enough when the greenhouse is empty.
Furniture and plants must not block roof vents, doors or glazing that requires cleaning. Leave adequate space between wall-side shelving and the structure so moisture cannot accumulate there. Frames, panels and screw connections should remain visible and accessible for early detection of changes and straightforward cleaning.
Tall crops
Tomatoes, climbing plants and larger specimens can use the height of the glazed upper section. Allow for their mature size and required support system when planning the layout. Attachments may only be fixed to suitable points; glazing, vent frames and moving mechanisms are not plant supports.
The best position for tall crops depends on light and airflow to roof vents. Arrange plants so lower crops are not shaded all day. Seasonal repositioning supports different crop rotations without changing fixed fittings.
Very tall plants must not interfere with the door, vents or opening mechanisms. Clear care paths make tying in, pruning and harvesting easier without damaging sensitive shoots. Leave enough space between spreading foliage and glazing for access to panes and to prevent damp plant material resting against them.
Automatic ventilation
Temperature-controlled roof openers can simplify everyday ventilation by responding to rising interior temperatures. They are particularly useful when nobody is on site during the day. Still check greenhouse conditions regularly, because sunlight, plant mass and season alter ventilation requirements.
For reliable operation, roof vents must remain free to move. Climbing shoots, strings and hanging objects must not obstruct either windows or mechanisms. Before forecast severe weather, follow the manufacturer’s operating and securing instructions.
Roof vents and opening mechanisms must remain accessible for inspection, cleaning and maintenance. Remove dirt and plant growth before movement is restricted. Checks are especially useful before extended hot spells and before winter.
Specify glazing for each individual surface
First assign each glazed surface its primary role. Solar-control glass suits strongly sunny areas, matt white glass can reduce overlooking and self-cleaning glass can ease external-surface care. Mirrored glass mainly shapes the exterior appearance. Choose by site and function, not solely for a uniform look.
Record the selected glass type for every roof and side surface in a clearly labelled sketch. Before ordering, this makes it possible to check whether sunny, overlooked or hard-to-reach areas have all been considered appropriately. Clear allocation also simplifies confirming the final configuration.
Assess transitions between different glass types from key viewpoints in the garden and house. Function-led surfaces can look different depending on light and surroundings. A visual sketch helps balance privacy, solar control and the overall appearance before the arrangement is finalised.
Coordinate permanent decisions properly
Plan permanently installed components in technical order: the foundation fixes assembly height and orientation, the door position defines the main access, and glazing influences planting-zone layout. Then route rainwater and irrigation lines so they do not cross these established paths and work areas.
Floor and work surface
A durable internal floor makes watering, repotting and cleaning easier. Surface and drainage should suit intended use: work areas need secure footing, while regularly watered planting zones require controlled drainage. Choose a surface that remains usable when wet and can be maintained with mild cleaners.
Paving, gravel or other suitable finishes can be coordinated with the threshold and foundation. A level transition, reliable water runoff and lasting load-bearing construction are essential. Loose material must not affect door travel. For fixed finishes, falls and connection heights must be set before assembly.
The finished floor level must be settled before fitting fixed work surfaces, shelving or irrigation lines. Consider cleaning, possible underfloor services and comfortable working height. Raising the floor later can affect door connections and base areas; setting it too low can create unwanted steps or standing water.
Irrigation
For larger Prestige models, a clearly planned water supply with short, open routes is worthwhile. Decide in advance where water is taken, distributed and shut off in winter. Lines should neither cross main paths nor complicate cleaning. Separately controllable planting zones help meet different water requirements.
Drip irrigation can avoid loose hoses, keep paths clear and deliver water directly to plants. Drippers and run times must suit plant type, container size and season. Check regularly for blocked outlets or leaking connections so unnoticed water does not affect plants or the internal floor.
Filters, shut-off valves and water connections should remain easy to reach for operation, cleaning and frost protection where relevant. Route outdoor and indoor lines clearly so they can be checked if a fault occurs. Before frost periods, drain or protect water-carrying parts according to their design. Avoid inaccessible areas where residual water can remain.
Maintenance access
Glazing, gutters, doors, vents and base panels need regular visual checks and cleaning. Leave sufficient access around the greenhouse for this. Use mild products and soft tools suitable for each surface. Abrasive aids can damage glass, coatings or aluminium finishes.
Dense hedges, walls or built-in furniture must not make exterior surfaces and technical components inaccessible. Nearby plants should be capable of being cut back without endangering the glazing. Adequate clearance also helps clean gutters, inspect fixings and remove leaves at the base.
A narrow, permanently clear maintenance zone makes care and minor service work easier. It should be walkable and not used for storage. Check on the site plan that sides facing away from the house or a property boundary also remain accessible, as dirt and plant growth can otherwise be missed.
Future flexibility
Plant collections and preferred uses can change over the years. Keep an area free of permanent furniture or fittings. This open zone can later accommodate larger containers, extra propagation space or a temporary seat, while also making more extensive care tasks easier.
Prestige may initially be used for vegetables and later provide room for citrus, ornamental plants or seating. When use changes, adjust light, temperature and irrigation accordingly. The structural specification should therefore meet the most likely long-term need, not only a single season.
For mobile tables, shelving and containers, choose wheels or glides suited to the intended internal floor. Movable elements should be securable against unintended rolling. Also plan a parking position where relocated equipment does not block paths, doors or access to glazing.
Before ordering
Set foundation, orientation and glazing before ordering
Before ordering, clarify available floor area, access, required clearances, possible approvals and needed foundation area. Requirements can depend on the site and project; when uncertain, consult the relevant municipal authority or a qualified professional. Measure driveways, gates and narrow points so all components can reach the installation area.
Mark the strongest sun directions and sides facing neighbours, patio and living areas on a site plan. Add trees, roof edges and other shade sources. This supports informed glazing, privacy and ventilation choices. Mark door access and the main path before deciding final orientation.
Prepare a level, stable base and the endpoint for rainwater routing before assembly. Check dimensions, right angles, heights and service connections before construction begins. Keep the assembly area clear and accessible so profiles and glazing can be handled without unnecessary moving or contact with hard surfaces.
Continue planning with Bloomcabin
Useful pages on choosing, ordering, warranty and product details
Frequently asked questions
Questions and answers about the Bloomcabin Prestige Premium Greenhouse
Which model size suits my use?
First plan paths, potting benches, beds and the mature size of your crops. Then compare available floor area, model width and door arrangement. This ensures you choose not only a greenhouse that fits the garden, but one with enough useful interior space.
How much clear space should remain around the greenhouse?
A fixed minimum cannot be stated without site and installation details. Plan a continuously walkable working zone around the greenhouse so glazing, gutters, connections and fixings remain accessible. Leave additional space in front of the door for unobstructed access and moving plant containers.
How do the base panels affect planting?
The base panels reduce side light immediately at the lower edge. Small light-loving plants are therefore better raised up or positioned slightly further inside. Potting benches, larger containers and work areas can be arranged effectively in front of the enclosed surface.
Should glazing for every side be decided before ordering?
Yes. Check sun exposure, overlooking, plant needs and cleaning access for each roof and side surface. As replacing permanently fitted panes later is demanding, the arrangement should be clearly established before ordering.
Can roof and sides have different glazing?
Yes. During configuration, select suitable glazing separately for roof and sides. This can combine high roof light levels with greater privacy or solar control on a particular side.
When is a double sliding door worthwhile?
A double sliding door is useful when wide plant trays, equipment or larger containers regularly need to be moved in and out. Also check that the wider access works with planned paths, potting benches and the rest of the interior layout.
Are automatic roof openers required?
No. Manual openers are included as standard. Automatic temperature-controlled openers are an additional option when the greenhouse warms quickly on sunny days or nobody is regularly present during daytime.
Which documents should I keep?
Keep order documents, product information and assembly instructions permanently. They contain important guidance on foundations, assembly, use and care, and can also help with future maintenance or service questions.
Bloomcabin Prestige Premium Greenhouse
Configure Prestige Premium for your site and use
Choose the suitable size and door option first. Then assign preferred glazing to individual roof and side surfaces, and add frame colour and equipment. Before completing your order, check that the configuration matches foundation planning, door access and intended service routes.
Pre-order checklist
✓ check available space and maintenance access
✓ define the site and key viewpoints
✓ specify roof and side glazing
✓ coordinate frame colour with house and garden
✓ plan doors, vents and rainwater routing
✓ check foundation dimensions and finished assembly height
