
































Classic Accoya Fusion
Classic Accoya Fusion – aluminium greenhouse with real Accoya accents
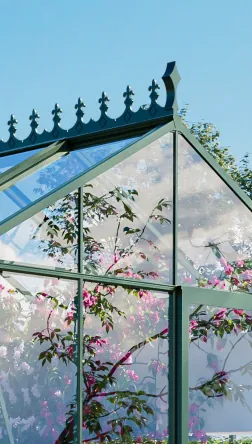
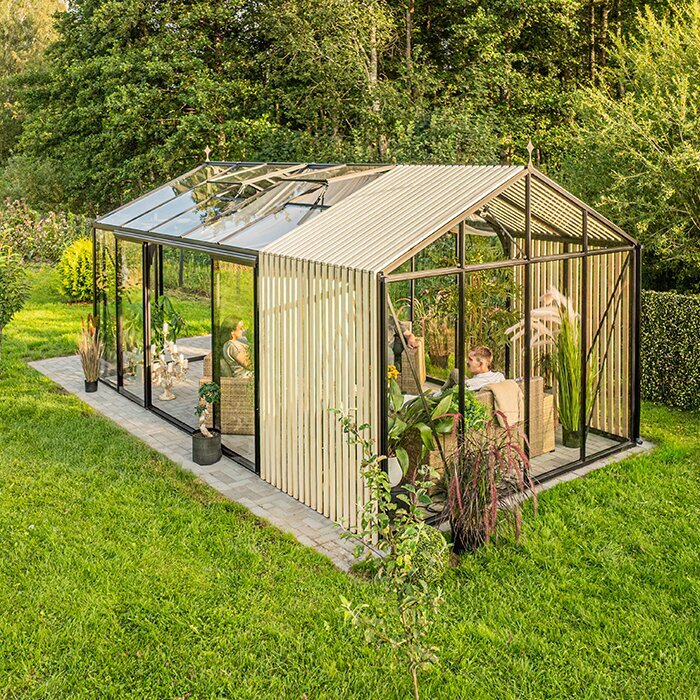
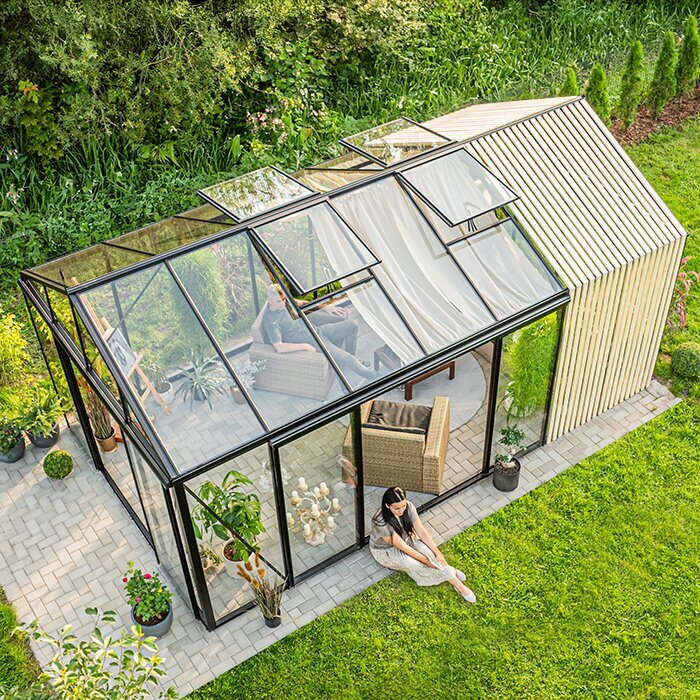
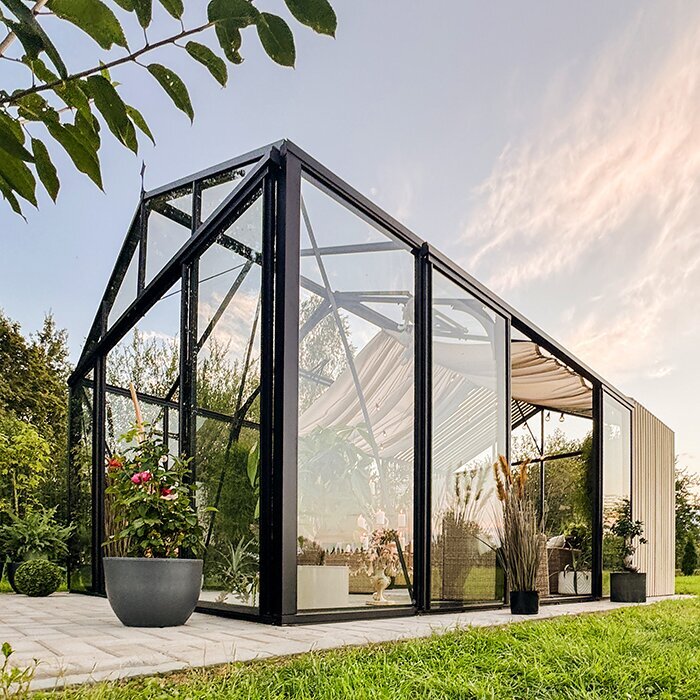
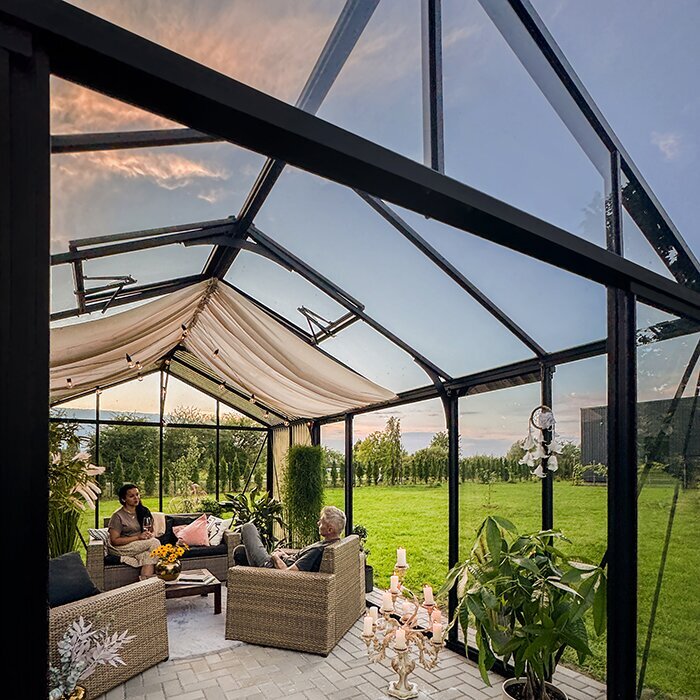
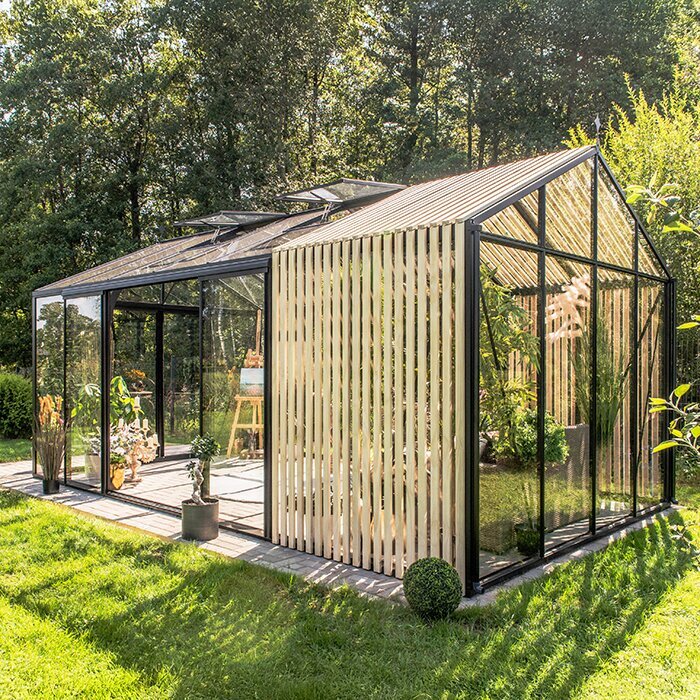
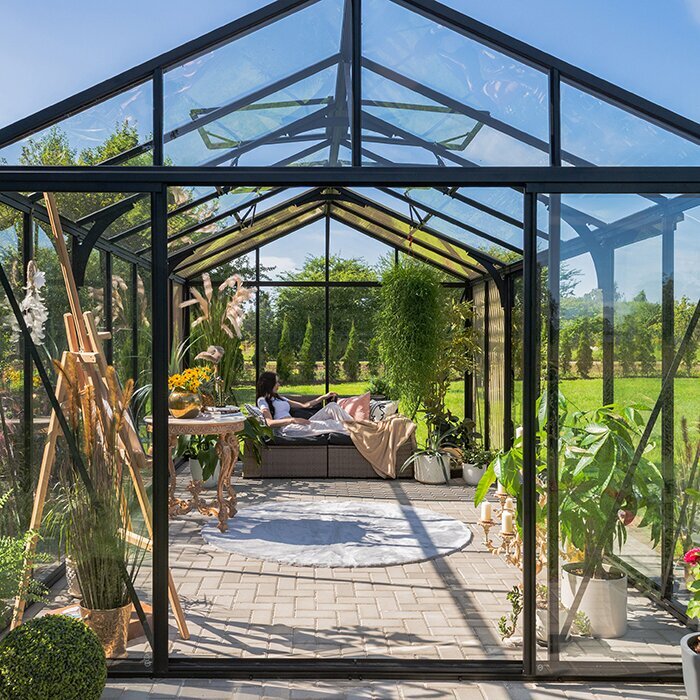
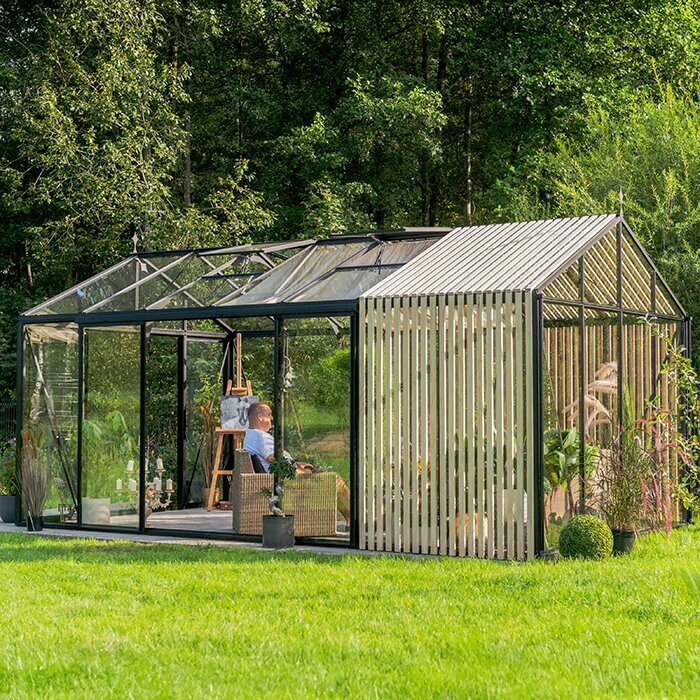
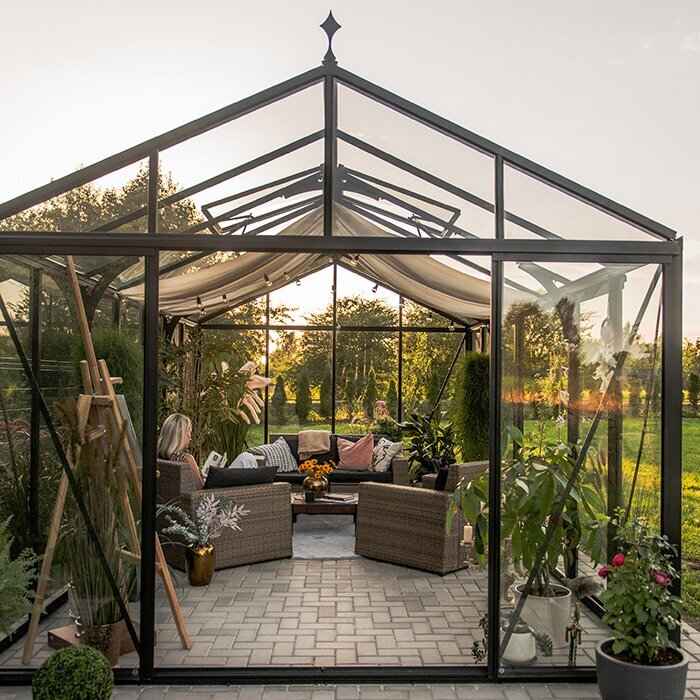
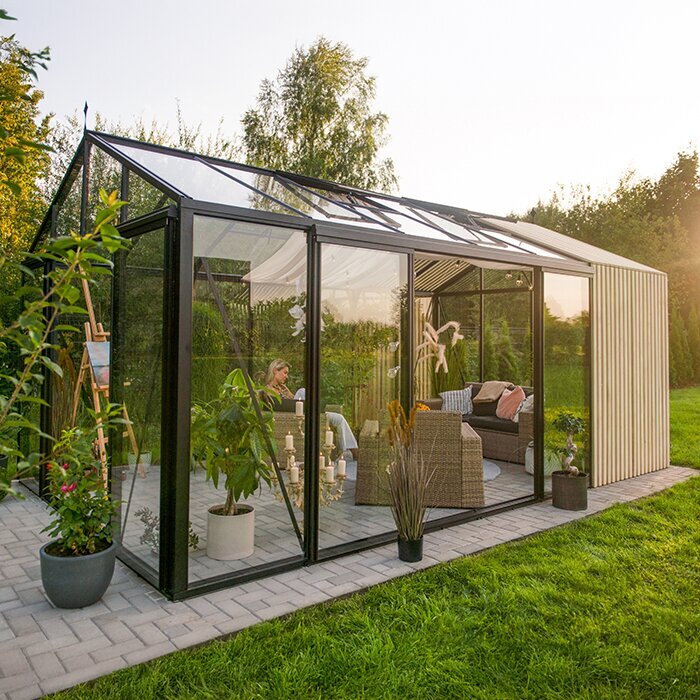
The Bloomcabin Classic Accoya Fusion greenhouse pairs the established Classic aluminium frame with clearly visible accents made from genuine Accoya timber. The crisp profile gains an organic character that changes naturally as the timber ages. It is designed for gardeners who want dependable growing space that also sits comfortably beside the home, outdoor living areas and garden paths.
The range covers around 3.8–18.9 m²and reaches approximately 2.34 m in height. Features include several glazing options, along with sliding doors, up to 37 RAL colours, roof vents and integrated drainage.
Choosing a configuration is about more than dimensions and colour. Review the site’s sunlight, natural timber weathering, planter access, sliding-door location, drainage and foundation from the outset. Considering these together produces a practical greenhouse that fits its setting. Explore more models and planning resources through Bloomcabin Australia.
Construction and materials
Classic design with genuine timber accents
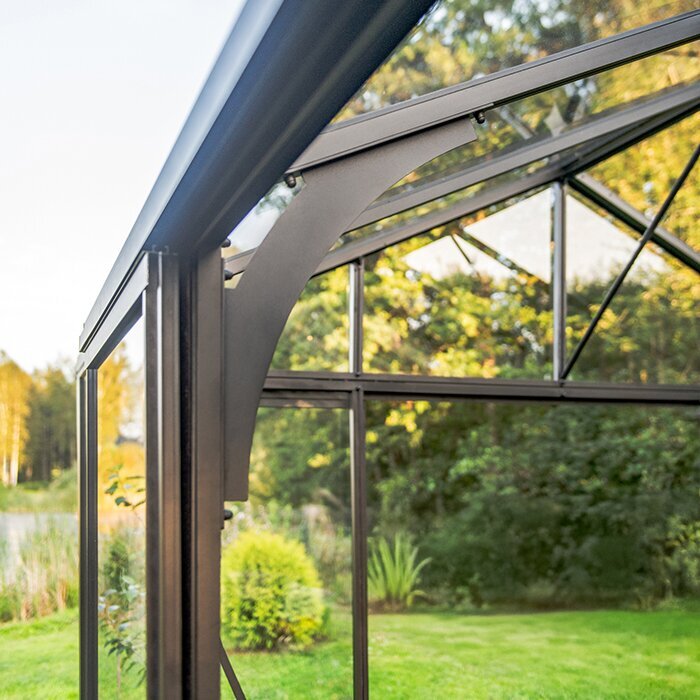
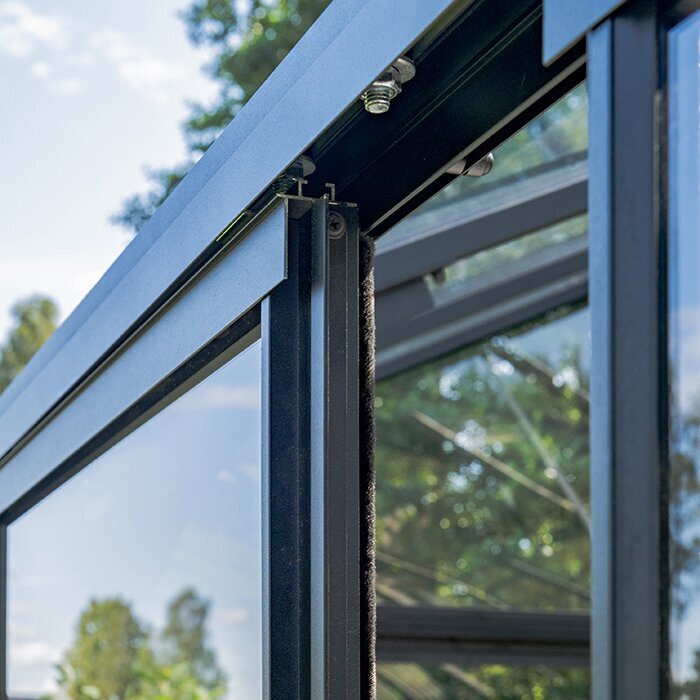
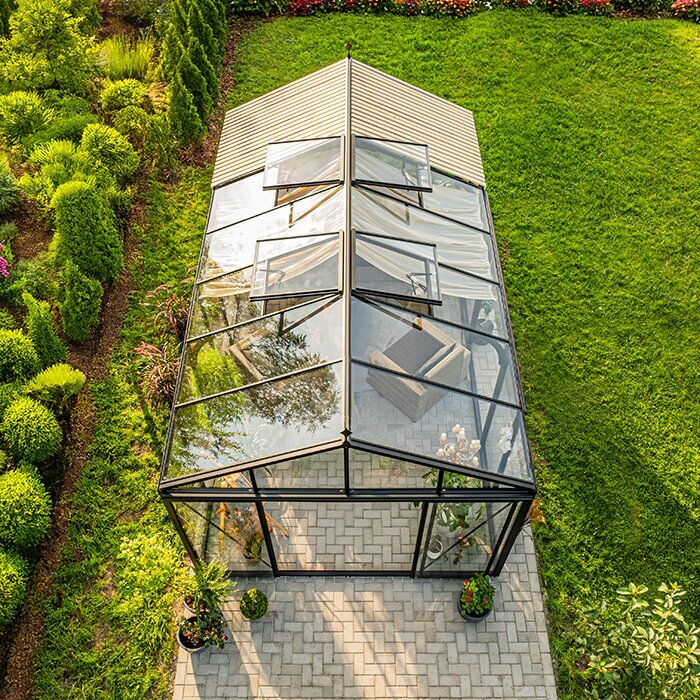
Structural support comes from the powder-coated aluminium frame; genuine Accoya appears as an exposed decorative element. This preserves the Classic model’s precise shape while introducing the visual warmth of timber. Viewed closely, clean-lined profiles, clear surfaces and natural wood grain form a distinctive material contrast.
Accoya is not substituted for any load-bearing aluminium profile. Classic Accoya Fusion is still an aluminium greenhouse in its structure, interior character and operation, with timber reserved for selected visual details. A fully timber-built greenhouse is therefore a different type of design.
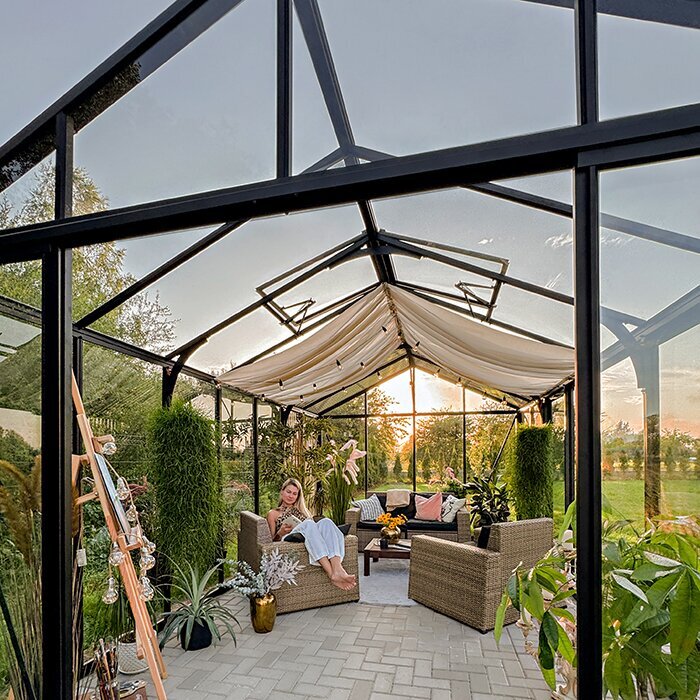
Unlike designs joined to a tool store, Classic Accoya Fusion does not incorporate storage. The entire footprint can instead accommodate beds, pots, propagation benches, circulation or a compact seating spot. Tools, growing media and plant-care products will need another dry place. Include that requirement when arranging work routines and movement between the home, shed and greenhouse.
Genuine Accoya details
Natural grain as a visible accent on the aluminium structure
Classic geometry
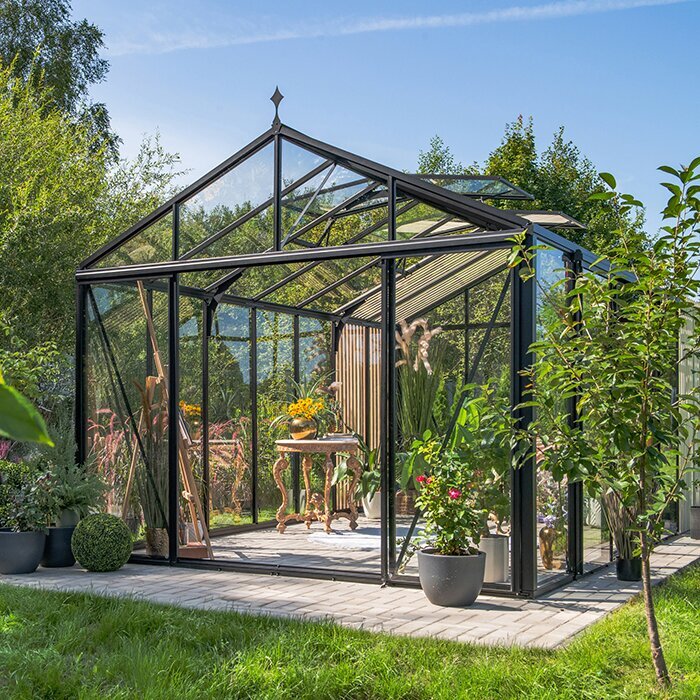
Pitched roof and useful interior for varied crops
Up to 37 RAL colours
Coordinate the frame with home, planting and timber tone
Limited series
Created for gardens where the greenhouse contributes to the overall design
Accoya timber at a glance
Modified radiata pine for lasting outdoor use
Made from radiata pine, Accoya is altered by acetylation to take up less moisture and remain more dimensionally stable. For exposed visible components, this means changing moisture has a reduced effect while the natural timber structure is retained. The real-timber surface nevertheless needs cleaning and care unlike that required by powder-coated aluminium.
Accoya is classified in durability class 1. This describes the timber’s resistance, but says nothing about surface colour or visual uniformity.
Bloomcabin specifies untreated Accoya. The grain and original character of the timber remain on display, with no coloured finish included in the supplied design.
Design in detail
Coordinate frame colour, glazing, timber and planting
The finished look comes from the relationship between frame colour, glazing, timber and plants. Reflected light can shift the profiles’ appearance, while raw Accoya adds warmth. Compare samples at the proposed location, viewing them from the home, outdoor living area and the garden approaches that will be used most often.
Black + Accoya
Creates a pronounced contrast and highlights the greenhouse’s clean form.
Muted RAL shades
Greys, sage greens and other restrained tones create a calm link between the timber and surrounding plants.
Clear glazing
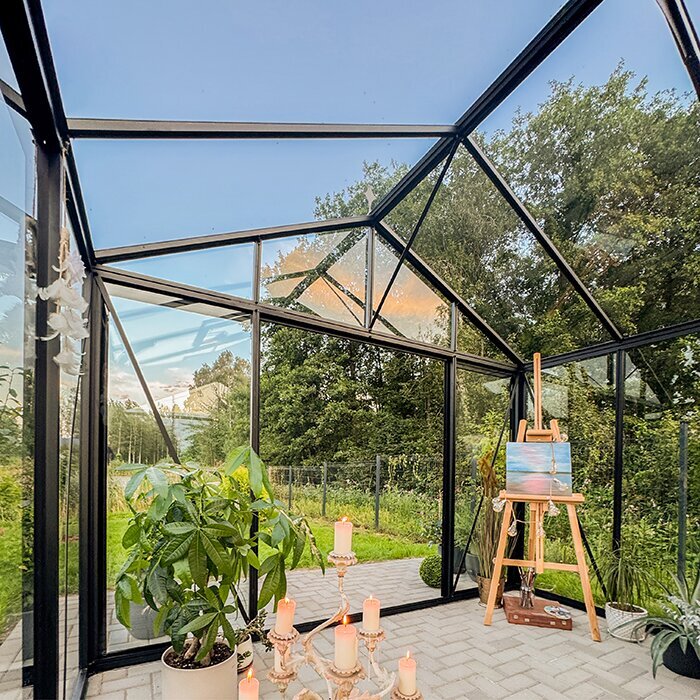
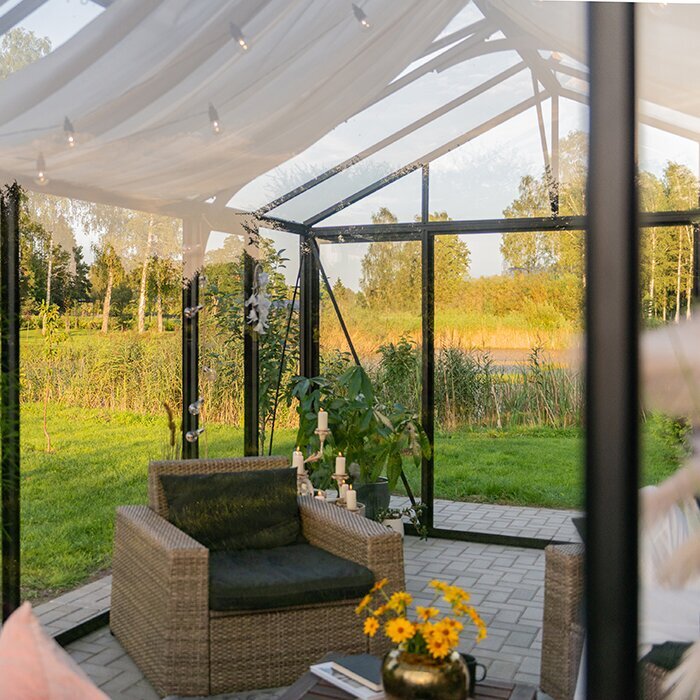
Gives a light, transparent appearance and shows the timber details clearly.
Planting at the base
Grasses, herbs and plants with striking leaves emphasise the natural material pairing.
Dimensions and features
Aluminium frame, features and Accoya details at a glance
Current range
approx. 3.8–18.9 m²
Available floor areas in the current model range
Height
approx. 2.34 m
Approximate overall height of the current model
Glazing
Polycarbonate, toughened glass and selected specialist glazing
Possible glazing combinations depend on the selected configuration
Doors
Space-saving sliding doors
Position and additional doors vary with size
Accoya details
Untreated Accoya with pre-assembled removable details
Durability class 1; the untreated surface may weather naturally grey outdoors
Frame, features and guarantee
Powder-coated aluminium, roof vents, integrated drainage and up to 37 RAL colours
12-year Bloomcabin warranty for the greenhouse structure
Light and greenhouse climate
Coordinate light, ventilation and plant layout
Your glazing selection determines how light spreads, how much can be seen through the structure and how quickly heat builds. Roof vents release warm, humid air when tall plants and shelving leave the airflow path open. Treat glazing, ventilation and the internal arrangement as parts of the same plan.
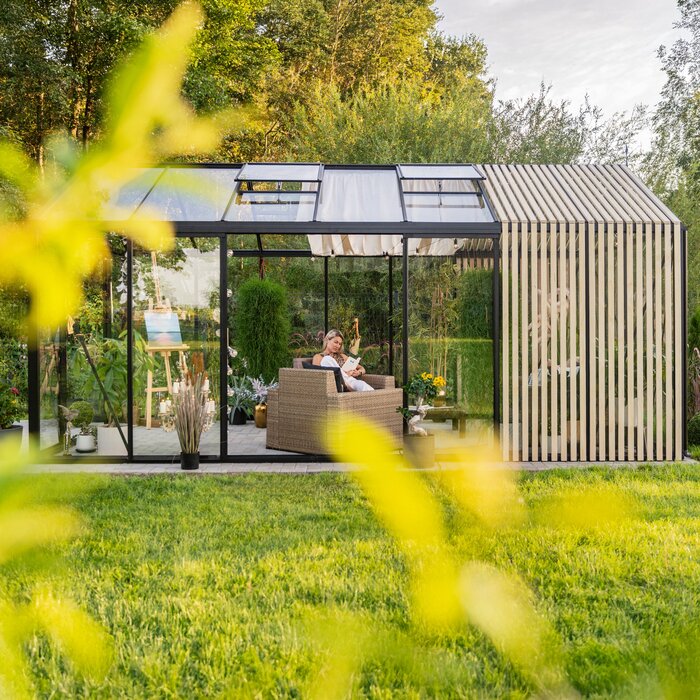
Large glazed areas admit abundant light, with the Accoya pieces contributing only small localised accents. Crop planning should still follow the changing shade pattern. Seedlings may suit a different zone from tall fruiting plants, and benches, trellises and worktops will usually cast more shade than the decorative timber.
Let the intended crops determine the layout. Give early seedlings a well-lit position that is convenient to reach, and place tall tomatoes or cucumbers where shorter plants will not sit in lasting shade. If the roof and walls use different glazing, decide the light requirement separately for each growing zone.
Ways to use it
Four practical roles for a Classic Accoya Fusion greenhouse
01
Kitchen-garden greenhouse
Used in a kitchen garden, the greenhouse shelters tomatoes, cucumbers, herbs and early seedlings. Locating it near outdoor beds, compost and water simplifies regular care. Keep crops harvested often towards the doorway and train climbers further inside, preserving a workable central route even when summer growth becomes dense.
02
Cut flowers and ornamentals
With ornamentals or flowers grown for cutting, the glazed structure becomes part of the garden view. Varying plant heights, seasonal displays and carefully chosen pots can echo the Accoya without reducing function. Provide generous work aisles and unobstructed access to roof vents so cultivation and cleaning remain manageable all season.
03
Propagation and potting area
A greenhouse devoted to sowing, pricking out and repotting needs robust benches, accessible shelves and space for containers of growing medium. Position seed trays for easy checking without creating persistent dampness against nearby components. Durable containers can sit below the worktop, while regularly used tools should stay handy but clear of the principal walkway.
04
Seating among the greenery
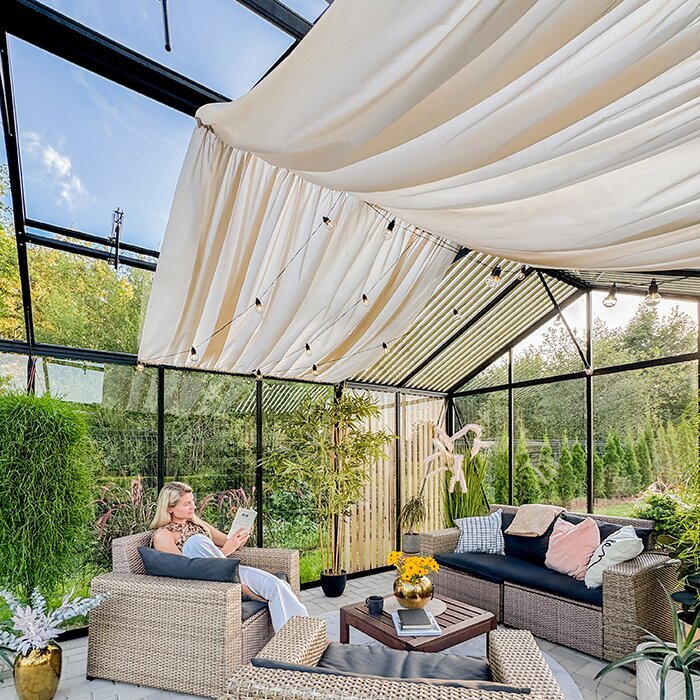
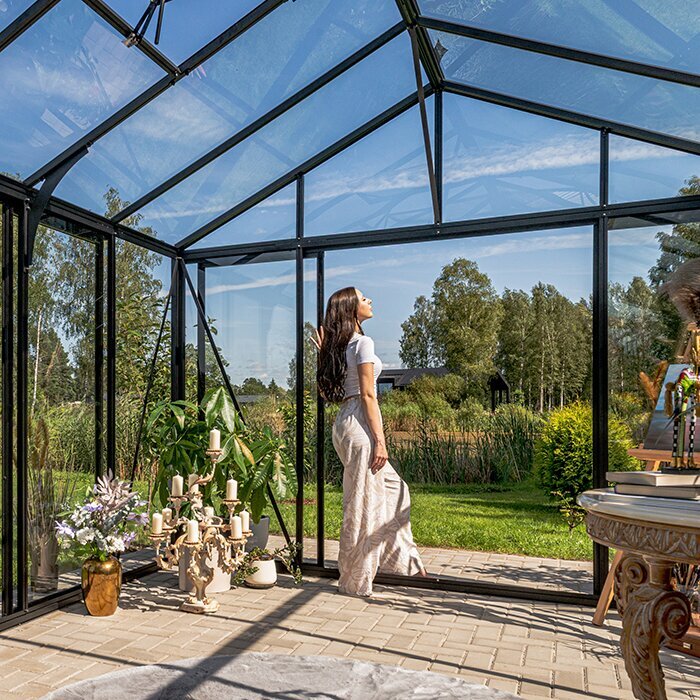
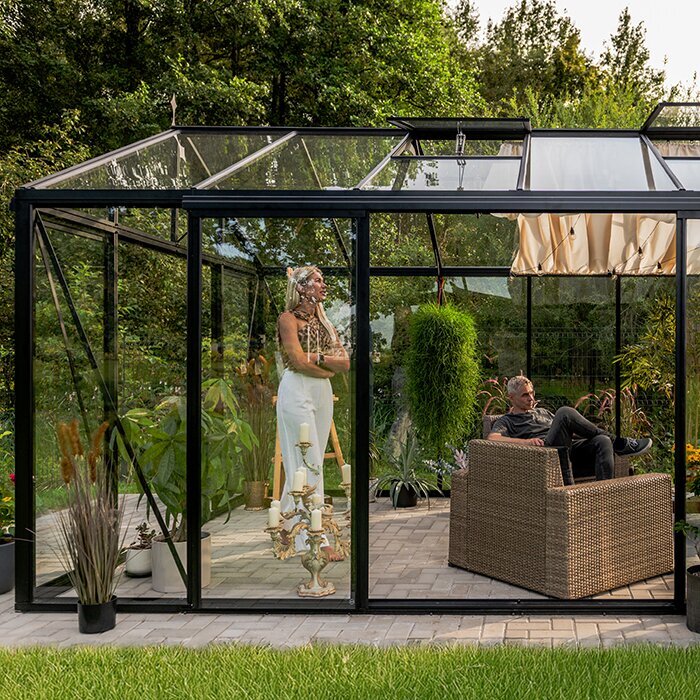
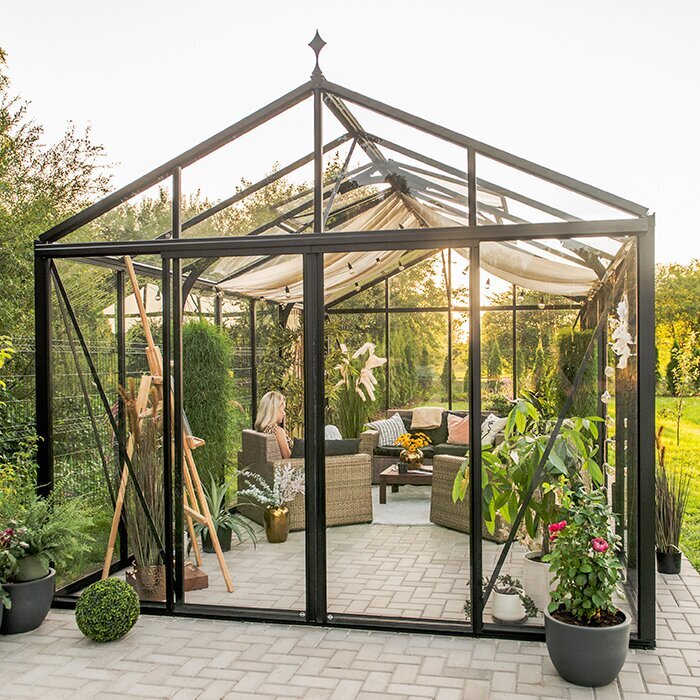
Where the selected size allows, a chair or compact table can share the greenhouse with the plants. It must not impede the entrance, roof-vent operation, watering route or access for care. Movable pieces are usually more useful than built-ins because they can be shifted during propagation or when preparing for winter in cooler regions.
Site, foundation and weather
Daily sunshine is only one part of site selection. Trace the route from the house, allow for moving bulky planters, and confirm access for assembly, maintenance and rainwater discharge. Nearby trees, walls and buildings may alter both sunlight and airflow. Settle the doors, glazing, vents and internal plan after assessing those conditions.
Connecting greenhouse and garden
Natural stone, timber decking, rendered façades and sharply edged beds can all sit well with Accoya. Repeating selected existing materials in paths or borders establishes a deliberate connection with the wider garden. Wherever practical, examine the proposed combination at its future location under natural daylight.
Draw the site to scale before constructing paths or foundations to reveal competing uses of the space. Include the greenhouse outline, entry, nearby beds, water points and movement route from the property boundary. The drawing will show whether assembly, cleaning and plant care have adequate clearance and whether the site can genuinely support a larger model.
Door placement belongs in the orientation decision because the sliding door shapes both symmetry and access. Avoid choosing an attractive facade if it creates inconvenient movement. Aim for a location that offers a pleasing view, short maintenance routes and easily reached outdoor areas.
Summer heat
Strong sun can raise greenhouse temperatures quickly, especially when a full crop canopy is also releasing moisture. Assess the position under high summer sun rather than relying only on spring observations. If nobody is home during the day, match ventilation and crop selection to that routine, keeping sensitive plants away from the hottest glazed faces.
Direct roof ventilation and any chosen solar-control glazing towards the exposures receiving the greatest sun; individual faces may require different treatments. Seasonal tree shade can help, provided branches remain clear of the roof and cleaning access. Any temporary shade fitted inside must leave air circulation and vent movement unobstructed.
During initial use, record temperatures across several parts of the day. This reveals the warmest zones and whether your ventilation pattern is working effectively.
Foundation and frost
Correct alignment of the aluminium frame, glazing and sliding doors begins with a firm, level base. Small inaccuracies can multiply as assembly progresses, so verify elevations, diagonals and connection locations before starting. Shape the surrounding ground to carry both rainfall and surface runoff away from the structure.
Match the foundation to the soil profile, slope and any local frost conditions so the frame stays level, plumb and correctly aligned. Design calculations must also account for the 30 m/s wind resistance and 210 kg/m² snow load specified for Bloomcabin greenhouses. Have the footing design professionally determined before assembly begins.
Resolve the foundation, working area and drainage path ahead of delivery. The route between unloading point and greenhouse site needs clearance from sharp turns, low branches and vulnerable planting. Reserve a clean place where components can be laid out during construction. Before excavation, map water and electrical services so future anchors will not meet them.
Natural greying of Accoya timber
Exposure to weather varies with each timber piece’s location. Covered sections may keep their first colour well after surfaces open to sun and rain have begun changing. Uneven stages of weathering are expected, so avoid aggressive cleaning intended to force the tones to match.
Gently clear away loose debris and prevent water from pooling where materials meet. Because timber, coated aluminium and glazing have different care needs, never apply one cleaner across them without checking suitability. Trial each product on a discreet area. Keep pressure washers away from Accoya details, seals and joints.
Untreated Accoya changes outdoors, so it will not provide a permanently uniform, newly finished colour. That ageing process belongs to the material rather than being an exception to it. When evaluating the design, picture both its original timber colour and the silvery-grey finish that can develop later.
Plants and interior
Start the interior plan with the crops themselves, considering mature height, required area, frequency of harvest and room for care. Those needs establish the benches, open floor and circulation. Preserve access to doors, roof vents and glazing that requires cleaning. Separate seedlings, tall fruiting crops and pots into practical zones at suitable working heights.
Work benches
Benches running along the sides make use of the greenhouse length without interrupting the main aisle. Limit their depth so rear pots remain reachable without loading the frame or glazing. Mobile or removable tops allow the space to shift between propagation and large pots. Their supports must leave drainage, services and cleaning points exposed.
Set bench height for the person using it rather than adopting a standard dimension automatically; comfortable positioning makes sowing, pricking out and repotting easier. Place heavy bags and large pots on sturdy lower surfaces. Keep small, regularly needed items within easy reach in containers protected from persistent moisture.
Allow roof vents to be inspected, operated and cleaned, which rules out tall shelving immediately below them. Clearance is also needed along the inside of the glazing. Trellis wires and crop supports must not connect to moving components. Reserving these access zones early prevents established plants from needing major rearrangement whenever care or maintenance is due.
Timber details in the planted interior
Accoya components are decorative details, not shelves, plant supports or mounting points for later accessories. Drilling or leaving wet materials against them may alter the finish and appearance. Provide freestanding or separately supported trellises, hooks and shelving that suit the greenhouse structure. Independent fittings also make future crop changes easier to accommodate.
Position watering stations and saucers so spills cannot sit against timber or frame junctions. After irrigation, inspect densely planted corners and clear any escaped water before it remains there.
Maintain a clear inspection and cleaning zone beside every Accoya detail. Furniture, pots and bags of growing medium should not rest against or continually hide the timber, allowing dirt or surface changes to be found promptly.
Choosing frame colour on site
Include permanent surroundings when choosing colour: house facade, fences, roof covering and paved paths shape the setting in every season. Seasonal flower colours change too much to determine the frame colour on their own.
Light, viewing distance and neighbouring materials can each change the apparent RAL colour. Inspect a physical sample in direct sunshine as well as shade. Warm Accoya and glazing may make it read differently from a printed colour chart, particularly when you are coordinating it with windows, metal fences or existing powder-coated features.
To relate the frame to existing windows, fences or coated metalwork, place the actual samples side by side. Matching RAL names do not ensure matching appearances: substrate, sheen and age all influence existing finishes. A visually balanced combination will often work better than insisting on nominally identical specifications.
Selecting suitable glazing
Clear glazing opens views to the crops and makes the greenhouse feel visually connected to its surroundings. It also exposes pots, irrigation pipework and working supplies to outside view. Near a home or outdoor entertaining area, enclosed storage elsewhere can keep equipment organised. Efficient working order matters more than presenting a staged display.
Use specialist glazing selectively when you want to moderate glare, strong solar exposure or overlooking. Base each choice on orientation and activity: a panel comfortable beside a bench may deprive a light-demanding crop of what it needs. Assign the priority for every surface—plant light, user comfort or screening—before selecting it.
Mixed glazing affects the outside composition as well as the growing environment. Panel transitions can either reinforce the architecture or make it look fragmented, while their internal position establishes zones of brightness and shade. Map orientation, expected crop height and important sightlines on a sketch before allocating each type of glazing.
Planning for changing uses
Distinguish elements that are difficult to alter from furnishings that can move. Reworking the foundation, drainage, glazing or doorway later is disruptive, whereas pots, benches and shelves can respond to new crops. Establish those permanent building decisions first, then retain enough internal flexibility to apply what you learn through use.
Ventilation
As plants grow vigorously, monitor the space required for each roof vent to open. Train or trim tall growth before foliage obstructs a mechanism or is damaged by it. Shade cloth and trellis frames likewise need clearance from every moving vent.
Opening the sliding doors can add ventilation when needed, so preserve clear access through the doorway and along each approach to it.
Ventilation planning should reflect when someone can attend the greenhouse. If it is unattended from morning until evening, allow for that in both configuration and plant selection. Check crops, doors and vents after longer absences. During autumn in cooler regions, overheating may ease, but a closed structure can still retain excess humidity.
Interior floor and threshold
Coordinate finished floor level, doorway threshold, work aisles and the feet of planned benches.
Choose flooring that withstands damp gardening work and repeated cleaning. A flat, slip-resistant finish helps pots and small carts move safely. Loose aggregate and jointed surfaces behave differently when draining or being cleaned, so assess both functions. Whatever construction is selected, exclude depressions that trap irrigation water, soil and plant waste.
Determine the threshold and final floor elevation before adding fixed benches. Extra layers installed later may narrow the opening, interfere with doors or divert water the wrong way. Keep the connection to exterior paths firm and close to level so pots and bags of growing medium can be moved without avoidable barriers.
Watering
More floor area generally brings additional plants and a longer irrigation round. Locate the tap, hose and isolation control so every bed remains accessible without placing equipment across the principal aisle. Give watering cans a defined home. Tanks and other water containers must not create persistent damp or prevent cleaning and component access.
Drip systems can deliver water to separate crop zones while limiting splashes onto foliage, paths and greenhouse components. They still require checks of emitters and growing media. Route tubing neatly, keep it accessible and avoid sliding-door tracks. This allows seasonal inspection, cleaning or removal without dismantling the rest of the interior arrangement.
Plan access to every valve, joint and isolation point after plants reach full size. Avoid hiding fittings beneath damp bags or behind weighty benches. In frost-prone locations, establish how pipes will be emptied and vulnerable parts protected before cold weather. Clear routing also makes an emerging leak easier to identify.
Flexible fit-out
The same greenhouse may support quite different activities over its life, from raising vegetables to ornamentals, mixed planting or sheltering pots through winter. Each change alters light, height and floor-space requirements. A defined central aisle with adaptable zones at the sides supports that evolution. Reserve permanent specialist fittings for a use expected to continue.
Freestanding shelves, movable benches and pots can be repositioned as the season changes, but they still need sound footing and suitable finishes. Tall narrow units may wobble on wet floors or contact the glazing. Wheels are worthwhile only when the floor and thresholds let them roll freely. Genuine flexibility therefore depends on strong, well-chosen furnishings.
Build up the interior progressively during its first growing season. Note the morning and evening light, where warmth lingers, and the routes that prove convenient for watering and harvest. Only then add more shelving, crop supports or growing areas, avoiding choices that would compromise ventilation, cleaning or everyday operation.
Record the configuration clearly
From plant list to the right order
Begin by noting every crop intended to share the greenhouse at one time. Include plant quantity, final height, harvest timing and the work area each requires. You can then see which zones stay occupied and when seasonal room becomes free. This makes choosing a size easier without judging by the advertised floor area alone.
Next, record the chosen arrangement face by face. A labelled sketch should locate the door, glazing panels, frame finish and exposed Accoya pieces. This becomes particularly valuable when roof and wall glazing differ, or when the greenhouse appearance from the home and outdoor living area has influenced the decision.
Revisit the documented selection against the actual site before confirming the order. The doorway must suit the delivery route, the foundation must serve the drainage plan, and glazing must support the intended use. Finally, ensure planned services and furnishings will preserve access to all controls, cleaning areas and crop-care points.
Further information
Guidance on choosing, ordering and guaranteeing your greenhouse
Classic Accoya Fusion
Common questions about the Classic Accoya Fusion greenhouse
What role do the Accoya details play?
They provide visible genuine-timber accents. The greenhouse’s structural construction remains aluminium.
Does Classic Accoya Fusion include integrated storage?
No. Plants, work areas and circulation can occupy its floor space. Choose the Accoya Storage Greenhouse model when built-in storage is required.
How do I choose the right size?
Plan plants, work surfaces and circulation first. Then select a version in which every area remains accessible and mature plants have enough room.
Where should the sliding door be positioned?
Align the doorway with the garden route used most often so pots and growing media are easier to move. The proposed interior layout must also keep that entrance unobstructed.
Can roof and sides have different glazing?
The selected configuration may combine glazing types. Allocate each panel according to solar exposure, crop requirements and the level of screening wanted.
What should I consider with clear glazing?
Everything inside, including plants and working supplies, can be seen externally. Keeping the space organised and storing tools and growing media elsewhere is therefore helpful.
Can trellises be fixed to the Accoya details?
Do not treat the timber pieces as mounting points. Give trellises, hooks and shelving their own supports, selected to work with the greenhouse structure.
Which details help with a product enquiry?
Useful details include installation site, intended use, preferred door side, glazing, frame colour, foundation and access to the build site.
Your enquiry to Bloomcabin
Coordinate use, access and material choices before ordering
Specific information about your location, intended crops and preferred configuration will help the team respond to your enquiry.
Have these details ready for your enquiry
✓ Describe the installation site and property access
✓ State intended use and main crops
✓ Choose the preferred door side
✓ Assign desired glazing panels
✓ Select frame colour with house and garden surroundings in mind
✓ Include foundation, drainage and planned service-route details