

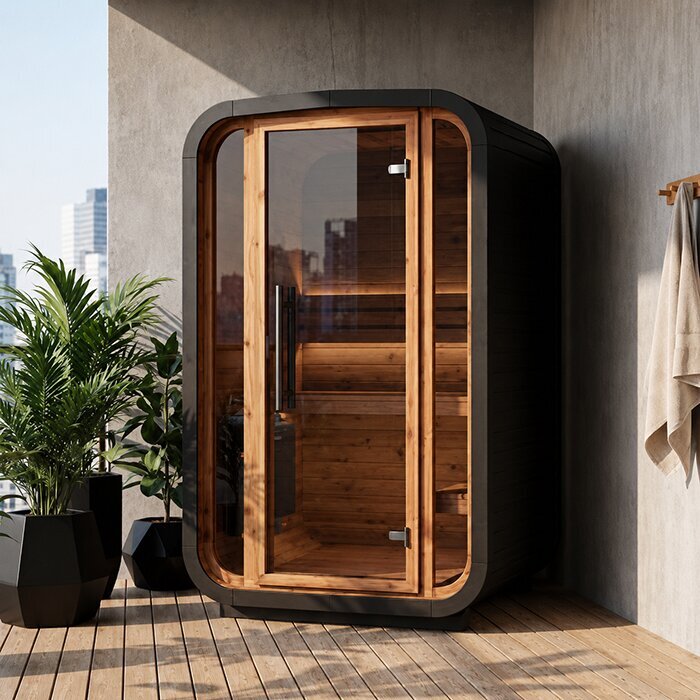

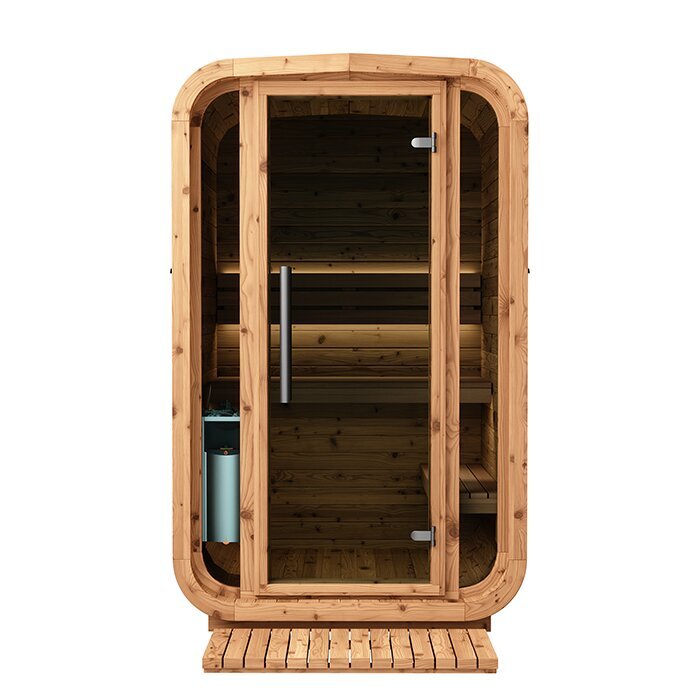


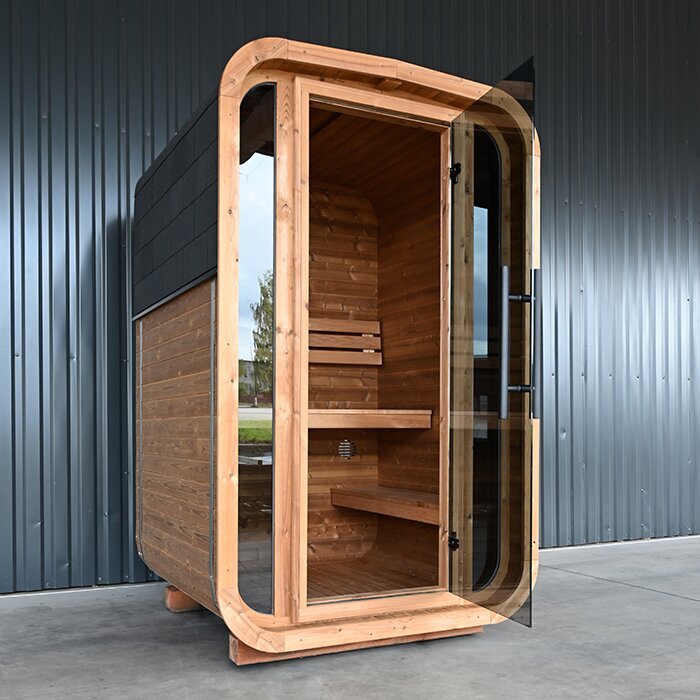

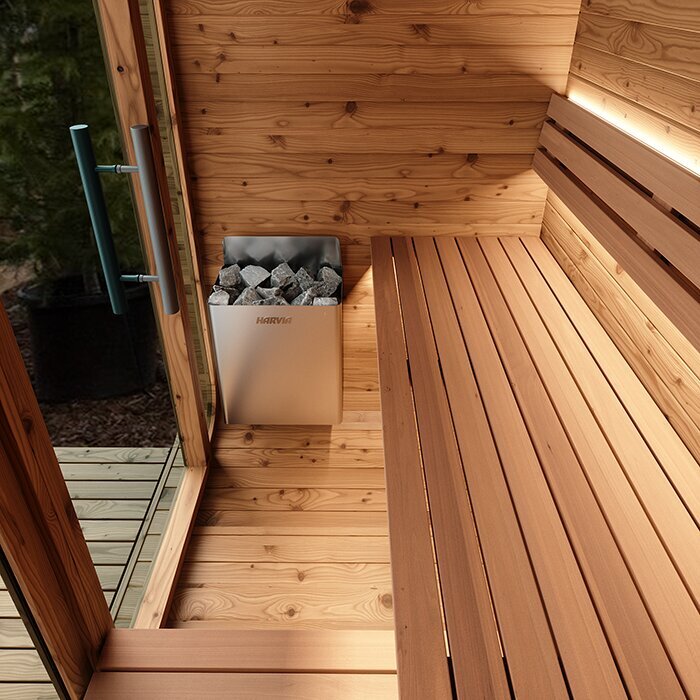






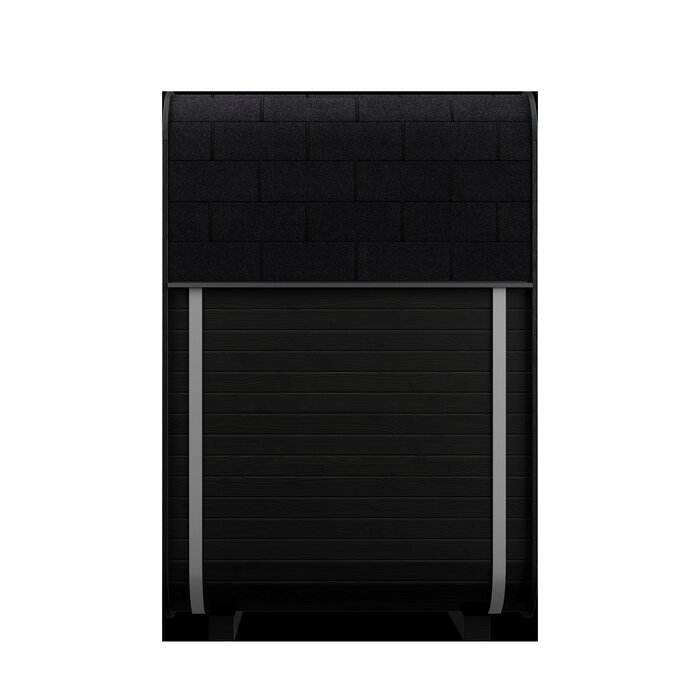





Space-efficient outdoor sauna for solo use
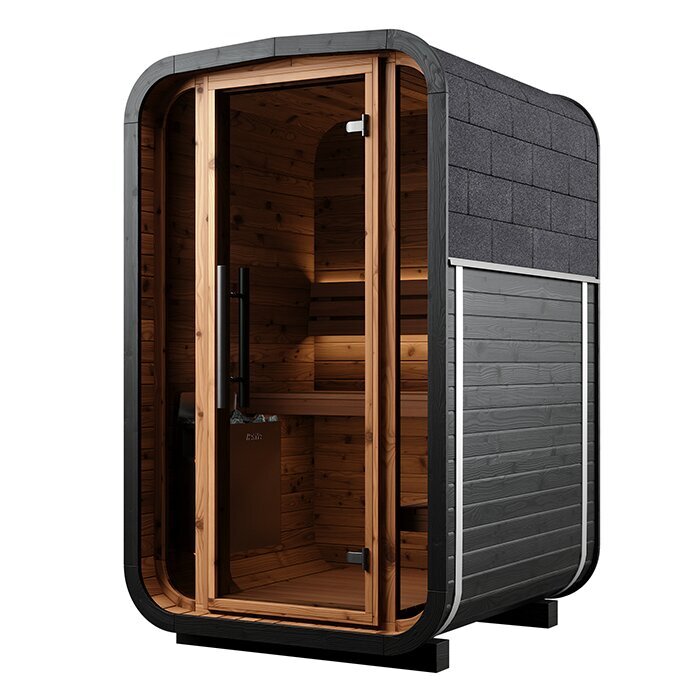
S 140 – a small Thermowood garden sauna with approx. 195 cm internal height
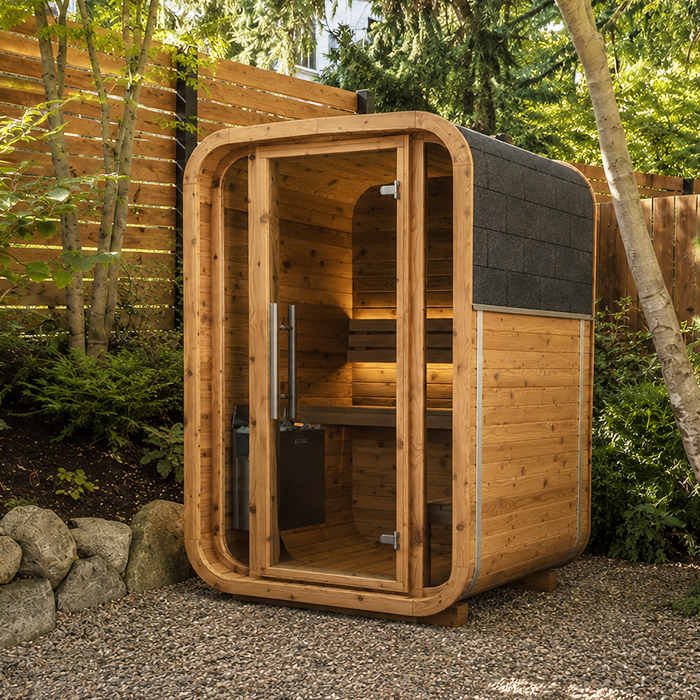
The Bloomcabin S 140 is made for outdoor settings where a standard barrel sauna would occupy excessive space. The cabin provides seated sauna bathing for one person, making it useful on compact patios, in city gardens and at other constrained sites. Its footprint is only part of the planning task. You must also account for an unobstructed doorway, assembly access, airflow, space to maintain the timber and a workable path between the unloading area and final position.
Use this page to assess the dimensions, intended use and technical needs against your site. To review other formats, visit the Bloomcabin sauna range.
Everyday use
An outdoor sauna where every square metre matters
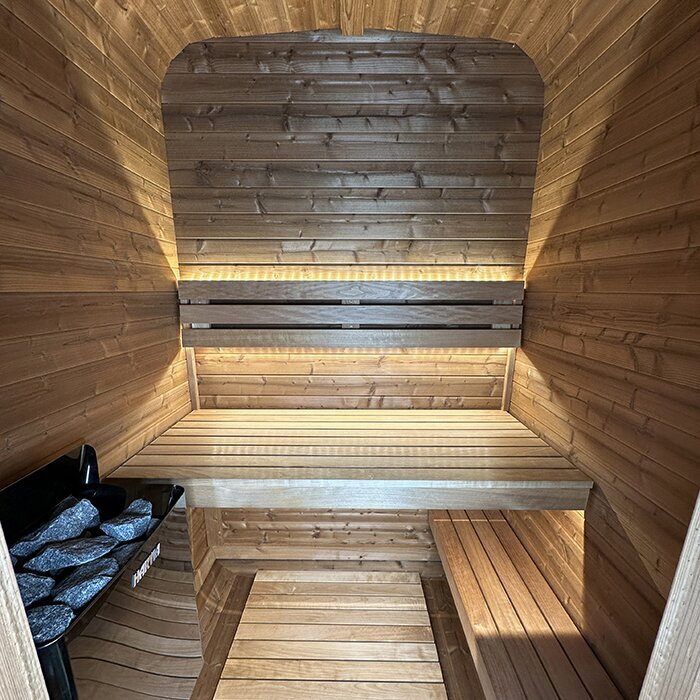
For someone who usually bathes alone and has limited garden or patio room, the S 140 offers a purpose-designed option. The cabin supports seated use, and its approx. 121 cm bench should not be treated as the reclining platform found in a larger sauna. Choose a more spacious model if stretching out or sharing regular sessions matters to you. This defined layout makes the decision clearer: you can assess before ordering whether a one-person seated cabin reflects your normal routine.
Because the S 140 has little exterior width, it may fit a side yard, courtyard, compact city garden or slender patio. Avoid squeezing it into a recess that merely matches the cabin dimensions. Clear room is needed outside the door, and the outer faces should remain reachable for construction and ongoing maintenance. Note any eaves, gutters, balustrades, wall projections or vegetation that encroach on the available area. Rather than relying on an estimate, draw the cabin, door movement and immovable obstacles to scale.
Although the footprint is modest, around 195 cm of internal height gives the S 140 a tall cabin profile. Perceived room will also depend on the user’s height, seated posture and planned heater location. Provide overhead clearance for building and maintaining the sauna; branches, awnings and adjoining structures must stay out of that working space. On a roofed patio, position the cabin so its exterior remains reachable and ventilation can pass around the timber.
Key details at a glance
What stands out about this model
Consider the measurements, interior arrangement and expected use—not simply the price.
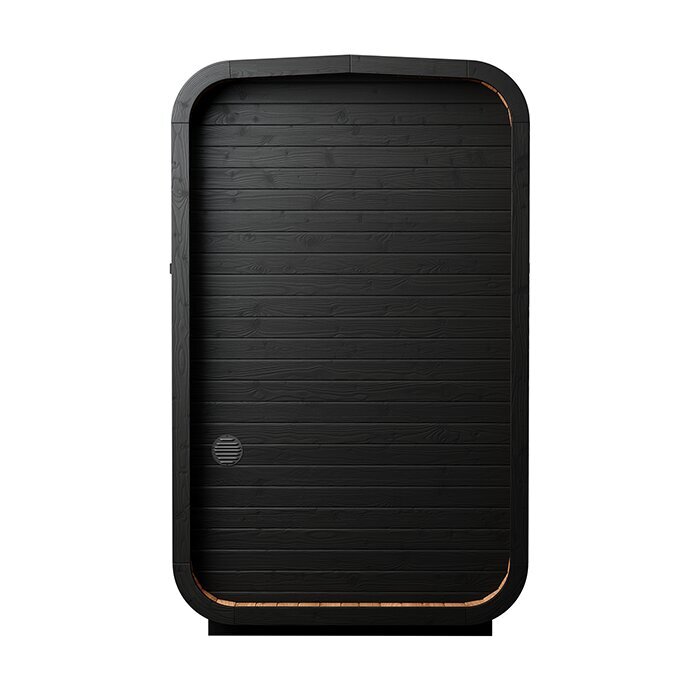
Approx. 145 × 133 × 221 cm
Together, these exterior measurements occupy roughly 1.93 m² of ground.
Approx. 195 cm internal height
Its upright design provides comfortable cabin height despite the small footprint.
Approx. 121 cm bench
Designed for relaxed seated bathing and solo sauna sessions.
Approx. 5 m³ internal volume
Match this small cabin volume with an electric heater approved for the model.
Material and construction
Thermowood gives the compact S 140 a natural character
FSC®-certified timber that has undergone thermal treatment forms the sauna structure. The process lowers the timber’s moisture absorption and improves dimensional stability as outdoor conditions vary. Natural variation remains visible in Thermowood, including differences in grain, shade and minor appearance; it will not resemble an industrial material with a perfectly uniform finish. Support the cabin on a sound, freely draining base and maintain airflow around it to limit prolonged moisture exposure.
Its warm timber colouring can complement contemporary decking, gravel, natural stone or planted surroundings. Keep the landscaping practical as well as attractive. Irrigation and wet leaves should not remain against the wood, and loose surfacing must not compromise footing or obstruct the doorway. Beside a house, check that roof runoff is not discharged onto the cabin. Thoughtful placement preserves access for inspection, cleaning and maintenance without detracting from the setting.
Preserving the initial timber shade requires a care product approved for Thermowood and the particular surface. Read its directions and trial it somewhere discreet before wider application. Exterior timber exposed to weather has different needs from sauna interiors that encounter skin contact, heat and humidity. Coating the surface will not correct poor site drainage, so water must still escape effectively from beneath and around the wooden structure.
Heating system
Match the S 140 with an appropriate electric heater
Only a compatible electric sauna heater is intended for the S 140. This removes the need for a chimney and firewood storage, but makes early electrical planning essential. The specifications for the cabin, heater and controller must be considered together. Treat the supply as a dedicated installation rather than an everyday outdoor power point. Ask the relevant state or territory electrical safety regulator which licensing and certification apply at your address, then have the cable route, protection, switching and safety measures handled accordingly. Resolve the route before completing the base or patio surface where practicable.
The S 140 has an internal volume of approximately 5 m³, but heater selection must follow the model’s technical specifications rather than a simple assumption that greater output is preferable. Insufficient output is also inappropriate. Check the permitted mounting arrangement and position, together with every required separation from combustible materials. Use a compatible heater and controller combination without relocating the heater yourself. Once operating, its surrounding area must remain clear of robes, towels and other belongings.
Give the engaged electrical professional the documentation for the chosen heater and controller well before assembly. Any mismatch between the equipment and the prepared supply can then be identified early. Do not operate the system until installation, testing and commissioning are complete. Thereafter, follow the cabin, controller and heater instructions for switching, temperature settings and shutdown.
Before assembly and siting
Prepare the compact S 140 site carefully
Trace the cabin outline and full door arc on the ground before placing an order. Check that entry and exit remain easy, then walk the everyday route from the house. Planters, furniture, balustrades and tight passages may cause difficulties that the footprint alone does not reveal. Route the electrical supply so it cannot create a trip point or cross the intended cool-down space.
Provide an even, structurally sound base capable of carrying the cabin, heater and occupants over time. Rain and cleaning water need an escape path rather than a place to pool under the timber. On an existing patio, consider the finish, underlying build-up and supporting frame as one system. Flexible boards or settled pavers are unreliable despite the sauna’s modest area. Before arranging work, seek a site-specific assessment if the drainage, anchoring or load capacity is uncertain.
Survey the complete delivery path, beginning where unloading will occur and ending at the prepared position. Record gate and doorway openings, overhead clearance, steps, gradients, sharp corners and anything projecting into the route. Prefabricated panels may improve access to a compact property, yet handlers still need room to carry, turn and stage them safely. Reserve a stable, clean assembly zone and shield parts from soil and rain. Obtain prior agreement if temporary access across a shared area is necessary.
Typical uses
Where the S 140 can make particular sense
The best sauna choice starts with the people using it and their everyday sauna routine.
Urban garden
Its compact format suits properties with limited space.
Sauna bathing alone
Planned for regular sessions by one person.
Narrow patio
For sites with very little available width.
Holiday home
A compact option for a holiday home where the sauna will usually serve one person.
Comparing models
S 140 or HC150—which layout suits you better?
With roughly 195 cm of headroom, a seated bench and a notably compact footprint, the S 140 is geared towards personal sessions. It merits consideration when site width is the principal constraint and solo use will be the norm. Exterior size should not decide the purchase by itself. Ask whether sitting provides the comfort you want or whether a longer bench for reclining is important. Select the smaller form only when it aligns with the way you expect to sauna most often.
The HC150 is wider and accommodates two people, although its internal height is only about 175 cm. Each model consequently creates a different spatial experience as well as requiring a different footprint. The HC150 adds seating for a couple; the narrower, taller S 140 focuses on one occupant. Whichever you consider, reserve working room for construction, the opening door and continued access to the outside faces.
Test the published measurements against each regular user’s height and preferred seated posture. A reduced footprint helps only if the bench and remaining room are comfortable in practice. Where several household members expect to use the sauna, compare their needs for individual seating and shared bathing before ordering. Base the choice on the routine scenario rather than an infrequent exception.
Model-specific tip
Make the area around the S 140 work efficiently
A shower outdoors, somewhere to sit and covered towel storage can add convenience, but locate them only after fixing the doorway, electrical zone and access route. Seating directly outside the entrance can impede exit, while unsecured objects become hazards in low light. Designate one dry area for rest or storage and another for cooling and water. This protects footwear and fabrics from spray while keeping the compact setting easy to navigate.
Equip a tight site with essentials first, then live with the arrangement before adding more. Portable seating and storage can be adjusted around the walking and cooling routes more readily than fixtures installed at the outset. Favour objects that clean easily and can be put away when idle. The sauna area can then evolve if regular use reveals that rest or storage space is needed elsewhere.
Outdoor sauna all year round
Plan access, cooling off and weather protection for every season
Year-round access works best when the path from the house is direct, illuminated and secure under wetfoot conditions. Light the entrance, level changes and edges while avoiding needless intrusion on privacy. Judge the surface during rain, leaf fall and the cold-season or wet-season conditions experienced in your region. Keep hoses, extension leads and unsecured objects elsewhere. When weather or ground conditions have shifted since the last session, inspect the route briefly before using the sauna.
Planning a plunge tub, outdoor shower or small pool also means resolving supply water, runoff and any locally relevant frost protection. Direct cool-down water away from both the sauna underside and electrical equipment, and provide safe footing between the wet zone and cabin. Select pipes and fittings for their exposure conditions while retaining maintenance access. If there is no permanent water connection, you still need a defined and controlled destination for discharged water.
Keep robes, footwear and towels in a sheltered location so the cabin does not become crowded. Take damp fabrics out to dry after every session. Covered seating may serve as a rest point provided it does not interrupt access or ventilation around the structure. Arrange belongings so none can fall or move towards the entrance or heater. Put drinks on a firm surface beyond the heated cabin, and avoid breakable vessels wherever people walk barefoot.
Caring for Thermowood
Inspect and maintain Thermowood and components regularly
Although Thermowood performs in variable outdoor conditions, it remains natural timber. Exposure to sun, rain and changing temperatures gradually affects its shade and finish. Weathering may vary from side to side: timber beneath an eave will age differently from an elevation open to the weather. This normal visual development is distinct from deterioration associated with trapped water or poor airflow. Routine observation makes expected changes familiar and helps unusual ones stand out sooner.
Periodically examine the timber, barrel bands, fasteners, seals and door, repeating the check after exceptional loads or weather. Identify movement in joints, rubbing parts, resistance at the door and pockets where water lingers. Once a session ends, ventilate and dry the cabin as directed for the sauna and heater, taking wet pads and fabrics outside. Electrical faults or abnormalities require assessment by an appropriately qualified professional rather than a do-it-yourself repair.
Clean the interior with products compatible with its materials, applied using a soft cloth or an appropriate brush. Work sparingly so residues are removed without saturating the wood. Pressure washing, harsh chemicals and unsuitable solvents may damage, stain or raise the surface. Confirm whether a treatment belongs inside a sauna or is restricted to exposed exterior timber. With the power off and the cabin cool, clean it and allow complete drying before reheating. Observe the heater and controller manufacturers’ separate care directions.
Check before ordering
Clarify delivery contents, transport and site needs early
Order from the specifications of your selected configuration, not from photographs alone. List whether it includes the electric heater, controller, sauna stones and necessary protective parts, then identify work to organise on site. Base preparation, the electrical supply and help with assembly may all need separate arrangements. Check this list against the order confirmation so the delivered package is compatible with everything prepared beforehand.
Send the supplier or prospective assembly team photographs and measurements of tight turns, steps, gates and other difficult sections before delivery. They can then consider the access route while changes are still possible. Nominate a receiving point and a clean, solid area where parts can be sorted safely. Clear movable obstacles and protect finishes that could be damaged. Any unresolved restriction should be discussed before the appointment is confirmed.
Investigate the site-specific planning, building, boundary and electrical matters before permanent work begins. What applies depends on the state or territory, local council controls, the land, existing development and installation design. Ask the relevant authorities and suitably qualified local trades what must be addressed at your property. Drainage, underground services and proximity to a boundary may also influence the layout. Store the technical documents, assembly manual and electrical information together for use during installation and maintenance. See Useful information.
Routine use and interior
Leave the cabin uncluttered before and after each session
Before switching on the heat, look over the cabin. Nothing should occupy the bench or heater zone, the door should travel normally and visible technical parts should appear undamaged. Bring in only what the immediate session requires. Store shoes, robes, spare towels and maintenance products somewhere dry beyond the cabin. This preserves valuable movement space and reduces the chance of belongings ending up close to the electric heater.
Shut down the equipment as its operating instructions specify, then ventilate the cabin. Where the product guidance calls for it, wipe moisture from the surfaces receiving the most use. A seat cover limits direct perspiration on the timber but should be taken outside to dry. Because misplaced belongings quickly crowd the compact S 140, remove everything unnecessary. The interior should be orderly and dry before the door remains closed for a lengthy interval.
For a shared garden or holiday property, assign responsibility for storing manuals, allowing the cabin to dry and completing periodic inspections. Brief every user on controller operation, ventilation and the need to keep the heater surrounds unobstructed. Defined responsibilities help preserve the same procedure regardless of who takes a session. Anyone who cannot use the installation safely should be prevented from reaching the controls or heated appliance without supervision.
Making the most of a small footprint
Position the S 140 thoughtfully in limited space
On your plan, test several orientations rather than assuming the first position will work. Plot the cabin outline and door arc alongside boundaries, the house and fixed features, including downpipes, outdoor lights, taps and existing electrical points. A location with direct entry and reachable exterior panels is preferable. Comparing the options this way shows which arrangement integrates with the site without improvised cabling or awkward walking paths.
A position beside the house must not make windows, doors, shutters, downpipes or service panels unusable. Examine whether an eave reduces airflow or channels rainfall towards the timber, and preserve routes along boundaries and existing paths. Before excavation or attachment work, establish the exact location of underground services and any proposed fixings to existing construction. A gap that accommodates the dimensions on a drawing may still fail as a practical sauna site.
Where possible, inspect the chosen area in different weather and at several times of day. Look for runoff travelling towards it, leaf litter collecting against one side and access that becomes awkward during rain. Roof drainage and garden irrigation may increase the amount of water reaching the outer timber and should be included in the assessment. Retain obvious, short routes to sheltered storage and the cool-down space. Good orientation improves daily operation as well as making efficient use of the available land.
S 140 and privacy
Create privacy while keeping the sauna accessible
Compact sites often place the S 140 near a home, patio or boundary, so consider sightlines before finalising its orientation. Views of the entrance matter most when someone is entering or leaving. Review the doorway from surrounding windows, paths and seating positions. Turning the cabin may provide sufficient screening without another structure. Keep sheltered storage nearby so users need not cross a long, exposed or slippery route.
Privacy at the doorway may be improved with a slim screen, open slats or deliberate planting. Set any addition far enough away to preserve the door arc and maintenance access to the timber faces. Avoid enclosing the wood with solid panels that hold damp air. Allow for mature plant size, irrigation and fallen foliage rather than judging new planting alone. Freestanding screens or planters must be stable and secured against movement into the cabin.
A restrained design can borrow the existing patio’s lines and materials. Prioritise an obvious path, useful covered storage and screening only where sightlines require it. Too many ornaments make a small site harder to inspect and maintain, so leave the ground visually clear. Pooling water, debris and structural changes will then be easier to detect. Aim exterior lights at the access route without glare for users or unnecessary spill towards neighbours.
Frequently asked questions
FAQ – Bloomcabin S 140
Can the S 140 be fitted flush into a narrow recess?
No. A recess must allow considerably more room than the cabin outline. Preserve the full door movement plus access around the outer faces for construction, ventilation, maintenance and inspection. Check overhead space for projecting or low obstructions as well.
How can I tell whether an existing patio is suitable?
Assess the patio finish together with its supporting construction: both need to stay level and carry the continuing load while allowing water to escape. Arrange a professional inspection before assembly if the boards deflect, paving has settled or the underlying build-up cannot be confirmed.
How does the S 140 interior differ from the HC150?
The S 140 provides an approx. 121 cm bench and around 195 cm of internal height for one seated user. The wider HC150 accommodates two people but has an internal height of only about 175 cm.
Are the electric heater, controller and sauna stones always included?
Not in every configuration. Verify separately whether the chosen package supplies the electric heater, controller, sauna stones and each required protective component. Do this from the product description before electrical work is arranged.
What care helps Thermowood retain its original colour?
Choose care products expressly intended for thermowood and for the particular surface, whether inside or outside. Try the product on a discreet area first. Surface treatment does not remove the need to prevent standing water or leaves that remain wet.
What preparation does S 140 need before an extended period without use?
Follow the shutdown instructions, take out every textile and ventilate until the interior is fully dry. Inspect the bench, doorway, heater area and visible joints afterwards. Do not leave the cabin closed for the extended pause until it is dry, empty and orderly.
What should be prepared at the site before delivery?
Resolve the stable, freely draining foundation, delivery access of adequate width and an unobstructed work area. Confirm in advance both the electrical preparation required on site and the components included with your selected configuration.
Bloomcabin S 140
Is the S 140 the right garden sauna for you?
The S 140 suits you if you are looking for a particularly small electric garden sauna and expect to bathe mainly alone in a seated position. The proposed site must be accessible, structurally adequate and larger than the footprint alone: reserve the doorway, provide drainage, plan the electrical supply professionally and retain maintenance access. When those conditions align with your property and routine, the model creates a permanent sauna setting while occupying less land than a larger cabin.
If needed, compare further Bloomcabin outdoor saunas and barrel saunas.
Planning checklist
✓ External dimensions, door area and care access measured
✓ Confirmed that solo seated bathing matches the intended routine
✓ Confirmed an even, structurally sound and freely draining base
✓ Agreed a suitable electric heater and professional connection
✓ Checked the chosen configuration and included components individually
✓ Clarified transport route and site requirements in advance
View the S 140