
Can a Rain Barrel Run Greenhouse Drip Irrigation?
Greenhouse watering guide
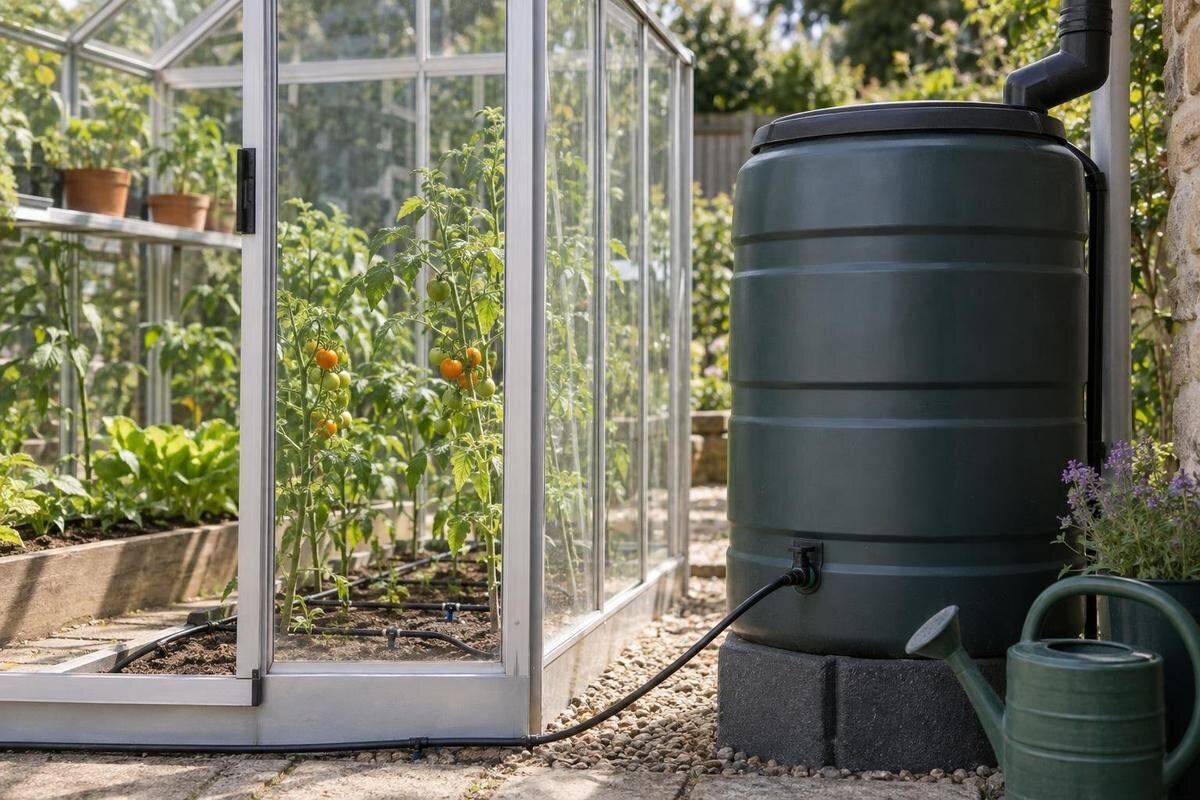
Yes, a rain barrel can run greenhouse drip irrigation, but it is a conditional yes. Gravity has to provide enough pressure at the emitters, and the emitters, filter, valves and tubing must suit that low-pressure supply. The water level above the lines changes as the barrel drains, while every restriction can reduce delivery. A full tank or a trickle from the tap is not proof that a whole drip network will work. Check the makers’ operating requirements, assemble the complete route and measure flow at several outlets before relying on it.

When a rain barrel can run drip irrigation
A rain barrel supplies gravity pressure, not the pressure of a hose connection. That can be enough for a short, simple layout using emitters explicitly rated for low-pressure or gravity-fed operation. Do not assume that any drip kit will work: some components need more pressure to open, and a network can lose much of the small amount available before water reaches the last outlet. A full barrel may still produce uneven or negligible flow if its water surface is too low relative to the emitters, the line is restrictive or the emitters are unsuitable. Treat the component maker’s stated operating range as the starting requirement.
Plan the greenhouse footprint and irrigation route together, but keep their roles distinct: floor area can help you estimate line runs and outlet counts, but it does not create pressure. If you are comparing models in the lean-to greenhouse range, which spans 3.69 to 14.34 m², sketch the growing layout for the size you are considering. Include the barrel, main line, branches and beds rather than judging the irrigation requirements by the model name alone. Gravity is a plausible option when the source can be positioned safely above the highest emitter, the components suit the resulting low head, and each outlet delivers enough water for its planting point. If any condition is uncertain, test a sample setup before buying a complete system.
Measure the water level above the emitters
Available head comes from the vertical gap between the water surface in the barrel and the emitter, not from how tall the empty barrel looks or where its tap sits. Check the water surface at the level you expect when a cycle starts, then check the lowest level at which you plan to use the barrel. Compare the heights of individual emitters too: a line that climbs to a high shelf or upper bed has less head there than a lower row. If the water surface is level with or below an emitter, gravity has little or no margin for the resistance of a filter, valve and tubing. Do not assume the system will run reliably just because water comes from the tap.
Record the levels on a simple sketch rather than estimating from the barrel stand. The Pyramid Greenhouse range lists areas from 5.53 to 18.9 m², but floor area does not tell you whether the barrel surface is high enough; that depends on the barrel location and emitter elevations. If raising the barrel is part of the plan, use a stable support intended for a full water container and check its rated capacity with the maker or a qualified professional. A full barrel is heavy, and a makeshift platform creates a separate safety problem. If you cannot safely gain enough height, consider a low-pressure system designed for the available head or another water-delivery approach.
Where pressure is lost along the line
Head measured at rest is not the whole story. Once water moves, it meets resistance in the filter, shutoff valve, timer, fittings and tubing; narrow lines, long routes, many bends and several open outlets can leave less pressure at the far end. A gauge reading with a closed valve can therefore look more reassuring than conditions during irrigation. Follow the emitter and tubing makers’ limits for run length, outlet count and pressure. Avoid adding unlisted components on the assumption that a connector cannot affect delivery. When a route is long, separate it into smaller zones or choose a supply line according to the system maker’s guidance rather than guessing at a tube size.
For a layout with several branches, mark the full path from the barrel outlet to the highest and most distant planting points, including junctions and controls. When considering the T-Shaped Orangery Greenhouse, listed from 16.52 to 30 m², use the selected floor plan to sketch each growing row and its supply route. Note where the line changes direction or rises to reach pots or benches. These details make the sketch useful for choosing components and identifying outlets to test. If the layout has substantially different elevations, test those parts separately rather than expecting one setting to distribute water evenly everywhere. An assembled-system test is more useful than estimating delivery from floor area.
Select emitters rated for low pressure
Choose emitters by the conditions they are specified to handle, not simply by the word drip on the package. Look for a stated minimum operating pressure or confirmation that the product is suitable for gravity-fed, low-pressure use. Check whether the stated range applies to an individual emitter or to a complete line. The available head must still meet the maker’s minimum after water passes through the chosen filter, valve and tubing. A published flow rate also has a pressure context: an emitter advertised at a particular output under one set of conditions may deliver a different amount at a lower head. If the supplier cannot confirm the requirements, do not build the whole system around an assumption.
Emitter style alone does not guarantee suitability. Pressure-compensating models, adjustable drippers, inline dripline and microtubes vary by design; some need a particular pressure to open or regulate flow, while others are sold for gravity operation. Check the exact model and operating range, and ask whether the complete combination—including connectors and any timer—has been tested at the expected head. When planning planting positions in one of the Limited Edition Aluminum Greenhouses, listed from 3.77 to 28.08 m², count the outlets needed for the pots or beds you intend to use. Match emitter count and spacing to that crop layout, then verify that the proposed emitters can operate at the available pressure.

Filtration for a gravity-fed system
Rainwater can carry leaves, roof grit, pollen, insects and other debris into small outlet passages. A screened barrel inlet keeps larger material out, but it is not automatically the filter specified for drip emitters. Check the emitter maker’s filter requirements, including any stated mesh or filtration rating, and choose a filter suitable for low-pressure flow. There is no universal recommendation for every emitter: a filter that is too coarse may let clogging particles through, while an unsuitable or restrictive filter can reduce already limited flow. If the manufacturer does not publish a requirement, ask the irrigation supplier before settling on a filter.
Put the filter where it is easy to inspect and clean, and note its condition during the flow test. A gradual drop in collected output can come from sediment or a blocked screen, not just a lower barrel water level. Keep the barrel covered as its manufacturer directs, clear debris from the inlet screen and flush the lines according to the system instructions before connecting or reopening sensitive emitters. Cleaning does not remove the need to retest: a clean filter, full barrel and open valve may produce a different result from the low-water conditions you encounter later. Record the results so routine checks have a useful baseline.
Plan lines and zones around the greenhouse layout
Lay out the network around real growing positions. On paper, mark the barrel, its tap, the filter, the main tubing, each branch, every pot or bed, and the highest and farthest emitter. Keep routes direct where practical, but preserve access to paths, doors and vents. Avoid routing a line where it will be routinely pinched, stepped on or moved during normal work. Containers may be rearranged, so plan around the layout you intend to maintain rather than an empty floor plan. Check the tubing maker’s limits for line length and outlet count before deciding whether one line or several branches will serve a row.
Different rows may need separate zones when their elevations, emitter counts or plant requirements differ. If all outlets run at once, the network has to share the available flow; opening one zone at a time can make testing and adjustment clearer, though each added valve also needs to suit low-pressure operation. Account for fixed storage, shelving, benches and access paths before placing branches. When comparing the Limited-Edition Aluminum Greenhouses with Storage, listed from 5.52 to 28.08 m², mark both storage and growing areas on the selected floor plan. This helps you route lines around the spaces you need to reach during watering, harvesting and routine maintenance.
Test flow at the outlets
Test the assembled system, not an individual dripper held under a tap. Connect the actual barrel, filter, valve, tubing and emitters, then fill the barrel to a representative starting level. Flush lines first if the instructions call for it. Place identical measuring cups beneath comparable outlets near the supply, at the end of each branch, and at high and low points. Run the system for one fixed interval; 10 minutes is a convenient comparison, not a watering prescription. Record the collected volume and the barrel’s water level. Repeat with all intended zones open at once, since a layout may behave differently under its normal load. If you plan to water zones separately, test them that way too.
Repeat the catch test when the water level is near the lowest point at which you expect to use the barrel. Compare like-for-like emitters with the maker’s stated range and assess whether each planting point receives enough water; there is no single acceptable volume for every crop or container. If one cup is consistently low, inspect for a kink, clogged filter, blocked emitter or excessive line restriction before changing the run time. For a model in the Prestige Greenhouse range, listed from 3.77 to 28.08 m², test every branch in the chosen growing layout rather than relying on a short bench test. If a component’s specification is given as pressure, a suitable low-range gauge reading while water is flowing can help. Ask an irrigation supplier to identify compatible equipment if you are unsure.
Check valves, timers and connections
A valve or timer may stop an otherwise suitable gravity system. Check the exact device’s minimum inlet pressure and flow, flow direction and any stated restrictions. A hose-end timer designed for a pressurized supply may not open or pass enough water at a rain-barrel head. The word automatic says nothing about gravity compatibility. A manual shutoff may be simpler, but it still adds resistance and should suit the line’s pressure. Ask the seller or manufacturer for specifications when they are missing, and test the device in the finished circuit rather than assuming that water through an open tap proves the controlled system will work.
Check the barrel outlet, adapters, valve, filter and tubing connections as a set; fittings that look similar may not match. A leak wastes stored water and can lower delivery. Keep rainwater separate from potable plumbing; if you plan to connect both supplies, ask a qualified local professional to assess safe separation and any backflow protection needed. Put shutoffs where you can reach them without disturbing plantings. When sketching a route for the Classic Aluminum Greenhouses, listed from 3.77 to 28.08 m², use the selected footprint and walkway plan to position controls accessibly. Before freezing weather, follow each component’s winter instructions and drain or disconnect lines and timers as their manuals direct.

Tank capacity and pressure are different
Do not confuse water capacity with pressure. A larger barrel contains more water and may let the system run longer between refills, but if its water surface sits at the same height, its capacity alone does not give the emitters more gravity head. As the barrel drains, the surface falls and the available head falls with it. Use the catch test to learn how much your setup delivers during a representative cycle, then track the water level through actual use and rainfall replenishment. A layout with enough pressure can still run short of stored water, while a large, full barrel can still fail to supply enough pressure through restrictive components.
Floor area is not a direct measure of water demand either; a greenhouse with many thirsty containers may use more than one with fewer plants or different growing media. When planning the planted area within a Spacious Greenhouse, listed at 47 to 70 m², distinguish the growing positions from paths and other unplanted space. Count those positions, consult reputable crop guidance and monitor bed or container moisture to refine watering times. Keep the storage question separate from the delivery question: plant demand and refill frequency help determine how much water to keep, while elevation and tested component compatibility determine whether gravity can deliver it.
When to simplify the layout or use a pump
If the low-water-level test gives uneven output, look for a simple cause first: clean a clogged filter, unkink a line, shorten an unnecessarily long route, reduce the number of simultaneous outlets or split the network into zones. Change one feature at a time and repeat the same catch test so you can see what improved. Choose tubing size, emitter counts and maximum runs using the system maker’s guidance rather than scaling a design by guesswork. Raising the barrel can add head only if it can be done on a support rated for the full container and placed safely. Have a qualified professional assess a proposed stand or elevated installation if its capacity or stability is uncertain; do not assume a shelf or bench can support a full barrel.
A pump may be more practical if the emitter specifications require more pressure than gravity provides, the barrel cannot safely be raised, or a long, branched layout will not pass the low-level flow test. Select it for the actual water source, filter, tubing and emitter requirements; a pump does not resolve problems with an incompatible emitter, clogged filter or unsuitable timer. Follow the manufacturers’ instructions, and have a qualified person handle electrical or plumbing connections that require professional work. For a small system, simpler components and fewer outlets operating at once may be more dependable than trying to automate a setup that barely meets its operating requirements.
Frequently asked questions
How high should a rain barrel be for drip irrigation?
There is no single height that works for every setup. Compare the water surface at the barrel’s lowest expected level with the highest emitter, then check that the remaining head meets the emitter and valve requirements. The tubing, filter and other fittings also affect delivery. Raise a full barrel only on a support rated for it.
Will standard drip emitters work from a rain barrel?
Not necessarily. Check the exact emitter’s minimum operating pressure and whether its maker approves it for gravity-fed use. An emitter’s advertised flow rate may apply only at a specified pressure. If the requirements are unclear, ask the supplier and test the assembled system before relying on it.
Can a timer work with a gravity-fed drip system?
Only if the particular timer works at the pressure and flow your barrel can provide. Some timers have minimum requirements or restrict flow. Check the model’s specifications, then test it with the filter, tubing and emitters connected. A compatible manual shutoff may be simpler, but it also needs to suit the system.
Does a bigger rain barrel provide more pressure?
Capacity and pressure are different. A larger barrel holds more water, but its capacity alone does not increase gravity pressure if the water surface is at the same height. As the barrel drains, its water surface drops and the available head decreases. Use capacity to think about how long the supply may last, not whether the emitters will run.
How can I check flow at the farthest emitter?
With the complete system running, collect water from comparable emitters near the supply and at the ends of the lines for the same fixed interval. Repeat with the barrel near its lowest working level and with the zones you plan to operate open. Compare like-for-like outlets with the maker’s specifications, and investigate low results before extending watering time.
Rain-barrel drip irrigation is viable when the water surface stays high enough relative to every emitter and each component is rated for the available low pressure. Map the route, confirm emitter, filter, valve and timer requirements, then measure flow at near and far outlets with the barrel at both a normal starting level and its expected low level. Compare the results with plant needs and monitor how quickly the reservoir drops. If delivery falls short, simplify or zone the layout, or have an appropriately specified pump selected. A tested system—not a promising barrel size or a tap-side trickle—shows whether gravity is enough.
