
Self-Watering Greenhouse Containers: What to Check
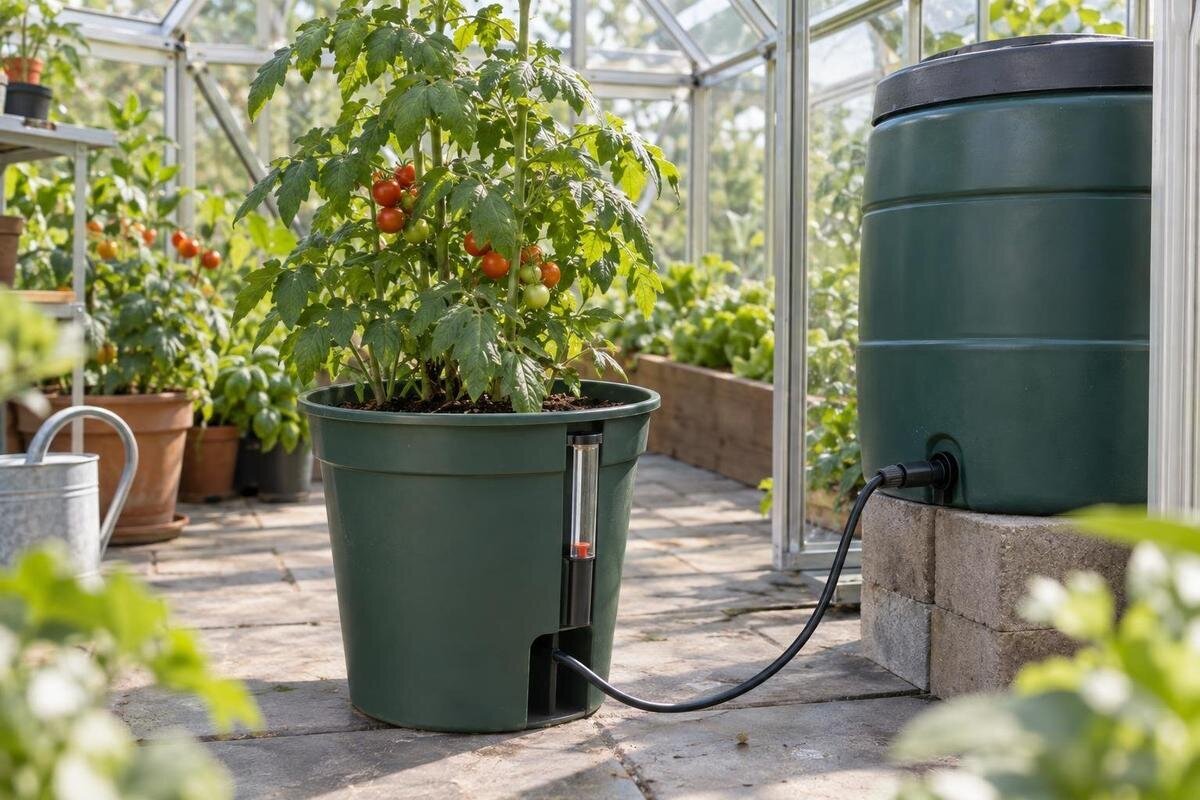
Greenhouse watering
Self-watering planters can reduce how often you add water, but they still need inspection and a safe route for excess water. In a greenhouse with a paved floor, the important questions are how the reservoir feeds the root zone, whether you can reach and clean it, and where overflow goes. Compare the fill opening, growing medium and drainage path as one system; a large reservoir is not useful if roots stay too wet or spilled water has nowhere to go.

Buying checklist 1
How a self-watering container works
A self-watering container stores water in a reservoir below or beside the growing medium, then moves it towards the root zone through a wick, capillary contact or another method described by the maker. The instructions should distinguish the planting area from the reservoir: roots need moisture but also air, so keeping all the mix submerged is not the same as supplying moisture through a wick. Look for a diagram showing the waterline, any separating platform or wicking element, and where roots can reach the moist zone. The name alone does not tell you whether water spreads through the whole container or reaches the mix only near one point. That affects where you place young plants and how you check moisture.
Check where you add water and where excess leaves. A fill tube may lead directly to the reservoir rather than into the soil; an indicator, if supplied, may show stored water but not moisture around every root. Confirm the maximum fill level, the outlet’s purpose and whether the maker calls for initial top-watering while roots establish. If you are planning the greenhouse too, the Spacious Greenhouse listing gives a size range of 47 to 70 m². A range is not a floor plan: lay out containers against the exact structure you choose and leave clear access to each fill opening. A diagram tracing the route from refill point to root zone is more useful than capacity alone.
Reservoir capacity and refill access
Compare reservoirs by access as well as capacity. Ask whether the reservoir is integral to the planter, removable, or reached through a separate chamber, and whether its usable volume is stated. A headline capacity can be hard to interpret if the overflow level, air gap or internal shape leaves some stored water unavailable to roots; what matters is the refill pattern under your growing conditions. An indicator helps only if it remains readable where the pot will stand and the instructions explain its scale. Ask whether you can inspect or empty the reservoir without dismantling the planting area, and how you will notice an empty reservoir, a blocked fill path or an unexpected leak.
Map the fill opening before planting. A tube that is reachable in an empty container may become hidden behind foliage, a bench leg or another pot as plants grow; reaching a plug can also be awkward if you must move a planted, water-filled unit. Leave room to remove a lid or tray and empty the reservoir without splashing paving or disturbing nearby plants. The Classic Aluminum Greenhouse listing gives a size range of 3.77 to 28.08 m², but that range is not a service layout. Include an approach to each planter and an aisle on your sketch, especially if you plan several units.
Buying checklist 2
Overflow on a paved greenhouse floor
An overflow outlet is different from a drain that lets water leave the growing medium. In many reservoir designs, an overflow sets the highest intended water level; a separate opening may handle drainage through the mix. Some containers have a plug or removable fitting, while others direct water to one side. Check the model’s diagram and instructions to identify each opening, whether it must stay open and how to clear it. Do not assume a small hole is a fill port, or that a saucer will safely contain overflow. A tray can hide a slow leak or send discharge back towards the planter if it sits too high.
On paving, do not assume spilled water will disappear as it would in open soil. It may collect beneath the pot, track along joints, reach a walking route or remain unnoticed behind a tray. Before filling, decide whether excess will be collected, directed to an appropriate floor drain or removed by hand; check that the route is visible and unobstructed. Keep any floor drain clear rather than parking a planter over it, and empty a collection vessel before it can overflow. Wet paving can be slippery, so keep discharged water out of walkways. The Lean-To Greenhouse listing spans 3.69 to 14.34 m²; for any chosen structure, trace the route from each outlet to its destination before fixing container positions.
Match the growing medium to the reservoir
The wicking mechanism depends on the growing medium. A blend that loses contact with the wick or platform may not draw water through the pot as intended, while a dense, persistently wet mix can leave too little air around roots. Fine, moisture-retentive and coarse, fast-draining blends behave differently, so a familiar potting mix is not automatically right for every reservoir design. Read the instructions for recommended media, wick placement, planting depth and initial watering. If the container uses a basket or column to bring water into the mix, check that it will remain properly positioned after the planter is filled. Do not substitute a different medium without considering how it may change the wicking action.
Container depth and root development also matter. A small transplant may not reach the damp lower zone immediately; later, a larger plant can use the reservoir more quickly. Ask whether the system expects you to wet the mix from above at first, and whether any part needs to stay exposed rather than buried. When planning container groups for a structure such as the Limited Edition Aluminum Greenhouse, allow for crop spacing as well as pot dimensions. Plants needing different mixes or moisture conditions may need separate containers, so decide how to group them before working out how many pots will fit.

Buying checklist 3
Check moisture around the roots
Check moisture below the surface, near active roots, rather than judging only by reservoir level or the top layer of mix. Capillary systems can create a gradient: the lower medium may be wetter while the surface stays comparatively dry, especially before roots are established. Use a consistent, gentle check in a representative container and compare more than one point if the planter is wide or the wick feeds from one side. A full reservoir means water is available, not that it has reached every root. Conversely, a damp surface does not tell you whether the base is saturated. Use the same depth and location for repeat checks so you can compare conditions over time.
Read several clues together: reservoir level, moisture in the root zone and the plant’s response. If the mix stays saturated, adding water can worsen poor aeration; if a plant wilts while the reservoir is full, inspect wick contact, the fill route and medium before topping up again. Follow the maker’s directions for re-wetting a dry mix or emptying the reservoir. When laying out planters in a structure such as the T-Shaped Orangery Greenhouse, consider the sun and airflow at each proposed position. Check conditions at the actual container rather than assuming one corner represents the whole space or that every reservoir will need refilling at the same time.
Leave room for containers and floor access
Plan containers as objects with working clearances, not just footprints on a sketch. Include the planter body, any projecting fill tube, exposed overflow side and enough hand space to open a lid or clear an outlet. Keep a continuous route to the door and work area; do not run an overflow tube across the only walking lane or block access to a floor drain. Leave room to lift out a removable reservoir, if the design has one, and to inspect or wipe the paving beneath the planter. Set the base as the maker directs; a support or riser that changes outlet height or covers a drain can alter where water goes.
Look at the paved floor before settling on a layout. After ordinary cleaning or rainfall, note where water remains, whether joints or low spots direct it towards a proposed container, and whether a floor drain can be reached without moving several pots. Do not put a planter where it conceals a recurring puddle. If you are considering the Pyramid Greenhouse, use the footprint of your chosen size to plot container positions and walking routes. Include access to the paving beneath each planter, not just space between pots. If the floor’s load capacity or drainage is uncertain, ask a qualified builder or installer to assess it rather than estimating from container count.
Buying checklist 4
Group crops by water needs
Group plants by moisture preferences instead of sharing a trough simply because several fit. A linked reservoir or long planter gives them a common water level and often the same refill rhythm; one plant that needs the medium to dry more between waterings can be a poor match for another that prefers steadier moisture. Separate containers let you adjust for differences in root depth, mix, plant size and stage of growth. They also make it easier to identify a container whose overflow, wick or medium is not behaving as expected. Keep plant labels and watering notes with each group rather than relying on memory.
Arrange manageable groups: plants with similar moisture needs can share a checking routine, while crops needing a drier cycle or a different mix stay separate. Place high-demand or less predictable containers where they are easy to inspect, rather than letting one rapidly emptying reservoir set the schedule for all. When comparing layouts for the Limited-Edition Aluminum Greenhouse with Built-In Storage, account for the storage space as well as the planting area. Check whether separate crop groups and the access needed to tend them will fit in your chosen size. Keep stored items out of the spaces you need for refilling and inspecting those groups.
Make refilling and cleaning manageable
Even a planter that reduces frequent watering needs routine inspection. Clear debris from fill openings and overflow ports; check removable plugs, indicator parts and wicks for damage or displacement, if fitted. Use the container’s cleaning instructions rather than guessing which scrubber or cleaner is appropriate for its materials. If the reservoir cannot be emptied in place, decide how you will do it without dragging a planted container across the floor. Before reuse, make sure fittings are returned to the specified position and the outlet remains open. A quick inspection is especially useful after moving the planter or changing its growing medium.
Keep fill ports visible, avoid placing stored items in front of them, and refill through the designed opening unless instructions specify otherwise. A brief note of refill dates, reservoir levels and root-zone conditions can help distinguish changing plant demand from a leak. Before a period when you will not be checking plants, confirm the level and outlet are within the maker’s directions; filling beyond the limit is not a substitute for monitoring. If you are planning a Prestige Greenhouse, include the space needed to inspect, drain and clean each reservoir in your layout. A planter may fit neatly in a corner but still be awkward to empty or clean there.

Buying checklist 5
Test the water path before planting
Before filling every planter, set one empty unit in its intended position. Make sure the fill opening is reachable, any water-level indicator can be read, and the overflow points towards the destination you planned. Read the assembly and filling instructions; if the maker describes a water test, follow that procedure with a controlled amount and observe where discharge goes. Collect or wipe test water so it cannot pool on the paving. Check the route again after moving the unit, tray or nearby bench. Do not cap an outlet just to stop a spill; correct the route or container position instead.
After adding the specified growing medium, carry out the recommended first wetting and check moisture at more than one depth before planting a full group. Watch for mix that is not contacting the wick, water escaping from a joint, a reservoir that spills before reaching its indicated level, or an outlet that stays dry when the instructions say it should release excess. Note how the upper and lower parts of the mix feel, then resolve problems while the container is still easy to reach. A one-container trial can reveal awkward access and drainage issues before several identical units are in place.
Monitor demand instead of following a fixed schedule
Once crops are planted, do not treat a fixed calendar interval as a guarantee. Stronger sun, warmer conditions, more foliage or fruiting can increase demand; cooler or cloudier periods may reduce it. Check the reservoir and root zone together so you can connect a falling level with what the plants are using. Use an indicator, if present, as one clue rather than a substitute for checking the medium and plants. If you normally refill at set times, add an extra check after a marked change in weather, growth or greenhouse ventilation. Early observations help you learn how that container behaves in its actual location.
Troubleshoot the pattern, not only the symptom. A reservoir that empties unusually quickly may reflect rising plant use, a leak or an overflow that is not working as intended. A full reservoir with dry roots points towards poor wicking, an unsuitable mix or interrupted contact; persistently saturated lower mix calls for a different water level or setup according to the maker’s instructions. Take recurring leaks seriously because water can stay hidden beneath containers on a paved floor. The most workable system is one whose reservoir, root-zone moisture and overflow you can inspect without moving the whole growing area.
Frequently asked questions
Does a self-watering container mean I never need to check the growing medium?
No. The reservoir may lengthen the time between refills, but plant growth, the medium and greenhouse conditions all affect water use. Check the reservoir and the root zone, and watch for overflow or a blocked water path.
Can I place a self-watering container on a paved greenhouse floor?
You can, provided the surface is suitable and the container is set up as instructed. Plan where overflow will go: paving may not absorb spills, and water can collect beneath a pot. Keep outlets and walking routes accessible.
Should I keep the reservoir full all the time?
Follow the container’s fill-level directions rather than assuming it should always be full. Use any indicator alongside checks of the growing medium. Filling above the stated limit can send water out through the overflow or leave the mix too wet.
Why can the top of the growing medium look dry when the reservoir has water?
Water may wick upward gradually or unevenly, particularly before roots establish. Check moisture near the roots and inspect the wick, medium contact and fill route before adding more water. A full reservoir does not prove that water has reached every root.
Can different crops share one self-watering trough?
They can, but plants with similar moisture needs are easier to manage together. A shared trough gives them a common water level and refill pattern; separate containers allow different watering approaches for plants that prefer different conditions.
Consider both routes: how water moves from the fill opening through the reservoir and growing medium to the roots, and where excess water goes after leaving the overflow. An accessible reservoir is useful only if the chosen mix wicks as intended and excess water has somewhere to go. On paving, keep outlets visible, leave room to reach each container and check moisture below the surface as plants establish. Those details make it easier to spot a problem before it leaves a wet floor or stressed crop.
