
Diagnosing Greenhouse Puddles After Watering
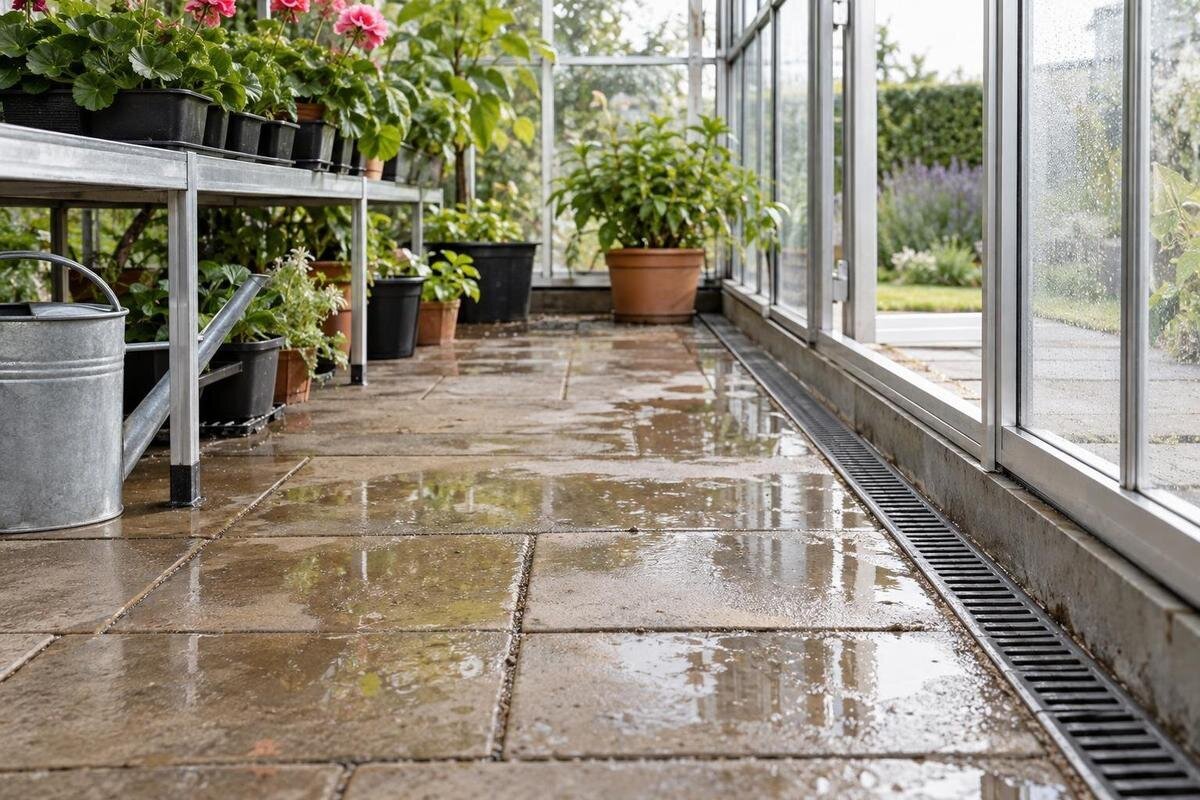
Greenhouse drainage
Water left on a greenhouse floor after watering can point to a blocked outlet, a low spot or a spill that has little to do with drainage. Map the route and observe routine watering on separate occasions under comparable conditions to find where water starts, how it travels and where it remains.

Why a puddle appears after watering
Water left on the floor after watering is evidence of where water stopped, not proof that the floor is graded incorrectly. It may spill when a can is filled, splash off a bench or tray, overflow from a pot, escape from a hose connection, or run off a bed. Alternatively, ordinary watering may reveal an existing low point, a raised joint that diverts flow, or a route with no obvious exit. Distinguish a thin damp mark from standing water and note whether the patch sits beside its source or forms a trail. Its first appearance and how long it remains matter as much as its final size.
Before moving pots or wiping the floor, record whether it was dry before watering, when the first wet patch appeared, and whether rain or cleaning happened at the same time. A puddle that appears only after watering one bed is different from a damp patch that returns in dry weather. Use the next watering the plants actually need as an observation; do not give them an extra soak just to reproduce the problem. Mark the first wet point and nearby tray, connection, doorway or joint rather than choosing a repair from the final puddle alone. Later checks can use the same reference.
Draw the greenhouse floor before testing
Draw a top-down plan and keep a fixed reference, such as the entrance, at the same edge each time. Show the inside perimeter, door, beds, benches, pots, taps or hose connections, irrigation lines, floor joints, visible grates and channels. Mark each puddle with a letter or number instead of shading a large area, and add a short legend. Note whether benches or pots can move so later tests can be compared fairly. Add arrows only after watching water move; label a suspected route as uncertain until an observation confirms it. This keeps guesses about the slope from becoming facts on the sketch.
Include the floor surface and boundaries between paving, soil, gravel or a raised bed, since water can behave differently at each transition. Record the exact greenhouse model and variant if known, then compare the installed outline with the matching manufacturer base drawing. For a lean-to greenhouse, label the wall-side edge you actually see and the route to the doorway; do not estimate the footprint from a catalogue image. Use the product family name when requesting the matching drawing, then add site measurements so an installer can compare the base perimeter with the mapped wet area. If the outline is approximate, label it as such.
Separate watering from other sources of moisture
A source check can prevent an outlet from being blamed for water that arrived another way. On a day when the floor begins dry, note what happens after watering. On another occasion, observe whether moisture appears after rain, overnight cooling, washing or use of a hose outside. Water from rain, droplets from above and a supply-line leak can leave a mark in the same place as surface runoff, but they will not respond to the same remedy. Record timing and likely source as separate observations, not conclusions. If rain and irrigation happen together, the event cannot clearly show which one brought water inside.
Look for a repeatable connection without dismantling anything: does the wet patch begin under one pot, at a hose fitting, beside the same threshold, or along an edge? If practical, catch routine drips from one pot or tray without changing the rest of the setup. Record the result before changing a watering pattern or moving several items at once. The Limited Edition Aluminum Greenhouses range is listed from 3.77 to 28.08 m²; when requesting a drawing, note the selected model and size rather than relying on the family name alone.
Make the watering check repeatable
A useful check follows normal care rather than creating a flood. Start when the floor is as dry as practical, with no recent rain, cleaning or outdoor hose use confusing the result. Use the same watering method, zone order and normal amount for that scheduled watering. If you use a hose, keep its setting and route consistent. Record the volume only if you can measure it without changing what the plants need; otherwise, note the method and duration. Do not water plants a second time simply to complete a test. If you suspect a leak, avoid altering equipment in a way that could create another source of water.
Work through one zone at a time if the layout allows it, then pause and note the first wet point, direction of travel and any standing water. Use the same reference points on a later normal watering, not just the same general description. Change one variable at a time when comparing events; for instance, observe a different irrigation zone without also changing the hose setting and route. Do not introduce dye, detergent or a large volume of water. If you are comparing sizes in the T-Shaped Orangery Greenhouse range, use the selected model drawing to outline the greenhouse, then add the actual beds, benches and paths to define your test zones.

Trace water from its first wet point
Follow the water from the first mark, not backwards from where the puddle is deepest. On the sketch, note the first wet edge, the direction of any thin streams, places where water crosses a joint, and where a barrier, tray, bed edge or threshold turns it. A narrow trail can merge into a broad pool, so photograph it early as well as after watering stops. Include a scale reference, such as a ruler placed beside the water path, and use the same camera position when you repeat the observation. Add a separate mark if water appears to enter from above or an outside edge.
Compare the sequence during another ordinary watering. A route that begins at the same point and stalls beside the same obstruction is stronger evidence than two puddles that happen to occupy one corner. Check whether a person, hose or watering can might have carried water across the floor before the pool formed. When recording observations for a Pyramid Greenhouse, identify the selected model and mark the wet route on your site sketch. Keep observed flow separate from assumptions about the floor’s level, and note any part of the trail you could not see, such as water passing beneath a bench or covering.
Find the intended drainage outlet
Identify what is meant to carry water away before calling an opening a drain. The intended route might be a documented floor outlet, a channel, a doorway leading to an exterior surface, or a route that has not yet been provided; some floors have no built-in drain. Look for an accessible grate or channel and record whether leaves, soil or potting mix cover it. A gap at the base or edge is not automatically an outlet. Check the greenhouse documentation or ask the installer where water is intended to go, including what happens beyond the visible opening.
If an outlet is known and accessible, remove only loose surface debris you can reach safely. A small amount of clean water may show whether it enters the visible opening, but do this only if the route is known and the surface can be wetted; stop if water backs up. Do not push a rod into an unknown line, use chemicals or pressure, or pour in enough water to overflow the floor. For a Limited-Edition Aluminum Greenhouse with Built-In Storage, mark any actual floor transition beside the storage if one exists; do not assume the product name describes a separate drainage route.
What puddle patterns can tell you about the floor
Use the shape and position of pooling as clues, not as a level survey. Water that sits repeatedly in a shallow depression may indicate a low area; a long trail can reflect a surface change, channel or obstruction. Water gathering against a door may have travelled from another zone. Repeat the observation after similar watering and mark the puddle boundary from the same reference points. Check whether a tray, bed edge, hose or stored item moved between tests, since any of these can redirect flow and make the pattern look like a change in grade.
Visual impressions can identify where a qualified person should check, but they do not measure a floor or foundation accurately. A short level placed on the floor may show a local difference; it cannot establish the drainage fall across the whole base or how that base was built. Avoid shimming, cutting, drilling or packing around the greenhouse to force a route. When choosing the Bloomcabin Prestige Greenhouse with Metal Base, distinguish the supplied base configuration from the finished floor and drainage arrangements at your site. Compare the selected model’s actual base drawing with field observations so the reviewer can relate the recurring puddle to the installed perimeter.
How floor surfaces and planting zones affect water paths
Surface material changes how a wet patch looks and how quickly it disappears. Water may sit on a hard, sealed finish, pass through open joints or gravel, or soak into exposed soil, so a dry-looking patch does not prove that water reached an outlet. Mark paving edges, cracks, joints, gravel, soil, mats and changes in level on the sketch. Note whether the floor was recently swept or whether water could have run beneath a removable mat. Photograph the original pattern before moving coverings or changing the floor setup.
Keep growing areas separate in the record. Water from trays, pots and raised beds may cross a path at one edge, while water applied to the path itself follows a different route. Label each zone and note which one received water, then describe the surface and planting arrangement rather than calling the whole floor wet. The Spacious Greenhouse listing spans 47 to 70 m²; for a greenhouse of that scale, labelled zones and several reference photos are more useful than one image of a puddle.

What to provide for a site review
If puddles persist, assemble a short evidence record before anyone changes the floor. Include the dated sketch, model and size from your order records, surface type, notes from a dry-start observation and each controlled watering, and photos showing the first wet point and later pool. Mark which possible sources you ruled out and which remain uncertain. Add visible outlet details, exterior wetness and relevant recent site changes. If available, include the manufacturer’s actual base or foundation drawing for the exact model; a generic dimension or product image cannot replace the installed conditions.
Ask a qualified greenhouse installer, groundwork specialist or drainage professional to review the water route and site together if the cause remains unclear, the outlet is hidden or inaccessible, the floor appears to have shifted, or water repeatedly reaches the base or an adjoining structure. State what you need assessed: the water source, a possible blockage, or the floor and site grading. For a Classic Aluminum Greenhouse, include the exact ordered variant so the reviewer can match the right drawing; the family name alone may not identify the installed size.
Checking whether the correction worked
Address the confirmed cause rather than treating every puddle with absorbent material. If it begins at an overflowing tray or avoidable splash, adjust that part of the routine. If it comes from a leak in a water supply line, arrange for the leak to be addressed. If a documented, accessible outlet is obstructed, deal only with loose debris you can safely reach and have a persistent blockage assessed. A repeated low area or a route that requires changes to the floor or base calls for site-specific review. Do not seal a gap, cover a grate or add fill until you know what it does.
Keep the original plan and compare a later normal watering under similar conditions. Mark the route again, note what stopped and what remained, and update the outlet status. If the puddle moves, the correction may have redirected water without removing its source; the new pattern is useful evidence, not a reason for another unverified alteration. A clear before-and-after record shows whether the floor now clears as intended and whether water is being sent somewhere you have not assessed.
Frequently asked questions
Why does a puddle appear only after I water?
Watering may be creating the puddle, or it may simply reveal a low point or obstruction. A spill, overflowing pot, dripping connection and water travelling across the floor can all leave water in a similar spot. Note where it first appears and whether the floor was dry beforehand.
How can I tell a blocked outlet from a low spot?
A puddle beside a known outlet that does not drain may point to a blockage, while pooling at the same floor depression may suggest a low area. Neither pattern proves the cause. Map the route, check the outlet’s intended path and compare observations from similar watering events.
Should I pour water on the floor to test drainage?
Begin with the next normal watering that the plants need; do not flood the floor or water plants again just for a test. A small amount of clean water may help check a known, accessible outlet, but only if the route and surface are suitable and the water does not back up.
Do I need to repeat the watering check?
A second observation under comparable conditions helps show whether the same source and route recur. Keep the starting floor condition, watering zone and method as consistent as practical. If rain or cleaning happens at the same time, record it; that event may not isolate watering as the cause.
When should I ask a professional to review the drainage?
Seek a qualified site or greenhouse professional if water repeatedly reaches the base or an adjoining structure, the outlet is hidden or inaccessible, the floor appears to have shifted, or the cause remains unclear. Share your sketch, observations and the drawing for the exact greenhouse model, if available.
Reliable diagnosis comes from repeatable observations: note what was wet before watering, record the route rather than only the final puddle, and compare similar watering events. Once you can show whether water began at a supply point, travelled across the floor or backed up at a known outlet, you can focus the assessment on that cause, using your site observations and the drawing for the installed model.
