
Diagnosing Greenhouse Water: Roof, Ground or Condensation
Greenhouse troubleshooting
When water appears in a greenhouse, the wet spot rarely identifies the source by itself. Rain can enter high and travel along a frame; runoff can approach at ground level; condensation and irrigation can leave similar puddles. A reliable diagnosis comes from recording what was wet first, comparing rainfall with indoor watering, and repeating observations without disturbing panels or seals. These checks help separate the possibilities and gather useful evidence before you request a part or an installer’s assessment.

Before requesting a replacement part 1
Record timing before drawing conclusions
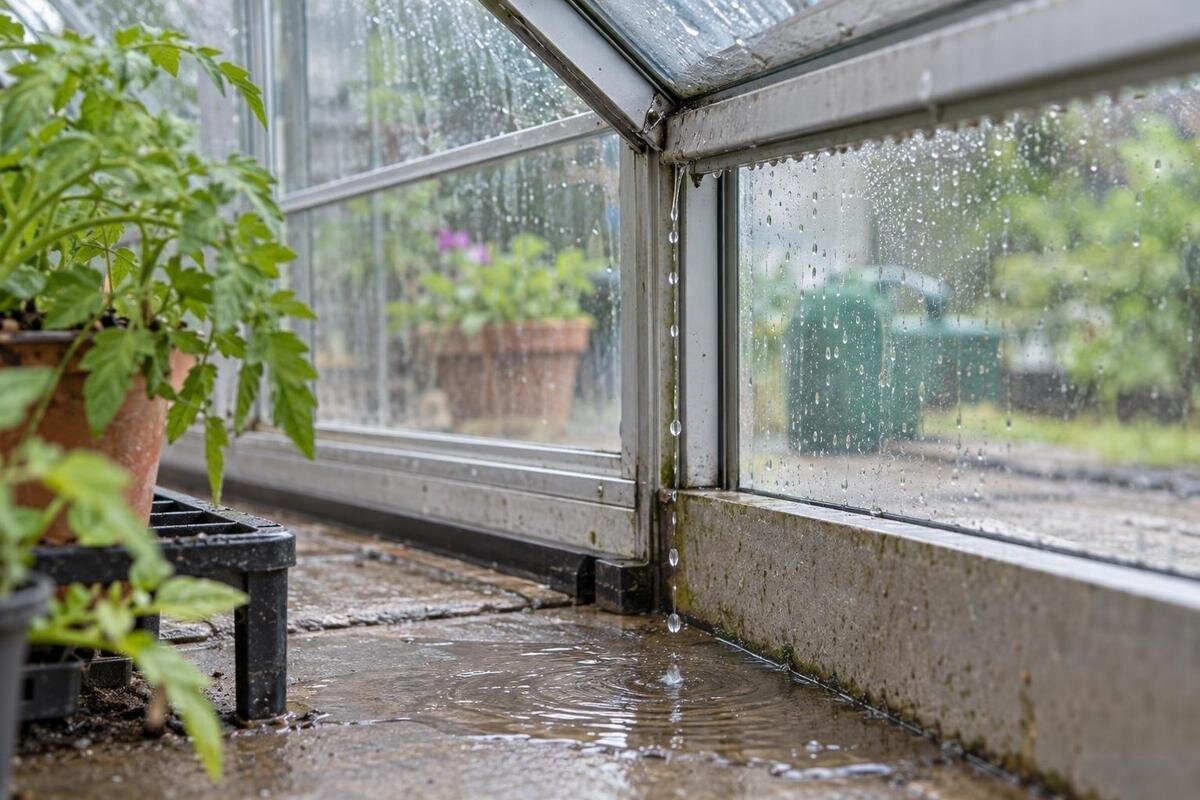
A wet floor is the end of a water route, not proof that the roof is leaking. Rain can enter high and travel along a frame; water can collect around the base; condensation, irrigation or a spill can leave a similar patch. Before drying the area, note what you actually see: beads on a panel, a narrow run, a damp edge, wet soil or standing water. Photograph a wide view and a close-up from the same moment. Record whether moisture is on the inside face, outside soil or floor; droplets on exterior glazing after rain are not the same observation as dampness indoors.
Make an event log for several observations: date and time, recent rain or meltwater, wind conditions, indoor watering and when the first dampness appears. Note whether it began during the weather event, hours later or on a dry day, and whether the outside ground was already wet. Include the greenhouse model name from your paperwork; a catalogue entry such as Classic Aluminum Greenhouses can help confirm the product family, but it cannot identify the installed glazing, seal or compatible part. Also note whether doors or vents were open and when watering last occurred. Compare repeated events instead of relying on memory or one dramatic puddle.
Prepare for safe observation
After the area has dried naturally, sketch the interior as broad zones—roof, upper walls, door area and base—and mark benches, irrigation lines and the first wet points. Put small pieces of dry, absorbent paper on accessible benches or floor at selected points below likely drips; label each location and time. Keep the markers identical and replace them between observations. Record when each is still dry as well as when it first becomes damp; this gives a sequence, not just a final stain. Leave them loose and away from glazing, seals, moving vents and equipment. Do not stick anything to a panel or remove a cover; the aim is to observe water, not change how it sheds.
Work from ground level and from inside where footing is dry and stable. Never climb onto the frame or roof, lift glazing, or handle cracked or loose glass to investigate. If water is close to electrical equipment, do not touch it or test it; keep clear and arrange qualified help. On your sketch, show the actual layout and any attached structures. If your greenhouse matches the T-Shaped Orangery Greenhouse, identify the particular bay or junction where moisture appears rather than recording only the model name. During rain, observe from a safe position without reaching towards glazing.
Before requesting a replacement part 2
Signs of water entering through the roof
A roof-entry pattern is more likely when dampness first appears during or soon after rain and repeatedly starts high on one side or at a particular joint. From inside, look for a fresh drop or narrow run at a glazing edge, ridge, vent perimeter or junction with an adjoining wall, if present. Wind-driven rain may produce a different pattern from calmer rainfall, so record conditions rather than treating one dry interval as proof. Compare the first wet point in more than one event; a puddle simply sitting below the roof is a weaker clue. A drip at one edge is also a different observation from droplets appearing across many panels.
Water may travel before it drips. A panel edge or frame channel can guide it sideways or downward, so the wet spot on the floor can be some distance from the entry point. Follow any visible track upward only from a safe position; do not pry at glazing, probe a seal or work from a ladder. For an Oasis Pyramid Greenhouse, as for any model, distinguish the point where water leaves the frame from the point where the visible trail begins. Record both locations, then consult the model-specific manual to identify the assembly before discussing a replacement part.
Follow the water trail to its first wet point
Use the observation markers to compare the order in which different areas become wet, rather than wiping every surface at once. A damp patch shows where water reached the paper, but nearby markers that remain dry also help narrow the route. If a marker under an upper frame darkens before one on the floor, the frame may be carrying water. If a lower wall or sill becomes damp first, consider a route from the base or an indoor source too. Keep the positions consistent between observations so you can compare the sequence during the next natural rain event.
Sketch arrows only where you can see a continuous trail, and distinguish water running down a surface from separate beads forming on it. Check inside corners, door thresholds and wall junctions without removing trims or panels. For a Lean-To Greenhouse, include the adjoining-building junction in the sketch, but do not assume it is leaking because water appears nearby. Record whether the visible trail reaches that junction or begins elsewhere. If there is no continuous trail, label the route as uncertain rather than drawing arrows based only on where the water lands. This keeps an observed drip separate from a suspected entry point.

Before requesting a replacement part 3
Check the ground and greenhouse base
Water near the base calls for an exterior check as well as an indoor one. From accessible ground, look after rain or thaw for water running towards the greenhouse, pooling beside one edge, or arriving from a hose, irrigation line, garden bed or nearby downspout. Note where exterior water appears before the interior floor changes and whether the same side is affected in more than one event. A photo that shows the wet patch and surrounding ground together can be more useful than a close-up of the puddle alone. Avoid digging beside the base, changing a slope or adding a drain as a diagnostic experiment; site drainage and foundations need an assessment suited to the installation.
Look for a repeatable route at the lower edge, but keep alternatives open: roof runoff can land near a wall, and condensation can run down glazing and collect at the base. A dry roof with water first appearing at the lowest edge after rain points towards an exterior route, but does not confirm it. If paperwork lists the Bloomcabin Prestige Greenhouse with Metal Base, treat that name as product identification only; it does not tell you what foundation, drainage or water barrier was installed on your site. Verify base details in the manual or with the installer. Note separately if moisture begins after irrigation rather than rain.
Recognize condensation on interior surfaces
Condensation usually begins as small beads on the inside face of glazing or frame surfaces rather than as one clear track from outside. It may be widespread, appear on several panels, and run downward to a bench or floor. Note whether it develops when the greenhouse air is humid and exterior surfaces are cooler, including after watering, rather than during rainfall. Compare the roof, upper walls and lower surfaces: if many areas are wet before any puddle forms, the floor may only be collecting water from a larger interior pattern. Log moisture on exterior surfaces separately.
Compare the pattern across the whole structure. Similar droplets on multiple interior panels, with no matching exterior wetness and no consistent rain link, favour condensation; one seam that repeatedly releases a stream during rain needs a separate leak check. For a model from the limited-edition greenhouse range with storage, record moisture on the glazing, frame and storage area separately rather than treating all dampness as one event. Note which area becomes wet first. Ventilation and watering routines can affect moisture, yet changing them does not establish that a seal is sound. A single localized drip deserves attention even when other panels are also beaded.
Before requesting a replacement part 4
Compare rainy and dry conditions
Compare a dry-weather period with a natural rain event, starting each observation with dry surfaces and markers. During the dry period, keep normal plant care but record each watering and check whether dampness follows it. During rainfall, observe from indoors and note when the first wet marker changes; check again after the rain stops because water can continue along a frame. Record how long it has been since watering and whether the markers were dry before rain began. Do not spray the roof with a hose or direct water at a seam to create a test. An uncontrolled spray can confuse the pattern or drive water where ordinary rain would not.
Interpret the comparison as evidence, not a verdict: a localized wet point high on the structure that follows rain suggests entry above; water that begins outside or at the lower perimeter supports a ground-level route; broad interior beading without a rain link supports condensation. A pattern that changes between storms may reflect different wind or rainfall conditions, so note the first wet point each time. If the pattern remains unclear, repeat the observations without changing several conditions at once. When requesting help with a model from the Limited Edition Aluminum Greenhouses range, include the rainy- and dry-weather records together so the inquiry describes more than a single puddle.
Rule out water from inside the greenhouse
Check for sources created inside the greenhouse. Look at watering cans, hose connections, irrigation fittings, trays under pots and containers that can spill or overflow. Find any wet mark directly below a bench or connection and compare its timing with use; drops after watering can be mistaken for a roof drip if noticed later. If safe, change one routine at a time—for example, pause a particular watering source while keeping the observation record—so you can see whether the same area becomes wet. When a hose is in use, look for visible drips at accessible connections, but do not dismantle or adjust fixed fittings to run a test.
Plants and damp growing media can raise indoor moisture, while a small plumbing leak can leave a local patch even on a clear day. Note whether moisture recurs without rain, follows a watering session or stays limited to one connection. A splash can also run under a shelf before it is noticed, so compare nearby surfaces as well as the puddle. If a water line or fixed fitting appears responsible, have a qualified plumber or relevant installer inspect it instead of guessing from the floor stain. Keep distinct notes for roof, base and indoor sources; combining them into one greenhouse-leak description can send a parts inquiry in the wrong direction.

Before requesting a replacement part 5
Prepare a useful parts or installer inquiry
When you ask for help, send evidence that lets someone match the structure and the event. Include the exact model name, any serial or order information available, glazing type only if confirmed in records, and any part number from the manual. Add dated wide and close photographs of the first wet point, a simple sketch showing where it is, and notes on rain, watering and when the dampness appeared. If the route changes with wind or weather, include that too. Keep the original model labels and notes together. Do not identify glass or seals by appearance alone; similar-looking parts can differ.
Check the manufacturer’s manual or documentation before cleaning, removing or replacing a seal, pane or component; follow only the procedure and part identifiers for that exact model. An installer should review persistent entry, concealed junctions, damaged glazing, loose components or any change that could affect how the structure is assembled. Avoid generic caulking or structural alterations as a diagnostic shortcut: they can hide the original route and complicate a later inspection. If a part number is missing, ask the manufacturer or supplier to confirm it from the greenhouse identity rather than choosing a visually similar item.
Choosing between repair and replacement
A targeted repair is most plausible when observations repeatedly lead to one accessible component, the model and part are known, and the manufacturer’s instructions provide an approved replacement route. If water returns at several joints, the source is hidden, the frame or glazing appears damaged, or no exact part can be identified, get an installer to review it before deciding. Do not modify structural members, adjust the frame or work on glass without appropriate instructions and expertise. A single dry day after a suspected leak is not enough to confirm that the source has been addressed. Water entering at the site boundary is not necessarily fixed by replacing the greenhouse.
If replacement is being considered, diagnose site drainage and condensation first so a new structure is not chosen as a cure for an unresolved water route. Compare the actual footprint, location, adjoining structures and documentation for models under consideration; product names alone do not confirm suitability. The Spacious Greenhouse catalogue listing gives a size range of 47 to 70 m², but that range does not establish whether it fits your site or addresses the water problem. If runoff is the source, decide how that issue will be handled before comparing structures. Keep repair and replacement as separate decisions until the water source is clear.
Frequently asked questions
Does a puddle directly under the roof prove there is a roof leak?
No. Water can travel along a frame before it drips, and condensation or irrigation can leave water in the same spot. Look for the first wet point during rainfall and repeat the observation; a puddle’s location alone is not enough.
Can condensation collect at the greenhouse base?
Yes. Droplets can form on interior glazing, run down a panel or frame, then collect at a low point. Check whether the glazing is wet across several areas and whether the pattern occurs without rain before concluding that water is entering at the base.
Should I spray the greenhouse with a hose to find a leak?
Avoid using a hose as a test. An uncontrolled spray can obscure the original pattern or drive water into a place ordinary rain would not reach. Record what happens during natural rain, or ask an installer about an appropriate controlled assessment.
What should I do if water appears near broken or loose glass?
Do not handle or lift the glass to investigate. Keep clear and arrange an installer’s assessment. Use the manual for the exact model and part identification rather than selecting a replacement by appearance alone.
What information should I send when asking about a replacement part?
Provide the exact model name, any serial or order information, the part number from the manual if available, and clear photos of the wet point. Include a sketch and notes about rainfall, watering and when the moisture first appeared.
A useful diagnosis comes from a repeatable link between weather or indoor water use and the first wet point, plus a clear record of how the water reaches the floor or base. If the evidence remains mixed, keep the observations and request a model-specific review before ordering parts. Once you know whether water is entering above, collecting below or forming inside, you can address the likely cause instead of treating every wet floor as the same repair.
