
Is Bubble Insulation Useful in a Glass Greenhouse?
Greenhouse winter energy
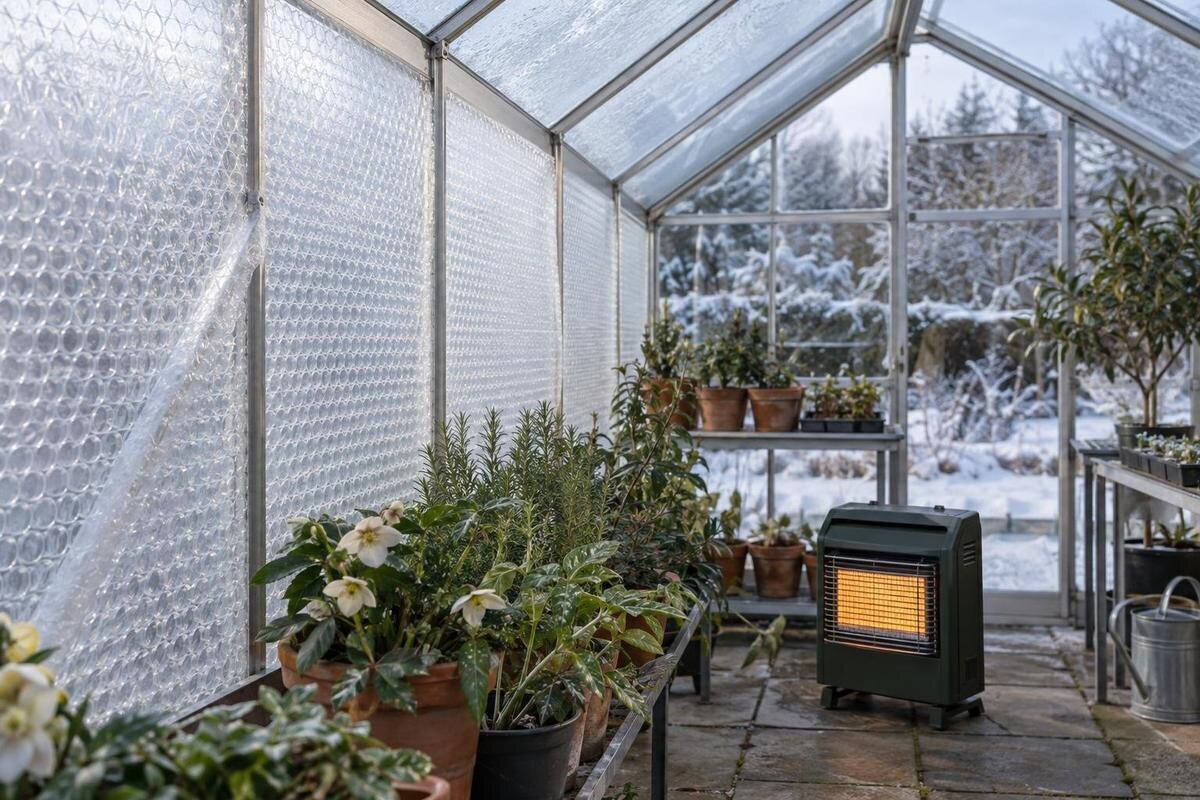
Bubble insulation may reduce heat escaping through the glass it covers, but there is no universal savings percentage or guaranteed greenhouse temperature. The result depends on the area insulated, the material and installation, air leakage, outdoor weather and the heater’s actual energy use. An added layer also cuts some incoming light and can change where condensation forms. The useful question is whether a documented greenhouse-grade product, fixed by a compatible method, reduces measured heating energy use without creating a larger daylight, moisture or access problem.

How bubble insulation affects heat loss
Bubble insulation adds pockets of still air over glazing. If a greenhouse-specific material is installed as its maker specifies, it can slow heat transfer through the covered panes. That effect is local, not a whole-structure upgrade: uncovered glass, framing, the floor, doors, joints and open vents still contribute to heat loss. An inner layer does not repair a loose or damaged pane, create heat or guarantee a night-time temperature. Its potential value depends on how much glazing it covers and whether conditions such as heater settings and ventilation stay comparable when you assess it.
Before buying material, identify the exact greenhouse model and which surfaces are glazed. Ask the manufacturer for glazing details and approved retrofit attachment methods. If you are comparing structures as well as insulation, use the T-Shaped Orangery Greenhouse listing to identify the model in your enquiry, then specify the version you are considering. For an existing unit, find the assembly documents or contact the supplier with the model and variant. Keep the response with your insulation plan so that guidance for a different frame or pane system is not mistaken for guidance for yours.
How coverage, air leaks and weather affect heat loss
The potential saving depends partly on how much glazing is covered and how continuous the layer is. Gaps around handles, vents and frame members, loose edges or untreated roof panes leave parts of the glass without the added barrier. Separate leakage at a door or open vent remains a source of heat loss, especially in windy conditions. Thermal-resistance information is useful only when it applies to the installed arrangement, including its air space and orientation. Ask whether the stated value was tested for the complete assembly or only for the bubble material. A result from another greenhouse cannot stand in for your own whole-structure performance.
Inventory the actual panes before estimating how much material you need. Note their dimensions and shapes, moving sections, hardware and areas that must remain uncovered. A greenhouse footprint or area label is not the same as glazed surface. When comparing versions of the Pyramid Greenhouse, use the panel arrangement for the exact version in your coverage plan. Work from drawings for your structure or careful measurements, and allow for the space required by the specified fixing method. Record wall and roof coverage separately, including any panes you intend to leave untreated. This makes material quotes easier to compare on equivalent coverage rather than roll length alone, and gives you a record of what was actually insulated when you assess the results.
Measure energy use under comparable conditions
A useful comparison begins with the heater’s energy use, not just an indoor temperature reading. Record consumption before fitting the layer, then repeat after installation over comparable periods. An energy meter or the heater’s own consumption log is more informative than temperature alone: the same temperature may be maintained with less energy, while a warmer reading may simply reflect milder weather or a changed setting. If monitoring would require adapting equipment or wiring, ask a qualified professional about a suitable method. A whole-house utility bill may conceal the greenhouse heater’s change among other household use.
Keep the comparison fair by recording the indoor set point, outdoor temperature, wind, heater settings, door openings, vent use and any change in plants or watering. Compare several similar cold periods rather than one mild stretch with a colder one; conditions can change sharply from night to night. Put temperature sensors where their maker recommends, out of direct sun and away from the heater outlet, and use the same locations before and after. Heater run time alone is a rough clue, not a measured energy saving, unless the equipment’s documented energy input and operating pattern make the estimate reliable. Use a simple log with a start time, end time and energy reading for each comparison period. Note when the insulation was fitted and whether its coverage changed. If you adjust the thermostat or leave a door open longer than usual, record that rather than treating the period as directly comparable. Keep unusual results in the log with an explanation; do not select only the nights that suggest a saving.
Use your own utility rate for cost comparisons
Convert measured energy use into a cost comparison using the rate that applies to your own electricity or fuel account. Canadian utility plans differ, so a national average or headline rate may not match your incremental charge. Check any time-of-use period, tier or variable delivery component shown on your bill, and compare the same billing basis in both periods. Separate fixed monthly charges from charges that vary with consumption: fixed fees do not fall simply because the heater uses less energy. If the greenhouse shares a meter with a home, do not attribute the entire bill difference to insulation unless the greenhouse load can be isolated.
Write down the energy units, comparison dates, rate used and variable charges included, rather than quoting a savings percentage without its assumptions. A warmer greenhouse is not automatically a cheaper one if the heater has run longer or its target has changed. When reviewing the Spacious Greenhouse listing, keep the listed area separate from your operating-cost comparison. Electricity and fuel need to be compared in their own metered units and at the applicable rates. Also record the cost of the film and compatible fixings separately from the heating bill. That lets you distinguish a reduction in running costs from recovery of the purchase cost. Do not extend a saving observed over a few nights to the entire winter without explaining the assumptions about weather and heater use. This gives you a transparent comparison without implying that bubble insulation will save the same amount in every greenhouse.

Account for lost daylight
An added film usually reflects, absorbs or scatters some incoming light. The effect varies with the material’s transparency, thickness and bubble pattern, as well as its cleanliness, installation and the angle of the sun. A layer that looks clear to the eye is not necessarily highly transparent to plant-usable light. Ask for documented transmission information for the specific film, including how it was tested and what kind of light the result describes. Do not compare figures from different test methods as if they measured exactly the same thing, and avoid relying on appearance alone.
Winter daylight can already be limited, so weigh the possible heat benefit against the light your plants need. Seedlings and actively growing plants may have different light requirements from dormant plants; there is no single acceptable reduction for every greenhouse. If you are comparing structures as well as materials, identify the exact Bloomcabin Prestige Greenhouse version when asking about glazing and the proposed film. Request light-transmission information for the proposed combination rather than relying on how clear it looks. A suitable horticultural light meter can help compare conditions at plant height before and after, under similar sky conditions. Mark the measurement positions so you can return to them, and record the time, sky conditions and whether the film was wet or dry. Include plant positions beneath treated and untreated areas where possible. If you move benches or plants during the trial, note the change so that a different position is not mistaken for an effect of the insulation.
Condensation behind the insulation
Moist greenhouse air can condense when it meets a sufficiently cold surface. Adding a layer changes the surfaces and air spaces in the glazing assembly; if humid air reaches the gap, moisture may form between the film and glass or on the visible side of the film. The location and amount depend on temperature, humidity, airflow and how the layer is fitted. A dry-looking greenhouse does not prove that no water is hidden behind the insulation. Check the glass and frame after cold periods, including the areas you can no longer see easily.
Before covering panes, consider where moisture could drain and how the surfaces can be inspected and dried. Look at lower edges and nearby channels for water or damp debris, and follow the structure maker’s drainage instructions. The Limited-Edition Aluminum Greenhouses with Storage listing identifies a model with storage; if that is the structure you are considering, include the storage section in questions about moisture and drainage rather than assuming conditions are identical throughout. Do not seal the layer in a way that prevents intended ventilation or makes water impossible to inspect.
Check material and fixing compatibility
Bubble-shaped packaging wrap may look similar to greenhouse insulation, but appearance does not establish that it is suitable for greenhouse use. Look for product information covering its intended location, light transmission, durability in that location and recommended fixing method. Ask whether the material is meant for the temperatures and exposure it will encounter. If a supplier quotes a thermal value, check what was tested and whether the test included the air space and installation method you would use. Without those details, do not treat a package claim as a measured result for your glass greenhouse.
Frame material is only one compatibility question. For the Classic Aluminum Greenhouse, ask about the precise frame profile, coating, glazing beads and permitted attachment points on your version. Confirm that the greenhouse maker and film supplier approve the same clips, rails or adhesive for that arrangement. Include removal in your questions: you need to know how the layer can be taken down for cleaning or inspection without an unauthorized alteration. Avoid drilling into glazing or altering a frame, and do not put adhesive on glass, seals or coated metal unless the relevant makers authorize it. If approved details are unavailable, consult a qualified greenhouse installer rather than improvising a fixing because it holds a sample in place.
Leave vents, doors and drainage accessible
Map the vents, doors, handles, tracks and moving panes before planning coverage. The insulation should not prevent a vent or door from opening and closing as intended, or cover controls you need to reach. Preserve the greenhouse’s designed ventilation instead of sealing openings to retain heat: ventilation also helps remove excess moisture and heat. Check the full travel of moving sections, not only their position when closed. A layout that works on a still day may interfere with access when a window is open or when you need to reach a handle in winter.
Keep drainage paths and access clear as well as the openings themselves. Film edges or fasteners should not obstruct channels, collect debris in hidden corners or make routine inspection difficult. If you are considering one of the lean-to greenhouse models, ask for the opening and attachment details for the exact version you are assessing. For an existing greenhouse, mark the areas that need to remain clear around each opening before choosing a fixing approach. Check whether you can still reach handles and inspect drainage channels once the layer is in place. Confirm that the proposed arrangement leaves those areas accessible without having to detach a large section of insulation for every routine check.

Test a representative area before covering every pane
A small trial can reveal practical problems before you commit to covering all the glazing. Choose a representative area and use only a fixing method confirmed as suitable for the structure and material. Record temperatures and condensation before and after, along with the amount of glazing treated. You can also record heater energy use, but do not treat a small-area trial as a measurement of the savings from full coverage. Its first purpose is to assess fit, access, moisture and light. If you compare an insulated pane with an untreated one at the same time, choose areas with similar exposure; a shaded pane and a sun-exposed pane are not a fair pair. Keep vents and doors operating as they normally would during the comparison. Photograph or sketch the trial layout for your own records, noting where the edges and fixings sit, so you can relate observations to the arrangement you actually tested.
Include both cold periods and daylight checks in your review. Inspect behind or beneath the trial layer after cold nights, and compare light at plant height under similar conditions. A single short test cannot account for changing weather, and an observation on one pane may not represent every orientation or opening in the greenhouse. Note any interference with handles, drainage or access as well as changes in heater use. If the arrangement traps moisture or obstructs a vent, pause before extending it and check the instructions from the relevant manufacturers.
When the trade-off is worthwhile
Bubble insulation is worth considering when you can identify the glazing to be covered, obtain relevant product information and use an attachment method confirmed for the exact greenhouse. It is less attractive when winter light is already a constraint, the proposed material has no suitable documentation, or the installation would interfere with ventilation, drainage or access. Deal with known damaged panes or obvious gaps through approved repairs before judging the film; otherwise, a layer may distract from a different source of heat loss. Base the choice on measured energy use as well as the needs of the plants.
If you are comparing a retrofit with a new structure, use the Limited Edition Aluminum Greenhouses page to identify the model you want to discuss. Ask about glazing and any documented ventilation or insulation options for the exact version. Compare the answers with the film’s stated light transmission, thermal test conditions and fixing instructions. Keep your final decision tied to the coverage you can achieve, the light available to your plants and the results of your trial. If you choose partial coverage, record what remains untreated rather than expecting the result claimed for a different installation. If you decide against bubble insulation, your measurements still provide a useful baseline for assessing another approach.
Frequently asked questions
Will bubble insulation keep a glass greenhouse above freezing?
It may slow heat loss through the panes it covers, but it cannot guarantee a minimum temperature. Uncovered surfaces, air leaks, outdoor conditions, ventilation and the heater all affect the result. Check actual temperatures in the plant area rather than relying on a film’s claimed performance.
How much can bubble insulation lower heating costs?
There is no dependable percentage for every greenhouse. Compare measured heater energy before and after installation under similar weather and operating conditions, then apply the usage rate on your own utility plan. A product rating or a warmer reading alone does not show a cost saving.
Will bubble insulation reduce the light reaching plants?
Usually, an added layer reflects, absorbs or scatters some incoming light. The amount depends on the material and installation. Look for light-transmission information for the specific product, and compare readings with a suitable horticultural meter if light levels are important to your plants.
Can condensation form between bubble insulation and glass?
Yes. If humid air reaches a surface cold enough, moisture can form behind the layer or on its visible side. The location and amount depend on the greenhouse and installation. Inspect the glass and frame after cold periods, and keep intended ventilation and drainage clear.
Is ordinary packaging bubble wrap suitable for a greenhouse?
Do not assume so. Packaging wrap may lack documented greenhouse use, light transmission, durability in its intended location or an approved fixing method. Choose material with product information that covers those points, and confirm that the attachment method suits your greenhouse.
Bubble insulation can help when its material and fixing method suit the exact greenhouse, and the reduction in heat loss is worth the light and moisture trade-offs. The clearest evidence comes from energy readings made under comparable conditions, alongside checks for daylight, condensation and usable ventilation. If those observations do not show a worthwhile improvement, adding more film is not automatically the answer; consider which unaddressed heat-loss path or material limitation matters most.
