
A Greenhouse Layout for Garden Workshops and Demonstrations
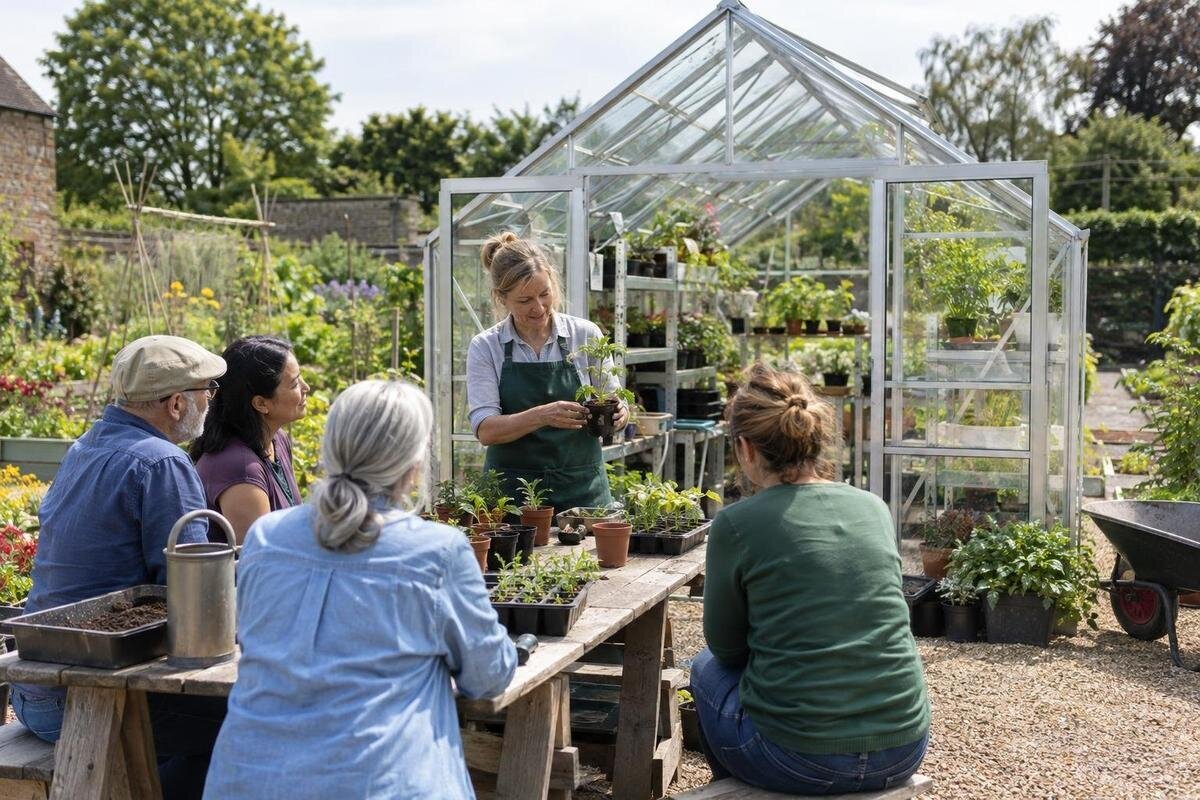
Greenhouse planning
A greenhouse used for workshops has to support both plant care and teaching: participants need to see the demonstration, reach materials and move without cutting through someone else’s work. Those needs are easy to underestimate if the plan begins with a product’s area or a hoped-for head count. Start with the activities and the busiest point in a session, then map people, work surfaces, plants, storage and services around them. A layout that works only while the room is empty will not work on workshop day. The goal is a teaching setup that stays clear while hands-on work happens and ordinary growing tasks remain possible.

01
Define the workshop before choosing a footprint
Write a brief for the busiest workshop you expect to run, rather than an average day: subject, maximum group size, instructor and helpers, likely tools, and whether participants watch together or work in smaller groups. Note tasks involving soil, water, delicate plants or shared equipment, and whether people need to sit, stand or change position. A short demonstration has different space demands from a session in which everyone plants a container or practises a technique. Include time for questions and clearing materials, plus anyone waiting to use a station. Floor area is not a ready-made capacity figure: participants, work surfaces, growing benches, supplies and clear circulation all compete for the same footprint.
Map the session in order—arrival, introduction, demonstration, practice, questions and clean-up—and mark where people go at each stage. Use the dimensions of a specific model and the real tables, stools, carts and supplies you plan to bring in; reserve space for bags and a waiting point that does not block the entrance. The listed Pyramid Greenhouse options range from 5.53 to 18.9 m² Pyramid Greenhouse. That range can frame an initial footprint comparison, but it does not establish a participant count or show how much room remains around equipment. Record whether the plan assumes seated or standing instruction and how many workstations run at once. Ask for the selected variant’s plan before treating its area as usable teaching space.
Make the demonstration visible from every work area
Choose a main focal point for each teaching segment: a potting tray, specimen plant, pruning cut or seedling sample. Place it so the instructor’s hands and the material are visible from the places where participants will actually stand or sit. Avoid a setup in which the instructor must turn their back to the group to work. For detailed tasks, a close-up sample at each participant station can be more useful than bringing everyone to one table. Keep the primary surface uncluttered; place reference samples and tools within reach without hiding the task. If the lesson shifts between demonstrations, decide how people will turn or relocate without losing the next view.
Test the view from the back, sides, entrance and any seated position. Shelving, mature plants, open containers and someone standing at another station can each block a low work surface, so mark their positions and expected heights on the plan. Light through greenhouse glazing changes during the day; check for glare on labels or a demonstration surface at the hours classes will run. If a camera or screen is planned, check its viewing angle as well. The Bloomcabin Prestige Greenhouse listings range from 3.77 to 28.08 m² Bloomcabin Prestige Greenhouse. On the selected variant’s drawing, position the benches, tables and presenter, then check whether everyone has a clear view of the demonstration.
02
Clear routes for arrivals, work and departure
Lay out arrival, observation, hands-on work and departure as separate movements, even if they share one room. Participants should not need to pass through an active tool area to reach a station or water point, and a queue should not occupy the only route between the door and the work surface. Keep the entrance free while people arrive, and decide where bags and handouts go before class. For a rotating lesson, mark the order of movement and where each group pauses. A loop works only if the actual openings and clear floor area support it; otherwise, staged transitions may be easier. Do not use a working aisle as temporary storage.
On a scaled drawing, include the selected model’s door position and opening clearance, then test the route with chairs pulled out, a loaded cart or the mobility equipment expected among participants. Check the path with the door open, not just on an empty-floor plan. If the workshop is intended for public access, confirm applicable access and occupancy requirements with the local authority and a qualified designer; no single aisle width can be inferred from greenhouse area. Classic Aluminum Greenhouses are listed in sizes from 3.77 to 28.08 m² Classic Aluminum Greenhouses. Compare the circulation routes on drawings of the variants you are considering, with the same furniture and equipment shown on each.
Separate demonstration space from hands-on stations
Give the instructor’s demonstration and participants’ practice distinct places on the plan. The demonstration surface should hold the plant or material, the tools needed for the task and a spot to set items aside without hiding the work. Participant benches should be close enough to follow the explanation but far enough from the presenter’s working area that observers do not crowd an active task. Check surface depth and working height against the activity: a tray of seedlings, a potting task and a cutting demonstration use space differently. Add chairs or stools to the drawing; a seat can extend into circulation when pulled back, and a standing group needs room to gather.
If people rotate through stations, define what happens at each one, where shared tools are collected and where completed work goes. Put materials at the relevant station before class rather than asking participants to pass containers across the room, and keep display samples separate from items meant for handling. Labels or a small instruction board can reduce repeated explanations, but locate them where they do not block the focal point or narrow a route. One central table can suit a one-task demonstration; parallel stations make more sense only when the group can move between them without crossing active work. Rehearse the handoff from watching to doing; that transition often determines how much floor space the layout actually needs.

03
Protect growing space and plan for storage
Teaching space should not take over growing space by accident. Mark plant benches, permanent crops or display areas, and the access needed for watering and routine care before placing chairs. Keep frequent pedestrian routes away from fragile pots where practical, and avoid storing workshop supplies on a propagation or growing surface between sessions. If a class uses plants from the greenhouse, set aside a defined selection area and a way to replenish it so handling does not disrupt the rest of the growing plan. Leave working room around planted areas, not just room for their footprint. Consider how plant growth or seasonal changes might alter sightlines over time.
List what must be stored between sessions—hand tools, pots, labels, printed material, protective coverings, folding chairs and cleaning supplies—and decide who needs access to each item. Frequently used teaching materials should be easy to retrieve without blocking an aisle or opening a storage door into it; sharp tools need a controlled storage routine. The Limited-Edition Aluminum Greenhouses with Storage page lists variants from 5.52 to 28.08 m² and identifies built-in storage Limited-Edition Aluminum Greenhouses with Storage. Confirm the selected configuration and internal arrangement before assuming it will hold workshop supplies or replace separate storage. Label a return place for each kit so set-up and reset do not spread supplies across plant benches.
Map water, power and cleanup needs
Make a service list before fixing the work zones. A class may use water for a potting task, plant care, handwashing or cleanup, but these activities differ in timing and runoff needs. Mark where water is required, who uses it and whether someone carrying a filled vessel would cross a route or pass active tools. Include a place for used materials and wet tools so they do not return to clean supplies. Think through the route from each work surface to a water point, and avoid making cleanup dependent on moving chairs or plant trays. If the plan relies on plumbing or drainage, identify that early and ask a qualified professional what the site can support.
Decide whether the lesson actually needs powered equipment. Task lighting, a projector, a camera or charging may be useful, but none should be assumed. Mark proposed equipment locations on the plan and keep cords out of walking routes and away from wet work; have a qualified electrician specify and install any electrical service. Check daylight at the teaching hour too, since a screen or fine demonstration may be hard to see in glare. Coordinate electrical and water planning before benches and finishes are fixed rather than trying to fit services around a completed layout. If no power is needed, keep the floor plan simpler rather than adding equipment without a teaching purpose.
04
Account for seasonal greenhouse conditions
An enclosed growing space does not hold one consistent workshop condition through the year. Sun, outside weather, ventilation and the greenhouse’s operating setup affect how the room feels; conditions suitable for a plant task may not suit an extended class. Plan the calendar and lesson format accordingly, and decide what will happen on a day when the space is unsuitable: move the activity, shorten it or use another venue. Do not promise year-round teaching comfort from a product name or footprint. Ask the greenhouse supplier and appropriate building professionals what operating options are available for the exact model and site, and how those options affect normal plant care.
Check shade, airflow and glare where the presenter and participants will be, and consider whether seated attendees remain comfortable through the session, not only at arrival. If the selected specification includes doors or ventilation elements, show their locations on the furniture plan and keep them unobstructed. Plan for the group to leave or relocate if conditions change. Limited Edition Aluminum Greenhouses are listed from 3.77 to 28.08 m² Limited Edition Aluminum Greenhouses. When comparing variants, confirm their operating features separately: the listed area does not establish temperature control or year-round suitability. Consider those features alongside the workshop calendar and the plant-care routine.
Choose a site as well as a floor area
The greenhouse location shapes the class before anyone steps inside. Walk the site at the times workshops are likely to run and note sun and shade, nearby trees, existing paths, water and power routes, drainage, and how participants and materials will arrive. Decide where a small group can gather before entry without standing across a garden path, and whether carts or supplies can reach the greenhouse. A comfortable indoor drawing can fail if the outdoor approach is muddy, blocked or unsuitable for the planned set-up. Coordinate the footprint, hard surfaces and service routes while there is still time to adjust the landscape plan.
Consider the intended use early if workshops will be open to community groups or the public. Local requirements may depend on the site and activity; confirm approvals, occupancy, access, fire-safety, sanitation and structural questions with the relevant local authority and qualified professionals before treating a greenhouse product as a teaching venue. The Spacious Greenhouse listing shows variants from 47 to 70 m² Spacious Greenhouse, but that range is not a class-size rating or evidence of public-use approval. Ask project-specific questions rather than extrapolating from another installation or product image. These checks should inform the site brief before the layout is finalized.

05
Building connections and daily workshop routines
If a greenhouse will sit against an existing building, plan the connection to that building as part of the project. A lean-to category alone does not establish that a particular wall, foundation, door, drainage pattern or service route is suitable. The Lean-To Greenhouses listing includes variants from 3.69 to 14.34 m² Lean-To Greenhouses. Have the supplier and a qualified installer review how the selected variant will meet the existing building, including the necessary clearances and access to doors or other features that must remain usable. Resolve those details before positioning the teaching table around an assumed entrance or service connection, and include the confirmed arrangement in the workshop plan.
Set the daily operating routine alongside the participant plan. Decide who prepares plants and tools, welcomes the group, supervises the demonstration, collects shared equipment and handles cleanup; allow time and a clear place for each task. After a class, chairs and loose supplies should be moved without covering plants or blocking the route needed for ordinary care. Where workshops share the greenhouse with regular gardening, post a simple reset checklist and assign responsibility for restocking and waste removal. This avoids a layout that looks orderly during a demonstration but leaves the growing area difficult to use afterward. Include a separate plan for delivery or set-up days if bulky materials have to come in.
Rehearse the layout before committing
Before ordering or building, mark the proposed footprint on site or make a room mock-up with tape, movable tables and the actual chairs and equipment. Invite someone to play the instructor while others take their planned positions. Run the session sequence: enter, watch, collect materials, work, ask questions and leave. Notice blocked views, collisions, waiting, awkward reaches and routes that depend on moving plants or equipment at the last minute. Repeat the test with the busiest expected group and, if useful, with the layout arranged for both seated and standing instruction. A rehearsal often reveals more than a second look at an empty plan.
Compare model drawings by usable arrangement: door and opening locations, the space occupied by benches or storage, and any services or accessories shown must match the version under consideration. The T-Shaped Orangery Greenhouse listing spans 16.52 to 30 m² T-Shaped Orangery Greenhouse. Use the chosen variant’s drawing for the rehearsal, including the furniture and equipment that will be present during a class. Keep a record of group size, room setup, activity and seasonal assumptions so a greenhouse enquiry can address the actual workshop rather than a vague request for more space. Treat this record as a working plan that can be updated after the first sessions.
Frequently asked questions
How many people can a greenhouse workshop accommodate?
There is no reliable number based on greenhouse area alone. Draw the exact variant with benches, tables, storage, door clearance and the planned activity, then count only places that preserve sightlines and clear movement. Confirm any occupancy or access requirements for your intended use with local professionals.
Is one demonstration table enough?
A single table can work for a short demonstration, but hands-on sessions may need separate practice surfaces or repeated stations. Decide whether the group watches together or works in rotations, then rehearse the transition so observers do not crowd the instructor.
Should I plan water and power before finalizing the layout?
Yes. Identify only the services the lesson needs, but locate them before fixing benches and circulation. Water, cleanup and powered equipment affect work zones and routes. Ask qualified plumbing and electrical professionals to confirm what can be installed at the site and how it should be planned.
Can plants remain in the greenhouse during workshops?
Yes, if the layout preserves plant care and participant movement. Keep routine access to growing areas, separate class materials from propagation space, and define which plants participants may handle or use. A reset routine helps return the greenhouse to growing use after each session.
Can any greenhouse host public workshops?
Not automatically. A product listing does not establish that a particular model or site meets requirements for a public workshop. Ask the local authority and qualified professionals about the proposed activity, access, occupancy, sanitation, fire-safety and structural considerations before committing to that use.
Build the layout from the actual lesson, not from a target number of chairs. When every participant can see the demonstration, reach a station and follow a clear route while growing areas remain accessible, the greenhouse can support both teaching and plant care. A scaled drawing, service plan and on-site rehearsal will expose compromises early; the selected model and site still need their own project review. That is a more dependable basis for a workshop space than area alone.
