
Greenhouse and Pergola in One Garden Plan
Garden planning guide
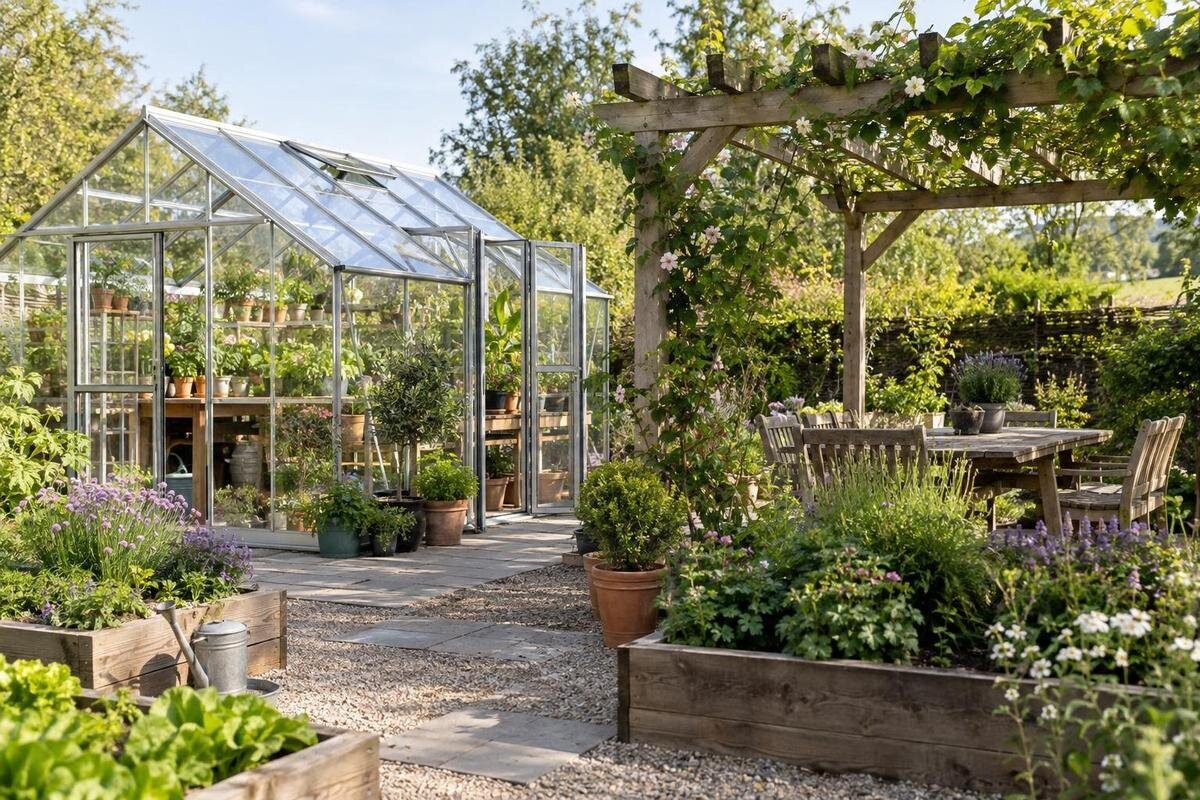
A greenhouse and a pergola can share one garden plan without competing for the same light, access or outdoor space. Give each a distinct purpose, then test their positions against seasonal shade, movement, runoff and any shared water or electrical needs. Treat them as separate structures that may be linked by a path or a coordinated service plan—not as one automatically connected building. That keeps the growing area practical while preserving a pergola’s value for outdoor use.

Give the greenhouse and pergola separate purposes
A greenhouse and a pergola do different jobs, so write down what each one needs to do before choosing positions. For the greenhouse, consider the plants you want to grow, the potting tasks you expect to do and the access you will need. The pergola might provide a place to sit, eat or gather outdoors; how much sun or rain shelter it offers depends on its design and any covering. Name the main use for each structure rather than trying to make both serve every purpose.
Then decide how closely the two uses should be linked. A short walk between them may be convenient, but they do not have to touch or share an entrance. The greenhouse may need a brighter location than the pergola, while the pergola’s best position may depend on its intended shade or views. Write a simple brief for each: purpose, users and important access needs. That makes it easier to spot a conflict early, such as a seating area taking space needed to open a greenhouse door.
Measure the site and mark fixed constraints
Start with a rough plan of the whole area, not just the patch where you expect the greenhouse to stand. Mark property boundaries, the house, doors and windows, fences, gates, existing patios, trees, paths and known utility locations. Note any changes in level or places where water collects after rain. These features can affect both structures’ positions and the route between them. A sketch does not need to settle every detail, but it should show the features that cannot easily be moved.
Compare possible structures with the measured space. Use stakes, removable markers or a scaled drawing to show each proposed outline, including room around it for access. The limited-edition greenhouse with built-in storage has a listed area range from 5.52 to 28.08 m². Use that range to narrow your shortlist, then confirm the exact configuration’s external measurements, door position and clearance requirements. On the drawing, distinguish the structure’s footprint from the surrounding space you need to use it. If storage is part of your greenhouse choice, establish where it opens and how you would reach it while carrying supplies. Compare two possible arrangements on the same scale: one with the structures closer together and another with more space between them. This makes the trade-offs visible before either position becomes fixed.
Map sunlight and pergola shade through the seasons
A site that looks bright during one visit may be shaded at other times of day or in another season. Observe the area in the morning, around midday and later in the afternoon, noting the house, fences and trees that cast shade. Repeat the check at different points in the growing season if you can. In Canada, the sun’s path and day length change substantially over the year, so a single sunny-day impression will not show the whole pattern.
Add the pergola’s expected shadow to that record. Its shade depends on its position, design and any covering, and may fall differently on the greenhouse as the sun moves. Compare those shaded areas with the light needs of the plants you plan to grow, as well as any work areas inside the greenhouse. Deciduous trees can also alter the pattern as their foliage changes. Temporary markers can help you compare positions on site, but an outline on the ground will not show the shadow of a full-height structure. Keep the footprint comparison separate from the shade assessment, using the pergola’s proposed dimensions and covering to assess where its shadow would fall.
Plan a clear route between the house and both structures
Draw the route people will actually take from the house or garden gate to the greenhouse and pergola. A direct path makes it easier to carry trays or tools to the greenhouse and bring food or drinks to the seating area. Think about who uses the garden and what they carry; a path that looks open on paper may feel awkward when someone is holding a watering can or moving a cart. If step-free access is important, include that need in the plan and seek appropriate design advice.
Show doors and gates on the same drawing so a route does not end in an awkward turn or pass straight through the seating area. Consider how the path will work when the ground is wet and whether leaves or winter conditions affect access. For a Bloomcabin Prestige Greenhouse, place the selected configuration’s actual outline and entrance on your route sketch. Trace a few ordinary trips: carrying a tray from the house, taking tools to the greenhouse and bringing a meal to the pergola. Check where these routes meet and whether someone seated at the table would have to move each time another person passes. A shared path can connect both spaces without running through either activity area. Where possible, keep the main approach easy to follow, with room to pause at an entrance rather than stopping in the through route.

Allow room for doors, greenhouse work and pergola seating
A structure’s outline is only part of the space it uses. Mark the greenhouse door’s full travel on the plan and check that it will not hit a fence, furniture or another structure. Allow room to bring in the tools, trays and supplies you expect to use, and consider whether you will be able to reach the areas that need regular attention. Use the selected product’s drawings or confirm the details with the supplier rather than assuming every model has the same entrance position.
For the pergola, include the furniture as well as the structure itself. Draw the table and chairs at their intended sizes, leaving space for people to pull out a chair and move around it. The Spacious Greenhouse listing gives an area range from 47 to 70 m². When comparing a greenhouse of this scale with your available garden space, show the complete proposed footprint rather than reserving an approximate corner for it. Mark the entrance and the outdoor area where you would set down supplies before carrying them inside. Then add the pergola furniture and check both spaces together, with chairs pulled out and the greenhouse door in use. This reveals whether the gap between the structures is genuinely available for movement or has already been allocated to seating, door clearance or greenhouse work.
Account for runoff, drainage and rainwater plans
A roof or covering can change where rain lands, while paving and changes in ground level can affect where it flows next. On your site sketch, note likely runoff paths from the greenhouse and any roofed pergola, as well as existing low spots. Avoid placing a main walking route where it is likely to become wet or difficult to use. If you already have drainage concerns, use the plan to identify them and ask a qualified drainage or landscape professional to assess the site rather than trying to resolve them with a rough sketch.
If you want to collect rainwater, plan for each structure separately before deciding where a container or other equipment might go. For a model in the Aluminum Greenhouses range, confirm what the selected configuration provides, where its water sheds and how overflow would be managed; do not assume fittings or collection equipment are included. Add the proposed container to the drawing at its actual size, along with the space needed to reach it and use a hose or watering can. Consider the trip from that point to the greenhouse and whether it crosses the pergola’s seating area. Keep collection equipment out of door clearances and the main connecting path. Record any unresolved drainage questions beside the relevant location on the plan, so they can be assessed together rather than overlooked when the furniture and planting are added.
Decide which services the two spaces actually need
List the water and power needs for each structure separately before deciding whether any route can be shared. The greenhouse might need water for irrigation and could have equipment that requires electricity; the pergola may need neither, or it may have planned lighting or other equipment. Only include services you genuinely expect to use. Mark possible connection points on the plan, along with the paths people will take, so a hose or service route does not become an obstacle.
Do not assume an existing tap or outdoor outlet has the capacity or location to serve new equipment. If you are considering a lean-to greenhouse, check its selected dimensions and installation requirements as part of the plan for the space beside the house. Identify where you expect to draw water, where a hose would run during use and where it would be stored afterwards. For the pergola, distinguish between a service you need regularly and one intended only for occasional use. A plan for permanent lighting is different from simply wanting access to water nearby. Give each proposed connection a clear purpose rather than adding services because the structures are close together. Have proposed electrical work assessed by a qualified electrician, and ask the appropriate qualified contractor about water connections before installation.
Check how the structures look together from the house
Once the practical layout works, consider the views from the house, patio and main garden path. A greenhouse and pergola can look related without matching exactly: align their positions with existing paths or planting, and consider whether one should sit behind the other in a particular view. Keep that visual goal secondary to light, access and space. A pleasing view is not useful if it depends on blocking a greenhouse entrance or pushing seating into the everyday route.
Product photographs can help you understand a model’s general appearance, but they do not provide a reliable scale for fitting structures into your garden. When reviewing Limited Edition Aluminum Greenhouses, use the images to consider appearance and the measured product information to establish fit. Do the same for the pergola, including its proposed covering. On your plan, mark the places from which you most often see the garden, such as a kitchen window or patio seat. Compare what each arrangement would place in the foreground and what would remain visible beyond it. You might prefer a clear view of the greenhouse entrance or a pergola positioned away from the main view of the planting. Treat these as preferences to balance with the practical layout, not reasons to reduce access or put the growing space in unsuitable shade.

Keep space for maintenance and seasonal access
A layout should still work after installation. Leave access for routine tasks around both structures, including cleaning, tending plants, moving furniture and reaching areas that may need inspection or service. Check whether paths remain usable when garden equipment is stored nearby, and avoid treating a narrow gap as maintenance access unless the relevant supplier confirms it is adequate. If winter access or moving furniture seasonally matters to you, include those tasks in the same plan.
Conditions such as snow and wind exposure vary by site. Confirm the selected products’ requirements with the supplier or a qualified installer rather than inferring suitability from appearance. The T-Shaped Orangery Greenhouse has listed area options from 16.52 to 30 m²; use the chosen configuration’s full outline to assess the spaces around its projections. On the maintenance plan, identify which gaps are intended for access and which are simply spaces between structures. Trace how you would carry cleaning supplies around the greenhouse or move pergola furniture to its seasonal storage location. Avoid allocating the same gap to permanent storage and routine access. If a task depends on moving several items first, decide whether that arrangement is manageable or whether the structures should be farther apart. Keep these working spaces visible on the drawing when adding planting.
Confirm local requirements before settling the layout
Before ordering, check whether local planning rules, permits or property conditions affect either structure or the proposed service work. Requirements can vary with the location and project, so confirm them with the municipality or the relevant qualified professional rather than assuming a familiar garden arrangement is automatically permitted. This check is especially useful before you commit to fixed paths, drainage work or service locations that would be costly to revise.
Make one final drawing that shows the greenhouse and pergola at their chosen dimensions, the path between them, door movement, likely shade, drainage concerns and planned service points. The Pyramid Greenhouse listing gives an area range from 5.53 to 18.9 m²; use the precise configuration, rather than area alone, when comparing it with the space beside the pergola. Bring the separate planning notes together on this drawing so you can see whether they conflict. A location reserved for seating should not also be counted as door clearance, maintenance access or a place for water collection equipment. Mark anything still undecided and resolve it before ordering. Keep a copy of the agreed layout for discussions about installation and landscaping, especially if paths or services will be completed separately. If a check reveals a conflict, move a structure on paper first.
Frequently asked questions
Do the greenhouse and pergola need to touch?
No. A clear path can connect them while leaving each structure room for its own access, light and maintenance. If you are considering a physical connection, confirm the installation requirements for both products and have the proposal reviewed by a qualified professional. Do not assume a pergola can support or serve as part of a greenhouse.
How can I tell whether pergola shade will affect the greenhouse?
Check the likely shadow at different times of day and in more than one season. Include shade from trees and the house, not just the pergola. Compare the pattern with the plants you intend to grow, and revise the position if the growing space would receive less light than those plants need.
How much space should I leave between the structures?
There is no universal gap. Allow for the chosen products’ actual dimensions, door movement, the route people will use, maintenance access and the way water drains from the site. Check product-specific clearance guidance, then confirm the plan with a qualified installer if the available space is tight.
Can the greenhouse and pergola share water or electrical services?
They can be considered together in the plan, but do not assume an existing tap or outlet can serve every intended use. List the equipment and connection points for each structure, then have a qualified contractor assess the proposed routes and electrical work before installation.
What should I compare when choosing a greenhouse for this plan?
Use a listed area as an early screening figure, not as proof that a particular model will fit. Check the selected configuration’s external dimensions, entrance position, clearances and installation requirements against your scaled plan. Also confirm how its position affects light, movement and access to the pergola.
A successful combined plan does not require the greenhouse and pergola to touch or mirror one another. It gives growing, shade, seating, movement and services enough room to work at the same time. Agree on each structure’s purpose, test the proposed positions against seasonal shadows and actual clearances, then confirm drainage, installation requirements and local approvals for the exact choices. If those checks reveal a conflict, revise the drawing before ordering so neither structure compromises the other’s use.
