
A Greenhouse at the Heart of a Kitchen Garden
Kitchen garden planning
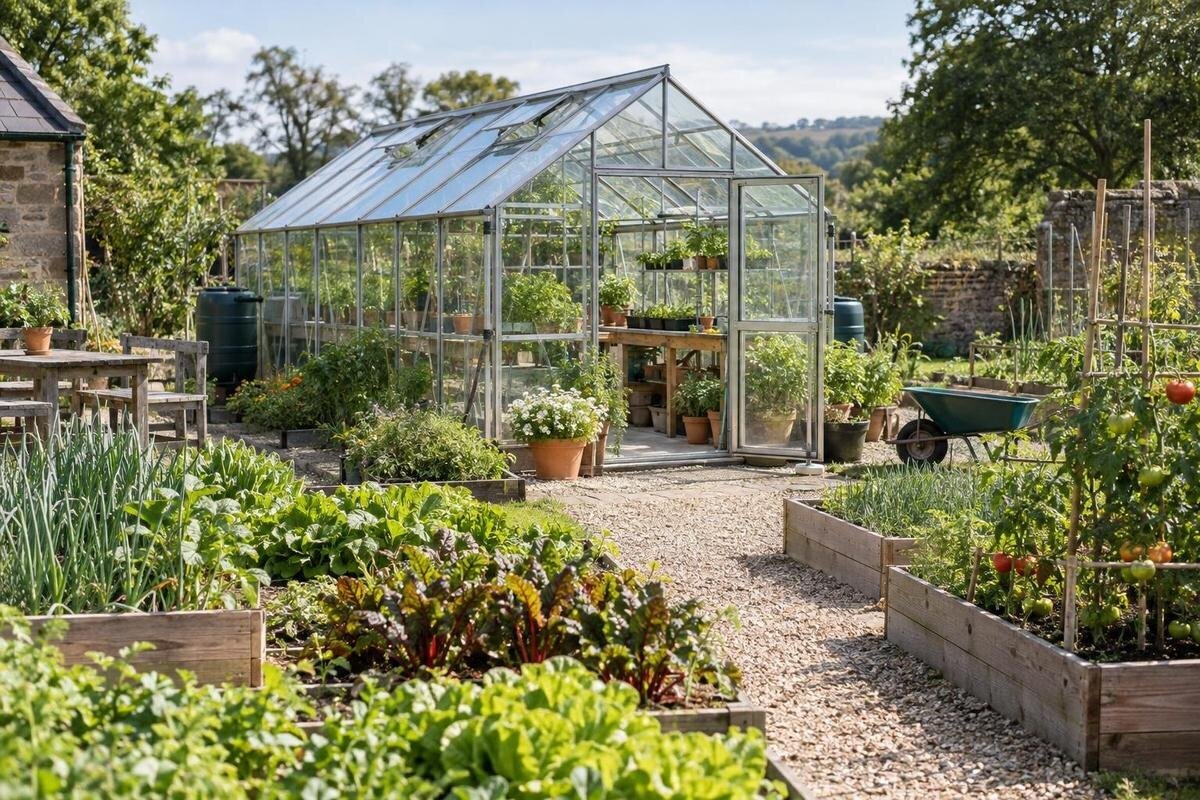
A greenhouse can serve as the working hub of a kitchen garden, but its position affects much more than the space under cover. The outdoor beds, water point, compost area and paths all shape how easily you can sow, tend and harvest. Plan those connections together before settling on a footprint.

Define the greenhouse’s role in the kitchen garden
Treat the greenhouse as the working centre of the kitchen garden, not a landmark that must sit in the geometric middle of the property. Its value comes from the jobs it supports: starting plants, protecting crops when the growing plan calls for it, and shortening the route between covered growing and outdoor beds. List the tasks you expect to do in a typical week, then note which ones happen outside. If seedlings move from the greenhouse into beds, map that transfer; if harvest goes directly to the house, mark that trip too. A useful hub reduces backtracking while leaving the outdoor growing area central to the plan.
Block out the likely location before drawing bed edges. Allow for the chosen structure’s actual outside dimensions, entrance location and working access, then sketch routes to the kitchen, beds, water and compost. The Oasis Pyramid greenhouse is listed in sizes from 5.53 m² to 18.9 m²; use that range for an initial comparison, then obtain the dimensions of the option you are considering. On the sketch, distinguish the space occupied by the structure from the space you need to work around it. Mark where you would put down a tray or harvest basket while opening the door, without blocking the path. These small pauses are part of the working layout, not spare space to fill with another bed. Keep the sketch adjustable until the greenhouse details are settled, because a footprint change can shift a bed edge, water route or turning area.
Read the site before fixing the greenhouse location
Make a simple site plan showing the house, property edges, existing beds, paths, trees and any known services. Then observe candidate locations at different times and, if possible, at different points in the growing season. Note where shade falls, which areas are exposed to wind, and where water tends to collect after rain or snowmelt. A sunny spot on one visit may be shaded when nearby trees are in leaf. These observations help you compare locations without assuming that one orientation or one part of the yard is right for every garden.
Once a few locations remain, measure the usable area and mark routes that must stay clear. The Limited Edition greenhouse with built-in storage is listed in sizes from 5.52 m² to 28.08 m². Compare the specific option with each possible location rather than using a different greenhouse size for every sketch. That makes it easier to see what the location itself changes: the distance to water, the outdoor bed area left available, or the route from the house. Note any existing feature that would need to move and whether moving it is part of your project. Keep observations and unresolved questions separate so that an unmeasured space does not become an assumed fit. If work may affect a known service, check its location with the relevant provider or a qualified professional before finalizing the layout.
Arrange outdoor beds around convenient access
Draw the paths between the greenhouse and the beds before deciding where every crop will go. Consider which beds you visit often, which are mainly for larger or less frequent harvests, and where you will carry seed trays, tools and containers. A bed that can be reached from both sides can be arranged differently from one beside a fence or wall. Avoid relying on a standard path or bed width: leave enough room for the way you work, including reaching plants and passing with the equipment you use.
Group beds by practical tasks as well as by crop. Crops you expect to pick frequently can be placed on a route that is easy to reach from the kitchen, while the rest of the plan can follow sunlight, rotation and access needs. Label each proposed bed with its intended use and show which side you will work from. If the layout depends on reaching a bed through another growing area, revise the access before assigning crops. The Bloomcabin Prestige Greenhouse is listed from 3.77 m² to 28.08 m². Place the chosen option on the same drawing as the beds so that its access space is included in the comparison. Look for bed corners that intrude into routes and places where someone tending plants would block the main path. Leave access for maintaining the greenhouse as well as cultivating the beds.
Plan a convenient water point
Mark where water is available and trace how it could reach the greenhouse and outdoor beds. A point that is convenient for one area may leave another dependent on a long hose route, so check the whole garden rather than just the greenhouse entrance. If a hose will be used, note where it crosses paths and whether it can be moved aside between jobs. Avoid placing a permanent point where routine watering blocks the main route between the house, greenhouse and beds.
Confirm the chosen greenhouse dimensions before deciding where a fixed water connection should sit. The Classic aluminum greenhouse is listed from 3.77 m² to 28.08 m², but a site plan needs the dimensions of the specific option. Trace a watering session on the drawing: where you collect water or connect a hose, which areas you visit, and where the equipment goes when you finish. Include a place for the hose or watering cans that does not occupy the greenhouse doorway or a bed access path. If you expect to use more than one water point, give each a clear purpose rather than adding them wherever space remains. This keeps the water plan tied to actual tasks. If new plumbing or drainage work is being considered, have a qualified professional assess the proposed locations rather than planning a connection in isolation.

Compost placement and handling routes
Plan where compost materials will arrive and how finished compost will reach the beds. Kitchen scraps or other accepted materials need a practical way to reach the compost system, and finished compost needs a manageable route back to the growing area. Choose the location with the materials and system you actually use in mind; not every compost setup has the same access or working-space needs. Decide what materials belong in it according to your composting method rather than assuming every garden residue should go into the same place.
Keep the compost working area out of the greenhouse entrance and, where the site allows, away from the main harvest path. Leave enough room to access the system, open it or turn material as your method requires, and move finished compost without squeezing past beds. In a shared garden, agree who brings material in and who handles finished compost before assigning a permanent location. If the site has municipal collection or other local requirements, check them while the plan can still be adjusted.
Lay out paths for people, tools and harvests
Give the garden a clear route between the house, greenhouse, beds, water and compost. A direct main path can simplify carrying harvests and supplies, while smaller paths can serve individual beds. Plan for turns as well as straight sections: a cart or wheelbarrow needs somewhere to pass, pause and change direction. Test the intended route on the ground with the equipment you use, and check that it does not depend on stepping through a bed or moving containers out of the way every time.
Choose path surfaces and slopes with the site’s conditions and intended users in mind. Where mud, snow, ice or freeze-thaw conditions are part of local life, think about drainage, clearing and how the path will be maintained. Mark where a path narrows beside a bed, fence or greenhouse, and test those points as carefully as the open sections. Include any place where you need to set down tools without obstructing someone else’s route. If mobility-device access is needed, plan around the people who will use it and confirm applicable requirements locally. The aluminum lean-to greenhouse is listed from 3.69 m² to 14.34 m². Neither its form name nor its area range establishes whether a particular option’s entrance and adjoining routes suit your site. Show the proposed approach on the plan and check it alongside the selected structure, rather than treating the path as a later addition.
Link greenhouse work to the bed plan
Plan the movement of plants as well as people. If you will start plants under cover and later move them outdoors, identify where they will go and how you will carry trays between the greenhouse and beds. Leave the entrance and the route beyond it clear enough for those tasks. Keep a crop list or simple planting record that connects each batch of starts to its destination, so the greenhouse supports the outdoor plan rather than becoming a separate growing area with no clear next step.
Use the expected workload to connect the greenhouse schedule with the bed plan. For each batch of plants, record the intended outdoor bed and the point in your growing plan when that space should be available. If two batches are assigned to the same space, resolve the overlap on paper rather than leaving their destination undecided. Also identify where trays will wait during a transfer without taking over the entrance or main path. The Limited Edition aluminum greenhouse is listed from 3.77 m² to 28.08 m². Its listed area alone does not show how many plants you will grow or what work they will need. Compare the selected option with the crops you intend to start and the outdoor destinations you have assigned. This keeps the greenhouse choice connected to the wider garden instead of using its size as a target for producing more plants.
Measure the full footprint before drawing beds
Measure the proposed greenhouse site rather than relying only on a stated area. A plan needs the actual outside dimensions and the location of the entrance, plus the space required to approach and maintain the structure. Add the outdoor beds, paths, water point, compost area and turning places before deciding that everything fits. Where a shape or boundary makes the site hard to visualize, mark a provisional outline on the ground and walk the routes. This can expose awkward turns or a blocked bed before the layout becomes difficult to change.
Confirm the exact model and size before setting permanent bed edges. The T-shaped orangery greenhouse is listed from 16.52 m² to 30 m². That range and the product name do not replace a dimensioned plan for the particular option. Check the selected dimensions against entrances, nearby paths and the outdoor growing area you want to retain. When marking the outline on the ground, include the full shape rather than representing the listed area as a simple rectangle. Mark the entrance separately so that the approach is clear during your walk-through. Note which measurements are confirmed and which spaces still need checking; this makes later revisions easier to follow. If more than one person will use the garden, walk the proposed layout together and include the tasks, tools and access needs each person brings. Resolve conflicting uses of the same space before making the bed boundaries permanent.

Keep enough space for outdoor production
A greenhouse should support the kitchen garden without taking over the space that makes it productive. Compare the area under cover with the beds, compost route, paths and room to work outside. More covered area is not automatically more useful: it can also reduce outdoor growing space and add tasks to the garden’s routine. Think about what you expect to grow, how often you can tend it and which jobs genuinely need a greenhouse before setting aside a large part of the site.
This balance matters especially on community plots or other shared projects, where the people who plan the garden may not be the only ones maintaining it. The Bloomcabin Orangerie is listed from 47 m² to 70 m², making it a substantial element to account for in the site plan. Treat that range as a scale reference, not a recommendation. Show the remaining outdoor beds, working routes and compost area on the same drawing, then compare the complete layout with the garden’s goals. If the proposed structure leaves less bed space than intended, revisit the allocation before accepting that trade-off. Discuss which crops belong under cover and which outdoor areas the group wants to retain. Consider who will manage each part through the year, including routine tasks rather than only the initial planting. A shared plan needs to reflect both the growing space and the work people have agreed to take on.
Confirm approvals, services and ongoing responsibilities
Before committing to a location, ask the local municipality or relevant authority whether approvals or other site requirements apply. Check property boundaries and any known restrictions, and consider whether the proposed layout affects drainage or existing services. Requirements depend on the actual site and project, so do not assume that a greenhouse of a particular size is automatically permitted. If the plan involves foundations, grading, plumbing or electrical work, ask the appropriate qualified professional to review the details before those parts are fixed.
A usable plan should also assign everyday jobs. Decide who checks the greenhouse and beds, manages water, maintains the paths and moves compost, especially if the garden is shared or will be unattended at times. Mark these tasks alongside the physical layout so that a route or service point has a clear purpose and someone responsible for it. Keep a copy of the plan with the selected greenhouse dimensions, bed locations and any unresolved site questions. Revisit it when the people using the garden or its growing goals change.
Frequently asked questions
Does the greenhouse need to sit in the exact centre of the garden?
No. Treat “centre” as the place that connects growing tasks, not a point halfway across the property. A greenhouse near the beds, water and compost routes may be more useful than one in the geometric middle. The best position depends on the site, the routes you use and the space needed for outdoor growing.
How close should outdoor beds be to the greenhouse?
There is no single distance that works for every plot. Keep beds convenient to reach with the tools and containers you actually use, while leaving room to pass, turn and maintain the greenhouse. Try walking the route with a garden cart or wheelbarrow before settling bed edges.
Where should a water point go in a kitchen garden?
Put it where it can serve the greenhouse and outdoor beds without turning a main path into a hose route. If one point cannot serve every area conveniently, consider the route and practical options before installing anything. Ask a qualified plumbing professional to assess new connections and related drainage.
Should the compost area be beside the greenhouse?
It can be nearby if that makes moving materials easier, but it does not need to be right beside the door. Choose a location with a workable route from the kitchen or collection point and onward to the beds. Leave space for the compost system you use and avoid making its working area a main passage.
How do I decide what size greenhouse to choose?
List the jobs and crops you want to support, then compare that plan with the outdoor bed area, available time and total site space. A product’s listed area is not a crop count or a complete site plan. Confirm the dimensions and access needs of the exact option before fixing paths and beds.
A greenhouse-centred kitchen garden is planned from the work outward: connect the structure to the beds, water, compost and kitchen, then check that paths and outdoor growing space still make sense as a whole. When the site plan reflects the actual footprint, daily routines and people who will maintain the garden, the greenhouse can support the wider growing area instead of competing with it.
