
How to Trace Condensation Drips onto Greenhouse Plants
Greenhouse troubleshooting
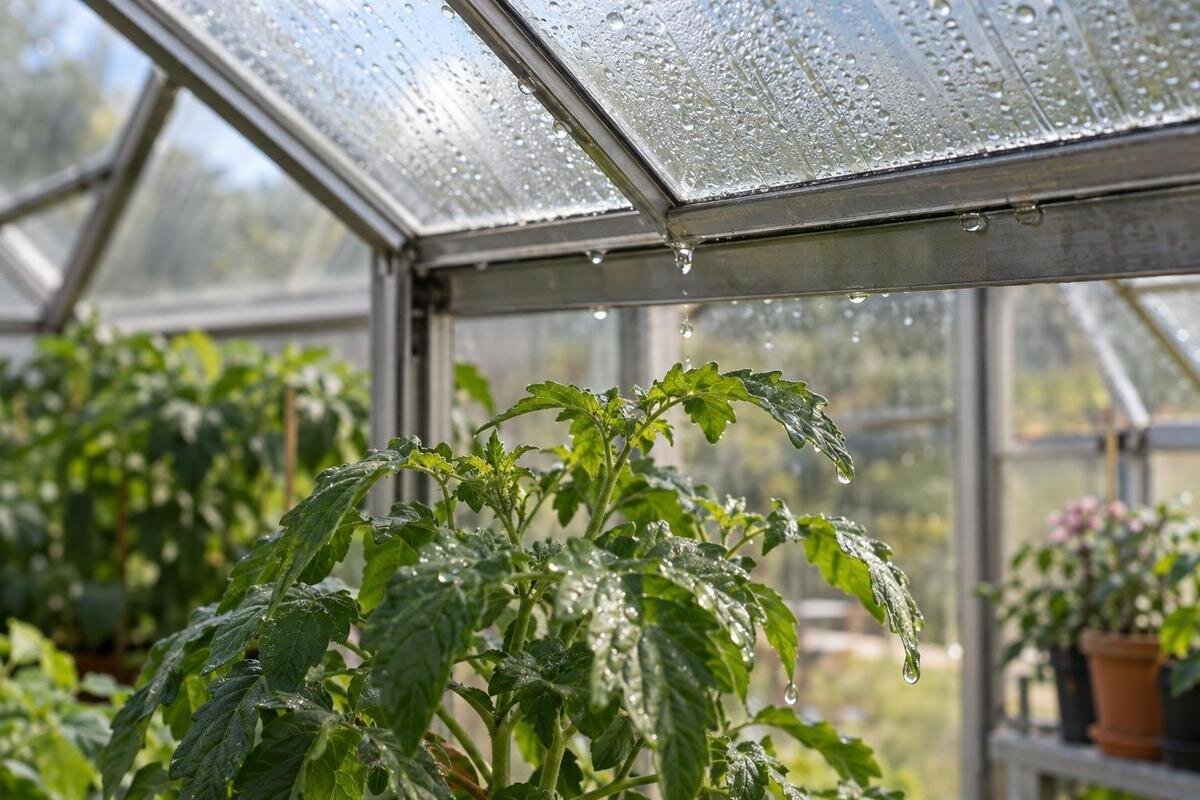
Morning droplets on leaves can come from several sources: condensation collected on an overhead surface, rain entering at a joint, irrigation spray, or moisture forming directly on foliage. Wet leaves alone do not identify the source. The useful clues are where water first appears, which surface lies above it, and what the greenhouse was doing overnight. Before wiping the trail or adjusting vents, make a location map, take repeatable photographs, and log temperature and humidity near the affected plants. Together, those records can show whether the same cold surface and overnight pattern recur.

Map wet spots and the surfaces above them
Begin at plant level. Draw a simple plan of the benches, rows, pots or beds and mark each wet group of leaves, each place a drop landed, and any damp floor patch. Use separate marks for water on leaf edges and water that appears to have fallen from above. Add nearby plants that stayed dry; they are useful comparisons, not irrelevant exceptions. A narrow strip below one roof section, one bench end, or scattered patches across the growing area are different patterns. Avoid a general note such as plants were wet, which hides those differences. The sketch need not be to scale, but it should preserve the relative positions of plants and roof sections.
Choose fixed labels such as door end, north side, bench A and roof panel 2, and keep the sketch oriented the same way each time. Note nearby vents, doors and shade screens if they are present, since their settings may change between observations. Record the greenhouse make and model when known. If you are comparing lean-to greenhouse options, use the same sketch to identify the roof sections above your planned growing area and the information you need about them. Stable labels make comparisons less dependent on memory, especially when you are checking several areas or discussing a layout with a supplier.
Photograph wet leaves and overhead surfaces
Take a wide photo from the same path or doorway before moving pots, wiping leaves or changing a vent. Include a fixed landmark, such as a post, door frame or labelled bench, so you can match the view to your sketch. Then take close-ups of the wet leaves and of any beads, tracks or drops on the inside roof or frame above them. One overview and a few focused images are usually more useful than many nearly identical close-ups. If no wet surface is visible, photograph the area anyway; a dry comparison can help show whether the source is elsewhere.
Record when each photo was taken and when you first noticed the wetness; those times are not necessarily the same as when dripping began. Note whether the surface was still wet after the greenhouse warmed or a vent opened, without deliberately changing the scene first. Keep the original images and use file labels that match the map, such as date, bay and view. If you add arrows to point out a suspected trail, save an unmarked copy too. That preserves the original evidence if another person reviews it later.
Trace drips back to an overhead surface
Start above the wettest plant and inspect from a safe position on the floor. Look for beads on the underside of the glazing, a narrow run along an edge, or water at a frame intersection, fastener, vent frame or gutter. Follow visible moisture towards its highest point, not just straight up from the leaf. Water can move along a surface before it gathers and falls, so a drop may land some distance from where the water formed. Mark the suspected route on your sketch and photograph the visible start, path and landing area separately. Do not label a joint faulty unless there is evidence at that joint.
Before searching for maintenance instructions or parts, record the maker, model and any identifying label on the structure. When browsing the limited-edition aluminum greenhouse range, distinguish product photographs from diagrams for the exact unit under discussion. A similar-looking structure does not establish that a drip came from the same type of joint. Use your own photographs to show the suspected route, and match any maintenance instructions to your greenhouse. If the route remains uncertain, mark it as a possibility and take another photo at the next wet period rather than filling in the gap from memory.
Rule out rain, irrigation and moisture on leaves
Condensation is more plausible when moisture appears on the inside of a cool surface during a damp overnight period without rain. A rain leak is more plausible when a track begins at a seam or opening after rainfall, especially if it recurs with similar weather. Irrigation can leave a pattern tied to a watering cycle, spray line or particular emitter. These clues can overlap: rain may arrive overnight, and watering may happen on the same evening. Write down when rain and irrigation occurred, along with the first time water was seen, instead of treating one timing clue as proof.
Check whether droplets first form on a leaf or arrive from above. Moisture can settle directly on foliage, and droplets at leaf tips or margins may have plant-related causes such as guttation; neither necessarily leaves a roof trail. Observe a leaf and the surface above it together before wiping either. Avoid spraying a hose to test a suspected leak or removing a seal as a first check, since both add water or change the evidence. If the pattern appears only after rain, investigate possible water ingress rather than assuming it is condensation.

Check glazing, frames and other cold surfaces
An air reading does not tell you the temperature of every surface. Condensation can form when a local surface cools below the dew point of nearby air, so inspect the inside face of glazing, frame transitions, panel edges, fasteners and vent frames above recurring wet spots. Look for beads, fine run marks or repeatable wet areas, and compare them with a nearby section that stays dry. Do not assume a surface is the source just because it looks different or is made of a particular material; the visible trail and matching timing matter. The aim is to locate the wet surface, not explain the greenhouse's entire climate.
Make comparisons at the same time of night or morning and record the exact panel or frame location. A surface-temperature reading can be misleading if the instrument is unsuitable or used differently, so follow its instructions rather than judging temperature by touch. When comparing a T-shaped orangery greenhouse with your existing layout, identify which roof panels would sit above the plants and ask about vent and accessory placement. Use model-specific information for that discussion; product photographs and catalogue names cannot tell you which surfaces will collect water.
Log temperature and humidity near affected plants
Place a temperature and humidity logger near the height of the affected leaves, then compare it with a nearby area where leaves remain dry. If possible, take readings at both locations at the same time; with one device, compare similar locations on similar nights rather than treating readings taken hours apart as simultaneous. Keep the sensor out of direct sun and away from wet leaves, glazing, heaters and a strong vent stream, and follow the device manual. Write down its exact position. A sensor reports conditions at that point, not the temperature of a roof panel or the cause of a drip.
Use the same units, clock and logging interval for each comparison, and note gaps or a device reset. Keep the time series where available instead of relying only on a daily average or a single maximum; a short change can disappear in a summary. Match each reading to the photo time and location. For a larger footprint, one point may not represent every corner: the spacious greenhouse range lists sizes from 47 to 70 m². If you are planning measurements across a footprint in that range, identify the plant and roof zones you want to compare before choosing monitoring locations.
Compare the overnight timeline with the drip pattern
Build a timeline from the last known dry check to the first wet observation. Add the evening temperature and humidity record, rain, watering, vent position, shade position, and any opening or closing of doors. If the logger records minimum and maximum values only, note when you reset and read it; do not assume its summary tells you exactly when conditions changed. Distinguish an observation from an estimate: a plant found wet at 7 a.m. may have been wet for hours. Repeating the same notes over comparable nights helps reveal whether a pattern is consistent.
A repeated drip under the same inside panel after a dry night, alongside visible beads and a matching overnight record, supports condensation; a track that follows rain points more towards a leak. Water appearing after irrigation suggests another source. None of these patterns is conclusive alone, so check for surface evidence too. If your layout includes a storage area, add its door or opening position to the timeline rather than assuming the growing space is uniform. When considering greenhouses with built-in storage, ask how the storage and growing areas connect. The actual floor plan determines whether they share air and which opening positions belong in your notes.
Test ventilation changes one at a time
Record ventilation as it actually stood overnight: which vents were open or closed, whether a manual or automatic mechanism changed position, and when that happened. Compare the observed position with the instructions for the exact equipment; a control's intended setting is not proof of its actual position. Ventilation can change moisture removal and local temperatures, so a change may shift the pattern without proving the original source. Keep this check focused on condensation evidence rather than diagnosing every ventilation fault. Do not force a mechanism or bypass a control to create a test.
If condensation remains the likely source, change only one suitable setting at a time, leaving irrigation and shade as stable as practical, and compare nights with similar conditions. Follow the equipment manual and avoid a change that could expose plants to unsuitable conditions. For a Prestige greenhouse under consideration, ask which ventilation accessories are compatible with the exact model and hardware before choosing an opener. For an existing structure, base the test on the equipment actually installed and record its observed position. The goal is a controlled comparison, not a blanket rule to leave every vent open.

Record shade and sunlight as separate variables
Record shade and sunlight separately from ventilation. Note whether a screen or blind was used, when it was moved, and which roof or wall areas received sun during the day. Shading can change how surfaces warm before evening, so it may affect the overnight pattern without being a direct fix for drips. Keep the screen setting consistent while you test a vent change, or keep the vent setting consistent while you compare shade; changing both at once makes the result hard to interpret. Compare photos taken at similar times of day, since a different sun angle can alter what is visible.
Before buying shade, verify its coverage and attachment method against the exact greenhouse model and the supplier's compatibility information. If you are considering a pyramid greenhouse, confirm that the proposed screen fits the model rather than assuming compatibility from its appearance. Record the shaded surfaces on your map and see whether drips continue in the same place. Plants may be wet because drops arrive from a different roof section, not because the screen is ineffective. Keep photographs of that route alongside the shade notes so the comparison remains tied to the affected plants. Treat shade as one logged condition, not a substitute for tracing water to its source.
Decide whether the evidence points to repair
If the same inside surface produces visible beads and drops across repeated cool, dry nights, the photos and log support a condensation explanation. If a wet trail appears only after rain, begins at a damaged panel or joint, or persists where the source is inaccessible, seek an assessment from a qualified greenhouse professional. Do not climb onto the structure, remove glazing or reseal a seam just to confirm a theory; those steps can create a safety risk or hide the original route. A rain-linked leak and a condensation pattern may need different responses, even when water reaches the same bench.
Prepare a concise record for any repair or replacement discussion: the sketch, matching photographs, first-observed times, weather and watering notes, sensor positions, vent and shade settings, and the exact model. Ask about the relevant panel or ventilation configuration rather than requesting a generic humidity fix. If you are comparing the classic aluminum greenhouse range as a replacement, use the mapped drip route to explain what you need to address. Ask about model-specific ventilation and compatible shade options, then compare those details with your observations. A different structure should not be treated as a solution merely because its appearance differs.
Frequently asked questions
Why do the drips appear only in the morning?
An overhead surface can cool overnight and collect condensation; you may not notice the water until it gathers and drips. The morning check tells you when you found it, not exactly when it started. Record the last dry check and first wet observation, then compare those times with the overnight log.
Can a humidity reading prove that condensation caused the water?
No. A logger records air conditions at its location; it does not measure every panel or identify where a droplet came from. Pair readings near the affected plants with photos of the surface above them, and note rain, watering, vent position and shade.
Where should I place a temperature and humidity logger?
Place it near the height of the affected leaves and compare it with a nearby area that stays dry. Keep it away from direct sun, wet foliage, glazing, heaters and strong vent streams. Follow the device manual and record its exact position so readings can be compared meaningfully.
Should I leave the vents open overnight?
There is no single setting that suits every greenhouse, plant and night. First record the vent position and check the instructions for the exact equipment. If you test a change, make one suitable adjustment at a time and compare similar conditions; do not force a mechanism or bypass a control.
How can I tell condensation from a roof leak?
Repeated droplets on the inside surface after a dry night support a condensation explanation. A track that appears after rain and begins at a joint or opening points more towards water ingress. Timing alone is not conclusive, so compare it with the visible trail and irrigation record. Ask a qualified greenhouse professional about persistent or inaccessible leaks.
A useful diagnosis is more specific than saying the greenhouse is too damp: it identifies the wet plants, the surface or route above them, and the overnight conditions that repeatedly accompany the drip. If photos and logs point to an overhead cold surface, use one controlled change to test the pattern. If water follows rain or the route is inaccessible, keep that evidence intact and treat it as a separate repair question. The map, photographs and timeline make the next decision more reliable than a single wet morning.
