
Greenhouses in Frost Pockets: Assessing a Low-Lying Garden
Greenhouse site guide
Before placing a greenhouse in a low-lying part of a garden, find out where overnight cold actually settles. A shallow hollow, slope or barrier can make nearby spots behave differently. Record minimum temperatures at likely positions, pair each reading with weather notes and map the routes cold air may follow. Repeating the comparison on clear, calm nights helps reveal a frost pocket more reliably than judging by elevation or a single patch of morning frost. Use the evidence to choose a position and assess whether crop protection or heating belongs in the plan.

How frost pockets develop in low-lying gardens
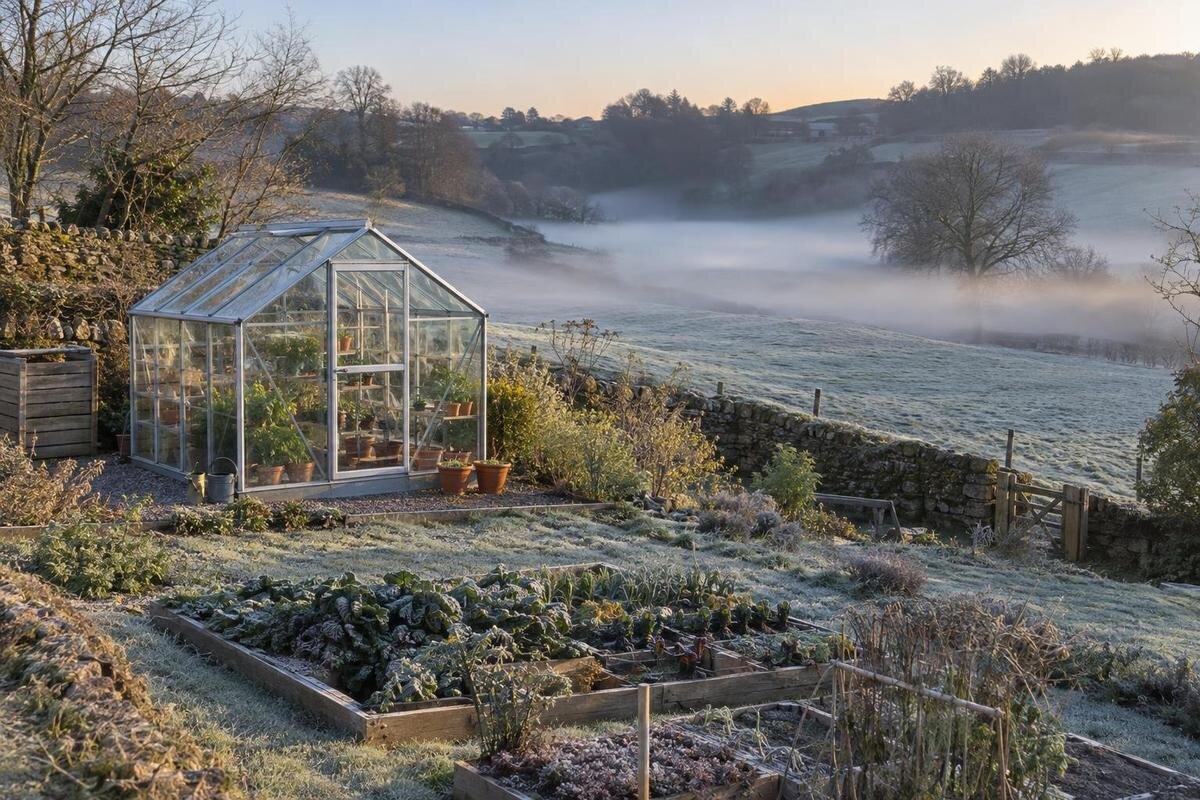
Low ground is not automatically a frost pocket, but it can be a place where cold air collects. On a clear, calm night, the ground loses heat and cools the air closest to it. That cooler, denser air may flow downslope and settle in a hollow, behind a bank or in another enclosed dip. Cloud and wind can change the pattern by limiting surface cooling or mixing the air, so elevation alone cannot predict the temperature at a proposed greenhouse position. Treat a frost pocket as a repeatable local difference: one spot records lower overnight minimums than nearby alternatives under comparable weather. Two corners at similar heights can behave differently because of slope, shelter and surface cover.
Barriers complicate that picture. A solid fence, dense hedge, retaining wall or building can slow, redirect or channel cold air; a gap may create another route, so the effect depends on the layout. Do not assume a wall keeps a greenhouse warm or that every hedge creates a cold trap. Visible frost at dawn is a useful clue, but frost on grass, leaves or a roof depends on the surface temperature as well as the air. One frost-free morning does not rule out a cold pocket, either. Note what you observe, then use repeated sensor readings to compare places rather than treating appearance as a verdict.
Map slopes, hollows and obstructions
Draw a scaled site sketch before placing sensors. Mark the direction and steepness of slopes, low hollows, raised edges, steps, walls, fences, buildings, dense hedges and gaps beneath or between barriers. Add arrows where cold air might drain or meet an obstruction, then mark possible greenhouse footprints. If a position beside a house wall is under consideration, include a lean-to greenhouse as one candidate footprint; its format does not prove the wall-side spot will be warmer. Keep the sketch practical and approximate rather than applying a standard setback or assuming a particular wall effect.
Walk the garden after a cold night and photograph the same views, noting the date, time and direction of each image. Record where frost appeared and whether it was patchy, then compare those observations with the slope and barriers on your sketch. Taking photographs from the same marked positions makes it easier to compare mornings without confusing a different camera angle with a change in frost coverage. Separately mark places where water pools after rain or thaw: wet ground is not proof of a frost pocket, but it is relevant to assessing a proposed location. If water repeatedly collects where the greenhouse might stand, have the ground and drainage assessed before planning its base. Mapping first lets you choose sensor positions without changing the site and masking its usual behaviour.
Choose monitoring points around the proposed site
Place one sensor at each candidate position and another at a reference point, such as a less enclosed area nearby or slightly upslope. The reference provides a comparison, not a universal temperature standard. Choose a spot where you can leave it in the same exposure throughout the test. Keep all sensors at a similar height, roughly where foliage would be, rather than putting one at ground level and another on a bench. At each proposed site, measure within the future growing area, away from eaves or direct contact with a wall, where shelter or nearby surfaces could affect the reading. Mark every location on the sketch and photograph the setup. Give each point a simple identifier that you also use in the temperature log. Record the height and position so you can restore the setup if a sensor is moved while gardening.
If a greenhouse model is already on your shortlist, use its intended growing area to guide sensor placement. For a range such as Classic aluminum greenhouse options, use the dimensions of the specific variant you are considering rather than a generic outline. Include uphill and downhill test points if the proposed growing area crosses a slope; a central reading alone may miss a difference between them. If you have fewer sensors than candidate positions, keep the reference device in place while you test the alternatives. Label the dates for each comparison clearly, and do not treat readings taken on different nights as though they were simultaneous.
Set up sensors for a fair comparison
Use a minimum/maximum thermometer at each point or a logger that records a time series. A logger can show when a temperature drop occurs, while a minimum/maximum instrument records the lowest value over the period; either can be useful if you use it consistently and identify the overnight window. Read each instrument’s instructions, set every display to the same unit, check its clock and note its identifier. If you are using several devices, place them side by side before the comparison begins. If their readings differ, check the setup and device instructions rather than silently adjusting the figures.
Keep the sensing element shaded from direct sun while allowing outdoor air to circulate; a ventilated radiation shield can help. Do not set a sensor directly on soil, attach it to masonry or leave it under an eave. Those positions can give a reading influenced by the nearby surface or shelter rather than the air at the proposed growing site. For a minimum/maximum thermometer, note when you reset it and the start and end of each overnight period. For a logger, keep its clock and recording interval consistent. A tidy record of position, device and timing makes later comparisons much more useful.

Log the weather with each minimum
Record the date, location, overnight minimum, instrument and—if a logger shows it—the time the low occurred. Add a brief weather note using the same simple descriptions each night: clear, partly cloudy or overcast; calm or breezy; and any recent rain, snow or noticeable frost. For a minimum/maximum thermometer that does not show when the low occurred, write down the overnight period it covers. A practical record can have one row per night, with a separate column for each monitoring point and shared columns for weather and observations. Keep measured values separate from comments such as “frost beside the hedge” so an observation is not mistaken for a reading. These notes help explain why readings vary. A clear, calm night is useful for detecting local cooling, while windier or cloudier conditions can produce a different pattern.
Repeat the comparison over several clear, calm nights and more than one weather event, then include other conditions rather than relying on a single type of night. If you will use the greenhouse in more than one season, revisit the measurements when those seasons approach; garden conditions can change over the year. A regional forecast or weather station can provide context, but it cannot represent every hollow or sheltered corner. Even if you are considering Limited Edition Aluminum Greenhouses, product information identifies a structure, not the overnight temperature at your particular site.
Look for a repeatable temperature pattern
Compare readings from the same night, not just the lowest numbers in the notebook. For each candidate position, note whether its minimum was lower than, similar to or higher than the reference minimum, and retain the numerical difference. This makes it easier to see whether the same location is consistently colder even when the overall weather changes. If all positions cool by a similar amount relative to the reference, the cold may be affecting much of the garden. If one location repeatedly records a lower minimum than nearby points under comparable conditions, that is stronger evidence of a local pocket. A single unusually low reading could reflect a changed sensor position, a device issue or a different weather event. Note gaps in the log instead of filling them with estimates. Review the weather notes beside any apparent exception, and keep the original readings so you can see how the pattern develops.
Look for differences between monitoring points within the same proposed growing area as well as between separate sites. A greenhouse spanning a slope or a small hollow may include both a colder edge and a less exposed area. If a T-Shaped Orangery Greenhouse is on your shortlist, compare the readings from the different parts of its proposed growing area rather than assigning the central minimum to the whole structure. Check whether the colder edge remains colder on repeated nights or whether the difference appears only under particular weather conditions. That distinction helps you describe the local pattern without claiming that one reading represents every crop position.
Consider sunlight and drainage alongside temperature
Temperature is only one part of choosing a usable position. Overlay your readings on a seasonal shadow diagram to see whether buildings or trees shade a candidate location during the periods when you plan to grow. Note any changes in shade across the year rather than judging from a single summer afternoon. On the same sketch, record where rainwater or meltwater runs and where it stands. Shade, wet ground and low temperatures are related to different site conditions; one observation should not be used as a substitute for the others.
Use the combined map to compare practical options, not to assume that the coldest reading always rules out a spot. A slightly less cold position may have other drawbacks, while a more exposed one may not suit your growing plans. If a Pyramid Greenhouse is among the options you are considering, draw the selected footprint on the shadow and temperature maps before settling on a location. Check that the position works with the measured cold pattern, seasonal light and ground conditions. If water persistently pools there, get the ground and drainage assessed rather than assuming a greenhouse will resolve the problem.
Test the actual greenhouse footprint on the site plan
Once you have a shortlist of possible positions, draw the full greenhouse footprint using verified dimensions for the exact option you are considering. Include its intended orientation and the areas where you expect to grow plants. Keep the drawing to the same scale as your site sketch so you can compare the structure with the mapped hollows, barriers and monitoring points. Label the uphill and downhill sides where relevant, and distinguish the outer footprint from the growing areas you have monitored. If the footprint crosses a mapped cold-air route, add sensors at the relevant edges during the next comparison. Keep earlier test points marked rather than redrawing them to fit the preferred location. The aim is to learn whether the proposed structure sits consistently in the coldest area, not to infer indoor temperatures from outdoor measurements.
If storage is part of your plan, include the footprint of the exact configuration rather than sketching only the growing area. For example, if you are comparing Limited-Edition Aluminum Greenhouses with Storage, check the chosen option’s dimensions and where its storage area sits on the plan. Distinguish the storage area from the crop area when matching the drawing to your temperature records. A reading from a point intended for storage should not be presented as a measurement from a future growing bed. Include the whole structure when comparing its location with cold-air routes and ground conditions, while keeping the crop-specific temperature assessment tied to the places where plants will actually grow.

Use crop needs to assess heating
Begin with what you plan to grow and when. Make a list of the crops and their sensitive stages, then consult reliable crop-specific guidance for the conditions they need. Compare those needs with the site’s recorded outdoor minimums to identify whether a cold position could limit your plans. The outdoor log helps you compare locations, but it does not predict the temperature inside a greenhouse. An unheated structure should not be assumed to stay above a chosen crop’s minimum through the night simply because it is enclosed.
Choosing a structure and deciding whether it needs heat are separate questions. If a Prestige Greenhouse with Metal Base is on your shortlist, consider the selected configuration alongside your crop list and intended growing season, rather than treating the model name as a heating recommendation. Summarize the recurring outdoor minimums at the preferred site and identify which crop requirements prompted concern. That gives a qualified professional a clearer account of your intended use than a single lowest reading would. The outdoor log alone is not a heater-sizing calculation. If heating appears necessary, have a qualified professional assess suitable equipment and installation for the greenhouse and intended conditions. After installation, indoor readings can help refine the plan and show whether the conditions in the growing area meet your needs.
Monitor temperatures inside the greenhouse
After installation, monitor inside and outside at the same time during cold nights. Put the indoor sensor near the growing area at a consistent height, away from direct sun, and follow the device instructions. Compare the readings on clear, calm nights as well as other conditions, noting whether heating was operating where applicable. An outdoor site log cannot show how the finished greenhouse behaves overnight; only measurements inside the structure can show what your crops are likely to experience in their actual positions.
If the greenhouse covers a large area, one interior reading may not represent every growing zone. For a larger option such as the Spacious Greenhouse, consider monitoring more than one crop area before relying on a single minimum. Label the indoor points on a simple layout showing the crops or beds they represent, and keep the outdoor reference identifiable in the same record. Note changes in crop placement, sensor position or heating operation so later readings can be interpreted in context. If one growing area repeatedly records a lower minimum, compare that result with the requirements of the crops placed there. Use the results to adjust crop placement, timing or your heating plan if needed. The useful outcome is an understanding of actual growing conditions, rather than a promise that any particular model will remove frost risk.
Frequently asked questions
What is a frost pocket?
It is a part of a garden where cold air repeatedly collects, often in a hollow or behind an obstruction. Elevation alone does not confirm one; compare overnight readings at nearby positions under similar weather.
How many nights should I log?
There is no universal number. Record several clear, calm nights across more than one weather event, and include contrasting conditions. Repeat the comparison in the seasons when you expect to use the greenhouse.
Where should I place an outdoor thermometer?
Place a sensor within the future growing area at each proposed greenhouse site and another at a reference point. Keep them at a similar height, roughly where foliage would be. Shade the sensors from direct sun while allowing air to circulate, and avoid direct contact with walls or shelter beneath eaves.
Does frost on the lawn show where the greenhouse should go?
It is a useful clue, but not a temperature record. Frost on a surface depends on that surface’s temperature as well as the surrounding air. Use repeated sensor readings to compare candidate positions.
Can outdoor minimums tell me what size heater to buy?
No. Outdoor readings help compare locations, but heater requirements depend on the greenhouse, intended crop conditions and other factors. Check crop-specific guidance and ask a qualified professional to assess equipment and installation.
A low-lying garden may still offer a suitable greenhouse position, but the decision should rest on recurring readings from the proposed growing area and notes about the weather. Keep cold-air routes, seasonal shade and wet ground in view, then compare indoor temperatures with crop needs when refining the heating plan. That sequence turns a general warning about frost pockets into a site-specific plan without promising that a greenhouse or heater will eliminate frost risk.
