
Growing Ranunculus in a Greenhouse in Canada
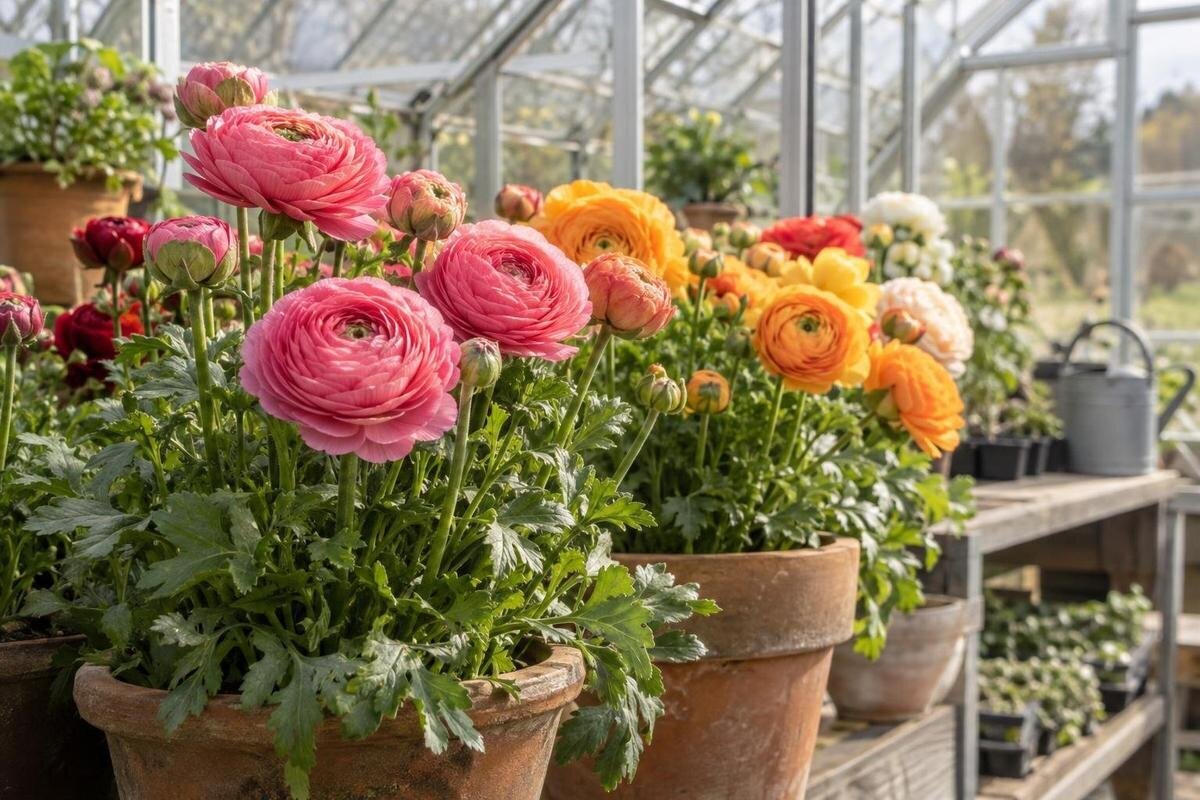
Greenhouse crop guide
Ranunculus is a cool-season flower, so a greenhouse helps most when it provides cool, bright growing conditions—not simply extra warmth. In Canada, the right planting date depends on conditions inside the structure: a sunny greenhouse may heat quickly, while an unheated one may still freeze. Start with sound corms, a free-draining bed or container mix, careful watering and regular air movement. This guide follows the crop from corm preparation to harvest and focuses on the controls that matter most for healthy stems and fewer rot problems.

Keep ranunculus in a cool growing range
Ranunculus asiaticus, the Persian buttercup commonly grown for cut flowers, is a cool-season crop. During active growth, use about 10–16°C (50–61°F) by day and 5–10°C (41–50°F) at night as a practical starting range. It is not a universal set point: cultivar, growth stage and supplier directions matter. Repeated days above roughly 18–21°C (64–70°F) can move plants beyond their preferred conditions, speed development and shorten stems or the useful flowering window. If that range is hard to maintain, schedule the crop for the coolest workable part of the year rather than trying to counter heat with extra water.
Measure near the foliage and buds, not on a shaded wall or beside the doorway, and record both daily highs and overnight lows. A greenhouse can heat quickly in bright sun even when the outdoor air feels cool; an unheated structure may also fall close to outdoor temperatures at night, so glazing alone is not frost protection. During cold spells, check the growing medium at root depth as well as the air. For a footprint reference, the Pyramid Greenhouse is listed in areas from 5.53 to 18.9 m². Compare the actual plan for bed space and openings rather than assuming the shape controls temperature.
Choose a planting window for your greenhouse
Decide when you want flowers, then work backwards from the supplier’s expected time from planting to bloom. Leave a buffer for uneven emergence and variable weather; a target flowering window is more realistic than one exact date. Canada does not have a single greenhouse planting month that suits every site: winter severity, daylight, heating and whether the bed freezes all matter. Autumn planting can be workable where the structure stays cool but protects the crop. If an unheated greenhouse freezes or remains very dark, consider a later window or a protected tray stage instead.
Try a small batch if you have not grown the cultivar in your structure. Record the cultivar, corm grade, hydration and planting dates, emergence, first coloured buds and daily temperature highs and lows. That record can show whether slower growth coincided with low light or cold soil, rather than prompting several changes at once. Staggering a few batches may spread the harvest, but each one meets a different light and temperature pattern, so label them separately. The Limited-Edition Aluminum Greenhouses with Storage collection is listed from 5.52 to 28.08 m²; use the floor area to sketch beds, paths and staging space before estimating how many corms will fit.
Select healthy corms and the right cultivar
Ranunculus is generally started from dried, claw-shaped corms rather than seed or a true bulb. Choose a named cultivar for its flower colour, stem length and flowering window, and check that the seller provides clear handling instructions for the corm grade you are buying. Varieties and sizes can emerge or flower at different rates, so do not assume separate lots will develop together. For cut flowers, label each cultivar before opening the packages, and keep the lots separate during hydration and planting. Before ordering, check the expected schedule and base quantities on the stated grade and your planned spacing, not just the greenhouse’s total floor area.
On arrival, inspect the lot and separate corms that are soft, wet, collapsing or heavily moulded. Firm, dry corms may have a papery outer surface and irregular claws; those features alone are normal, not a reason to discard stock. Follow the seller’s directions if planting cannot happen immediately, and keep packages labelled in a dry, ventilated place rather than a damp greenhouse corner. Discard corms with obvious rot or a sour smell instead of soaking them or placing them beside healthy material. Keep lots separate during inspection, and check the rest of a package if one corm is damaged, since moisture can affect its neighbours.
Hydrate and plant corms with care
Some growers rehydrate dry corms before planting; a soak of about three to four hours is a common example, but follow the supplier’s method if it differs. Use a clean vessel and cool or room-temperature water, and do not leave corms submerged overnight. Drain them thoroughly and plant soon after. Pre-sprouting is optional: set prepared corms in a shallow tray with barely damp—not wet—medium in a cool place, then inspect frequently. Once short roots begin to show, handle the corms gently and plant without waiting for long, tangled growth that can break during transplanting. Soaking is a handling step, not a way to make damaged stock safe.
Place each corm with its claw-like points facing down and the central crown up. Cover it with roughly 2.5–5 cm (1–2 in) of loose medium, adjusting for the supplier’s directions and the container or bed. Keep depth even so rows emerge at a similar pace, and avoid pressing the medium into a hard cap. Water enough to settle it around the corm, not enough to leave the planting zone saturated. In pots, follow the supplier’s guidance for the number of corms rather than crowding them because the surface looks open. Mark each row or pot with the cultivar and planting date so you can compare emergence and flowering later.

Prepare a bed or container that drains freely
Whether you use a greenhouse bed or containers, choose a growing medium that drains freely and still holds enough moisture for roots. Compacted or heavy soil can stay wet around corms, increasing the risk of rot before shoots are established. A raised, well-structured bed may work where existing soil drains; pots with clear drainage holes are useful when the bed is unsuitable or has a disease history. Containers need closer moisture checks because their mix can dry differently from a deep bed. Do not leave pots sitting in a tray of runoff, and avoid reusing mix from a crop that had unexplained root problems.
Before planting the whole crop, water a small area and see whether excess water drains rather than pooling or leaving a dense crust. Correct compaction or choose clean containers and mix instead of assuming more irrigation will solve a slow-draining bed. Plan row widths and paths so you can reach every plant to inspect it and cut stems; hidden corners are easy to miss. Include somewhere to set trays or a clean bucket without blocking the aisle. The Bloomcabin Prestige Greenhouse range is listed from 3.77 to 28.08 m². Use that floor area as the start of a layout, then check the actual growing area and drainage at your site separately.
Give developing plants bright light and space
Give ranunculus the brightest practical position in the greenhouse. It grows best with strong light; short winter days or deep shade can slow growth and contribute to weak, stretched stems. Check the site during the season when you plan to grow, because low-angle sunlight and nearby trees or buildings can cast different shadows than they do in summer. Keep supplies, benches and taller crops from blocking light over the bed, and clean dirty glazing if it is reducing daylight. If stems look weak, review light alongside temperature, spacing and moisture. If you use shade to manage heat, recheck the light available to the crop as well.
Leave room for leaves and hands between rows, using the cultivar’s spacing directions as the final guide. About 10–15 cm (4–6 in) between corms can serve as a planning example, with rows wide enough to inspect and harvest without trampling crowns; adjust it if foliage would form a dense mat. Reassess spacing as the leaves expand, since a row that looks open just after planting can close over. The Spacious Greenhouse listings cover 47 to 70 m², but floor area is not the same as a sunlit growing bed. Compare the plan with the part of your site that receives light during the crop window, then reserve room for paths and staging.
Water according to the medium and growth stage
Immediately after planting, water just enough to settle the medium. Before shoots emerge, water use is low, so avoid keeping the root zone constantly wet. As leaves develop, aim for evenly moist—not soggy—medium and let excess drain after each irrigation. Check below the surface with a finger or moisture probe, including both the driest and wettest parts of a bed; the top can look dry while the root zone remains damp. Adjust to sunlight, temperature, pot size and growth stage rather than watering automatically every day. In pots, check several containers because exposed ones may dry sooner than sheltered ones.
Water at soil level where possible, or use overhead irrigation early enough for leaves to dry before night. Cool, cloudy spells usually call for less frequent watering than bright, warm periods, and containers should never stand in runoff. Check your watering route from end to end so every row receives attention without leaving a saturated corner. If you use automated irrigation, verify that the far end and corners receive water rather than assuming a timer makes coverage even. The Aluminum Greenhouses collection includes listed areas from 3.77 to 28.08 m²; use the intended footprint to estimate how much crop you can monitor and water, not as evidence of a particular irrigation setup.
Ventilate to limit heat and condensation
Ventilation limits heat build-up and moves humid air out, helping reduce prolonged condensation on leaves. Open available vents or doors as the greenhouse warms, provided outside conditions are not cold enough to push the crop below its growing range. Watch plant-level readings on clear days; one warm midday can matter even when the forecast is cool. More ventilation is not always better if it chills the bed, and airflow does not correct saturated soil. A fan can move stagnant air, but it needs a route for air exchange to carry moisture out rather than simply circulating it. Check for persistent condensation in the morning and review vent timing, spacing and late watering together.
Assess vent access when comparing any greenhouse: can you reach the controls, will a nearby wall obstruct an opening, and can you respond when sunshine raises the temperature? The Lean-To Greenhouses listing covers 3.69 to 14.34 m²; review the individual plan for vent positions and operating access instead of inferring them from the name or floor area. Make sure vent operation remains practical once beds are in place, and leave enough space for air to move between rows. A vent cannot correct a tightly packed canopy that stays wet.

Reduce disease pressure with routine hygiene
Good disease prevention starts with dry, clean planting stock and a root zone that drains. Persistent wetness can lead to corm or root rot, while dead, damp foliage in a crowded canopy can favour Botrytis (grey mould). Young plants that collapse or leaves that develop mould are reasons to inspect, not a diagnosis; other problems can look similar. Use clean trays and medium, leave enough space for leaves to dry, remove spent flowers and damaged leaves, and avoid splashing soil onto foliage during watering. Drainage and airflow work together: extra air movement will not rescue a root zone that stays flooded.
Inspect plants and stem bases at least weekly, with extra attention after damp weather or a period of poor airflow. Remove clearly affected debris promptly without carrying it through healthy rows, and clean tools and reusable trays between batches. Do not reuse mix from a diseased crop until you know the cause; if losses spread or recur, consult a local horticultural diagnostic service rather than guessing at treatment. Record where symptoms first appeared and how quickly they changed, which can make a diagnostic query more useful. The Limited Edition Aluminum Greenhouses range is listed from 3.77 to 28.08 m²; include work clearance for crop inspection and clean-up, not just space for planting.
Harvest at the right stage and clear the crop
Harvest when buds show their colour and the outer petals are beginning to open; adjust the stage to the cultivar and how the stems will be used. When possible, cut while the greenhouse is cool rather than during the hottest part of the day, using clean, sharp snips. Remove leaves that would sit below the water line in a bucket and place stems in clean water promptly. If stems will be handled or moved, check the preferred harvest stage for that use instead of waiting for every flower to open fully. Keep the route to the bed clear and avoid stepping on corm crowns while reaching between rows.
After flowering, leave foliage in place while it is green because it continues to replenish the corm. When leaves yellow naturally and active growth winds down, reduce watering and clear dead material instead of letting it stay damp around the bed. Whether to lift and save corms depends on the cultivar, disease status and available storage conditions; follow the supplier’s instructions and do not save diseased stock. Keep saved lots labelled so their cultivar and planting history remain clear. The T-Shaped Orangery Greenhouse listing spans 16.52 to 30 m²; inspect the actual plan for clear routes between beds for harvesting and end-of-crop clean-up.
Frequently asked questions
Can I grow ranunculus in an unheated greenhouse in Canada?
Yes, if you can schedule the crop for a cool growing period and protect it from freezing. An unheated greenhouse is not frost-proof. Check overnight air and root-zone temperatures, especially during cold spells, and follow the corm supplier’s guidance. If the growing bed is likely to freeze, delay planting or use a protected staging area.
When should I plant ranunculus corms in Canada?
There is no single calendar date for every greenhouse. Work back from your target flowering time using the supplier’s estimate, then consider the light and temperatures your structure actually provides. Autumn planting can work where the crop stays protected; otherwise, try a later start and keep records of how it performs.
Do ranunculus corms need soaking before planting?
Not always. Some suppliers recommend soaking dry corms for about three to four hours; follow the directions for your stock. Use a clean vessel and cool or room-temperature water, drain the corms well and plant promptly. Avoid leaving them submerged overnight, and do not soak corms that are already soft or rotten.
Which way up should I plant ranunculus corms?
Place the claw-like points facing down and the central crown facing up. A planting depth of about 2.5–5 cm (1–2 in) is a useful starting point, but check the supplier’s directions for your corm grade and container or bed.
How often should I water greenhouse ranunculus?
There is no reliable fixed schedule. Water enough to settle the medium after planting, then check below the surface and adjust as roots and leaves develop. Keep the root zone lightly and evenly moist during active growth, let excess water drain, and reduce watering in cool, cloudy conditions.
Treat ranunculus as a cool-season crop: prepare healthy corms, keep the root zone well drained, and use temperature and moisture observations to guide watering and venting. In a Canadian greenhouse, let the conditions inside the structure—not a generic planting date—set the schedule. A small trial batch can show how a particular cultivar responds to your light, temperature and growing medium before you commit a full bed.
