
How to Move a Greenhouse to Another Area of the Garden
Greenhouse relocation guide
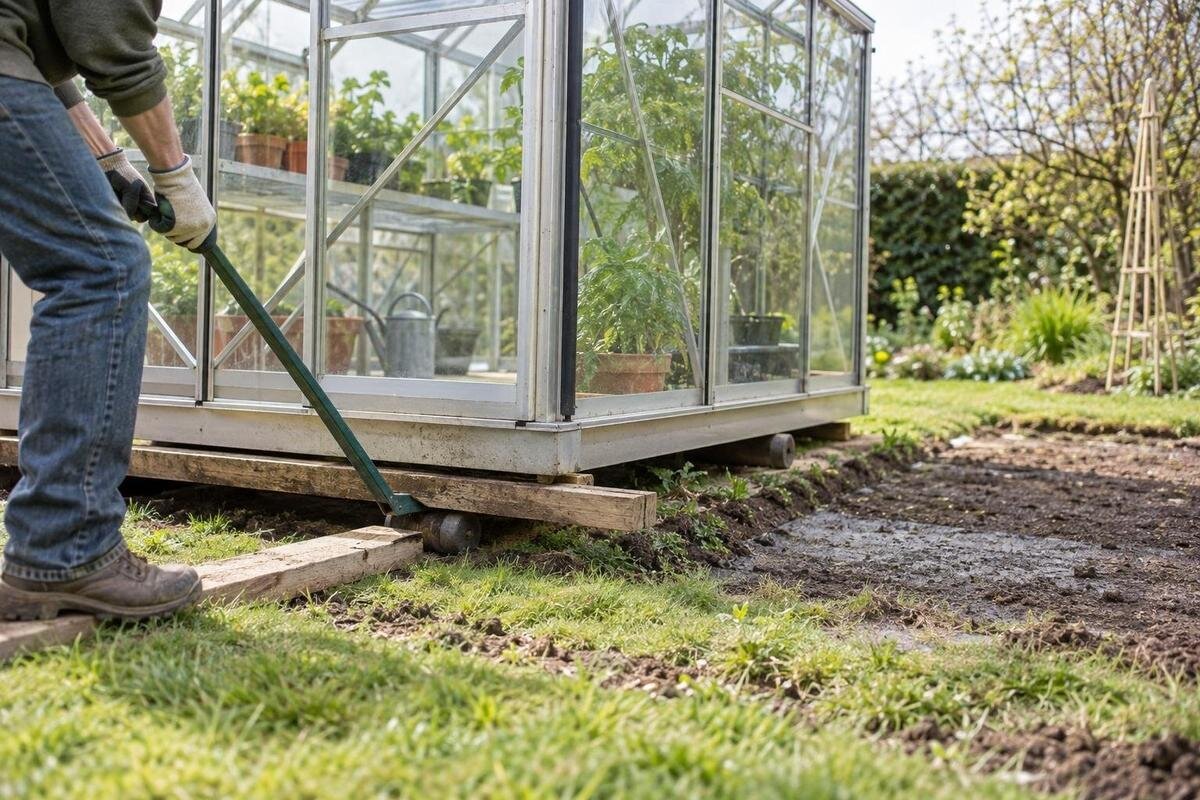
Moving a greenhouse across the garden usually involves dismantling and rebuilding, rather than simply lifting and carrying it. The handling of the frame, glazing, doors, vents and base needs to follow the manufacturer’s instructions for the exact model. Before removal, identify the greenhouse, assess its condition, confirm the new site and foundation, and have a qualified installer plan the work, particularly if glazing must be handled.

Decide whether relocation is practical
Begin with a condition review, not a dismantling date. Note visible frame distortion, loose joints, damaged connections, corrosion, cracked or missing glazing, doors or vents that bind, and signs of previous repairs. These observations are information for the manufacturer or installer, not a do-it-yourself structural diagnosis. Do not force a stiff fitting or climb onto the frame to inspect it. Photograph concerns from the ground and include the full greenhouse as well as close views. List missing, substituted or unfamiliar components even if you do not know their names. A move can expose weaknesses that were less obvious while the structure was assembled, so ask a qualified installer to assess whether this exact greenhouse is a reasonable candidate for dismantling and reassembly.
Check early whether the manufacturer can identify the model and provide the correct instructions and component references. If essential parts are unavailable, an upgrade enquiry may be more practical than paying to dismantle a structure that cannot be rebuilt. Where possible, compare an itemized move estimate with a replacement estimate that includes site and foundation work, rather than looking only at transport or labour. The Classic Aluminum Greenhouse listing covers models from 3.77 to 28.08 m² and can be one reference for discussing a new unit; that range does not establish a match for an older greenhouse. Ask the manufacturer to confirm compatibility instead of inferring it from appearance, and share any uncertainty with the installer before booking removal.
Gather the greenhouse’s records and measurements
Collect the original invoice or order confirmation, manufacturer’s name, model and serial or production label if present, assembly manual, technical drawings, and correspondence about earlier repairs or parts. Copy the label wording exactly and photograph it in place. A model name guessed from the greenhouse’s shape can be misleading, especially after years of repairs or when similar product names appear in a catalogue. Send the order reference and label photos together when asking the manufacturer or seller to identify the structure. If paperwork is missing, ask whether they can search using the seller, approximate purchase date or previous correspondence; do not fill gaps by assuming. Record any changes to doors, vents or panels if you know when they were made.
Record measurements that can be taken safely from the ground: the outside footprint, base outline, door opening, and locations of doors, vents and obvious additions. Note the units, and compare dimensions with the manual if available. Photograph each side, the interior, connections and the arrangement of glazing and components; a numbered photo log helps the installer discuss each area. Record which accessories belong to the greenhouse so they are not mistaken for structural parts. Do not write on panels or climb onto the greenhouse to measure the roof. If a replacement is more likely, treat a page such as Limited Edition Aluminum Greenhouses as a separate product enquiry with its own specifications, not as proof of what your existing structure is.
Assess the new garden location
Visit the proposed location at different times of day and note shade from the house, fences and trees. Look for low branches, roots or vegetation that could affect access, then check where rainwater gathers and where runoff from nearby roofs travels. A patch that looks flat is not evidence of a suitable base location; drainage, ground conditions and any slope need a site-specific review. Discuss local wind exposure and snow drifting or shedding with the manufacturer or installer, using the exact greenhouse’s documented limits rather than a general rule. The old position may have sheltered the structure differently, so do not assume its conditions predict what the greenhouse will experience in the new spot.
Check that the proposed location leaves room to open the door, move growing supplies and reach vents or serviceable parts; follow any clearances in the manual. Think about how a dismantled greenhouse and its components will reach the spot without crossing delicate beds or blocking routine access. If the new setting leads you to consider a different format beside a building, a Lean-To Greenhouse is a separate product type to assess against its own installation instructions and the building’s suitability; do not assume any wall can support or accept one. Before digging or preparing a base, have underground services identified through appropriate local channels and ask the installer or local authority whether any approvals apply.
Check the footprint and access route
Draw the proposed base outline on a simple site plan and compare it with the measured footprint of the existing greenhouse. Include the door swing, space needed to reach vents and any clearance named in the manual or recommended by the installer; the frame’s footprint alone may not describe how the space will be used. Map the route between the old and new positions, including gates, turns, steps and narrow passages. Ask the installer what must be transported as an assembly and what can be dismantled safely. Do not assume the largest component will fit through the narrowest opening simply because the greenhouse’s overall footprint fits the garden.
If you are reconsidering the move in favour of a replacement with a different outline, use that model’s actual plan rather than comparing only its advertised area. The T-Shaped Orangery Greenhouse is a named configuration whose full outline would need to be checked against the garden, door access and proposed base. Record overhead obstructions and where tools or a vehicle might be positioned, then leave the handling and access method to the installer. Include the route from the garden entrance to the greenhouse as well: a location can fit on paper but still make routine access awkward. These measurements give the installer specific questions to answer before dismantling begins.

Agree on dismantling and storage
Ask for the manufacturer’s assembly instructions for the exact model and build configuration. Do not assume dismantling is simply the assembly steps in reverse: the instructions may require a particular order, and components can depend on one another for support. If the manual is missing, request it from the manufacturer or supplier before work starts. Unless the manufacturer and a qualified installer approve a specific method, do not try to move the greenhouse as a complete structure. Arrange professional help for glazing work, especially if a panel is damaged or difficult to identify. Do not pry out glass or other panels with improvised tools. If you are comparing replacement designs, include the installation work in that comparison; a Pyramid Greenhouse option would need to be assessed using its own model-specific instructions.
Agree who is responsible for dismantling, identifying components, packing and transport before booking a date. Schedule the work around plant removal and the time needed to prepare the new base, with a buffer for weather or parts questions. Ask the installer how removed panels, frame pieces and fasteners should be identified, protected and stored; improvised labels or packing methods could damage surfaces or obscure orientation. Tie the inventory to the photos and manual, and keep small hardware separate only in a way the installer approves. Avoid leaving a partly dismantled greenhouse exposed or unsecured between work days. The installer should plan a safe stopping point in case the work has to pause.
Prepare a base for the exact model
Treat the new foundation as a separate piece of work, not a copy of whatever was under the greenhouse before. Confirm the exact footprint, base profile, fixing positions and tolerances from the manufacturer’s instructions, then have the installer or foundation professional assess the proposed ground and drainage. Existing concrete, paving or a raised base might not match the greenhouse’s fixing arrangement or the new site, even if it looks sound. Have its condition and dimensions checked before deciding to reuse it. If the garden slopes, has variable soil or holds water, the foundation professional should determine whether preparation is needed. There is no single base type that suits every garden.
Prepare and inspect the new base before the greenhouse arrives, including the dimensions and alignment required by the exact model. Do not drill new holes, cut frame members or improvise anchor changes to make a mismatch fit; ask the manufacturer or installer for an approved solution. A product title such as Prestige Greenhouse with Metal Base describes a particular listing, not a universal base specification or confirmation that an existing pad will fit. Keep the base drawing, measurements and any installer notes with the greenhouse records. The reassembly team can then compare the prepared base with the model requirements before setting the frame in place.
Confirm parts and support before dismantling
Make a parts list before dismantling and update it as components are removed. Use the manual’s exact names and part numbers where available; send the manufacturer or supplier the model information, purchase reference, photos showing a component in place, and close-ups of any damage. Do not order a replacement because it looks similar: lengths, profiles, glazing dimensions and connectors may differ between models. If glazing is cracked, missing or difficult to identify, ask a qualified installer or glass specialist to confirm the replacement and handling plan rather than trying to adapt a panel. Resolve questions about critical parts before the frame is taken apart, when the original layout is still visible.
Ask the manufacturer or seller to confirm availability and compatibility for the exact model, and check the warranty or service documents before dismantling; do not assume what effect disassembly will have on support. If key components cannot be sourced, compare rebuilding with a replacement enquiry. If your plans include built-in storage, Limited-Edition Aluminum Greenhouses with Built-In Storage is a separate product option to assess from its own drawings and specifications, not a source of compatible parts for the greenhouse you already own. Keep written replies, part identifiers and any revised inventory with the move records so the installer can see what has been confirmed.
Include qualified reassembly in the plan
Put reassembly in the job scope from the outset and use a qualified greenhouse installer familiar with the manufacturer’s system. Confirm that the installer has the manual, your photographs, an inventory of saved and replacement parts, and the new-base measurements before work begins. Ask who will decide if a frame, connection or glazing panel is unsuitable for reuse and how that finding could affect the estimate. The greenhouse should be rebuilt only with approved components and the documented assembly method. Do not authorize unreviewed cuts, added braces, new holes or other structural changes as a shortcut. If the installer identifies a mismatch, pause and get an approved solution before continuing.
Define what completion means in the reassembly scope. Ask the installer to include checks of alignment, fixings, glazing retention and door and vent operation against the manual, and agree how any outstanding work will be reported. Clarify who will supply a missing component, arrange a return visit or answer questions after the move if a panel shifts, a door binds or a connection needs attention. These responsibilities should be clear before work starts, rather than left for the final handover. Allow for any outstanding work in the plan for returning plants and equipment to the greenhouse.

Compare the full cost of moving or replacing
Ask for an itemized estimate that names the work being priced: model identification and condition review, dismantling, panel handling, transport, temporary storage if needed, base preparation, replacement parts, reassembly, final review and removal of unwanted material. Ask which items are conditional, what might change the estimate after inspection, and who supplies each replacement component. Access distance, narrow routes, special handling and additional site work can all affect the scope, so describe them accurately before an installer visits. Written inclusions make it easier to compare estimates and see whether each actually covers the same work. Confirm how damage or missing parts discovered during dismantling will be discussed before extra work is undertaken.
Compare the move estimate with a replacement quote that includes its own site preparation and installation, not just the cost of a new frame. A different-size replacement is a new planning exercise: the Spacious Greenhouse listing covers models from 47 to 70 m², but that range does not make it a direct substitute or confirm that its requirements suit your garden. Consider whether compatible parts and support remain available for the existing greenhouse, how much usable garden area the proposed outline leaves, and whether relocation solves the original problem. Decide only after the installer has confirmed a realistic rebuild plan and the replacement option has been assessed against the new site.
Keep a record of the completed move
Have the installer record what was reused, replaced or set aside, including part identifiers and any unresolved concerns. Keep before-and-after photos, the final assembly instructions, base measurements, supplier correspondence and notes about future maintenance together. If a component was not reinstalled, record why and whether it needs follow-up; an unlabeled spare part can be difficult to identify later. Save a copy of the records separately from items that will be stored in or near the greenhouse. This information is especially helpful if someone else handles a repair or part request in a later season, when the details of the move are no longer fresh.
Use the final handover to distinguish completed work from anything still outstanding. Before returning pots, shelves or plants, confirm which areas are ready for use and whether any items need to stay out until further work is finished. Check doors and vents as instructed, and report sticking, loose-looking glazing or unusual movement to the installer rather than adjusting structural connections yourself. Confirm that damaged panels and debris have been dealt with by the appropriate professionals. Review the condition of the old base and site before starting other garden work there, and record any remaining tasks separately from the completed greenhouse installation.
Frequently asked questions
Can I move a greenhouse without taking it apart?
Do not assume it is safe to move the greenhouse fully assembled. Ask the manufacturer and a qualified installer whether an approved method exists for your exact model. Otherwise, plan for dismantling and reassembly rather than lifting the whole structure.
Can I reuse the greenhouse’s existing base?
Possibly, but only after the installer checks its condition, dimensions and fixing positions against the greenhouse’s requirements and the new site. A base that looks sound may still be unsuitable or incompatible.
What information should I provide when requesting parts?
Provide the model and any serial or production details, order reference, manual or drawing, and photos showing the part in place and close up. Use the manufacturer’s part number if you have it; appearance alone may not confirm a match.
Who should handle greenhouse glazing during a move?
Arrange a qualified installer or glazing professional to assess and handle panels, particularly if any are damaged or difficult to identify. Follow the instructions for the exact model; do not pry panels out or improvise a handling method.
When should I consider replacing the greenhouse instead?
Consider a replacement enquiry if the structure cannot be identified, essential parts are unavailable, its condition raises concerns, or the new site does not suit its footprint. Compare complete estimates for moving and replacement, including foundation and installation work.
A successful move begins before the greenhouse is taken apart: confirm what it is, whether it can be rebuilt, where it will sit and what the exact manual requires of its base. Once a qualified installer has reviewed the structure, parts and site, compare the full scope and cost of relocation with those of replacement. That sequence helps avoid discovering after dismantling that an essential part is missing or the new foundation is not ready.
