
Planning Greenhouse Water and Electrical Services
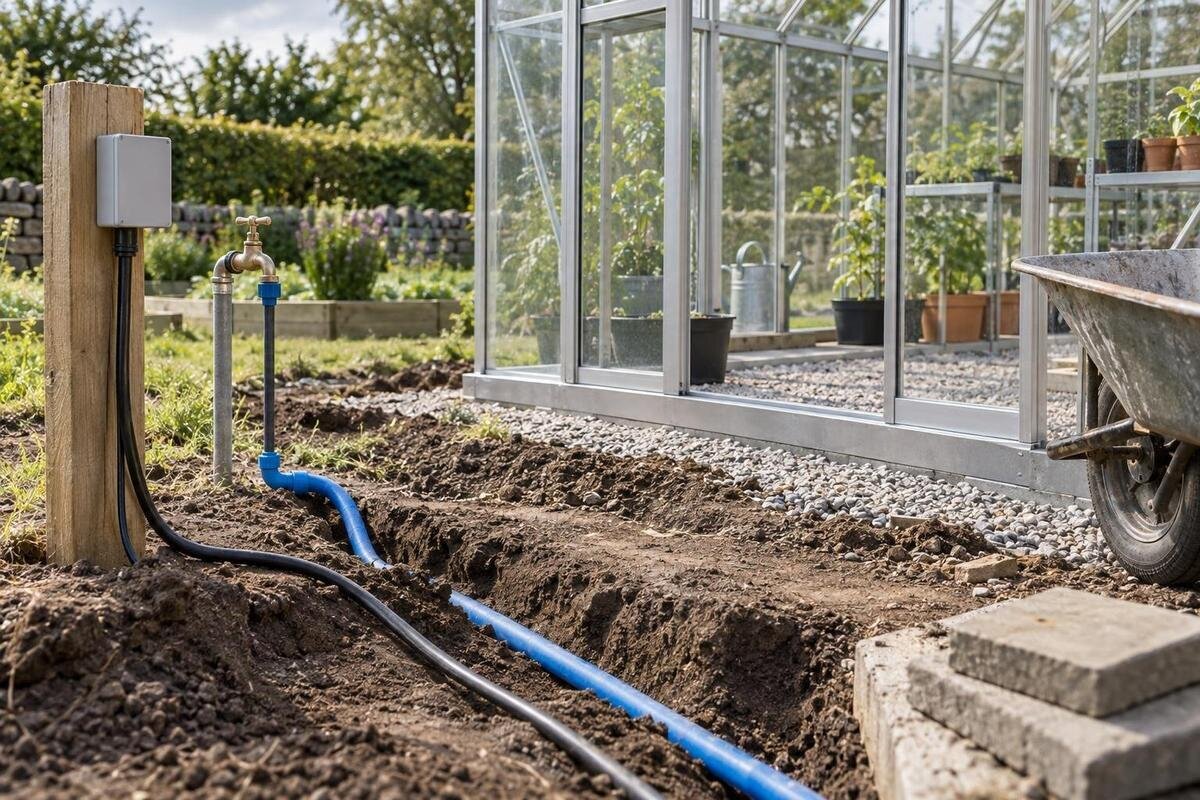
Greenhouse planning
Water and electrical services are easiest to coordinate while the greenhouse position, base and surrounding paving are still being planned. Once a patio, slab, path or planted border covers a route, changing where it emerges can mean disturbing finished work. Begin with the greenhouse model and its layout, list what you expect to use, and mark the available water and electrical supply points. Then ask the appropriate trades to review the proposed routes before anything is covered. Electrical design should be completed by a qualified professional; a product listing or general sketch cannot establish requirements for a particular site.

Before the base and paving are finished 1
Plan water and electrical routes before surfaces are finished
Water and electrical routes have separate design requirements, while the finished site creates its own access constraints. A route may cross ground that will become a walkway, and a valve or connection can be awkward if it ends up behind a fixed bed or beneath a hard surface. Map the proposals before paving, pouring a base or completing borders, so the greenhouse supplier, groundwork contractor and service trades can work from one layout. This also gives everyone a chance to identify constraints before materials are ordered or the work sequence is fixed; it is not a reason to install services before the design is settled.
Put the greenhouse outline, paths, doors, planned beds and paving on the same site plan, along with available supply points and any known buried services. Mark where each route could approach the structure and which parts of the finished site will need future access. The T-Shaped Orangery Greenhouse is listed with area options from 16.52 m² to 30 m², but those figures do not show the exact footprint or service entry for your selection. Ask for the drawing that matches the chosen option, use it to plan the route, and keep the plan provisional until the layout is confirmed.
Confirm the exact greenhouse footprint and orientation
Before anyone sets a connection point, confirm the greenhouse model, size option and orientation. A product family may cover several footprints, and a product photo cannot establish door positions, base details or where services may be brought in. Request the manufacturer drawing for the selected configuration and ask which document the installer will use. The Pyramid Greenhouse is listed with area options from 5.53 m² to 18.9 m²; that range can help with shortlisting but cannot locate an opening or service point on your chosen model. Match the drawing to the option you plan to order.
Use the drawing with a measured site plan. Show the door approach, likely benches or growing zones, nearby walls and fences, steps, and finished levels of adjacent paving where known. Place proposed service points only after checking that they will not sit beneath a path or behind a fixed feature. Add an orientation marker and revision date. If the greenhouse moves or turns, update the plan before work begins; otherwise, a contractor may rely on an obsolete position. Share the same version with the supplier, installer and service trades so each can comment on their work.
Before the base and paving are finished 2
Match the water supply to your gardening routine
Decide what the water connection is meant to do before choosing where it enters. Filling a watering can, attaching a hose, supplying drip irrigation or operating a pump are different routines and may need different access or equipment. List the jobs you expect, where water will be used, and how often the point needs to be reached. Note whether you will garden year-round or seasonally, and whether an existing outdoor tap might serve the planned work. A permanent feed is not necessary for every greenhouse; a clear use list helps distinguish a genuine need from a convenience you may not use.
Identify the water source you intend to use and ask a plumber or irrigation professional whether it can serve the planned system, including pressure or flow needs if equipment depends on them. Discuss any relationship between drinking-water supply, stored rainwater, pumps and irrigation controls with that professional rather than improvising a connection. If storage is part of your interior plan, consider the Limited-Edition Aluminum Greenhouses with Storage range when comparing layouts; confirm the selected configuration before deciding where to place water controls or a watering point. Keep valves accessible after shelves, beds and stored items are in place.
Place water points for access and seasonal care
Place a tap, hose connection or other water point around the work you intend to do, not simply where a pipe seems easiest to bring in. Think through the route from the door to beds, shelves, a potting bench or containers: a hose across a main aisle can become an obstacle, and a connection hidden behind storage is inconvenient to reach. Decide where you will stand to attach a hose and whether a bucket or watering can needs room nearby. Ask the plumbing or irrigation professional to confirm the proposed point and fittings. Do not assume a greenhouse frame or panel provides a ready-made service entry.
Consider maintenance and cold weather at the site. If water lines or fittings could be exposed to freezing conditions, ask the plumbing professional how the supply will be isolated, drained or otherwise managed, and where shut-offs must remain accessible. Do not rely on generic winterizing advice for a route that has not been designed. The Bloomcabin Prestige Greenhouse is listed with area options from 3.77 m² to 28.08 m²; plan a water point against your selected footprint and working layout rather than assuming one location suits every size. Record the final shut-off location for future care.

Before the base and paving are finished 3
List electrical equipment before requesting a design
List every electrical item you may want before requesting a design. Depending on your growing plans, that could include lights, a circulation fan, controls, a pump or seasonal equipment; these are possibilities to assess, not features supplied with a greenhouse. Gather each item’s manufacturer label or technical information, note where it would be used, and separate current needs from ideas for later. That gives the qualified professional a concrete equipment schedule and a chance to ask what may operate at the same time, rather than starting from an unclear request for a single outlet.
Think about future needs, but describe them specifically: a controller, another lighting area or a different watering system may change what should be considered. Do not estimate electrical demand from floor area. The Spacious Greenhouse is listed with options from 47 to 70 m², but area figures do not determine the supply or equipment a project needs. Share the selected layout and equipment schedule with the electrical professional, and ask whether future provision makes sense before routes are concealed. Any extra pathway should also be specified and documented by the professional, not added on guesswork.
Leave electrical design to a qualified professional
Electrical work in a greenhouse needs site-specific design. A qualified electrical professional can assess the available supply, intended equipment, route, exposure to moisture and other conditions, then determine the appropriate wiring and connection arrangements. Ask them to specify the circuits, protective measures, enclosures and controls for your site; do not select components, calculate loads or copy another garden project from a general article. The greenhouse model alone does not establish electrical requirements. Give the professional the equipment information and plan early enough for their decisions to be coordinated with the base and surrounding surfaces.
Ask what approvals or inspections apply at your location, who is responsible for arranging them, how the finished work will be tested, and which records you will receive. Share the base drawing, proposed route, water-system plan and equipment schedule so the designer sees the full setting. If you are considering the Classic Aluminum Greenhouse, identify your selected configuration on the plan rather than treating the model name as an electrical capacity or connection specification. At handover, make sure the responsible professional points out controls and isolation locations and explains which documents belong with the installation.
Before the base and paving are finished 4
Coordinate routes with the base and surrounding surfaces
Show each proposed route alongside the base outline and every planned surface: patio, path, edging, steps and permanent beds. A line drawn straight to the greenhouse says little about whether it can be installed, accessed later or coordinated with the construction sequence. Ask each trade to identify the route and connection points they require, plus decisions that must be made before the base or paving is finished. If existing underground services may be nearby, tell the contractors and ask how their locations should be verified before work starts. Note when access for route work will end. The plan shows intent, not an engineering specification.
Mark any expected crossings and ask the responsible professionals to coordinate water and electrical work. Do not assume two services can share a route or use the same installation method. Include the greenhouse’s proposed position and approach side: for a Lean-To Greenhouse, record the actual orientation and surrounding finished surfaces rather than infer service access from the model name. Coordinate any surface penetrations with the responsible trades. If a route changes on site, have them review the adjustment and update the plan before it is covered.
Keep service points clear of working and access areas
Inside the greenhouse, mark service points where they can be used without obstructing the door, main route or routine care. A tap tucked behind shelving is hard to reach, while a hose laid across a walking line can interfere with moving trays or tools. Sketch benches, growing areas and equipment before the final position is agreed, and consider who needs to reach a shut-off. Keep electrical outlet and equipment locations within the professional’s design; do not move them later to suit a new furniture arrangement without checking. Think about carrying water and supplies through the door, too.
Plan around people and tasks, not only the structure: entry, watering, harvesting, loading and cleaning each need usable access. The Limited Edition Aluminum Greenhouses are listed with area options from 3.77 m² to 28.08 m². Use that range to narrow your size options, then mark service points on the selected layout alongside the benches, growing areas and storage you expect to use. Confirm those locations with the relevant trades before installation. Leave room to see labels and reach designed controls, and revise any proposed positions that would become obscured once benches or storage are in place.

Before the base and paving are finished 5
Agree on responsibilities and handover records
Write down who is responsible for each part of the work before installation begins. Confirm who supplies materials, prepares routes, coordinates the base contractor, makes connections, arranges any necessary approvals or tests, restores paving, and provides service records. Ask the greenhouse supplier or installer what is and is not included; do not assume that assembling the structure includes plumbing or electrical work. If several trades are involved, name who coordinates dates and site access. A written scope can prevent a gap in which a route is ready but no one has agreed to make the final connection.
Agree on the handover documents in advance: a final route plan, photos taken before anything is covered, the location of water valves and electrical isolation points, equipment instructions, and any test or commissioning records that form part of the work. Let the responsible professional decide which technical documents apply. Keep the records with the greenhouse drawings and update them if the installed route differs from the proposal. Photos help show what was covered, but should complement a plan with reference points and clear connection locations, not replace it.
Walk the site before routes are covered
Before a service route is covered by paving, concrete or finished soil, arrange a walk-through with the trades responsible for it. Compare actual positions with the latest plan, confirm that connections emerge where intended, and check that doors, paths and future work areas remain clear. Ask the responsible professional whether the installation is ready to be concealed and whether any required test or inspection is outstanding. If an on-site adjustment is needed, agree on its new position and record the change rather than assuming the original drawing will remain accurate. Include the person completing the surface so the work sequence is clear.
Take dated photos that show each route in context and from a fixed reference point, then mark confirmed positions on the final plan before the surface is finished. Ask the trade to identify accessible valves and electrical controls and explain the handover; do not open or alter installed equipment yourself. Keep the final plan with the greenhouse model drawing and share it with anyone maintaining the garden or services. Clear records can help a future repair or layout change be handled without reopening more of the site than necessary.
Frequently asked questions
When should I plan water and electrical routes?
Plan them once you know the proposed greenhouse position and model, and before the base or surrounding surfaces are finished. The relevant trades can then review the drawing and coordinate their work while the routes are still accessible.
Does every greenhouse need a permanent water connection?
No. It depends on your watering routine and whether an existing outdoor tap can serve it. Consider how you will fill watering cans, use a hose or operate irrigation equipment, then discuss any new supply with a plumbing or irrigation professional.
Can water and electrical services use the same route?
Do not assume they can. Ask the qualified electrical professional and plumbing or irrigation professional to coordinate the route, installation method and any required separation for your site. A general sketch is not enough to settle those details.
Can I add services after the paving is finished?
It may be possible, but the route could be harder to access and finished surfaces may need to be disturbed. Have the trades assess your site before deciding; planning a possible future connection while the layout is open may give you more options.
Will the greenhouse installer connect water and electricity?
Do not assume that assembling the greenhouse includes plumbing or electrical work. Ask the supplier or installer to define what is included, then agree with the relevant trades who supplies, installs, connects, tests and documents each service.
A useful handover leaves no mystery about what was planned, what was installed and where the routes run. When the greenhouse footprint and daily use are clear, the water point can support your routine and the electrical layout can be designed for the intended equipment by a qualified professional. Agreeing on routes, trade responsibilities and records before paving closes access makes the finished services easier to use and easier to locate later.
