
Choosing Greenhouse Shade Cloth by Light and Placement
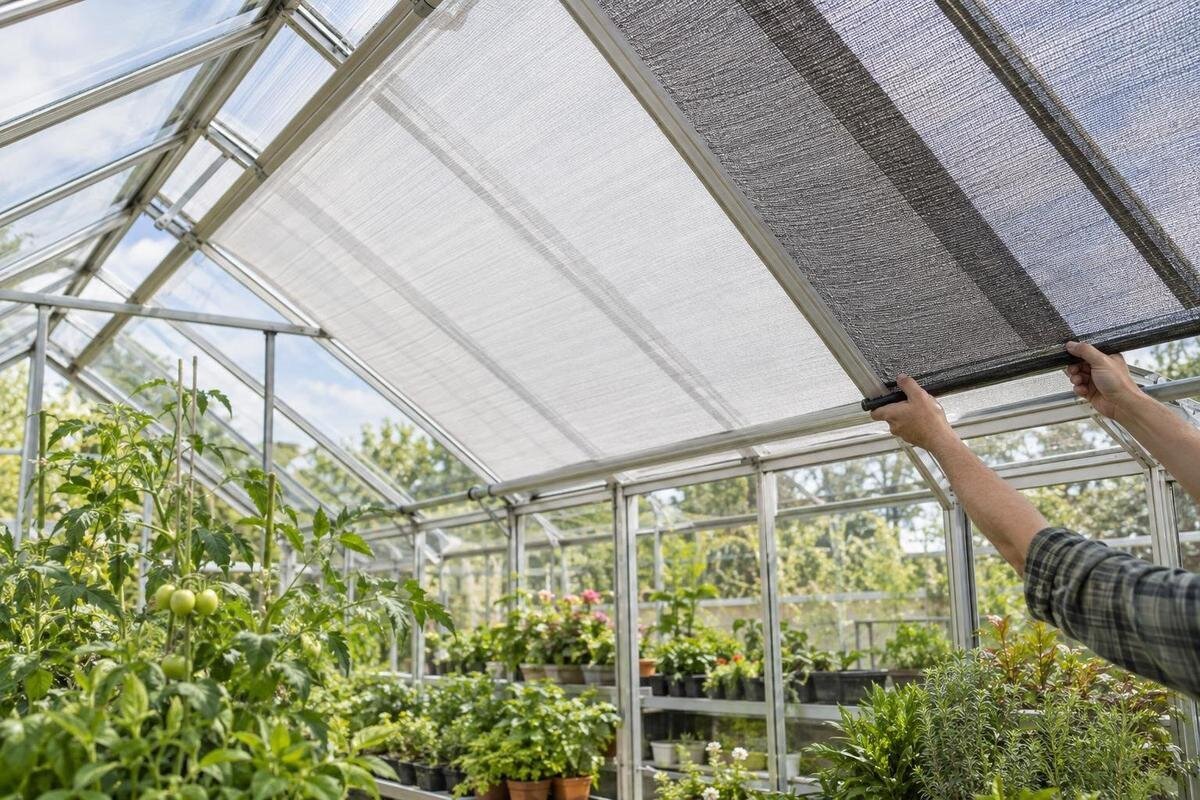
Greenhouse light and shade
Choosing shade cloth by its label alone is risky: a nominal shading percentage does not tell you how much useful light reaches a particular crop, for how many hours, or where the brightest patch falls. A more dependable approach is to identify crop-specific light needs, measure at plant height over representative days and choose coverage that addresses a repeated excess. This guide explains percentage labels, useful light readings, coverage planning and details to confirm before buying or fitting cloth. It focuses on light decisions rather than a universal shade recommendation.

What a shade-cloth percentage means
On a shade-cloth label, a percentage usually describes the proportion of incoming light the cloth is intended to block under a rating method. A nominal 30% shade rating is a product-level description, not a promise that each leaf will receive exactly 30% less light. At the bench, the result also reflects greenhouse glazing, sun angle, cloud, nearby obstructions and cloth orientation. Even on a clear day, the amount of light entering changes by the hour. Treat the label as a comparison point for cloth products, not a complete prediction of growing conditions.
Check whether the number refers to light blocked, light transmission, visible light, photosynthetically active radiation (PAR) or total solar radiation, and ask how it was tested. These measures are not automatically interchangeable. In your comparison notes, put the percentage beside its stated meaning rather than recording the number alone. This makes it easier to spot products whose labels describe different things. Keep the rating separate from the greenhouse area shown in a catalogue: the Limited-Edition Aluminum Greenhouses with Storage page lists an area range of 5.52 to 28.08 m². That figure identifies structure options; it does not tell you the cloth’s shade rating, dimensions or the light reaching your crops. Give structure size and cloth rating separate columns in your buying notes so neither is mistaken for a measure of crop light.
Set a light target for each crop
Before shopping, list the crops, varieties where relevant, growth stages and intended growing periods in each bed. Light needs vary by crop and stage; plants grown mainly for leaves and those grown for fruit do not automatically share a target, and seedlings may need different conditions from established plants. Look for a numeric PPFD range or daily light integral (DLI) in a reliable crop guide, from a seed supplier or through a local horticultural advisory service. A general “full sun” note is useful context, but too broad to set a shade percentage by itself. Record the units and growth stage alongside each target. If the guidance gives several ranges, keep their conditions attached rather than selecting one number without its context. Your comparison should address the crop you are growing now, not simply the crop name.
Draw a bed map and assign a target to each crop group instead of averaging across the greenhouse. Mark movable pots, trays and shelves separately because they may sit at different heights or move during the season. Give each group a clear label that you can reuse in your measurement log. Where crops share a bed but have different targets, mark their positions individually so the eventual coverage plan does not treat them as one uniform group. If you are comparing a structure at the same time, the Bloomcabin Prestige Greenhouse listing covers area options from 3.77 to 28.08 m². Make your final crop map for the selected setup, distinguishing planted beds from walkways and other space. Catalogue area alone does not establish planted-bed area or crop-light needs.
Measure light at canopy height
A PAR quantum sensor measures PPFD, or photosynthetic photon flux density, usually reported in micromoles per square metre per second. DLI is the accumulated photosynthetic light over a day, so a brief reading around noon cannot represent it on its own. Match the measurement to the target you have recorded: keep instantaneous PPFD readings separate from daily totals rather than comparing the numbers directly. If your crop guidance uses DLI, plan how you will record light over the day instead of relying on a few spot readings. A lux meter weights light for human vision; with the same meter, it can help reveal relative bright and dim spots, but it is not a dependable universal conversion to PPFD. Phone apps may help track rough trends, but they are not a substitute for reliable crop-light measurements.
Take readings at canopy height, not just in the walkway or at the greenhouse centre, and position the sensor as its manufacturer directs. Sample the middle and edges of each distinct crop zone; if possible, compare indoor and outdoor readings at the same time. Keep your body and tools from shading the sensor. The Spacious Greenhouse listing shows area options from 47 to 70 m². For the layout you are considering, mark the sampling points on your crop map before taking readings so you do not overlook beds farther from the central walkway. Include both apparently bright and dim positions rather than choosing only the most exposed spot. Record the sensor height at each point so later measurements can be compared with the same crop position.
Keep a representative light log
One reading on a clear afternoon is a poor seasonal baseline. For several representative days, note light in the morning, around solar noon and later in the day; include bright and overcast conditions if both occur during your normal growing weather. Keep measurement times and sensor positions consistent, and record the date, cloud cover, crop height and glazing condition. A log covering more than one day helps distinguish a recurring peak from an unusual spell of sun. Use a separate entry for each observation rather than reducing the day to its highest reading. If you miss a measurement, leave a gap instead of treating an estimate as a recorded value. When reviewing the log, compare similar times and conditions first; this makes the pattern easier to interpret without overlooking differences between days.
Link each reading to a named bed or mapped position, rather than labelling it only “left” or “back.” You can also record temperature, humidity and vent status separately if they are relevant, so you do not attribute every change to shade. For a layout based on one of the Aluminum Greenhouses, whose listed area options range from 3.77 to 28.08 m², use the same bed names on the plan and in the log. Note any nearby tree or building shadow that crosses the growing area, including when it reaches and leaves a measurement point. Keep these observations beside the readings they help explain, rather than relying on memory when you compare days.

Check whether shade addresses the problem
Compare your readings with the light target for the crop and stage in question. A brief, strong midday peak is different from light that exceeds the target for much of the day. Pale leaves, scorched patches, stretching or poor fruiting may be clues to investigate, but they do not prove that shade is needed; water stress, nutrition, disease and other conditions can produce confusing signs. Use crop guidance and measurements together instead of diagnosing from appearance alone.
If readings show excess light only in one bed or time window, targeted or adjustable coverage may preserve useful light elsewhere, provided the arrangement is compatible with the structure and cloth instructions. If readings are already low on cloudy days or early and late in the day, permanent broad coverage may worsen the shortfall. Be clear about what you want to change: a shade percentage describes a cloth rating, not a guaranteed temperature drop or a cure for every growing problem.
Match coverage to the crop zones
Plan coverage from your light map. If one bench repeatedly receives more light than its crop target while the neighbouring bed does not, consider limiting shade to the affected zone where a compatible, safely supported arrangement is available. Whole-area coverage is more appropriate only when the measured pattern and crop plan support it. A bright patch over one crop is not, by itself, a reason to reduce light across unrelated plants. Observe how the sun moves, since a narrow shaded area at one time may miss that crop later in the day.
Leave access to doors, vents, watering points and routine work routes, and consider whether coverage would unintentionally reduce light to lower or neighbouring crops. The Lean-To Greenhouses listing gives an area range of 3.69 to 14.34 m². If you are considering one of these structures, sketch the selected layout with the crop positions and proposed coverage boundary, rather than using the model name to predict which bed receives sun. Compare a whole-area plan with a bed-specific plan on the same sketch. Identify which crops each arrangement would cover and which would remain unshaded, including plants on shelves or beneath taller crops. This gives you a clearer basis for discussing cloth dimensions once the coverage boundary has been established from your observations.
Revisit shade as the season changes
Shade needs can change with the season and plant stage. Day length, sun angle, cloud patterns and leaf canopy develop over time, while the same crop may move from seedlings to flowering or fruiting. Cloth selected for the brightest weeks may reduce useful light in shoulder seasons if it stays in place by default. Local growing conditions also vary, so another gardener’s calendar may not suit your greenhouse. Treat shade as a setting to review against current crop targets and measurements, not as an automatic permanent fixture.
Note when you put cloth up, change coverage or remove it, then repeat readings at the same points. Update the map if crops move; otherwise, you may be responding to an earlier layout. The Limited Edition Aluminum Greenhouses listing shows area options from 3.77 to 28.08 m². For your selected layout, keep a dated version of the crop map with each seasonal review so the record shows both what was growing and where the cloth was placed. Reassess after a seasonal shift or a change in planted area. If you retain the existing coverage, record the readings and crop targets that support that choice rather than leaving cloth in place simply because it helped once.
Compare the cloth specification, not only its rating
Ask what part of the light spectrum or solar energy the rating covers, what transmission data is available and how the cloth was tested. Find out whether a stated percentage is nominal or measured under a particular setup. Weave, colour and construction can affect the light that passes through; if crop light is the concern, written test information is more useful than judging cloth by appearance. When crop guidance uses PPFD or DLI, check whether the supplier’s data can be compared on a compatible basis. Compare products only when their stated methods are reasonably alike.
Confirm the cloth’s dimensions, format, edge treatment and care instructions for the way you intend to use it. Keep these practical details beside the rating information so a comparison does not stop at the percentage. The T-Shaped Orangery Greenhouse page lists area options from 16.52 to 30 m²; that structural area is not a cloth transmission specification or roof measurement. Identify the exact structure option in your enquiry and describe whether you want to cover a roof surface, a side or an individual growing zone. Confirm dimensions and compatibility for that setup before comparing cloth quantities. If a supplier proposes an alternative format or size, check it against the same coverage plan. If the percentage or test basis remains unclear, ask what the figure represents before treating it as comparable with another cloth.

Check cloth dimensions and fixing methods
Measure the surface the cloth is meant to shade, not simply the greenhouse area or the total planted-bed area. Confirm the intended span and boundaries using the greenhouse and cloth documentation; a roof, side and individual growing zone can have different shapes. Any allowance for hems or overlap depends on the cloth design, so follow the maker’s instructions rather than estimating from a general area figure. Plan around doors, vents and maintenance access, and record the measurements you use when comparing options.
The Pyramid Greenhouse listing shows an area range of 5.53 to 18.9 m², but that figure does not establish cloth dimensions or suitable fixing points. Check the instructions for the exact greenhouse model and the cloth before attaching anything. Do not improvise drilling, tensioning or wind-load assumptions. If the permitted method is unclear, ask the manufacturer or a qualified installer to confirm a compatible approach. Give them the proposed coverage sketch and the measurements for the surfaces involved, rather than only the total greenhouse area. Include the locations of openings and any access you need for removing or adjusting the cloth. The agreed arrangement should leave greenhouse openings accessible and operable.
Test the plan and review the results
Where the product instructions permit a small, reversible trial, test the planned cloth over one representative crop zone before committing to broad coverage. Use the same meter, height and positions before and after, and compare readings at similar times and under similar sky conditions. Otherwise, a passing cloud or a different sensor location can look like a cloth effect. Change one factor at a time where practical, keep an unshaded comparison area if you can, and record exactly what changed. Decide in advance which crop target and measurement points you will use to assess the trial. Include positions near the coverage edge as well as beneath its centre, using the same points for each comparison. Follow structure and cloth instructions throughout the trial, and note any interruption that makes the before-and-after readings less comparable.
Watch the crop through a meaningful growth interval, not just immediately after coverage changes. Recheck the measured range, note the crop stage and look at new growth or flowering and fruiting as relevant. If the response is poor, revisit the diagnosis and growing conditions rather than automatically buying a stronger shade rating. A short record of dates, crop stage, coverage and meter readings gives you useful evidence for the next adjustment and helps separate a lasting improvement from one unusual day.
Frequently asked questions
Does a 50% shade rating mean half the light reaches the plants?
Not necessarily. The rating describes the cloth’s light reduction under a particular test method; the greenhouse covering, sun angle and installation also affect light at the canopy. Check what the percentage measures, then compare readings at plant height.
What shade percentage should I use for tomatoes or lettuce?
There is no reliable percentage for every variety, growth stage and greenhouse. Find crop-specific light guidance, measure what reaches the growing area, and choose coverage based on the gap between those readings and the crop’s target.
Can I use a lux meter instead of a PAR meter?
A lux meter can help compare brighter and dimmer spots when you use the same meter, but lux is not a dependable universal conversion to PPFD. For crop-light targets expressed as PPFD or DLI, use a suitable PAR sensor.
Should shade cloth cover the whole greenhouse or just one bed?
Use your light map and crop plan. If only one zone repeatedly receives more light than its crop target, targeted coverage may avoid reducing useful light elsewhere. Check that the arrangement is compatible with the greenhouse and cloth instructions.
How often should I reassess my shade plan?
Repeat your readings when the season, crop stage or planted layout changes. Keep dates and sensor positions in your log so you can compare conditions, rather than leaving cloth in place just because it helped during an earlier period.
A useful shade plan begins with a crop target and a measured light pattern, not a percentage that sounds reassuring. Choose cloth whose rating you understand, place coverage over the zones that need it and revisit the plan when crops or seasons change. Keeping your readings, crop map and coverage notes together makes later adjustments more deliberate and helps prevent shading plants that still need the light.
