
Planning Greenhouse Space Around Trees and Hedges
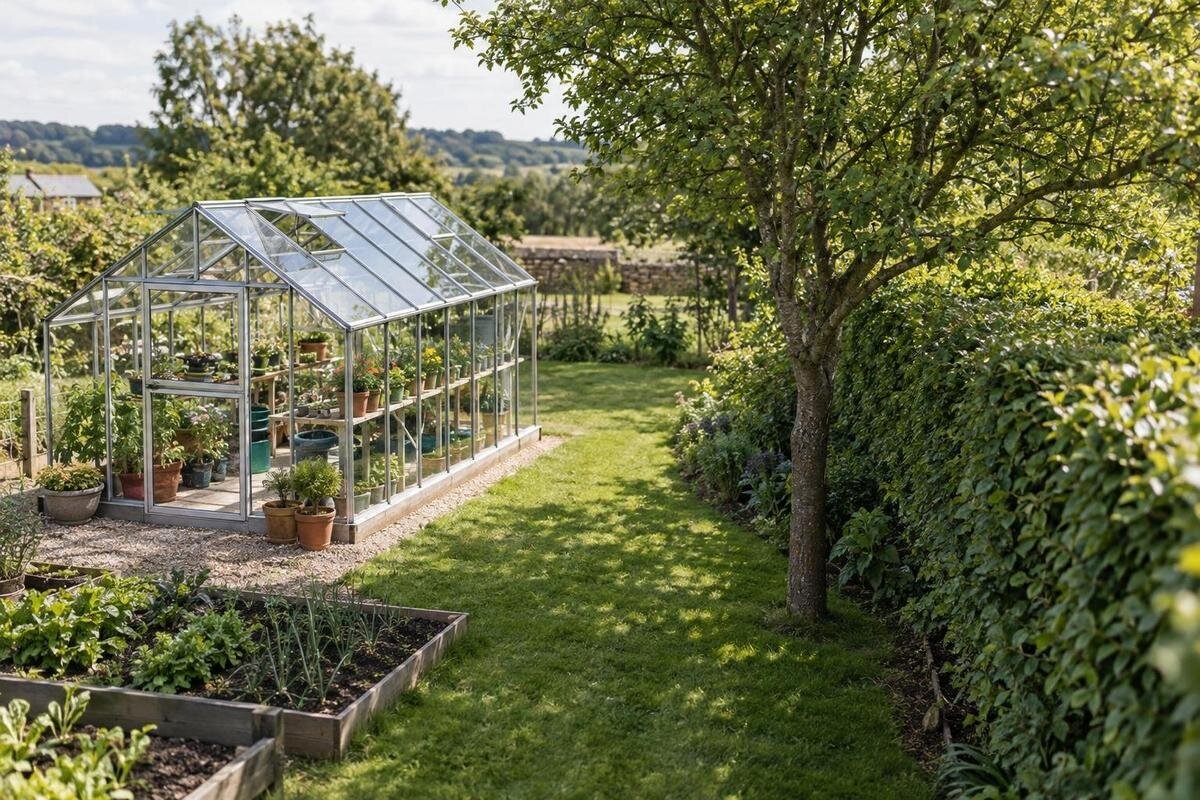
Greenhouse site planning
Choose the separation by looking at the planting’s likely future size and the work needed around the greenhouse, not by copying a single number. Trees and hedges differ in canopy, roots, shade and debris; sites differ in exposure and available access. A planting-distance worksheet brings these issues onto one scaled plan, so a gap that looks generous today is not mistaken for permanent clearance.

01
Why there is no universal planting distance
Distance is often treated as a measurement from a tree trunk to a greenhouse wall, but that covers only one part of the problem. A young crown may broaden, a hedge may need extra width for trimming, and roots can extend beyond the ground that looks occupied. The greenhouse needs a practical envelope too: its exact outside dimensions, any overhang or opening shown in its drawings, and room to reach the sides that require upkeep. The closest point matters, but it does not describe every kind of clearance. A gap that works for one task can be too tight for another.
Separate the questions you are trying to answer. Will nearby plants shade the growing area at useful times? Can you reach the greenhouse to clean it and deal with routine repairs? Could excavation or an overhead branch pose a concern? Write down the crops or uses that set your light priorities, as well as the sides you expect to service. Those questions can produce different answers for the same spot, so record them separately rather than combining everything into a supposed safe setback. A worksheet helps compare locations; it is not a construction clearance or proof that a tree is safe. Where root disturbance or overhead risk is uncertain, request a site-specific assessment.
Draw the greenhouse and planting on one scaled plan
Begin by drawing the greenhouse outline to scale, then mark the centre of each tree trunk and the current face or stem line of every hedge. Add fixed references such as the house, fence, garden paths and any known service route so you can relocate each measurement later. Choose a scale that leaves room for notes, label every distance in metres or centimetres, and avoid mixing paces with tape measurements. Record exactly where each measurement begins and ends. Include nearby trees even if they are outside your property, since their shade or branches can still affect the proposed spot. A dated photo from the same viewpoint helps, but cannot replace the measured sketch when you compare narrow gaps. If a measurement is approximate, label it rather than making the drawing look exact.
Use the selected model’s external drawing, not just a catalogue area or approximate bed size. Add an overhang, door swing or opening only where the chosen drawing shows it, and mark the route you intend to keep clear. For an initial comparison, the Classic aluminum greenhouse listing gives a range from 3.77 m² to 28.08 m²; the selected variant’s outside dimensions still belong on your plan. If you have not chosen a model, draw a clearly labelled placeholder footprint and replace it when you have exact dimensions. A product photograph can suggest a shape, but it is not a scale drawing. This prevents an area figure from being mistaken for the space needed beside a tree.
02
Allow for mature tree and hedge growth
Identify each tree by species or cultivar if you can, then use a reliable local horticultural reference or an arborist to estimate its mature height and crown spread. A nursery label for a young specimen describes what it is now, not necessarily its eventual footprint. For an established tree, note the crown’s current reach in several directions; it may be uneven because of buildings, pruning or competition with nearby plants. Growth estimates vary with species and site conditions, so record the source and date. If the species is uncertain, mark that uncertainty instead of assigning a precise radius from appearance alone. If the plan depends on regular pruning to limit growth, record that ongoing work rather than treating today’s size as permanent.
On each candidate plan, draw both the current canopy and an expected mature outline. If the estimate is broad, add smaller and larger plausible outlines and see whether either would shade the greenhouse, overhang its roof or obstruct a needed route. Hedges need the same attention: record the trimmed face and the width they are expected to occupy between cuts. A routinely pruned hedge still needs space for its normal growth and for the person doing the work. The T-Shaped Orangery Greenhouse listing covers areas from 16.52 m² to 30 m²; place a chosen variant’s actual outline beside those growth estimates rather than treating the area range as a clearance guide.
Treat root questions as site-specific
Above-ground size is not a reliable map of a root system. Roots may extend beyond the canopy edge, and their pattern depends on species, soil, moisture, past disturbance and the tree’s condition. A trunk-to-wall measurement therefore cannot establish where roots are, how large they are or whether excavation is acceptable. Note visible surface roots, raised paving, old planting beds and any known prior root work as clues, not as a complete underground survey. Do not use the absence of visible roots to set an excavation line. A mature hedge can also have a broad, overlapping root area that reaches farther than its trimmed face suggests. Mark what is observed separately from what is only assumed.
Before selecting a base location or digging near an important tree, have the specific site assessed by an arborist or other qualified professional familiar with tree roots. Ask what information they need and whether the proposed work could affect the planting; do not assume a distance, trench or root cut will be harmless. A qualified installer or site professional should also review the chosen greenhouse drawing and ground conditions. When comparing a variant from the Bloomcabin Prestige Greenhouse listing, which shows areas from 3.77 m² to 28.08 m², mark its proposed base perimeter and any planned excavation on the sketch for review.

03
Map shade across the seasons
Map shade at different times of day and in more than one season. On the plan, mark where each nearby tree or hedge casts shade in the morning, around midday and in the afternoon, and note the date and direction. Dated photographs from the same fixed viewpoint make comparisons easier. Deciduous trees create one pattern when leafed out and another when bare; evergreens screen light throughout the year. The sun’s lower winter path can extend shadows differently from summer. Include trees beyond the property line if they affect the site, and do not treat one bright-day visit as a year-round record. Draw the shadows for each proposed greenhouse position, since moving it changes which plants affect its light.
Use the map to identify which parts of the proposed growing area lose direct light and when, then compare that pattern with the crops and greenhouse uses you have in mind. Canopy height, orientation, neighbouring buildings and season all affect the result, so a single distance from the trunk cannot stand in for a light check. If you cannot observe the location over a full year, gather dated photographs or other reliable site records from different seasons and label what is missing. The Pyramid Greenhouse listing ranges from 5.53 m² to 18.9 m²; add the selected variant’s outside outline to the shade diagram to see how the observed shadows cross the growing space.
Account for leaves, clippings and falling branches
List what each plant sheds and where it tends to land. Leaves, needles, blossoms, fruit, seed pods, sap and hedge clippings can create different cleaning jobs; some arrive seasonally, while others may collect after trimming or storms. Mark the exposed sides of the proposed greenhouse and note whether the chosen drawings show roof channels, vents or tracks where debris could collect. Do not assume that every design has the same fittings. Consider whether you can reach the relevant roof edge and clear the ground beside it without forcing a route through branches. Note when heavier accumulation is likely, so you can see whether access will be needed during that period. The goal is to flag predictable maintenance, not forecast every falling leaf.
Treat dead, cracked or overhanging branches as a separate concern from ordinary leaf fall. A branch failure could damage the structure and put people at risk; pruning large or high branches should be assessed by an appropriately qualified arborist. Record the concern for review instead of deciding that shifting the greenhouse slightly or removing one limb resolves it. Revisit the plan after any agreed tree work because the canopy may change. A greenhouse listing with built-in storage, such as the Limited-Edition Aluminum Greenhouse with built-in storage, still needs outside access for clearing debris and checking the structure.
04
Reserve room for cleaning and repairs
Draw a working route around the greenhouse, not just an approach to the door. Decide which sides you need to reach for washing the glazing, checking the frame, clearing debris or making a repair, and show that route on the same plan as the plantings. Consider what you may need to carry through it, such as cleaning supplies or a replacement part, and whether it remains usable when the hedge is at its widest. Measure the narrowest point along the route; a generous entrance followed by a tight gap beside mature growth can still make routine work difficult. Mark which sides need regular access and which may need access only for occasional service.
Set the route according to the jobs you expect rather than borrowing a generic clearance figure. A larger greenhouse can leave less room around its sides on the same plot, even if its outline fits. The Spacious Greenhouse listing gives an area range from 47 to 70 m²; use the actual outside dimensions of a particular option to test where you can walk and work. If one side would be inaccessible, decide whether a different placement or footprint makes maintenance realistic before committing.
Plan for the hedge’s maintained width
Treat a hedge as a growing strip rather than a line on a property plan. Mark its current width, expected maintained width and the space used by the person or equipment that keeps it shaped. Consider both faces if you need to work from each side; one may be inaccessible even when the greenhouse is farther away on the other side. The hedge can cast continuous shade, and its roots may extend beyond the stems. If it is periodically reduced or replaced, note whether that is an established maintenance plan or only a possibility. Ask whoever maintains it how wide it normally grows between cuts, and use that width—not the freshly trimmed face—as the edge in your greenhouse sketch.
Where a hedge sits at a boundary, confirm who maintains it and what access is available before relying on that strip for pruning, excavation or greenhouse servicing. Do not plan on reaching across another property unless the arrangement is agreed. If the hedge must stay, draw its maintained width first, then place the greenhouse and work route around it. The Limited Edition Aluminum Greenhouses listing covers areas from 3.77 m² to 28.08 m²; compare the selected variant’s outline with the space needed for hedge trimming. Show where clippings would be collected and carried away as well as where trimming would take place.

05
Compare layouts using the same site information
Once the plant and task notes are on the plan, compare a few placements instead of moving the greenhouse by eye. Try shifting it away from the widest mature canopy, turning the outline to keep a useful access side clear, or using another part of the yard; then redraw the seasonal shade and root questions for each option. Mark any planting you intend to retain as a fixed feature, rather than assuming it can be removed later. A lean-to format may be worth comparing if it changes where the structure can sit, but it does not erase nearby root, branch or shade issues. The lean-to greenhouse range is one catalogue format to assess alongside freestanding models, not evidence that a particular wall-side location will work.
Keep every option on the same scale, with the selected structure’s external outline and any shown door movement. Test the tightest pinch point, the side you would use for cleaning and the projected canopy at maturity. A location with a comfortable path but persistent shade may not meet your growing aims; one with good light but no way to clean a side can be frustrating later. Write the trade-off beside each sketch. A format label or product photograph cannot substitute for the dimensions of the exact variant. If a wall connection is involved, verify the intended installation and have site-specific questions reviewed by a qualified professional.
Turn the sketch into a planting-distance worksheet
Turn the sketch into a row-by-row worksheet. For each tree or hedge, record its name or description, current and expected mature extent, distance to the nearest greenhouse edge, seasonal shade, likely debris and the access route. Add root or branch questions, the source and date of any growth estimate, and a confidence note. A simple status such as measured, estimated or unverified makes it easier to see which entries need follow-up. Attach the matching photographs or diagrams so another person can understand the reference points. Writing “unknown cultivar” or “winter shade not observed” is more useful than false precision. If you compare two placements, complete the same fields for both instead of relying on memory.
Use the review to identify questions for specialists, not to declare that a site is structurally approved. An arborist can assess important trees, root disturbance and branches; a qualified installer or site professional can review the exact greenhouse drawing, proposed base and ground conditions. Keep the selected variant’s plan with your worksheet, and update it if you change size or position. Note who will answer each unresolved question and what information they need to review. The outcome may be a wider gap, a shifted footprint, a different planting arrangement or another site. The useful choice allows for future growth and leaves enough room for the care both the planting and greenhouse will need.
Frequently asked questions
Is there a standard minimum distance between a greenhouse and a tree?
There is no universal setback that suits every tree and greenhouse. Mature canopy, roots, seasonal shade, falling branches, the chosen footprint and maintenance access all vary. Use a scaled plan to compare those factors, and get a site-specific assessment for root or overhead concerns.
How far should a greenhouse be from a hedge?
Measure from the greenhouse’s outside edge to both the current and expected maintained width of the hedge. Include room for trimming and clean-up, and consider shade and roots. There is no single hedge-to-greenhouse gap that applies to every species and site.
Do tree roots stop at the edge of the canopy?
Not reliably. Roots may extend beyond the canopy, and their pattern depends on the tree, soil, moisture and site history. A measurement to the trunk or dripline cannot establish where roots lie or whether excavation is appropriate. Ask an arborist if work is planned near an important tree.
Can pruning make a close greenhouse location suitable?
Do not count on pruning to resolve every issue. It may change shade or branch clearance, but it will not necessarily address roots, debris or access. Significant pruning should be assessed by an arborist, and any ongoing maintenance plan should be realistic.
Is the greenhouse’s listed area enough to tell if it will fit?
No. An area figure is a comparison aid, not an outside plan. Check the dimensions for the exact model and variant, including any overhang or opening shown in its drawings, then place that outline on your sketch. The maintenance route must fit beside the planting too.
Your final spacing should come from the mapped site, the selected greenhouse drawing and the care the planting will need over time. If a candidate location still depends on unverified root spread, a speculative pruning plan or squeezing past a mature hedge, leave that uncertainty visible and have it assessed before committing. A measured comparison may point to a wider gap, a changed orientation or another site; what matters is that it accounts for future growth and the upkeep the greenhouse will require.
