
How to Raise Plants in a Greenhouse for Outdoor Raised Beds
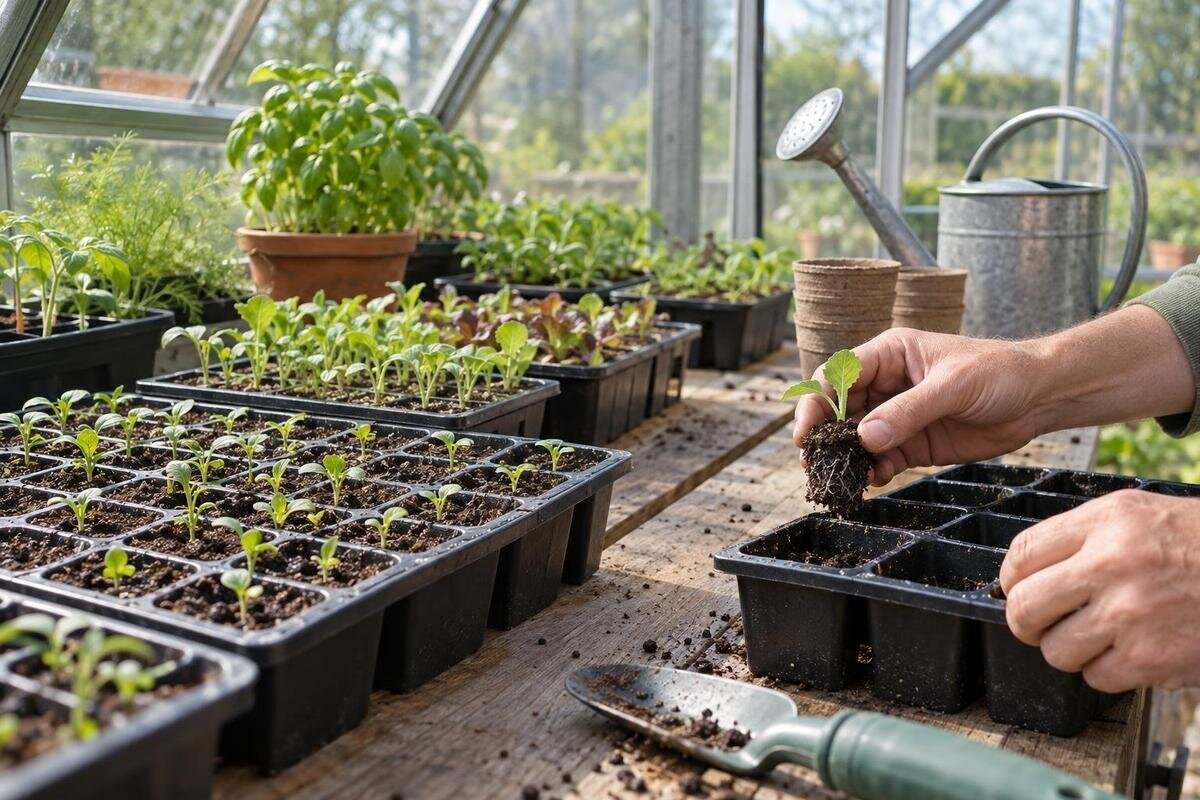
Propagation planning
Raising seedlings in a greenhouse for outdoor raised beds is a timing problem as much as a sowing task. The greenhouse is temporary nursery space; the beds are the destination. Plan backwards from when each crop can go outside, allow room for trays as plants grow, and schedule a gradual hardening-off period. The handover works best when plant readiness and bed conditions meet. Starting seeds early without that plan can leave seedlings crowded under cover or tempt you to transplant into soil and weather that are not yet suitable.

01
Temporary greenhouse nursery space
Treat the greenhouse as the starting point for outdoor raised beds, not automatically as the crop’s final home. It provides a sheltered place to sow and raise young plants, while the bed remains the destination. That distinction gives each batch an intended planting window: seedlings need enough space while they remain inside, and they need time to adjust to outdoor light, air movement and changing temperatures before planting. Greenhouse temperatures can rise quickly on sunny days and fall sharply overnight. Unless conditions are specifically managed for the crop, do not assume an unheated structure is frost-proof. Plants that will stay in the greenhouse need their own space and care plan. Plan each batch’s progression from sowing through hardening off to planting.
Decide which crops to start under cover and which to sow directly outdoors, using crop and variety guidance rather than a blanket rule. Record when nursery space should become free as well as when sowing begins: fresh trays may overlap with earlier starts that are hardening off. If the greenhouse also holds plants intended to remain inside, do not count their area as space that will become available for the beds. The Oasis Pyramid Greenhouse listings cover 5.53 to 18.9 m². Use that area as an initial comparison, then check the selected model’s dimensions against the space needed for your trays, access route and work area. Mark each batch’s expected planting window alongside the next planned sowing to spot space conflicts early.
Plant numbers from the raised-bed plan
Measure each raised bed and mark its crop positions before buying seed or filling trays. Follow spacing guidance for the particular variety and the way you intend to grow it: a compact bush, a sprawling plant and a trained crop do not use the same area. Mark the bed edges, supports, access strips and spots already occupied, rather than treating every centimetre as planting room. Include enough access to reach plants for watering and harvest. A simple sketch with crop names and plant counts gives you a realistic target and makes it easier to reserve space for another sowing before the bed is full. Count what you actually plan to grow, not just the maximum that can fit.
Then decide on a modest backup, not an unlimited surplus. Germination may be uneven and some seedlings may be weak, but extra trays create demand for greenhouse space and can tempt you to crowd the bed. Base the reserve on your experience with that crop and seed lot; mark which seedlings are spares and which are scheduled for a later planting. The Limited-Edition Aluminum Greenhouses with Storage range is worth comparing if storage forms part of your layout. Check how the chosen version allocates space for stored items, trays and movement; its name and overall area do not tell you how much nursery room remains.
02
Space for trays and growing seedlings
Measure the trays, pots and containers you actually use, then sketch their footprints on the proposed bench or shelf layout. Leave room to reach each tray, water without knocking over neighbouring pots, and lift a flat out for inspection. If you pot seedlings into larger containers in the greenhouse, include those larger footprints as well as a temporary place to set empty trays. Floor area and usable propagation area are different: a doorway, frame, central aisle or stored supplies reduce what is practical for plants. Check access from the side where you will work, not just whether everything fits on paper. Also check that taller seedlings will not be obstructed by an upper shelf. Do not assume benches or shelves are included unless the product details confirm it.
Plan for the busiest week, not the sowing date. Seedlings may move into larger containers or need more separation as they develop; a layout that fits at emergence can fail later. Add together the batches that will overlap, include space for daily handling and keep a margin rather than packing every surface. Then decide whether to stagger sowings, make fewer starts or compare another greenhouse size. The Bloomcabin Prestige Greenhouse listings range from 3.77 to 28.08 m²; compare those area options with your peak footprint and verify the selected model’s detailed layout. Area alone does not establish bench dimensions, storage or circulation space.
Sowing dates and outdoor planting windows
For each crop, choose a realistic outdoor planting window first, preferably a range rather than a single day. Base it on crop tolerance, variety guidance and local growing conditions instead of a universal calendar date. A local average frost-free date is a planning reference, not a guarantee; check the forecast and whether raised-bed soil is workable and suitable as planting approaches. Warmth-loving seedlings may need to wait for favourable nights and soil after the average last-frost date, while hardier crops follow a different schedule. Use the seed packet or a trusted regional growing guide for the specific variety, since one date is not right for every crop.
Count backwards from that window. Allow the crop-specific time from sowing to transplant size, then include the hardening-off period and flexibility for slow germination or a forecast that delays planting. Record actual emergence and transplant dates so next year’s plan reflects your garden, not just the packet estimate. A simple line for each crop—sowing date, expected transplant window, hardening period and bed—helps reveal where batches overlap. If that overlap prompts a structure-size comparison, the Spacious Greenhouse range is listed at 47 to 70 m². Compare the stated area and chosen layout with actual peak demand; extra greenhouse space cannot correct a too-early sowing or an unready bed. Recheck the forecast as the planting window approaches and shift the handover if conditions change.

03
Crop-specific sowing methods and batch sizes
Choose a propagation method crop by crop. Some plants are commonly started under cover and moved as young plants; others are usually sown where they will grow or do not respond well to root disturbance. Use species-specific instructions for the method and the stage at which a transplant is ready to move. For seed-tray starts, choose cell size and container depth to suit how long seedlings will stay inside, not only their first days after emergence. Sow at the recommended depth, then label each tray with crop, variety and sowing date so similar-looking batches are not mixed up.
Group crops with similar sowing and planting windows when that makes care easier, but keep varieties labelled. A succession crop can be sown later instead of being held beside the first batch for weeks; this reduces overlap and keeps plants closer to the bed’s schedule. Avoid mixing crops with conflicting transplant dates in one tray, since they may need to move at different times. The Classic Aluminum Greenhouse listings cover 3.77 to 28.08 m². When comparing sizes for seed-starting, use the number of trays in each batch to sketch how you would arrange them. Check that you can reach and remove each batch without disturbing plants scheduled to stay longer.
Greenhouse conditions during seedling growth
Check seedlings as conditions change through the day, because a protected structure can be cool in the morning and hot in bright sun. Put a thermometer near plant level, out of direct sun, and look at readings at different times rather than relying only on the outdoor forecast or one midday glance. Follow crop guidance for temperature and light; the same conditions do not suit every start. Ventilate when the greenhouse becomes too warm, and avoid placing trays in a hot spot or cold draught. A short, repeatable inspection helps you catch stress before it affects an entire batch. Note unusual conditions if they explain slow or uneven growth.
Water according to the growing medium’s condition, not a fixed weekday routine. Small cells can dry quickly, while constantly wet mix can leave roots short of air; the interval changes with container size, weather and growth. Water evenly and allow excess to drain where the setup permits, then check again after a bright day. If different groups dry at different rates, inspect them separately rather than watering every tray to match the driest one. Keep crops with different needs in separate groups when practical, remove damaged starts and leave room for foliage to expand. The Lean-To Greenhouses listings range from 3.69 to 14.34 m². If comparing that format with another, check the site, selected footprint and usable tray layout; the model name and area range do not establish light conditions or bench capacity.
04
Hardening seedlings off before planting
Do not assume that growing in a greenhouse has hardened seedlings off. They have had less exposure to outdoor wind, direct sunlight and day-to-night variation than plants already outside. Begin in a sheltered position for a limited period, then increase the time and exposure gradually as the crop tolerates it. Avoid starting with the harshest conditions of the day if seedlings are delicate. Watch for persistent wilting or leaf damage; if signs of stress appear, slow the change rather than pressing on to meet the planting calendar. The pace depends on both crop and weather, so use crop-specific guidance instead of one timetable for every tray. A change in wind or sunshine can alter how demanding an outing is.
Keep hardening-off groups organized by crop and intended bed. Label the trays, note when the transition begins, and bring tender plants back under protection when conditions are unsuitable. Leaving them outside simply to meet a target date defeats the purpose. Opening greenhouse vents can adjust the indoor environment, but it does not replace gradual outdoor exposure. When comparing the Limited Edition Aluminum Greenhouses for nursery use, consider how you will carry trays between the greenhouse and the hardening-off area. Include room to group trays near the exit without blocking access to plants that are still growing inside.
Plant readiness and bed readiness
Assess the plant and bed together. A seedling should be healthy and sturdy, at the crop-appropriate stage and able to hold a root ball without being severely crowded. Height alone is not a reliable test: a tall, soft plant can be less suited to transplanting than a compact one, and each crop has its own preferred size or leaf stage. Use the seed packet or a crop-specific guide for those cues. If one group is ready before its bed, review its nursery space and potting needs rather than treating the greenhouse as indefinite storage. Note the delay when planning the next sowing. Do not wait for every plant in a mixed batch to look identical.
Before carrying trays out, confirm that the bed is prepared and the forecast suits the crop. Soil should be workable rather than frozen or waterlogged; check any crop-specific warmth requirement and the outlook for the days ahead. Greenhouse warmth does not warm the bed, and a clear afternoon does not guarantee a suitable night. Mark planting positions and have labels and water ready before bringing out seedlings, so the trays spend less time exposed while you work. If the soil or forecast is unsuitable, keep the batch under appropriate protection and reassess when conditions improve. The T-Shaped Orangery Greenhouse listings cover 16.52 to 30 m²; compare the chosen footprint and placement with your beds and carrying route, not just the stated area.

05
Moving seedlings into the raised beds
On planting day, choose a calm time when sunlight is less intense if practical, especially for delicate seedlings. Water a tray first if its growing medium is dry, then lift each seedling out, supporting the root ball or holding a leaf as appropriate rather than squeezing the stem. Plant at the depth and spacing recommended for that crop; avoid bending roots into a shallow hole or leaving them exposed while you prepare the bed. Firm the soil gently without compacting it, and water in as needed to settle soil around the root zone. Work at a steady pace so plants are not left drying beside the bed.
Plant one bed or section at a time, keeping remaining trays protected and labelled until their turn. Match each seedling to its marked position, then check spacing before filling the row; corrections are easier while there is still room to adjust planting positions. After transplanting, monitor moisture near the roots and watch for wilting, pest damage or a sudden change in weather. Respond to the crop and conditions rather than following a fixed watering schedule. If the first group shows stress, pause before repeating the same approach with the next tray and assess moisture and exposure. If conditions deteriorate, use suitable protection for that crop; a plant raised under cover is not automatically ready for rough weather.
Adjusting next season’s transplant schedule
Record the details that explain how the handover went: crop and variety, sowing date, emergence date, tray or pot used, start of hardening off, transplant date and number planted. Note observed greenhouse conditions or forecast events when they affected growth, along with germination gaps, delays and losses. Include reasons such as crowded benches, a bed not being ready or weather that changed the plan. Count unused seedlings as well as the plants that went into the beds. Those notes help identify a cause rather than leave you with a vague memory that a batch was ‘too early’ or ‘too late’.
Review the notes after plants have settled into the beds. Which batches moved at the intended stage? Which waited for a bed, needed more hardening time or took space from later sowings? Change one or two parts of next season’s plan—sowing date, batch size, overlap or number of bed positions—so you can see what improved. Keep the record simple enough to maintain, whether it is a notebook or spreadsheet; consistent dates are more useful than detail you will not enter. The aim is a repeatable handover that sends the right number of healthy starts from greenhouse trays to prepared outdoor beds.
Frequently asked questions
How early should I sow seeds for raised beds?
Work backwards from a crop-specific outdoor planting window, using seed-packet or regional guidance for the time needed to reach transplant stage. Add the hardening-off period, then allow flexibility for weather and uneven emergence. A local average frost-free date can help set the window, but check the forecast and bed conditions before moving a batch.
Do greenhouse-grown seedlings still need hardening off?
Yes. A greenhouse shelters young plants from some outdoor conditions, but it does not acclimatize them to direct sun, wind and day-to-night changes by itself. Introduce outdoor exposure gradually, increase it as the crop tolerates it, and slow down if stress appears. Opening greenhouse vents is not a substitute for this outdoor transition.
Can an unheated greenhouse keep seedlings safe from frost?
Do not treat an unheated greenhouse as frost-proof. Conditions can change quickly and the structure may cool at night; what a plant tolerates depends on its species and stage. Follow crop-specific guidance, monitor conditions near the trays, and have a plan to protect vulnerable plants when the forecast or greenhouse conditions are unsuitable.
How can I tell when a seedling is ready to transplant?
Use the crop’s recommended transplant stage rather than height alone. Healthy, sturdy growth and a root ball that holds together without being severely crowded are useful general signs, but preferred size and leaf stage vary. Check that the bed is prepared too: plant readiness does not make frozen, saturated or otherwise unsuitable soil ready.
How many extra seedlings should I start?
Estimate the number of planting positions from your bed plan, then add a modest reserve based on germination and your experience with that crop. Avoid sowing a full extra tray by default: surplus plants take up nursery space and can lead to crowded beds. Label reserve plants separately so you can see how many were actually needed.
A useful plan for greenhouse-grown transplants moves plants in batches instead of aiming to fill every tray. Match the number of starts to the raised-bed plan, leave room for growth and hardening off, and let crop needs and outdoor conditions guide the move outdoors. Record where timing or capacity became tight so you can adjust the next sowing schedule before the greenhouse fills. The goal is to have healthy seedlings ready when their place in the raised beds is ready too.
