
Greenhouse Watering During a Two-Week Trip
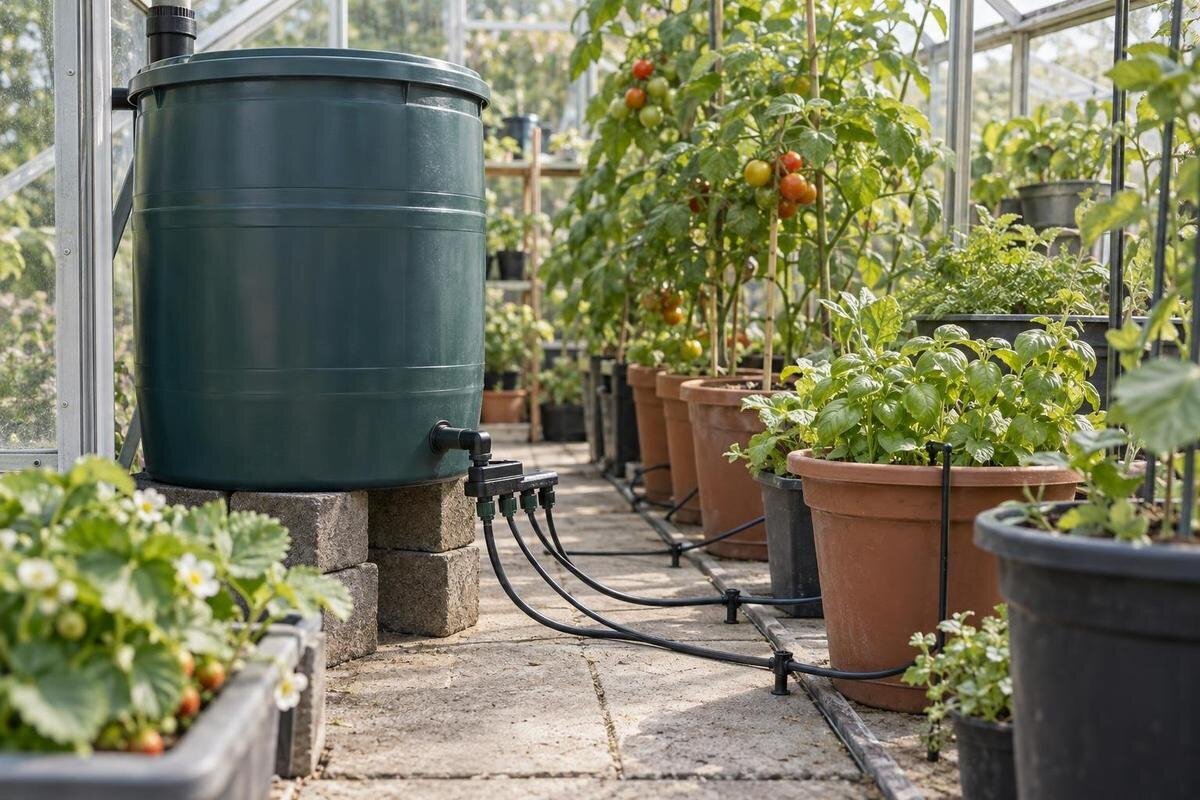
Greenhouse watering
Two weeks away gives a greenhouse watering system time to encounter more than one kind of day—and more than one chance for a timer, pump, line or water supply to fail. A timer is useful, but it cannot prove that water reached every root zone. A reliable absence plan starts with measured use, confirms that enough usable water is available, tests the complete schedule before departure and names a person who can respond if something goes wrong. The aim is to make normal variation manageable and faults visible early.

01
Plant inventory and the full absence period
List every crop group and the watering point that serves it: greenhouse beds, pots, baskets, seed trays and newly planted crops may not dry at the same pace. Note container size or bed area, growing medium, plant stage and whether each group is in direct sun or partial shade. Record plants at sensitive stages, such as recent transplants, and mark any that would be difficult to replace. This inventory prevents you from treating the whole greenhouse as one uniform area when different root volumes and exposure conditions need different attention. Use the list later to explain the layout to your visitor.
Set the absence window from your earliest departure to your latest realistic return, not just the hoped-for return time. Include a delay allowance that you can support with stored water or a planned visit; extra capacity is not a substitute for someone if a timer stops. Decide who can access the greenhouse and who receives an emergency message before adjusting the schedule. If you are comparing structures, the T-Shaped Orangery Greenhouse listing gives an area range of 16.52–30 m². Floor area helps you describe the space, but watering demand depends on the crops occupying it. Base your estimate on the actual beds and containers, and make sure the inventory covers every planted area.
Measure water use with the system you will leave running
Measure with the watering arrangement you intend to leave in place: the same water source, timer, lines, emitters and plant groups. Run a complete scheduled cycle while you can watch it. A water meter can show total use; where practical, a marked container can help measure output at an outlet. For a system with separate runs, record each run rather than assuming they use the same amount. Repeat the measurement on several ordinary watering days, using the same units and starting point. Record both total consumption and where the water goes. Timer run time alone does not tell you the volume used, and runoff on the floor consumes water without watering the root zone.
Record the reservoir-level change or the amount entering the system, then check moisture in representative beds and pots after the cycle. Look at outlets near and far along a line: dry containers beside saturated ones point to uneven delivery, not a problem to correct by lengthening every run. When planning the planting layout for a Pyramid Greenhouse, listed in sizes from 5.53–18.9 m², identify which beds or containers each watering run will serve. Use those same groups in your measurement log so you can connect water consumption with the results at the plants. If readings vary unexpectedly, repeat the test and inspect the system before treating the difference as normal.
02
Calculate usable reservoir capacity
Use the test log to calculate the water you need. Add the measured amount for each planned watering day; if the schedule stays consistent, a conservative observed daily demand multiplied by 14 is a useful starting calculation. If the schedule changes during the trip, total the planned days separately. Add a reserve for higher use on warmer or brighter days and for the return delay you are prepared to cover. Keep a separate calculation for each zone before adding the totals, so a change in crop mix or one especially thirsty group is visible. Do not rely only on a cool-day average or timer minutes; either can understate demand.
Capacity printed for a tank is not necessarily the quantity the system can deliver. Allow for water left below the usable draw level, any operating reserve and water you deliberately keep back for an emergency. Check the tank and equipment guidance to understand what can actually be used as the level falls. If rain or automatic replenishment might add water, treat it as uncertain unless its operation and overflow route have also been tested. If you are considering the Limited-Edition Aluminum Greenhouses with Storage, distinguish storage space from stored water in your plan. Count only water in a source your setup can actually draw from; the greenhouse model name does not establish reservoir capacity.
Give unlike crops separate schedules where possible
Group plants that genuinely need different quantities or timing separately, if the system can control independent zones. Small pots and baskets may dry sooner than a substantial bed, while a single schedule can leave one group too wet as another dries. Do not create extra zones just to make the plan look precise: each valve or outlet adds another point to identify and test. For every zone, write down which plants it serves, its measured use and the schedule you have observed working. If the controller cannot distinguish groups, test the compromise with the driest and wettest groups in mind, and plan a manual check for any vulnerable plants.
Draw the actual bed and pot arrangement before placing or adjusting lines, and mark where each zone starts and ends. If you are choosing a Bloomcabin Prestige Greenhouse, its listed area options range from 3.77 to 28.08 m². Prepare the watering sketch for the size and planting arrangement you select, with line routes and crop groups clearly identified. Label the zones in the greenhouse as well as on your sketch, using the same names on both. Keep the plan simple enough that a visitor can match labels to plants without tracing a line from memory. If you cannot tell which group an outlet serves, resolve that while you are home.

03
Allow for greenhouse weather and changing demand
Water use can change from one day to the next. Sun, temperature, ventilation, exposure to wind at openings, plant size and leaf growth can all affect how quickly beds and pots dry. If timing permits, test a normal schedule during conditions that resemble the warmer or brighter part of the planned absence; do not infer peak use from a cool, cloudy day. A forecast on departure day cannot describe two full weeks. Use the variation you observe to set a reserve rather than betting on one expected weather pattern, and keep ordinary ventilation and plant care consistent while testing.
Check moisture in representative containers and beds at root level before and after a cycle, not just at the surface. Note whether water drains away, pools or misses a group; correcting a distribution problem is safer than adding time to every zone. For a planting plan in the Spacious Greenhouse, listed at 47–70 m², record the planted areas separately from paths and other unplanted space. Note which areas dry fastest and use them as regular observation points during the trial. For comparisons to be useful, check the same types of plants and growing areas each time. Keep these observations alongside the water-use log so changes in consumption have some context.
What irrigation alerts can tell you
An alert is useful only for a fault the equipment can detect. Where the controller or monitor supports it, set notifications for conditions such as low water, power loss, an interrupted cycle or abnormal flow; do not assume those features come with a timer. Read the equipment instructions to learn what each notice means and how quickly it is sent. A record showing that a cycle was scheduled does not prove that the pump ran or that water reached the far end. Decide who receives alerts and who can act if the first contact is unavailable.
Test the alert system before travelling: use the equipment’s stated test method, confirm the message reaches the intended phone or account and check that another person can see it if needed. If alerts depend on an internet or cellular connection, plan for the possibility that the connection is lost; a local display or scheduled visit may still be necessary. When choosing watering equipment for a Classic Aluminum Greenhouse, listed in area options from 3.77 to 28.08 m², assess the controller separately from the structure. Confirm its monitoring functions with the controller supplier and test them on your installed system. Your visitor’s instructions should explain what each enabled alert means and who should respond.
04
Test the complete watering plan before departure
Run the final schedule repeatedly while you are still home, using the actual reservoir, timer and watering lines. Watch the first complete run, then leave the plan unchanged for several days if you have enough time. Compare the measured water drop with your calculation, confirm that scheduled cycles happen on the intended days and inspect the wetting pattern after representative cycles. A single successful run only shows that the system worked once. It cannot reveal a slow leak, a later blockage or a reservoir that empties sooner than expected, so test more than one cycle before trusting the plan.
Look for common visible failures: a disconnected or kinked line, a blocked outlet, water dripping onto the floor, an unexpectedly falling reservoir level or a timer that has not retained its schedule. Check the first and last points in each run and note dry or waterlogged plants. Use only the manufacturer’s recommended method to test a fault alert; do not create an electrical fault or open equipment to simulate a failure. If a pump, fixed electrical connection or unfamiliar control needs inspection, arrange help from a qualified professional before departure.
Give a backup visitor clear instructions
Choose someone who can reach the greenhouse and attend within the response time your crops need. Arrange an early check after you leave, then agree on a frequency that reflects crop sensitivity, weather uncertainty and the reservoir reserve; there is no reliable universal interval for every greenhouse. Make sure the visitor has access details and knows how to reach the water source. If you are planning a setup around one of the Lean-To Greenhouses, listed at 3.69–14.34 m², include visitor access in the layout plan. Once everything is in place, show the visitor the actual entrance, reservoir and any manual shut-off rather than relying on a sketch alone. Name a second contact in case the first person is away.
Leave a short routine in plain language: what a normal water level looks like, which plants to inspect, how to recognize a missed cycle and what action is authorized. If manual watering is needed, specify the measured amount and root areas from your own test rather than asking someone to guess from dry-looking soil. Provide your contact details, a backup contact and the number of a qualified service person if equipment needs attention. A photo of the normal controller display or reservoir level can make an unusual reading easier to identify. Explain which equipment the visitor should not disassemble or reset.

05
Use a departure-day checklist
On the final day, verify that the reservoir is at its intended operating level, the water source is available, the timer shows the travel schedule and the plants have received the tested cycle. Walk the full route and look for leaks, blocked outlets, loose visible connections and water running where it should not. Clear access to the reservoir and controller, and remove anything that could obstruct a line. Avoid last-minute changes to timing, growing media or ventilation: a new setting has not been proven just because it seems more generous. If the tank or system has a marked operating limit, stay within its guidance.
Keep the schedule, measured daily use, reserve estimate and visitor instructions together, with a sketch showing each crop group and the actual reservoir and control locations. If you are comparing the Limited Edition Aluminum Greenhouses, listed in area options from 3.77 to 28.08 m², keep that product information separate from the operating notes for your watering equipment. The notes should identify the timer, water source and zone labels the visitor will encounter. Tell the visitor when the first check is due and how to report an alert. If you are unsure that the water will last, shorten the unattended period or arrange another check rather than trusting an untested extension.
Review what happened when you return
When you return, inspect the plants and growing media before changing the schedule or giving extra water. Check the reservoir level, visible lines, timer record, alert history and visitor notes, then compare those observations with your expected use. A low reservoir could reflect ordinary demand or a leak; a full one could mean a missed cycle or lower-than-expected use. Look for the cause before adjusting a run time. Check every crop group rather than relying on the appearance of a single plant. This helps prevent routine post-trip watering from compounding waterlogging or masking a delivery failure that may still be present.
Record how many days the water lasted, whether each group stayed in suitable condition, what weather occurred and whether alerts or visits were timely. If demand exceeded the test, revise the reserve, schedule or visitor plan, or have the delivery system checked. If less water was used, verify that every zone received water before reducing capacity. For trips that might run longer, decide in advance whether a visitor can refill from a verified source or whether the greenhouse needs more frequent checks. The next plan should reflect what happened, not just repeat a timer setting that was never reviewed.
Frequently asked questions
How much water should I plan for a two-week trip?
Measure the water your tested setup uses on representative days, then add the planned daily amounts for all 14 days. If use varies, base the estimate on a credible higher-demand period rather than a cool-day average. Add a reserve for the variation you observed and any return delay you want to cover.
Can I rely on an automatic timer by itself?
Not safely as the whole plan. A timer can run on schedule while a reservoir is empty, a line is blocked or water is going to the wrong place. Test the complete system, confirm water reaches each group and arrange either a working alert or a person who can check.
Should I fill the reservoir to its stated capacity?
Use the reservoir’s intended operating level and calculate the water you can actually draw. Some water may remain below the usable draw level, and you may want to keep a reserve. Check the equipment guidance rather than assuming the tank’s full stated capacity will reach the plants.
Which irrigation alerts should I set up?
Use alerts only for conditions the installed equipment can detect, such as low water, power loss or an interrupted cycle. Check the equipment instructions and test that a notification reaches the intended person. An alert does not prove that water reached every plant, so keep a physical check in the plan.
How often should someone check the greenhouse?
There is no interval that suits every crop, weather pattern and watering setup. Arrange an early visit after departure, then choose a frequency that gives someone time to respond before a missed cycle becomes serious. Consider how much reserve is available and whether the visitor can reach the water supply and controls.
Plan two weeks of greenhouse watering as a tested system: measure demand by crop group, confirm the reservoir has enough usable water, observe repeated cycles and test any alerts. Give a visitor clear instructions and a way to respond if the routine fails. A timer can carry out the schedule, but measured results and a human backup make the absence plan resilient.
