
Planning Separate Greenhouse Watering Zones for Pots and Beds
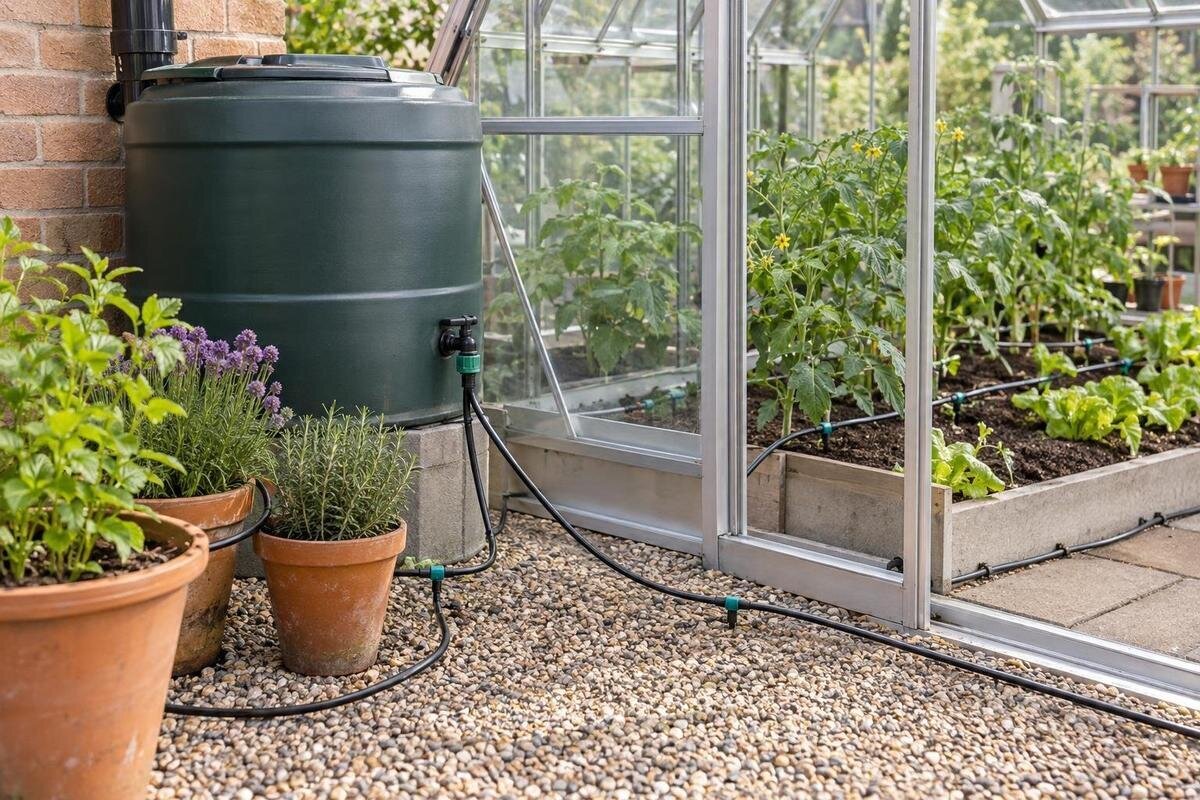
Greenhouse watering
Containers and planted beds can share a greenhouse without sharing a watering timetable. A pot holds a limited volume of growing mix, with its sides exposed to greenhouse air; a bed has a larger soil profile and different rooting and drainage conditions. Pot size, crop, growing medium, sunlight and ventilation can change the contrast, so there is no dependable rule such as “pots every day, beds twice a week.” A useful layout gives each genuinely different group its own control, then sets run times by checking moisture where roots are. The aim is not to install the largest number of timers. It is to avoid leaving containers dry while beds stay saturated, and to make adjustments straightforward as crops grow.

What a separate watering zone controls
A watering zone is a group of plants or irrigation lines controlled as one unit: it receives water for a set run time and can be scheduled separately from another group. Pots and beds count as separate zones only when their watering can actually be controlled independently. A simple splitter on one timed outlet may feed two branches, but if both start and stop together, it cannot give the containers a different schedule. Check that the timer has independent outputs or operates separate valves, and confirm that those controls suit the water source and delivery equipment you plan to use.
Plan the growing layout before choosing the timer. The Pyramid Greenhouse listing covers variants from 5.53 m² to 18.9 m²; use the exact chosen footprint and plant placement to plan line routes, rather than relying on the model name. Mark beds, pot benches, aisles, the water supply and proposed valve locations on a drawing. Start with one container zone and one bed zone if they need different timing. Add another circuit only when a crop group has a distinct moisture need or delivery requirement. Greenhouse listings do not establish irrigation compatibility, so verify watering equipment separately.
Why containers and beds often need different schedules
Growing mix in a container is confined to the pot, with its sides exposed to greenhouse air, so the water reserve is limited. Smaller containers and mixes with different drainage can dry at different rates; a sunny bench or a warmer, more ventilated spot may speed that up. A planted bed has a larger soil profile, but its depth, texture, drainage and root development affect how long moisture remains available. These are tendencies, not guarantees: a large pot can stay moist longer than a shallow or fast-draining bed.
One shared run time can create a compromise: a run that suits a thirsty container may leave a bed too wet, while a bed-focused run may not re-wet pots adequately. Do not assume that every pot belongs together or that every bed has the same demand; group them by observed drying. If you are considering a Limited-Edition Aluminum Greenhouse with Storage, use the selected version’s actual growing layout when marking pots and beds. The enclosure’s full footprint is not necessarily the area you will plant.
Group plants by how their root zones dry
Ask how much water needs to reach active roots and how quickly the growing medium loses moisture. For pots, consider container volume, how many plants share a pot, root development, growing mix and position. A young transplant may not use water like an established crop in the same spot. In a bed, compare crop stage, soil depth and row position. Plants near a vent or a sunny end can dry differently from plants in a less exposed area. Location is a useful clue, but it does not set the schedule by itself.
Keep similar conditions together and split a group only when monitoring shows a meaningful difference. It is usually simpler to group several comparable pots on one circuit than to control every container separately. On a sketch, label each group with its crop, approximate root volume, location and observed moisture. Include pots you expect to move or replace during the growing season, so their connection to a watering group remains clear. A bench does not have to remain one permanent zone if its plants change; reassess the grouping when you rearrange containers. When mapping a Bloomcabin Prestige Greenhouse, use the plant positions and moisture observations to identify which groups need their own schedules. This makes it easier to see whether an additional zone will solve a real problem.
Draw the zones on the greenhouse floor plan
Use a measured sketch to mark the supply point, beds, benches, doors, walking aisles and proposed valve locations. Trace each line to the plants it serves, and leave access to valves and connections for routine checks. Keep tubing out of busy walking paths where possible, and make sure it does not obstruct access to plants. Show how a line reaches pots on a bench, rather than drawing only its route across the floor. Include any place where you will need to reach behind containers or beneath a shelf to inspect a connection. Give each circuit a simple name on the drawing, such as “pot bench” or “centre bed,” and use the same name at its control. Marking these details first can reveal awkward crossings or inaccessible sections before equipment is installed.
The Spacious Greenhouse range is listed at 47 to 70 m², so use the exact chosen size and planted layout when tracing routes. A line to a distant bed may be much longer than one serving pots by the supply; line length alone does not tell you whether delivery will be even. Note the ends of each circuit so they can be checked during testing. Set zone boundaries according to plant needs first, then confirm that the selected equipment can serve each route.

Check water flow before dividing the system
A zone needs enough available flow and pressure for the delivery equipment connected to it. Check the equipment specifications and have the planned arrangement assessed against the water source under operating conditions. A pressure reading when nothing is running may not describe what is available once emitters are open. If you are unsure how to check the supply, ask an irrigation professional or equipment supplier to confirm that the source can support the intended setup.
Treat greenhouse area and water capacity as separate questions. The Aluminum Greenhouses listing includes variants from 3.77 m² to 28.08 m², but a footprint does not specify available flow or pressure. Keep a list of the outlets planned for each zone and use their manufacturer requirements to verify the setup. Make that list specific: identify the outlet type, how many you intend to connect and which circuit will serve them. Record any other use of the same water supply that may coincide with irrigation, so the supplier can assess the arrangement you will actually operate. Also check whether the controller runs zones one at a time or simultaneously, since that affects what the source must supply at once. Avoid compensating for uncertain capacity by increasing run times across every zone.
Match delivery to pots and beds
The outlet position should suit where roots are growing. In a pot, arrange delivery to reach the active root area rather than wetting only the rim; the number and position of outlets depend on the container, growing medium and equipment instructions. Check more than the spot immediately beneath an outlet when assessing the result. If part of the pot remains dry, review the delivery arrangement rather than assuming that a longer run is the only answer. In a bed, place delivery along the planted rows and check whether moisture reaches the intended root area across the bed. Mark unplanted gaps on the layout too, so you can distinguish the area being irrigated from the area occupied by crops. Do not assume that a wet surface means the soil is moist where the crop needs it.
Keep hardware on a shared circuit only when its operating requirements and resulting water delivery suit all the plants under the same schedule. Include filtration and accessible line ends where the equipment instructions call for them, and plan for routine inspection. When laying out lines for Lean-To Greenhouses, use the actual chosen floor plan to route them around beds, pots and access paths. The structure type alone does not establish which irrigation equipment or connections are compatible.
Choose a timer with independent controls
Check that the controller can run each zone on its own program, including a separate run time and watering frequency where needed. Some devices have multiple outlets but may not provide independent control in the way your layout requires, so read the specifications before buying. Write down the functions your pot and bed schedules require, then compare them with the available controls. Can you change the watering days for one zone without changing the other? Can you test a single circuit manually and suspend its automatic program when necessary? Confirm which valves the timer can operate and whether it can run zones sequentially. Separate circuits are useful only if the controls actually let you change one schedule without changing the other.
Think about how the timer will be used as well as how many zones it supports: clear labels, an easy manual test and a straightforward way to adjust programs can make routine checks simpler. The Limited Edition Aluminum Greenhouses range includes variants from 3.77 m² to 28.08 m², but greenhouse area is not a substitute for counting watering groups. Base control needs on the crop map, the number of independent schedules and the equipment requirements. Leave room for another output only if a separate group is likely to need one.
Set each run time by checking root-zone moisture
Test zones separately before relying on the timer. Run one circuit, then check moisture in several pots or bed locations, including points farther from the supply. Inspect below the surface and near the active roots; a quick look at the top layer may miss a dry area deeper down. Also watch for water that pools or runs away before it reaches the intended area. Follow the equipment instructions when making adjustments to emitters or controls.
Use those observations to adjust one zone at a time, changing either the run time or the interval so you can tell what made a difference. Distinguish between two questions: did the run moisten the intended root area, and how long did that area remain adequately moist afterwards? Check after watering and again before the next planned run, rather than judging both questions from one inspection. Record the setting, the places checked and what you observe instead of copying a schedule from another greenhouse. Include both a typical container or bed location and any spot that behaved differently. For a T-Shaped Orangery Greenhouse, as with any layout, check the actual far ends of each branch and the different planted areas; the listed variants range from 16.52 m² to 30 m². A timer’s setting is only a starting point until checks show that water is reaching the root zone as intended.

Review schedules as crops and conditions change
A schedule that suited newly planted crops may no longer suit them as roots and foliage develop. Changes in light, ventilation and greenhouse temperature can also alter how quickly pots and beds dry. Review the moisture pattern after transplanting, moving containers or changing the planting layout. Adjust the affected zone rather than automatically changing both; the point of separate controls is to respond to different needs without disturbing the other group.
Keep the circuits labelled and inspect them as part of normal greenhouse care. Look for leaks, loose connections, damaged tubing or outlets that deliver differently from the rest. Check filters and clean components only as their manufacturer directs. A labelled layout helps you identify which valve or timer program serves a dry pot or a wet bed. Keep a brief maintenance record alongside it, noting the affected circuit, what you found and any component you adjusted or replaced. Update the drawing when lines move, so an old label does not send you to the wrong control. These notes also help distinguish a recurring delivery problem from a recent change in planting. If a zone’s delivery shifts, investigate the line before assuming that the crop’s watering need has changed.
Troubleshoot one zone at a time
If all the pots in one zone are dry, check that its program ran and that water reached the line before extending the schedule. If only the containers farthest from the supply are affected, inspect delivery along that route. Compare an affected pot with an unaffected one on the same circuit: note their positions, growing media and outlet arrangements before deciding what to change. This keeps the investigation focused on the difference you can observe. If a bed’s surface is wet but the root area remains dry, review where the water is landing and check moisture at several points below the surface. Pooling in one spot may point to an outlet placement or delivery issue rather than a need to increase the run for every plant. After an adjustment, test that circuit again and check whether the original problem has improved.
A common mistake is changing the shared timer setting when only one circuit has a problem. Another is adding zones for every shelf or crop without a clear difference in water needs, which can make the system harder to manage. Begin with separate pot and bed schedules where observation supports them, then add controls only for a genuine difference. If a zone still delivers unevenly after basic checks, ask a qualified irrigation professional to review the measured supply and system arrangement.
Frequently asked questions
Do pots always need more frequent watering than beds?
No. Pots often have less growing medium to hold moisture, but container size, mix, crop and greenhouse conditions all affect how quickly they dry. A shallow bed or a fast-draining soil can need attention sooner than a large pot. Check moisture at root depth in both areas rather than relying on a fixed rule.
Can every container share one watering zone?
Only if the containers can tolerate the same schedule and delivery setup. Group pots with similar growing media, root development, light exposure and drying patterns. If a small pot is consistently dry while larger containers on the same line remain wet, consider separating it or changing the delivery arrangement.
Can one timer control pots and beds separately?
Yes, if the timer provides independently controlled outputs or operates separate valves with separate programs. A splitter that sends water to two lines from one timed outlet does not create independent schedules if both lines start and stop together. Check the timer and valve specifications before choosing the layout.
How should I choose the first run time?
Use the irrigation equipment’s instructions as a starting point, then run each zone and inspect moisture where the roots are. Check several pots or places in the bed, including points farther from the supply. Adjust one zone at a time; there is no reliable run time that suits every greenhouse, crop and season.
When should I review the watering schedules?
Review them after planting or transplanting, when crops grow substantially, and when greenhouse conditions change enough to affect drying. Keep an eye on root-zone moisture during regular use as well. If you notice a problem, check the affected zone’s timer and delivery before changing the schedule for every plant.
Reliable greenhouse watering comes from matching control to the roots, not from relying on one calendar for every crop. Keep pots and beds independent when checks show that they dry differently, route each circuit around the actual planting areas, and set schedules from observed moisture. A simple, labelled layout that you can test and adjust is more useful than a complicated system whose runs are never reviewed.
