
Hard Water in Greenhouse Irrigation: Avoiding Clogged Emitters
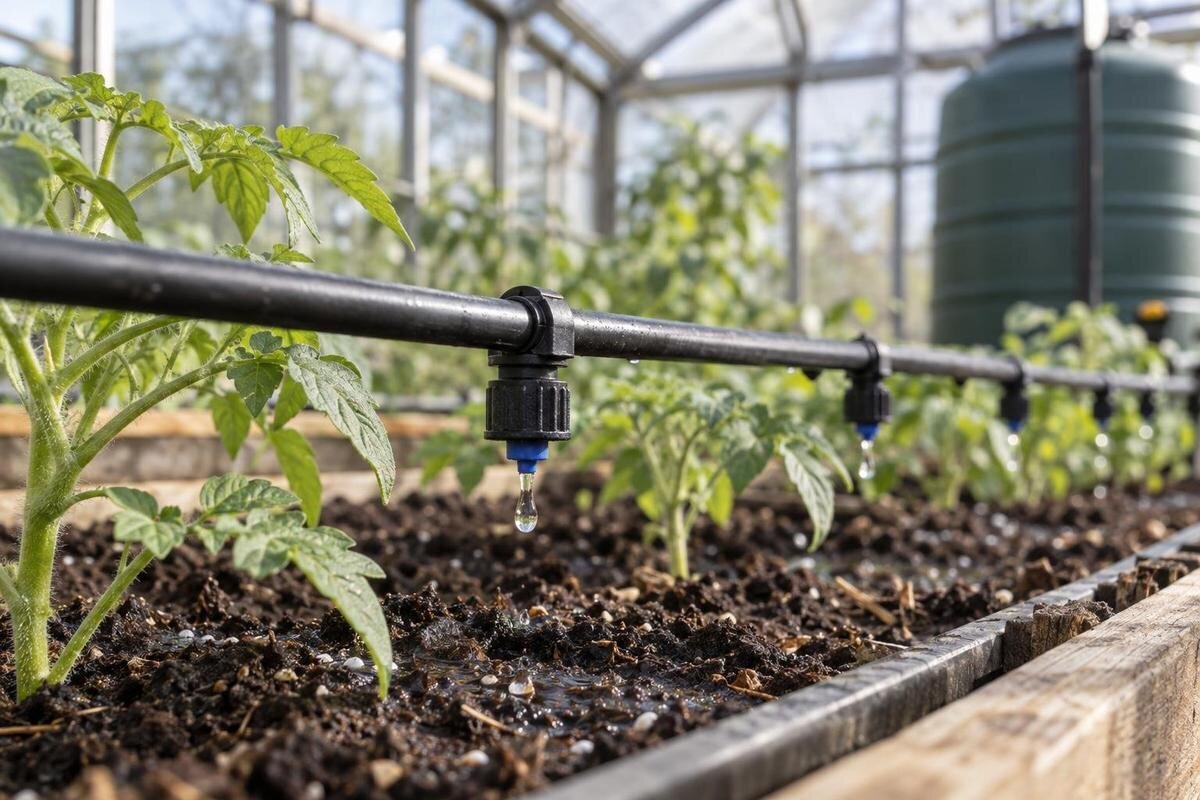
GREENHOUSE IRRIGATION
Hard water can leave mineral deposits in small drip emitters, but a slow or uneven outlet has several possible causes. Test the supply, compare flow at consistent points and check the exact filter and emitter instructions before cleaning or changing treatment. This guide explains which water results matter, what an inspection can reveal and how to keep maintenance within the equipment maker’s guidance.

What hard water can do to drip emitters
Hard water contains dissolved calcium and magnesium; it is not the same as visible grit that a screen filter can catch. Under the right conditions, dissolved minerals can leave deposits as water evaporates or becomes more concentrated, and a deposit may narrow the small passage inside an emitter. The restriction can build gradually, so an outlet may lose flow before a large crust is visible. Hardness alone does not predict whether scale will form in a particular line: alkalinity, pH, concentration changes and anything mixed into the irrigation water can matter. A white mark at a fitting is a useful clue, not proof that mineral scale is the only cause. Deposits inside an emitter’s labyrinth are especially difficult to identify by appearance.
If you are planning a greenhouse and its irrigation together, settle the bed layout before estimating emitter counts or tubing. The Bloomcabin Prestige Greenhouse with Metal Base is listed in footprint options from 3.77 m² to 28.08 m², but area alone does not specify line lengths, pressure or emitter placement. Draw the actual route and note where you can measure water at the inlet and at representative outlets. Include places where you can inspect filters and connections. This keeps a scale investigation from overlooking a layout issue, such as a long run or a branch that receives different flow.
Blocked emitters have more than one possible cause
Low output has several possible explanations. Sediment can lodge at a filter or emitter, fertilizer residue can collect after mixing, and biological material or damaged tubing can also restrict delivery. A kinked line, partly closed valve, dirty screen or change in the water supply may affect a whole section without any hardness problem. These causes can overlap: a line may contain particles as well as mineral deposits. Avoid labelling a blockage by its colour or by the fact that it appeared after a period of hard-water use. Note which outlets are affected and where, then check the shared parts upstream of them before settling on a cause.
Compare a few emitters of the same model near the inlet, partway along a run and near its end. Note whether the pattern is confined to one outlet, one branch or the full system. A single weak emitter suggests a local issue; a weak branch directs attention to shared components or its route, though neither pattern proves a cause. If you are considering the Spacious Greenhouse, listed from 47 to 70 m², sketch the proposed irrigation runs within your growing layout. Mark which outlets share a branch, valve and filter. That map gives you a practical way to group weak outlets during an inspection rather than treating every slow dripper as a separate blockage.
Test the water that actually feeds the lines
List every water source that feeds the greenhouse: municipal water, a well, stored rainwater or a blend. Do not assume a municipal utility report describes every tap in the greenhouse, or that an older well test still represents current conditions. If water passes through a storage tank, filter, softener or other treatment, identify the point where it enters the irrigation system. When sources are switched seasonally or mixed, each can contribute a different mineral and particle load. A change in source, treatment, storage or fertilizer routine is a reason to update the water-quality picture.
Use a laboratory or a test kit intended for the parameters you need, and follow its sampling instructions rather than improvising a container or handling method. Label each sample with its source, date and whether it was taken before or after treatment. A sample from the point of use may be more informative than a source-only sample when storage, treatment or mixing could alter the result. When planning a project with the Limited Edition Aluminium Greenhouse with Built-In Storage, identify any irrigation water tank separately from the greenhouse’s storage space. Record the actual water source, storage equipment and sampling location so a later result can be compared with water taken from the same point.
Read hardness alongside the rest of the water report
Check total hardness and its units first. Reports commonly express hardness as milligrams per litre (mg/L) as calcium carbonate, though a kit may use a different scale; compare like units and rely on the test provider’s interpretation rather than an online threshold detached from the method. Hardness describes calcium and magnesium content, not how likely a deposit is to form under every irrigation condition. Alkalinity is a separate measurement that describes the water’s ability to neutralize acid and is relevant to carbonate chemistry. pH describes how acidic or alkaline the sample is at testing; it does not replace hardness or alkalinity.
Electrical conductivity (EC) or total dissolved solids (TDS) can describe dissolved material overall, but neither is a direct substitute for a hardness result. Iron and manganese may be relevant when staining or deposits are present, while a turbidity or suspended-solids test can help investigate visible particles. Keep the full report, including units and test method, instead of copying one number into a notebook. If results are unexpected, inconsistent between samples or close to a kit’s reading limit, repeat the test as instructed or ask the lab for help before selecting equipment. That context is more useful than treating any single reading as a universal treatment threshold.

Use flow patterns to locate the restriction
Before cleaning, establish what low flow means for your system. Choose representative outlets of the same emitter type and collect water for the same timed interval under the same operating conditions. Record the volumes and exact locations, and use the emitter manufacturer’s stated flow information and operating range when interpreting results; different models are not directly comparable. If your system has a pressure gauge or test point, record its reading where the instructions specify. Do not adjust pressure simply to make one weak outlet match a neighbour, since that may hide the cause or change flow elsewhere. Repeat a measurement if the system was not running in its usual configuration.
Patterns are more informative than a single collection. If only one outlet differs, inspect that emitter and its local connection; if all outlets on one branch are weak, look at shared components and the route; if the whole system changes, check the common supply and filter. These are diagnostic leads, not final verdicts. When planning irrigation for a Classic Aluminium Greenhouse, mark near, middle and far test points on the proposed bed and tubing layout. Keep those points identifiable after installation, and record which emitter model is used at each one. Later comparisons should use the same locations and emitter type, with any changes to the operating conditions noted beside the results.
Inspect filters, tubing and emitters without damaging them
Start at the source and work downstream: inspect the inlet, filter screen or cartridge, valves, tubing, connections and any removable emitter parts identified in the manual. Look for trapped solids, a kinked line, loose fittings or visible residue, but do not assume residue composition from its colour. Confirm the filter type and rating against the emitter maker’s instructions. A filter designed for suspended particles will not necessarily address dissolved minerals, and a clogged or unsuitable filter can restrict supply. If the system has a pressure test point, compare its reading with the equipment instructions rather than guessing. Note where material collects; its location can help distinguish an upstream filter issue from a local blockage.
Check the exact irrigation model before taking an emitter apart. Some are designed to be serviced; others may be damaged by pulling apart the body or pushing a pin, wire, brush or compressed air through a narrow passage. Clean only parts the maker identifies as serviceable, using the stated method. If you are purchasing irrigation equipment alongside an Aluminum Lean-to Greenhouse, keep the emitter and filter model details with their own instructions rather than relying on the greenhouse listing for compatibility. Photograph the installation before removing a component, including its connections and position on the line. This gives you a reference for reassembly without guessing how the parts were arranged.
Follow the manufacturer’s cleaning procedure
Use the maintenance instructions for the filter, tubing, valve and emitter, not a generic online recipe. If the maker provides a flushing procedure for that system, follow its sequence and use only parts designed for flushing. Follow the instructions for shutting down or relieving pressure before opening a component, and do not force water or tools through a closed emitter. If the manual gives a cleaning method for removable parts, keep to it and check that it explains rinsing and reassembly. A method approved for one emitter design may not apply to another, even when the two look similar. Keep the instructions for each component together so they are easy to consult.
Do not choose vinegar, acid, bleach or a household descaler just because a deposit looks chalky. The wrong agent, concentration, contact time or rinse can damage tubing, seals or emitters; a familiar household product is not automatically suitable for irrigation hardware. If the manufacturer does not specify how to address a suspected mineral deposit, ask its technical support or an irrigation professional familiar with the exact model. For a project that includes a Limited Edition Aluminum Greenhouse, keep the separately selected irrigation component names and model numbers in your purchasing notes. Those details identify which cleaning instructions to consult. Avoid repeated attempts with unverified treatments, especially when the blockage’s cause has not been confirmed.
Choose prevention based on tests and inspections
Choose prevention only after comparing the water test with the inspection findings. A compatible screen or disc filter can intercept suspended material, but ordinary particle filtration does not remove dissolved calcium and magnesium. Installing a finer filter is not automatically a hard-water solution and may restrict flow if it is not suited to the system. Follow the emitter maker’s filtration requirements and base any change on the water report and observed debris. If fertilizer is added through irrigation, ask its supplier or a qualified horticulture professional about compatibility with the source water; residue after mixing may need a different response from scale formed from the source water alone.
An alternative water source is not automatically suitable. Rainwater may contain fewer dissolved minerals, but collection and storage can add debris or other material, so test it at the point where it will feed the system and follow the equipment’s filtration instructions. Select any softening or other treatment option from a complete analysis, with its compatibility for plants, fertilizer and irrigation components reviewed by a qualified water-treatment or irrigation professional. If you are planning a T-Model Orangery Greenhouse, record the proposed water source and any treatment alongside the irrigation layout. Keep that information current if the supply changes; prevention decisions depend on the water actually used and the specifications of the installed components.

Plan for access to filters and line ends
Make routine inspection possible in the finished greenhouse. Keep the filter, shut-off points, pressure test points and any maker-provided flush ends reachable, with enough room to remove and inspect components without pulling long runs apart. Label the water source, branches and valves to match a simple system sketch. Show the direction of flow and where samples and output checks were taken. If the manufacturer recommends a particular sampling or flushing point, include it in the plan; check compatibility before adding fittings or modifying a line. These details turn a vague note such as ‘drippers slowing down’ into an observation that can be checked again.
When comparing the Bloomcabin Oasis Pyramid Greenhouse, place the actual beds, containers, benches, supply line and watering components on your proposed layout. Check how you would reach each service point once growing equipment is in place, rather than judging access from the exterior outline. A flush end is useful only if it is part of the irrigation design and the maker’s instructions explain how to use it. Allow space both to reach a filter or connection and to remove any serviceable parts. Planning that access before installation helps avoid having to move equipment or disturb a tubing run just to inspect a suspected restriction.
Verify the result and keep a maintenance record
After manufacturer-approved cleaning, flushing or replacement, repeat the flow comparison at the same representative emitters and under comparable conditions. Note whether one outlet recovered, a branch changed or the whole line remains weak. If the result is unchanged, revisit the diagnosis instead of repeating the same cleaning attempt: check test conditions, filter state, source water and pressure against the maker’s guidance. A one-time improvement does not establish that water chemistry caused the blockage. Repeated deposits, water-test results consistent with suspected mineral buildup and a recurring flow pattern together provide stronger grounds for discussing treatment with a qualified professional.
Keep one record with the water source, sample date, test values and units, system and emitter models, flow observations, filter checks, maintenance performed and any fertilizer or treatment change. Follow the manufacturer’s recommended inspection interval if one is provided; otherwise, let observed debris, changing output or a revised water source prompt a review instead of relying on a guessed calendar schedule. This history helps distinguish recurring mineral buildup from a one-off obstruction and shows whether approved maintenance restored delivery. Keep the lab report and equipment instructions together so future checks can be compared with the same evidence.
Frequently asked questions
Can I identify hard-water scale by a white deposit?
A pale crust can be a clue, but it does not confirm what caused a blockage. Fertilizer residue and other material can look similar. Compare water-test results with flow patterns and inspect the affected parts before choosing a cleaning method.
Which water tests are useful for greenhouse emitters?
Ask for total hardness, alkalinity and pH, and consider EC or TDS, iron and manganese, and suspended solids where relevant. Keep the units and test method with the results; one hardness number alone does not describe every cause of deposits.
Will a regular irrigation filter remove hard-water minerals?
A particle filter can catch suspended material if it is compatible with the system, but dissolved calcium and magnesium pass through ordinary filters. Check the emitter maker’s filtration requirements and assess any water treatment separately.
Can I flush emitters with vinegar or another descaler?
Do not use a household product or chemical treatment unless the irrigation manufacturer specifically approves it for your equipment. Follow the instructions for the exact emitter, filter and tubing, including any required rinsing.
Is rainwater a reliable way to prevent emitter clogs?
Not by itself. Rainwater may have different mineral levels, but collection and storage can introduce particles or other material. Test it at the point of use and follow the irrigation maker’s guidance on filtration and compatibility.
Hard water is a plausible contributor when test results, deposits and flow patterns point in the same direction. If they do not, keep investigating other restrictions instead of escalating cleaning. A water report, repeatable flow measurements and the manufacturer’s maintenance instructions give you a clearer basis for preventing blocked emitters than appearance or an unverified treatment recipe.
