
How to Harden Off Greenhouse Seedlings Before Planting Outside
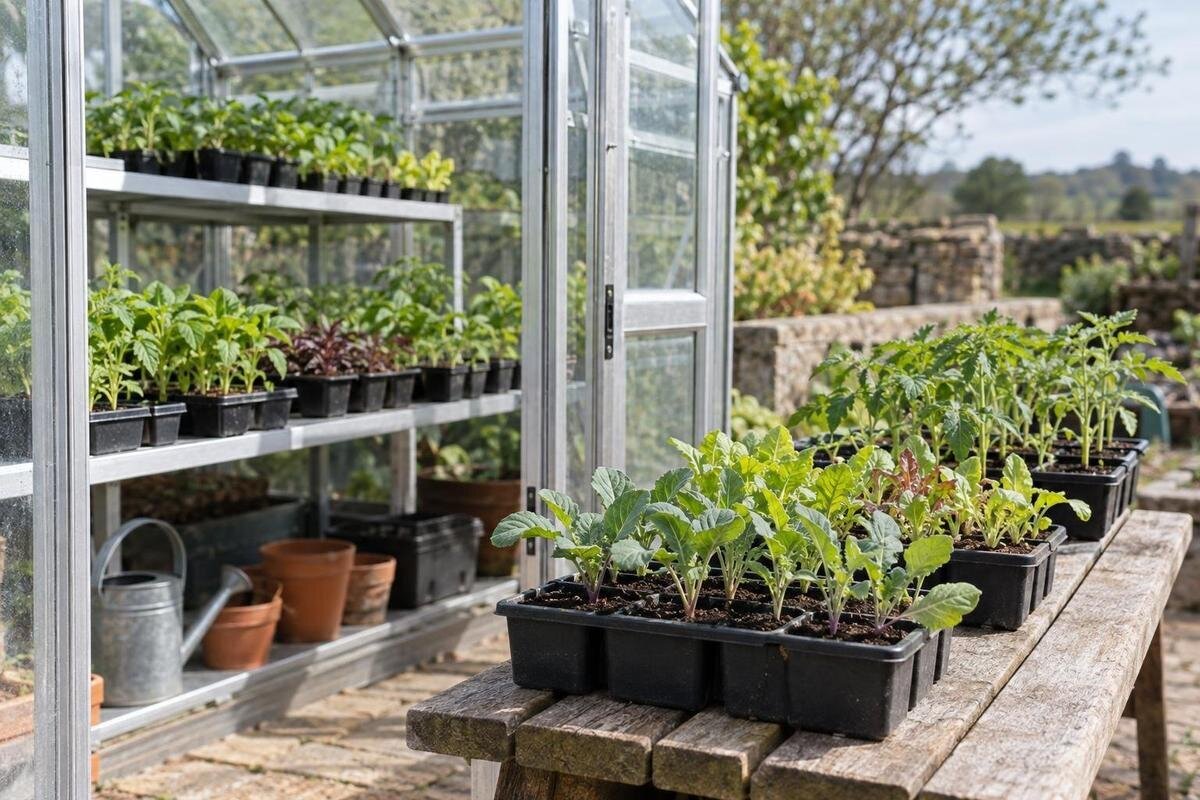
Greenhouse growing
Greenhouse-grown seedlings have had a more sheltered routine than the garden can offer: the light may be filtered, air calmer and temperatures less variable. Moving them straight into full sun, wind and cool nights can set growth back, even if they looked ready on the bench. Hardening off is a gradual, observable transition between those environments. The right pace depends on the crop, the conditions the seedlings have already experienced and the weather at your site, so use a sequence of exposure steps rather than one universal number of days.

What hardening off changes
Hardening off is the gradual introduction of seedlings to outdoor sun, wind, humidity changes and temperature swings that differ from their greenhouse routine. A protected growing space can reduce direct weather exposure, but conditions vary: vent position, shade, glazing, airflow and where a tray sits all affect what plants experience. A seedling beside an open vent is not starting from exactly the same place as one kept deep under shade. The aim is to increase outdoor demands in manageable steps, giving leaves and root balls time to respond between exposures. This reduces the shock of an abrupt move, but it does not make a tender crop frost-proof or correct a weak, poorly rooted plant.
Before moving trays, note how bright and breezy their greenhouse position actually is. Observe when the bench receives direct sun, whether air reaches the seedlings and how quickly the space warms. These notes establish the starting point for choosing an outdoor spot that is only moderately brighter or breezier, rather than jumping from deep shade to an exposed patio. If you are planning a growing space and comparing the Pyramid Greenhouse with other models, consider where the propagation bench would sit in relation to sun and shade at your site. Use the selected configuration’s published details and your measurements to assess tray space. The model alone cannot tell you what conditions seedlings will experience on a particular bench.
Check seedling readiness and the forecast
Choose seedlings that are established enough to handle and in sound condition. Crop-specific guidance matters: a newly emerged plant, a transplant just potted up or a root plug that falls apart may need more time to settle than a well-rooted seedling. Look for healthy ongoing growth and enough roots to hold the mix together without a tight, circling mass. A plant that is already wilted, diseased or badly stressed needs attention to that problem first; hardening off is not a recovery treatment. Check seed-packet instructions or trusted local growing guidance for the crop’s planting stage, since there is no leaf count or size that applies to every species.
Then look beyond the daytime high. Check overnight lows, frost alerts, wind gusts, rain and sun for the hours the seedlings will be outside; recheck before each outing because forecasts change. A sheltered yard, an open balcony and a low garden bed can experience different conditions on the same day. Average frost dates are useful for broad planning, but they do not guarantee a frost-free night in a particular garden. If a cold snap, strong wind or heavy rain is due, hold the seedlings under protection and resume when conditions are milder. Planning for those interruptions also means keeping space available for returning trays. When considering the Limited-Edition greenhouse with storage, check the selected layout against the number of trays you expect to shelter, rather than planning only for seedlings that are ready to move out.
Build a weather-responsive exposure plan
Choose a mild, relatively calm day for the first outing. Set trays in bright shade or dappled light, protected from gusts and pounding rain, and begin with a short period outdoors—often a few hours rather than a full day or night. Use a spot that resembles the eventual garden in a gentler form, not a dark indoor corner that offers no practice with real daylight. Keep containers stable and avoid places that heat up against reflective walls or paving. If the forecast is unsettled, wait; a missed day does not set plants back, whereas an unplanned burst of sun or wind can. Bring trays back into the greenhouse or another suitable sheltered place before conditions turn harsh.
Use each outing to assess readiness, not to count down to planting. If seedlings remain upright and show no lasting injury, extend their time outside or increase one exposure at a time—more direct sun, for example, while keeping wind similar. Later, introduce a slightly breezier spot. Changing one factor at a time makes it easier to see what caused a reaction; trays containing different crops may need separate routines. There is no need to reach full exposure by a fixed date. Regular trips between the bench and outdoor shelter should also be practical. If you are comparing the Prestige greenhouse for a propagation setup, check its entry and access details against the trays you will carry. Allow for returning a loaded tray promptly when conditions change, not just moving empty pots through the entrance.
Introduce direct sunlight gradually
Outdoor direct sun can be stronger than light under greenhouse covering, but the difference depends on glazing, shade cloth and bench position. Begin in bright shade, then introduce morning sun or a short spell of direct light; increase exposure only when the seedlings tolerate the current step. Avoid a sudden move into hot midday sun, especially if leaves are tender or the potting mix is already dry. If the planting site receives full sun, progress towards that real condition gradually; keeping plants in permanent shade only postpones the adjustment. Cloud cover can make an early exposure gentler, but seedlings still need to experience brighter conditions before planting in a sunny bed.
Inspect leaves after each increase in sun and again later in the day. Pale, bleached, papery or crisp patches on exposed leaves can indicate light injury, although symptoms can have other causes. If they appear, move the plants back to shade, check the potting mix and pause at the last tolerated level. Damaged leaves may not turn green again, so judge progress by the health of the remaining foliage and new growth. It helps to distinguish damage already present from patches that appear after an outing. For a new growing space, such as the Orangerie greenhouse, consider sun and shade at the proposed bench position alongside the selected configuration. Floor area alone does not describe the light reaching a tray or the size of the change it will face outdoors.

Increase wind exposure in stages
Air movement is another change for greenhouse-raised seedlings. Their leaves may have met less forceful air than they will in a garden, and gusts can bend or tear tender growth. Begin in a sheltered outdoor place, such as the lee of a screen or fence, without trapping the tray in stale heat. Over later outings, move gradually towards the airflow of the planting bed; don’t place seedlings in the most exposed corner just to test them. Secure lightweight cells and pots so they cannot tip, and avoid heavy rain that could displace potting mix or flatten small plants.
Wind can make potting mix dry faster, so combine leaf observations with a check of the root ball rather than extending exposure automatically. If leaves stay limp after the tray is shaded and watered as needed, return it to shelter and reassess the forecast. A temporary sheltered station between greenhouse and bed makes the transition easier to manage, provided it offers gentler airflow than the exposed planting area. When planning where to place a Classic aluminum greenhouse, consider that outdoor station as well as the structure itself. Assess wind in your own garden and check the proposed layout for moving trays between the two places. The greenhouse model does not establish how sheltered a nearby fence, patio or garden corner will be.
Treat overnight temperatures as a separate step
Daytime success does not mean a seedling is ready for a cold night. A greenhouse can remain milder than an open garden, and an overnight low can stress a crop that dislikes cold. Warm-season crops and cold-tolerant crops have different limits, and varieties and growth stages can differ too. Use the seed supplier’s or a trusted local horticultural guide’s recommendations for minimum temperatures and frost sensitivity; don’t apply one temperature cutoff to every tray. Check forecast lows for the planting area, not just a warm afternoon reading, and postpone outdoor nights when conditions fall outside the crop’s guidance.
Until crop guidance and the forecast align, bring plants back into protected shelter each evening. Consider an overnight trial only when the forecast is suitable for that crop; even then, conditions at the plants may differ from the forecast. If low temperatures or frost are expected, keep non-hardy seedlings protected. A minimum–maximum thermometer can help you understand the greenhouse baseline and compare it with the outdoor lows you are preparing for. This matters in an existing greenhouse as well as when considering a lean-to greenhouse: the product style does not establish the night temperature at seedling level. Use the conditions in the actual growing space as your starting point, and continue checking the outdoor forecast before deciding to leave a tray out overnight.
Check moisture during each outing
Check water before, during and after each exposure. Small cells hold little potting mix and can dry faster in sun and wind than on a protected bench. The surface may look dry while the root ball still holds moisture, or it may be dry below the surface before leaves show an obvious change. Check the mix just below the surface, or compare the tray’s weight, and water when the root zone is becoming dry. If plants are dry before going out, water thoroughly and let excess drain rather than setting saturated trays in the wind. Avoid leaving pots in standing water.
After the tray returns, check again rather than watering automatically: cool, cloudy or rainy conditions may leave the mix wet, while a sunny outing can use water quickly. Aim for appropriate, consistent moisture rather than saturated potting mix. Keep track of which trays dry first so you can give them closer attention on the next outing without watering every crop alike. If you are planning a propagation bench for the Limited Edition aluminum greenhouse, compare your tray dimensions with the bench space in the selected configuration. Check that you can reach and inspect each tray without lifting neighbouring trays. That access matters during hardening off, when plants may return with different moisture needs despite spending the same amount of time outside.
Choose a planting day that suits the crop
Hardening prepares seedlings for outdoor exposure; it does not decide when the crop or soil is ready for planting. Check crop-specific instructions for planting stage and soil conditions, then consider the expected weather and local frost risk. A seedling that has tolerated sun can still stall in cold, wet soil, and acclimation will not make a frost-sensitive crop frost-tolerant. If conditions are unsuitable after the seedlings have completed most exposure steps, hold them in protected conditions and maintain them carefully rather than planting just to stay on schedule.
Choose a calm, mild time for transplanting, often an overcast day or later in the day, so roots do not face the strongest sun immediately after disturbance. Water plants as needed before handling, keep roots from drying, follow crop guidance on spacing and planting depth, and water the soil after setting them in. Plan the move from bench to bed so the trays remain easy to handle while you work. If you are considering a T-shaped orangery greenhouse, compare its actual layout and access with the route to your planting area; the model name alone does not tell you how easily a loaded tray can be moved. Once seedlings are planted, the bed’s light, wind and moisture become the conditions to monitor.

Use plant responses to adjust the pace
Read the plants as feedback, not as a stopwatch. Check them when they go outside, during exposure if conditions change, and after they return to shelter. Healthy growth that stays upright and undamaged suggests the current step is manageable; a plant that droops, curls or loses colour may be responding to heat, dryness, light, wind or another issue. One symptom cannot identify the cause. Check the potting mix, feel the weather at leaf level and compare affected seedlings with others of the same crop that stayed in the greenhouse. A brief note of conditions and plant response makes it easier to adjust the next outing.
If you see persistent wilt, new dry patches, torn leaves or other injury, stop increasing exposure. Move the tray to bright shade or shelter, correct watering only if the root ball is dry, and give seedlings time to recover before repeating the last tolerated step. Don’t leave them out longer to force adaptation. Severe or spreading symptoms may reflect pests, disease or root trouble rather than hardening alone, so consider those possibilities separately and seek crop-specific help if the cause is unclear. Once growth looks stable, continue gradually instead of jumping from one successful outing to a full day in very different conditions.
Keep monitoring after transplanting
Transplanting is not the end of weather monitoring. Newly planted roots need time to settle into garden soil, and a hardened seedling can still suffer in unexpected frost, heat, gusty wind or a dry spell. Check the forecast during the first period after planting and use temporary shade or wind protection when conditions are unusually harsh. Adjust or remove protection as conditions improve so plants can receive suitable light and airflow. For frost-sensitive crops, follow crop guidance and don’t assume ordinary garden covering guarantees protection.
Water according to moisture around the root zone and the crop’s needs; a newly planted seedling may need closer attention than one established in the bed, but wet ground is not a reason to add more water. Look for renewed growth and leaves that remain healthy as conditions change. If rough weather follows transplanting, protect the plants where practical, then reduce temporary protection as conditions settle. Judge establishment by the plant’s overall growth rather than expecting every leaf to remain unchanged. The aim is for seedlings to continue growing in the garden’s actual light, wind and overnight temperatures without prolonged stress.
Frequently asked questions
How many days does hardening off take?
There is no single duration that suits every crop or forecast. Move through the stages according to how the seedlings respond: steady, mild weather may allow more progress, while cold, wind or strong sun may mean repeating a stage or waiting. Don’t advance just to meet a calendar target.
Should seedlings stay outside overnight during hardening off?
Not at the beginning. Bring them back under protection until the forecast and crop-specific guidance indicate that the expected overnight conditions are suitable. A successful day outdoors does not, by itself, mean a seedling can manage a cool night.
Can I start hardening off on a cloudy day?
Yes. A mild, calm, overcast day can be a gentle time for an initial outdoor exposure. Gradually introduce the brighter conditions the seedlings will meet in the garden; keeping them in shade throughout would leave that adjustment until planting day.
What should I do if seedlings wilt or develop pale patches?
Pause the increase in exposure and move the tray to bright shade or shelter. Check the potting mix and the weather before deciding whether water is needed. Repeat the last stage the seedlings tolerated once they have recovered; symptoms can have more than one cause.
Does hardening off make seedlings frost-proof?
No. Hardening off helps seedlings adjust to outdoor conditions, but it does not change a crop’s frost tolerance. Use crop-specific guidance and the forecast to decide when it is safe to leave plants outside or transplant them.
Keep the routine flexible: the greenhouse sets the starting point, the forecast sets the opportunities, and the seedlings’ response shows when to advance. Short, sheltered outings followed by gradual increases in sun, wind and cool-night exposure let you notice stress early and pause before it compounds. Match planting to the crop’s requirements and the conditions in the garden, rather than forcing every seedling to follow the same timetable.
